|
Let's start the lesson.
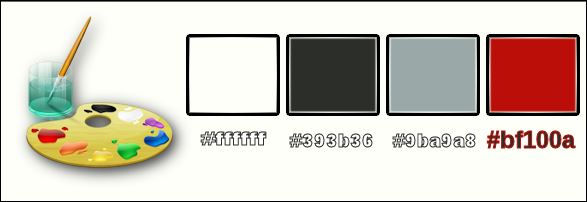
- Color-palette:Set your foreground color to color#9ba9a8
-Set your background color to color #ffffff
1.
Open the image ‘’Fond_choix_chic’’/ Window - Duplicate (or shift+D) - Close the original and proceed on the copy -Promote Background Layer =Raster 1
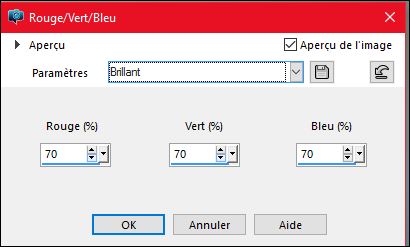
2.Adjust- Color- Red- Green- Blue with these settings
2.
Effects –Plugins – Neology –
Turnaround
3.
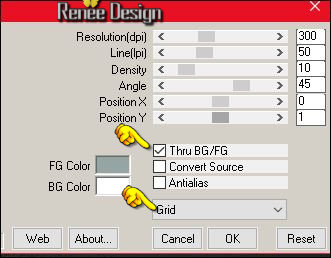
Effects –Plugins - &<Bkg Designer sf10 I>- Blur
'em!...with these settings 102/ 12
4. Image -
Flip(CTRL I)
5. Layers- Duplicate
6. Effects
–Plugins– Mura’s Meister – Tone use settings below -Color #95a5a4
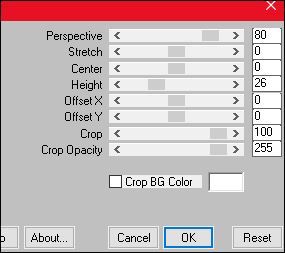
7. Effects –Plugins– Mura’s Meister –Perpsective
Tilling use settings below
8.
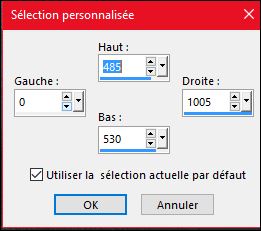
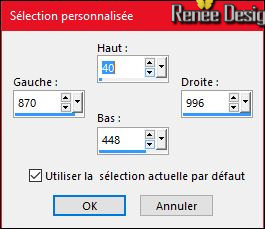
Activate Selection Tool -Custom Selection (S) -Rectangle with these settings
9.
Selections- Promote selection to Layer
10.
Effects –Plugins- Unlimited – Neology-Checkered Tiling with these settings 15/255
11. Effects
–Plugins– Mura’s Meister –Perspective Tilling (click
Reset )using the default settings
- Effects- Edge Effects- Enhance
Selections- Deselect All
12. Effects- Image Effects- Offset with these settings: H = 0 and V = 26
- Open the Maske ‘’ Masque_renee_choix_chic.jpg’’ in your Psp
13. Layers- New Raster Layer
14. Activate Flood Fill Tool and fill the layer with the background color white
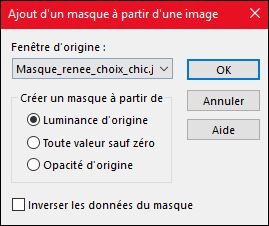
- Layers- New Mask layer from Image and choose Mask:
- Layers- Merge- Merge Group
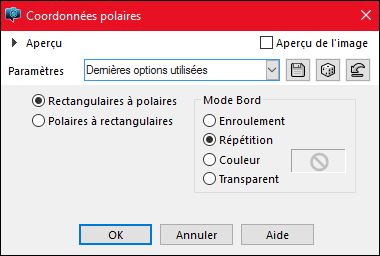
15. Effects- Distortions Effects-Polar Coordinates-Rectangular to Polar-Repeat checked
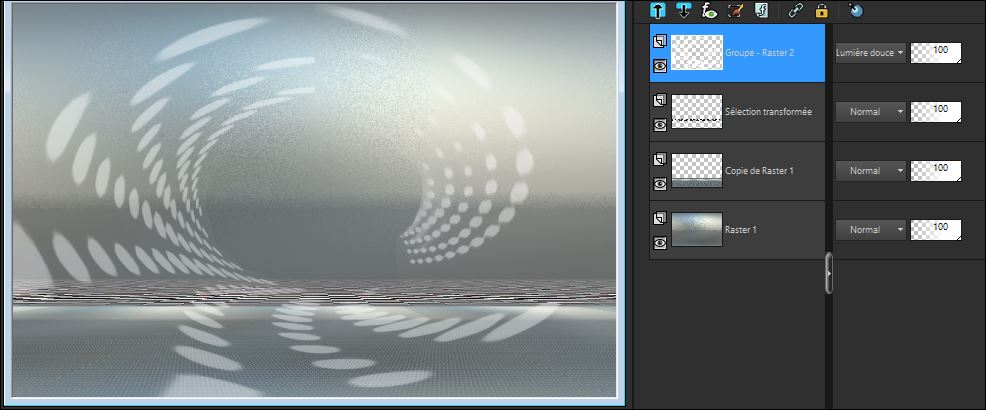
- Layer Palette - Double click on this Layer and set the Blend Mode to "Soft Light "
16. Activate Eraser Tool with these settings

- Erase the center to get this result-We will remove the remains of the straight lines from the mask
17.
Effects –Plugins– Flaming Pear –
Transtone
18. Effects- 3 D Effects- Drop Shadow with these settings 2/2/45/6 black
19. Open the tube ‘’Choix_chic_image1.png’’
- Edit/ Copy-Edit - Paste as new layer on your working image
20. Effects-Image Effects-Offset with these settings: H = 12 and V =
52
21. Effects
–Plugins – EyeCandy 5 Impact – Extrude -tab Settings/User settings choose my Preset
« Choix_chic_extrude ‘’

22. Layers- New Raster Layer
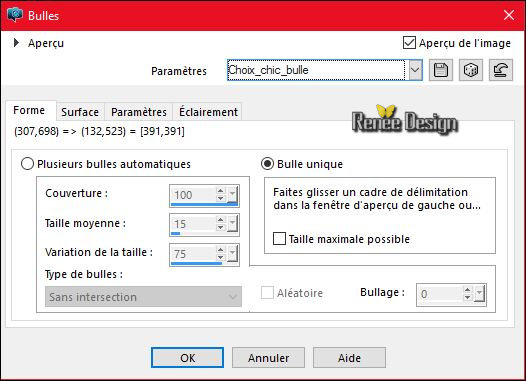
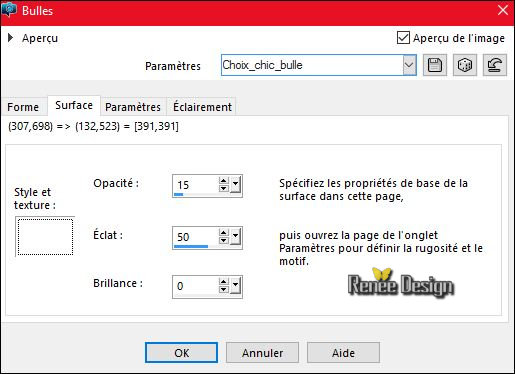
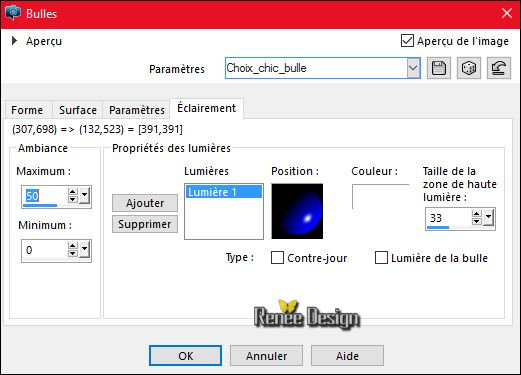
« Preset_BallsAndBubbles_Choix_chic_bulle »(››C:\Users\YourName\Documents\My PSP-files\extract in to the folder preset )
23. Effects- Artistic Effects- Balls and Bubbles- select my Preset
« Choix_chic_bulle «››Click on the preset and OK
24. Layer Palette - Double click on this Layer and set the Blend Mode to " Hard Light "
25. Layers- Duplicate
26.
Effects-Plugins -Unlimited- It@lian Editors Effect- Vetro - Vetro -
www.italianeditors.com / with these settings
17/18/255
27. Image
Resize to 68% /resize all layers not checked
28. Effects- 3 D Effects- Drop Shadow with these settings 2/2/100/1 black
- Se placer
sur le calque Raster 1
29.
Activate Selection Tool -Custom Selection (S) -Rectangle with these settings
-
Selections- Promote selection to Layer
30. Layers- Arrange- Bring to Top
31. Adjust- Blur- Gaussian Blur : Radius: 55
Selections- Deselect All
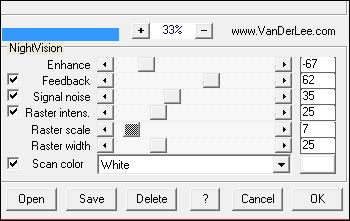
32. Effects
–Plugins– Vanderlee –Night vision with these settings
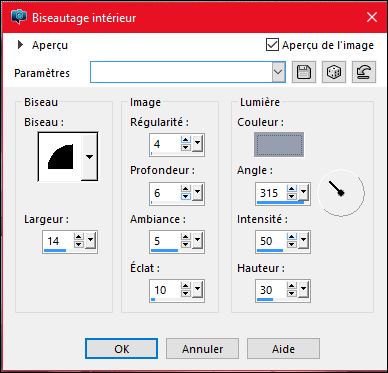
33. Effects-3 D Effects- Inner Bevel with these settings- Color #98a0b1
- Layer Palette - Double click on this Layer and set the Blend Mode to "Hard Light "
33. Layers- New Raster Layer
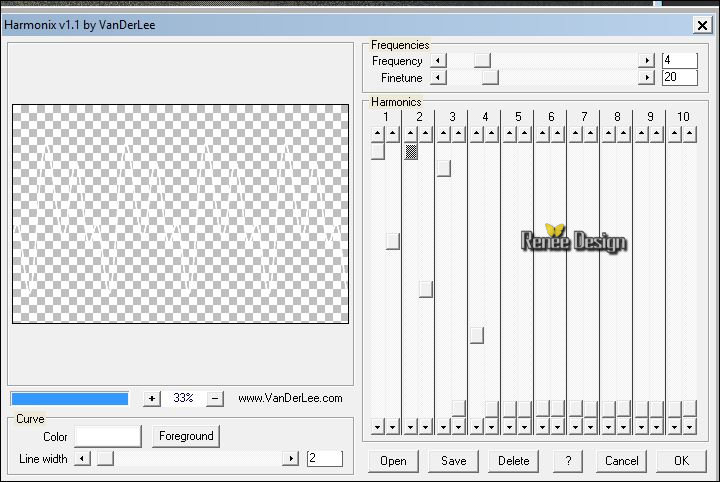
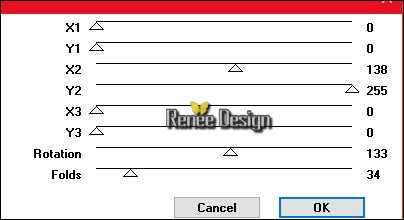
34. Effects
–Plugins –Vanderlee- Harmonix – Color white
(Try to get a similar form by moving curser- if slightly different if it does not matter))
35. Effects- Image Effects- Offset with these settings: H = 0 and V = 157
-
Set the layer opacity of this layer to 40%
36. Open thetube ‘’ Choix_chic_image2.png’’
- Edit/ Copy-Edit - Paste as new layer on your working image
- Move tool / place your tube on the right side of your image as shown in the example below
37. Open the tube ‘’ Choix_chic_image3.png’’
- Edit/ Copy-Edit - Paste as new layer on your working image
- Move tool / place your tube on the left side of your image
38. Effects
–Plugins– EyeCandy 5 Extrude -tab Settings/User settings choose my Preset »
Choix_chic_extrude_2 »
- Open the tube ‘’Elements_DECOS_Chic’’ (-Do not close we need it later for the rest of the work
)
39. Activate the layer ‘’lampe_1 » of the tube
- Edit/ Copy-Edit - Paste as new layer on your working image
- Move tool / place your tube in the upper right corner
40. Activate the layer « billes ‘’of the tube
- Edit/ Copy-Edit - Paste as new layer on your working image
- Move tool / place your tube on the right side of your image (see completed)
41. Activate the layer ‘’lampe_2 »of the tube
- Edit/ Copy-Edit - Paste as new layer on your working image
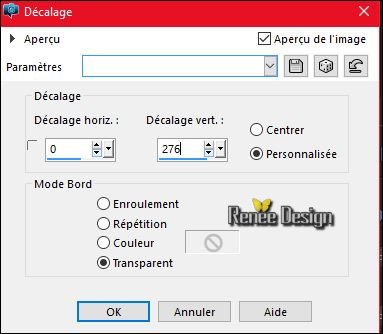
42. Effects-Image Effects-Offset with these settings
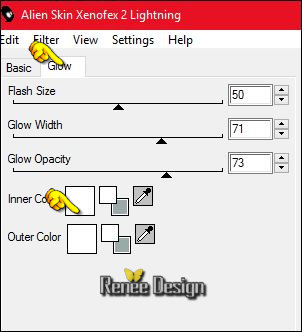
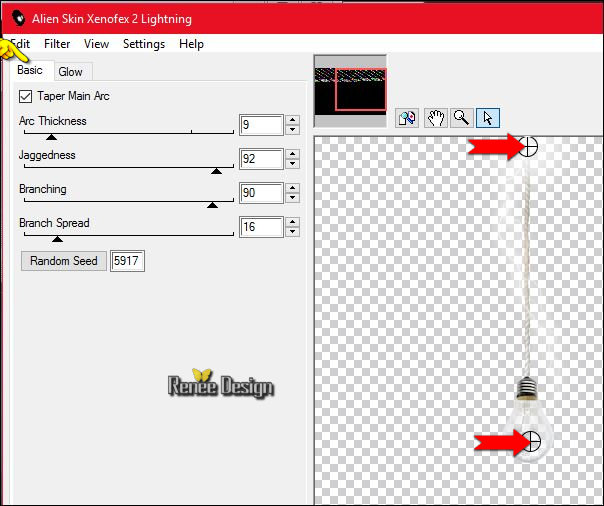
43. Effects
–Plugins– Alien Skin Xenofex 2-
Lightning use settings below
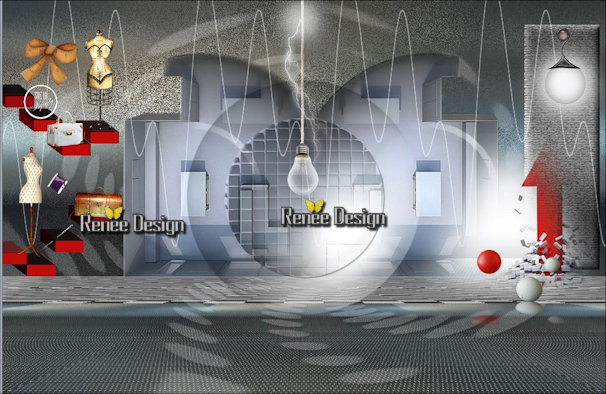
Place your mouse as shown by red arrow and move to the desired location
to place the well trajectory effect around the lamp , see screenshot
44. Back on the tube ‘’DECOS ‘’
- Activate layers 1-2-3-4-5 - 6 and 7 of the tube
- Edit/ Copy-Edit - Paste as new layer on your working image
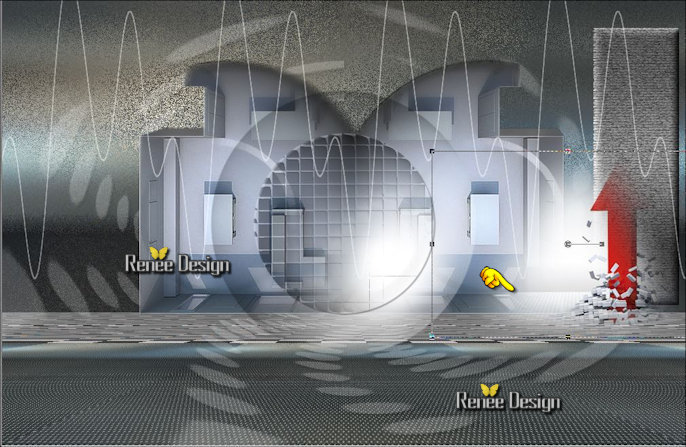
- Activate Move Tool (M) move it in the right place (see completed)
- You should have this result as shown in the print screen below
-In the Layer- Palette
- Layer palette – Make Copy of Raster 1 active
45.
Selections- Select All-Selections - Float
Selections – Defloat.
46. Layers- Duplicate
47. Effects
–Plugins – VM Instant art – Three Corners use settings below
- Layer Palette - Double click on this Layer and set the Blend Mode to "Screen"
Selections- Deselect All
48. Layers- Duplicate –Image Mirror (CTRL B )
- Layers- Merge- Merge Layers Down
-To replace the top of the layers palette
- Color-palette:Set your foreground color to color#bf100a -Set your background color to color #393b36
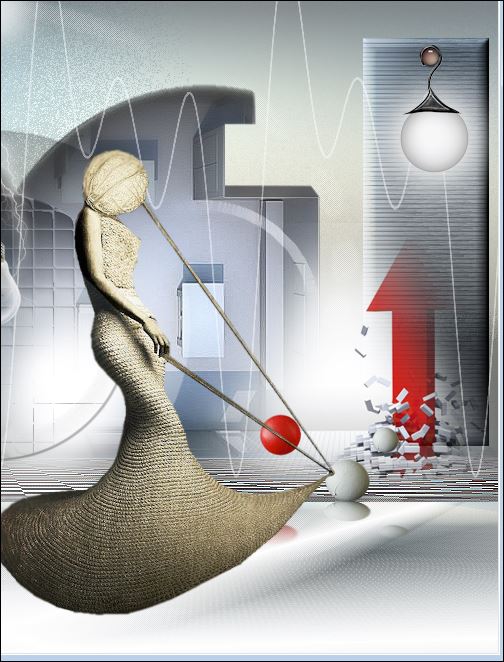
49. Open the tube ‘’ Renee_tube_femme_laine’’
-Edit/ Copy-Edit - Paste as new layer on your working image
- Move to the bottom as shown in the example below
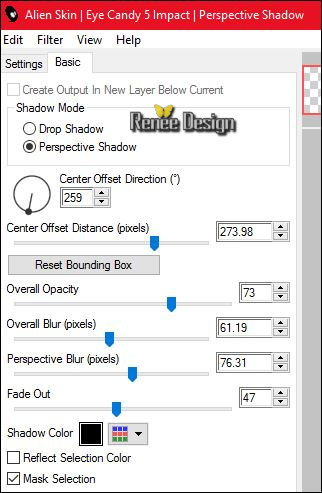
50.
Effects –Plugins –EyeCandy 5 Impact – Perspective
shadow-tab Settings/User settings choose my Preset ‘’ Choix_chic_shadow’’
51. Layers- New Raster Layer
52.
Selections –load/save selection –load selection from disc and choose my selection:
‘’Choix_chic_1’’
53.Activate Flood Fill Tool and fill the selection with the foregroundcolor (2
clicks)
- Layer Palette - Double click on this Layer and set the Blend Mode to "Screen"
Selections- Deselect All
54. Layers- New Raster Layer
55.
Selections –load/save selection –load selection from disc and choose my selection:‘’Choix_chic_2 »
56. Pot of Paint: Change the opacity of the color at 60%
- Activate Flood Fill Tool and fill the selection with the backgroundcolor ( 2 clicks)
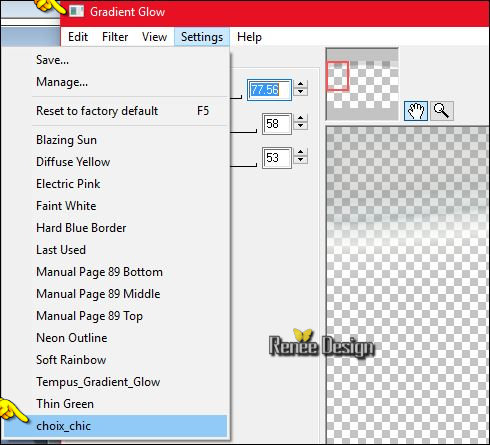
Attention - THE PRESET FILTER THIS IS NOT A PRESET CLICKABLE
It should be placed in the filter setting file like this
1. Open the folder in your filter (me it is this way)
and set the preset in the case concerned here Gradient Glow)
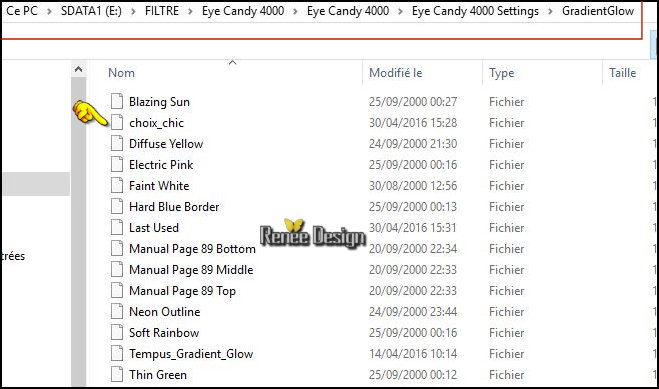
57. Effects
–Plugins – EyeCandy 4000- Gradient Glow and select my Preset
'‘choix_chic ‘’ with these settings
- click on the preset 'choix chic''
Attention
Overall Opacity 53
Selections- Deselect All
58. Open the tube ‘’ Renee_tubes_robes’’
- Image
Resize to 55%
- Edit/ Copy-Edit - Paste as new layer on your working image
-
With the Move Tool, move it in the right place (see finished image)
59.
Set the layer opacity of this layer to 55%
60. Effects
–Plugins – Graphics-Plus -Cross Shadow using the default settings
61. Image - Add borders-Symmetric checked:1 pixel #393b36
62. Image - Add borders-Symmetric checked:10 pixels #ffffff
63. Image - Add borders-Symmetric checked:1 pixel #393b36
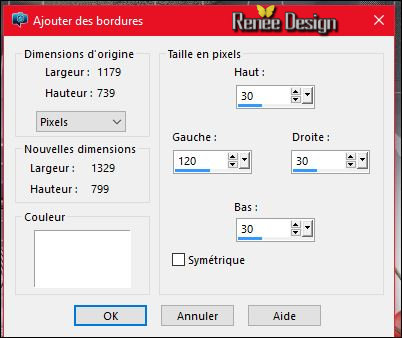
64. Image - Add Borders NO SYMMETRIC with these settings- White
65. Back on the tube "DECOS"
- Activate layer ‘’carres_lignes"of the tube
- Edit/ Copy-Edit - Paste as new layer on your working image
- Move tool / place your tube on the left side of your image
66. Activate layer« texte_clothes" of the tube
- Edit/ Copy-Edit - Paste as new layer on your working image
-Move tool / place your tube on the bottom left
67. Open the tube ‘’ deco_final’’
- Edit/ Copy-Edit - Paste as new layer on your working image - do not move it is the right place
68. Image - Add borders-Symmetric checked:1 pixel black
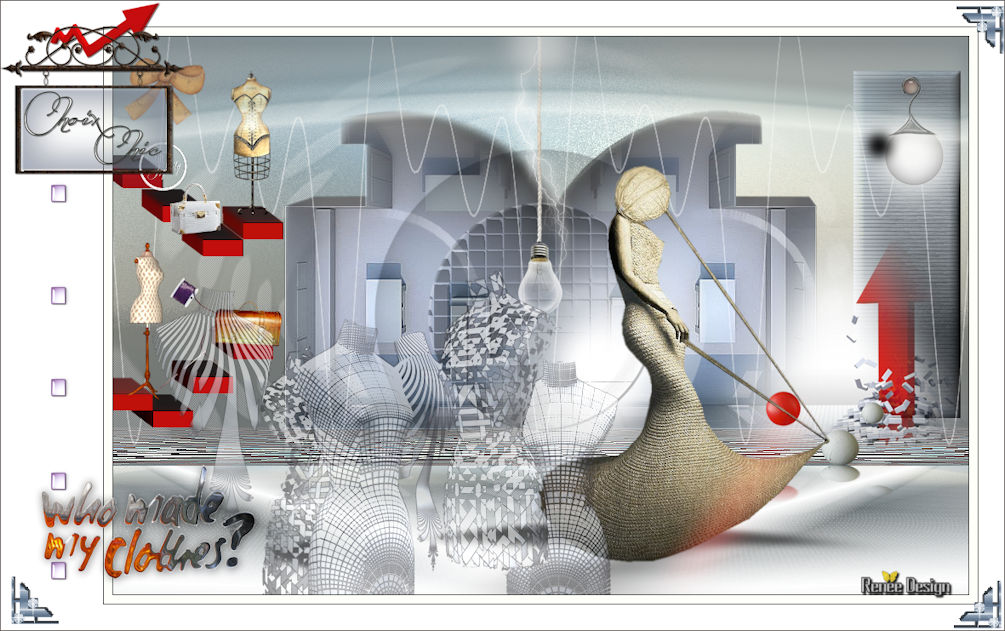
69. Image
Resize to 1005 Pixels width
Save as JPEG
I hope you enjoyed this lesson
Renée
This lesson was written by Renée 29/04/2016
Edited and Update
2016
*
Any resemblance with an existing lesson is a coincidence
* Do not forget to thank the people who work with us and for us I have appointed the tubeurs and translators
Thanks Renée
| 

 Translations


 When you see this logo the filter is imported in Unlimited

 All rights reserved