|
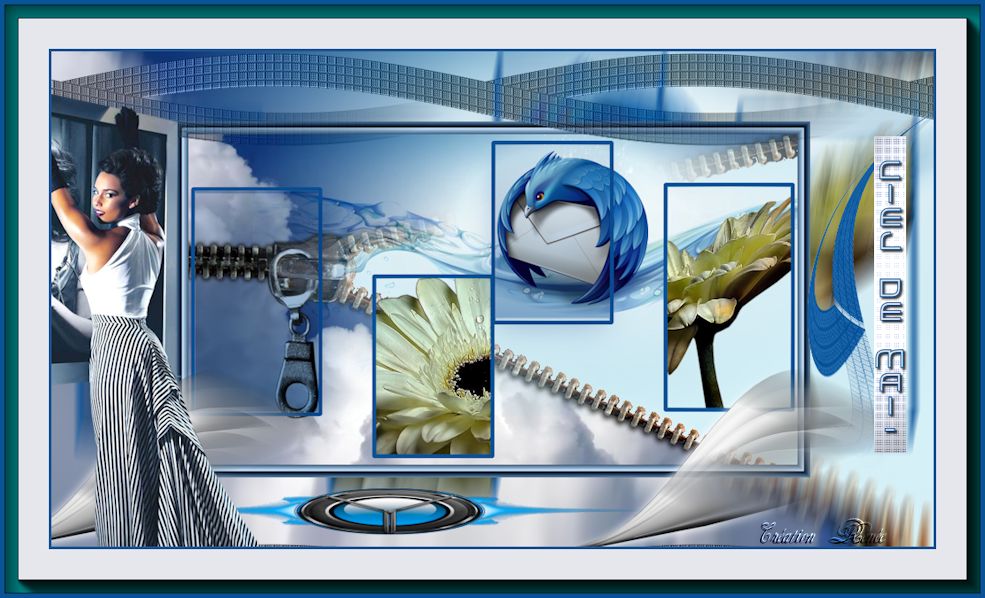
May of Heaven
Let's start the lesson .
1. Open image ''fond_ciel_de_mai'' On this background image we will work
2. Open the tube ''logo_mozilla_modifie' Edit-Copy - Edit-Paste as a new layer
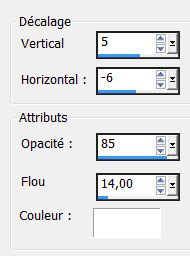
3. Effects- Image Effects-Offset with these settings
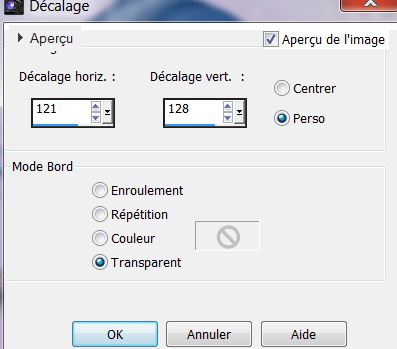
5. Layers- New Raster layer
6. Selections - load/save selection - load selection from disk and choose my selection: ''ciel_de_mai_1''
7. Open the tube'' @ nn_120607_flowers_078_2flowers
''Image Mirror
8. Edit-Copy - Edit-Paste as a new layer
9.Move as shown in the example
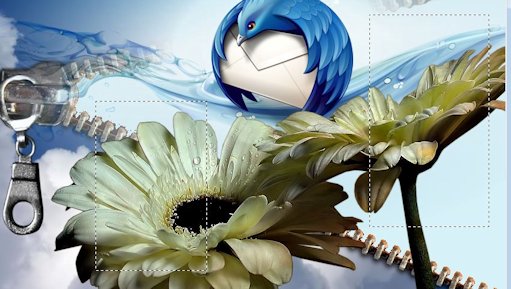
10. Selections- Invert
11 Delete
Keep selected
11. Selections- Invert
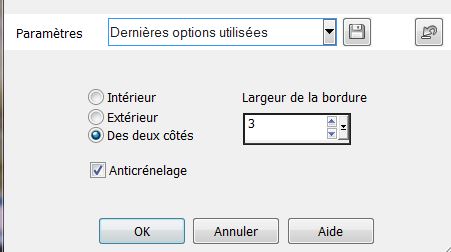
12. Selections- Modify-Select Selection Borders -Both Sides
13. Layers- New Raster layer
14. Flood Fill Tool: fill selection with the color: #095398
15. Image Mirror/ Image Flip
16. Selections-Deselect All

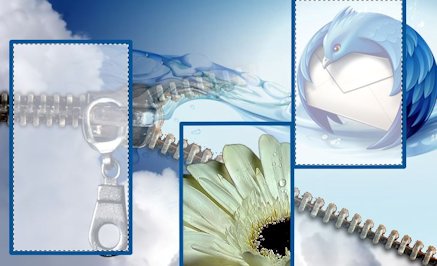
17. Select these two frames like this
18. Layers- New Raster layer
19. Activate Flood Fill Tool and fill the selection with this color:
#e5e7ed
20. Material Properties: Foreground color to this color:
#e5e7ed Background color to this color : #095398
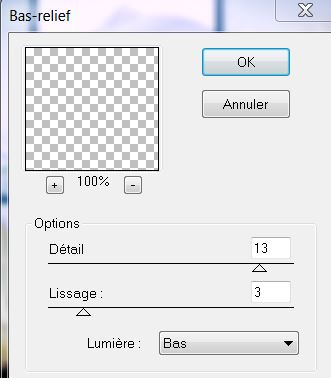
21. Effects- Plugins- Esquise - Bas relief
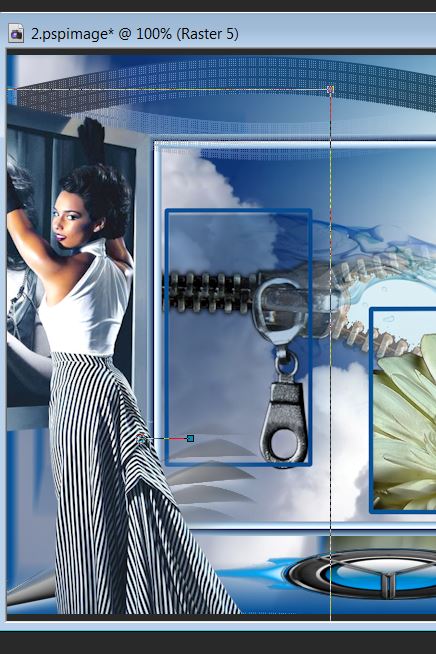
22.Selections- Deselect All
Your work look like this now
23. Effects-Plugins - EyeCandy5-Impact- / Perspective -tab Settings-User settings choose my -Preset
''ciel_de_mai_persp''
24. Layer Palette -Double click on this Layer and set the Blend Mode to"Multiply " Reduce the opacity of this layer to: 65%
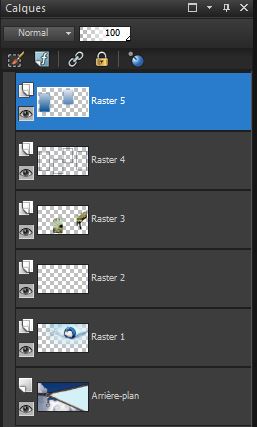
25. Layers- Merge-Merge Visible
26. Layers-Duplicate
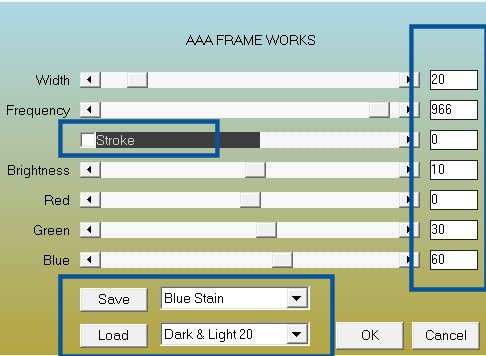
27. Effects- Plugins -AAA Frame Works sur (copy of Merged)
28.Image Resize at 72% Resize all Layers not checked
29.Activate the bottom of the Layer-Palette ( merged )
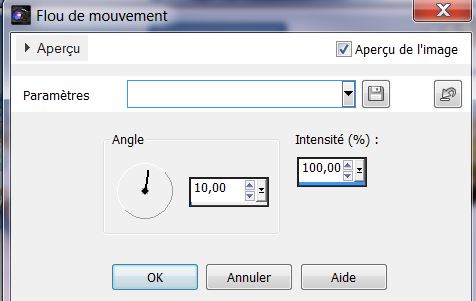
30. Adjust-Blur- Motions Blur use settings below
31.Activate the top of the Layer-Palette
32. Layers- New Raster layer
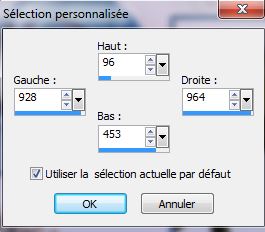
33. Selections-Custom Selection with these settings
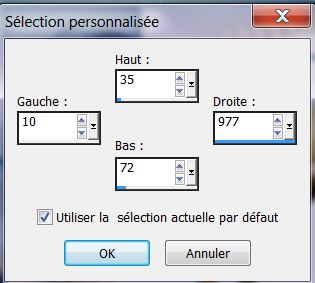
34. Activate Flood Fill Tool and fill the selection with the background color : #095398
35.Effects- Plugins - Penta Com – Dot and Cross -72/10/2
36. Selections- Deselect All (ctrl+D)
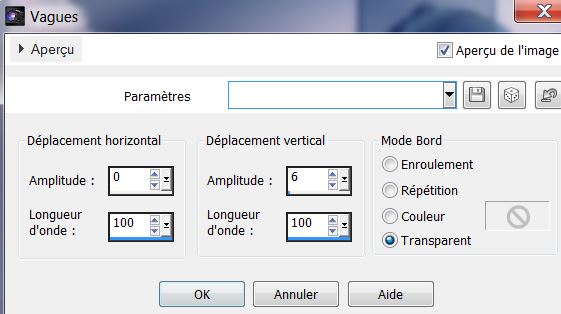
37.Effects- Distortion Effects-Wave use settings below
38. Effects- Plugins Mura Pro – Seamless- Fractal
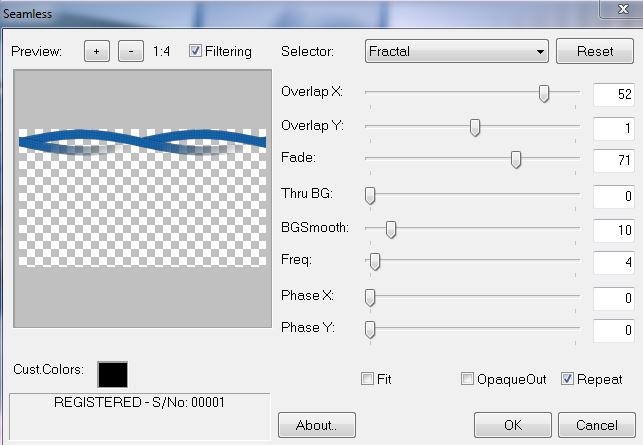
ATTENTION: click reset and than the settings
39.
Layer Palette -Double click on this Layer and set the Blend Mode to "Luminance Legacy " Reduce the opacity of this layer to: 79%
40. Effects- User Defined Filter - Emboss 3 default
41. Layers- New Raster layer
42. Selections - load/save selection - load selection from disk and choose my selection:''ciel_de_mai_3''
43. Open the tube ''image_ciel de mai1'' Edit/copy-Edit paste into selection
44. Selections-Deselect All
45. Open the tube ''Mtm_Misc131-paperworks Edit/copy-Edit paste as a new layer on your working area
46. Effects- Image Effects- Offset with these settings

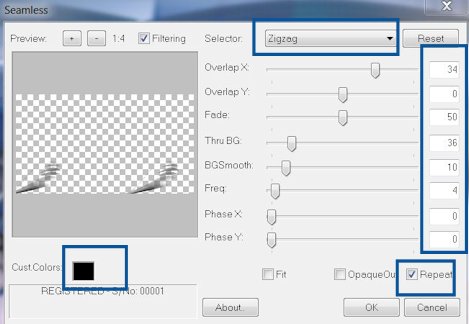
47. Effects- Plugins - Mura Pro- Seamless /color black /Zig
zag
48.Effects - 3D Effects - Drop shadow with these settings -color white
49. Layers- New Raster layer
50. Selections-Custom Selection with these settings
51.Activate Flood Fill Tool and fill the selection with color #e5e7ed
52. Effects- Plugins-Penta Com – Dot and Cross 72/10/2
53. Effects- Edge Effects-Enhance -More
54. Selections-Deselect All
55. Effects- Plugins – Unlimited 2.0 -&<Backg
roundDesigners IV>@ Night Shadow Pool

56. Layer-New Raster Layer
57. Selections - load/save selection - load selection from disk and choose my selection:
''ciel_de_mai_2''
58.Open the tube ''DBK AA Decor-165'' / Edit/copy-Edit paste into selection
59. Selections-Deselect All
60. Open the tube''DBK AA Model-Cel2574'' Image Resize at 65 % Activate Pick Tool with these settings (K)

Place like this
61. Activate the Text-Edit - Copy -Edit - Paste as new layer on your working area and move .Ore write your own text
62. Layers- Merge-Merge Visible
63. Image - Add borders-Symmetric checked: 5 pixels/ BG-Color : #1d5594
64. Image - Add borders-Symmetric checked: 50 pixels/ FG-Color #e5e7ed
65. Image - Add borders-Symmetric checked: 5 pixels/BG-Color #1d5594
66. Activate Magic Wand and click in the border of 50 pixels
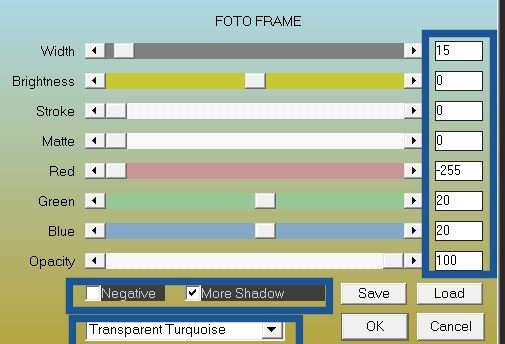
67. Effects- Plugins AAA Frame Foto Frame
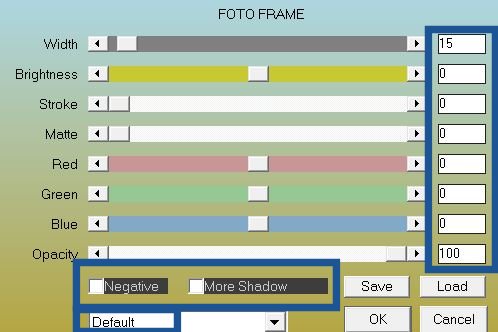
68.Effects- Plugins AAA Frame Foto Frame
69. Selections-Deselect All
70. Image Resize at 985 pixels Width
Save as JPG
I hope you enjoyed this lesson
This lesson was written by Renée
26/04/2013

|


 Translations