|
Let's start the lesson

- Preparation
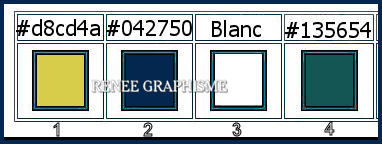
- Material Properties: Set your foreground color to color #d8cd4a = 1 – Set your background color to color #042750= 2
1. Open the background image ‘’Fond-Duracell’’’-
Promote Background Layer =Raster 1
2. Effects – Plugins – Medhi 2 – Flat Median with the settings shown below
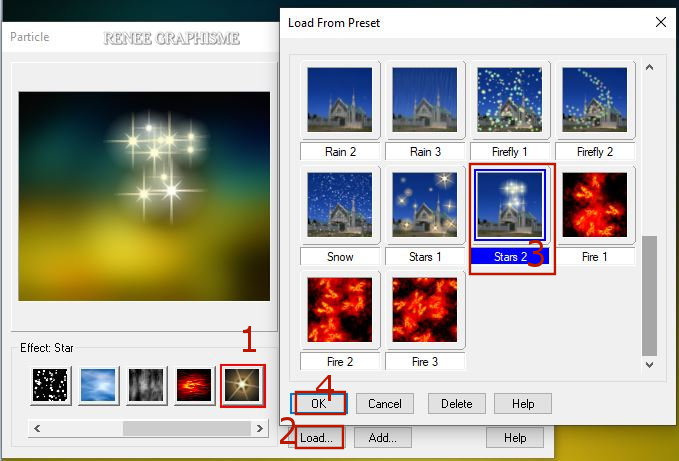
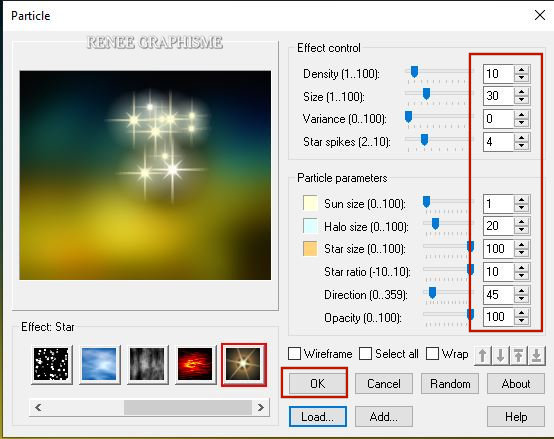
3. Effects - Plugins– Ulead particle (1) Effect-Star-(2) Load-(3) Stars 2 and OK-(4)Adjust the settings-OK
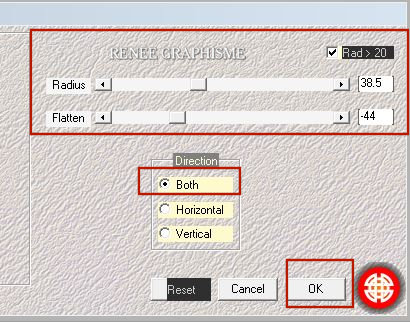
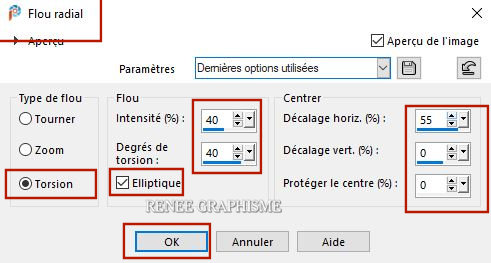
4. Adjust- Blur-Radial Blur with the settings shown below.
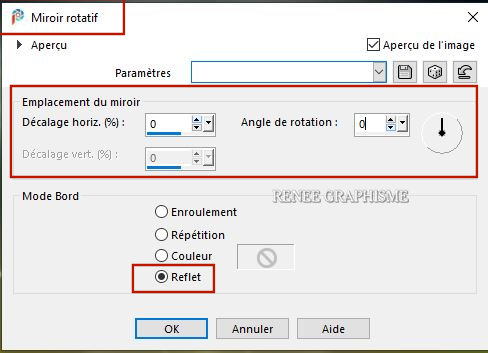
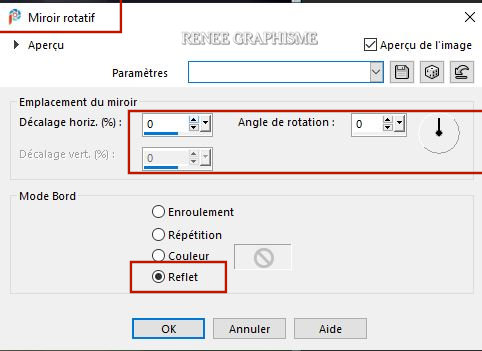
5. Effects - Reflection Effects - Rotating Mirror use the settings below
6. Layers-Duplicate
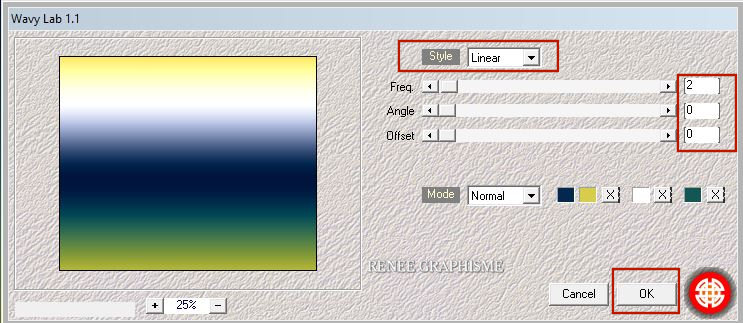
7. Effects – Plugins – Medhi – Wavy Lab 1.1 with the settings shown below -Colors 2-1-3-4
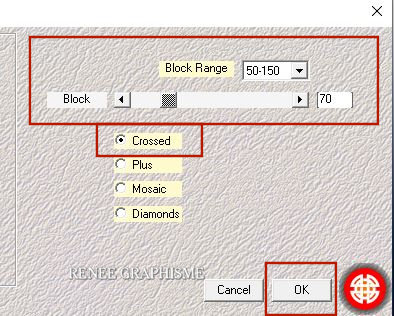
8. Effects – Plugins – Medhi – Sorting Tiles with the settings shown below
9. Effects – Edge Effects– Enhance
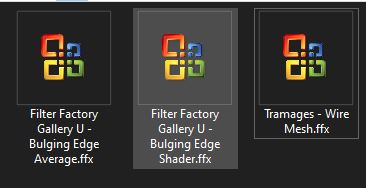
10. Effects –Plugins-
Unlimited 2.0 - Factory Gallery U - Bulging Edge Average
: 255
You can find this filter in>> Filter
-Déformation-Bulging Edge Average
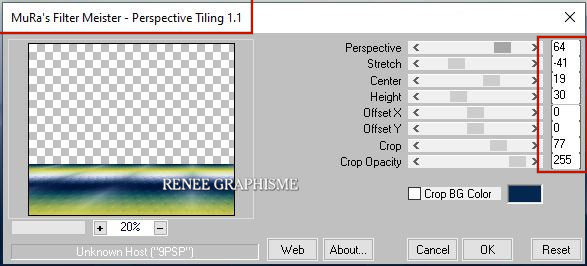
11. Effects – Plugins- Mura’s Meister – Perspective Tiling with the settings shown below
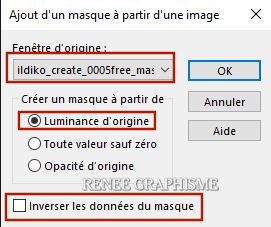
12. Layers-New Mask Layer-From Image and select Mask ’’
ildiko_create_0005free_mask.’’
- Layers- Duplicate
- Layers- Merge Merge Group
13. Layers-Properties-Change the Blend Mode to " Overlay "
-Activate the bottom layer in the layer palette= Raster 1
14. Open the tube ‘’
Duracell-Sol.pspimage’’ -Edit - Copy- Activate your work -Edit - Paste as a new layer
15. Objects – Align
- Bottom
16.Layers-Properties-Change the Blend Mode of this layer to " Hard Light " and reduce the opacity to 38%
- Activate the top layer in the layer palette
17.Selections –load/save selection –load selection from disc and select my selection: ‘’Duracell 1’’
DELETE

18. Layers- New Raster Layer
19. Color Palette-set the foreground color to color # ffffff=3
Flood Fill Tool  –
Fill the layer with the foreground color =3 –
Fill the layer with the foreground color =3
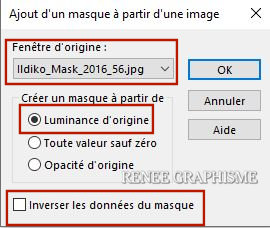
20. Layers-New Mask Layer-From Image and select Mask ’’
Ildiko_Mask_2016_56.jpg’’
- Layers- Merge- Merge Group
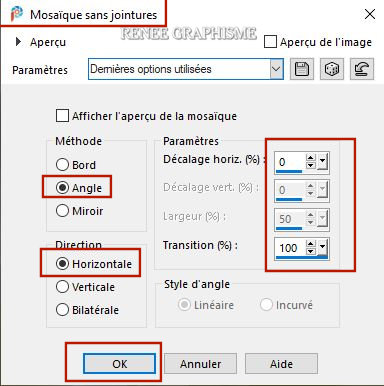
21.Effects- Image Effects-Seamless Tiling use the settings below
22. Effects - Reflection Effects - Rotating Mirror use the settings below
23. Objects – Align
- Bottom
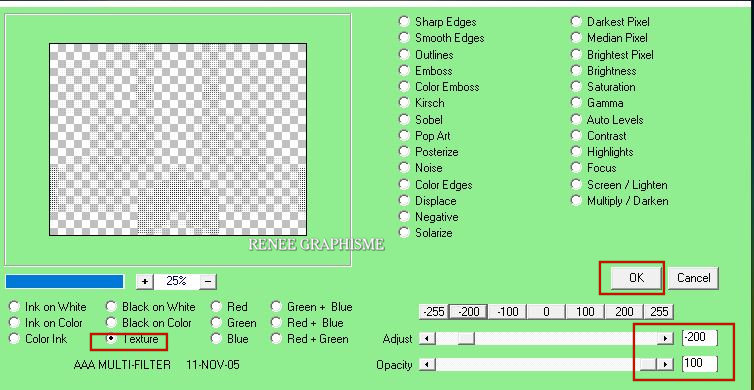
24. Effects – Plugins – AAA Multi Filter use the settings below
25. Layers-Properties-Change the Blend Mode to " Overlay "
26. Layers-Duplicate
27. Effects –Geometric Effects – Circle-transparent

28. Image - Mirror - Mirror vertical ( Image - Flip in older versions of PSP)
29. Pick Tool: (K) on your keyboard -Enter these parameters on the toolbar
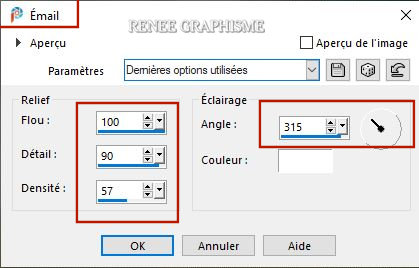
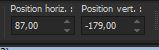 87/
- 179 87/
- 179
-Activate the bottom layer in the layer palette= Raster 1
30.
Selections-Select All
- Activate the top layer in the layer palette
31. Image-Crop to Selection
32.
Open the tube ‘’Duracell- Batterie png (green ) -Edit - Copy- Activate your work -Edit - Paste as a new layer
33. Pick Tool: (K) on your keyboard -Enter these parameters on the toolbar
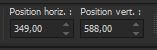 349/
588 349/
588
-Press ( M ) to close the Pick Tool
34. Layers-Properties-Change the Blend Mode of this layer to "Luminance -Legacy "
35. Layers- Duplicate
36. Pick Tool: (K) on your keyboard -Enter these parameters on the toolbar
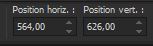 564
/626 564
/626
-Press ( M ) to close the Pick Tool
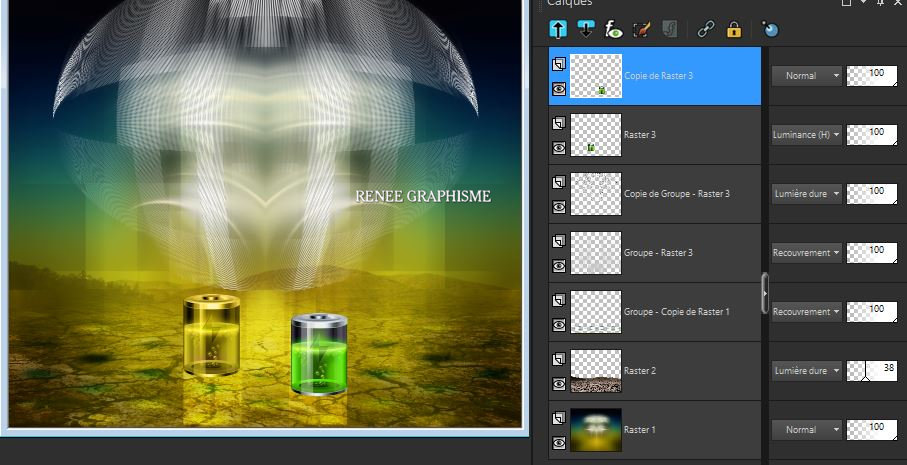
37.Layers-Properties-Change the Blend Mode of this layer to " Normal "
-Your work and Layer Palette look like this now-You should have this result
38. Layers- New Raster Layer
39. Flood Fill Tool
–
Opacity 75% – Fill the layer with the background color =2
40.
Effects – Plugins – Photoshopfun II- Kyle Size
a 255 / Transparency a 0
41. Effects - Plugins– Simple – 4 Way Average
42. Effects- Geometric Effects – Circle – Transparent
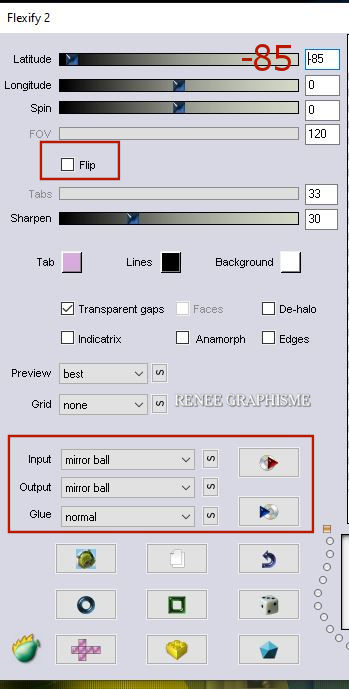
43. Effects – Plugins – Flaming Pear – Flexify2 use the settings below
44. Layers-Properties-Change the Blend Mode to "Soft Light "
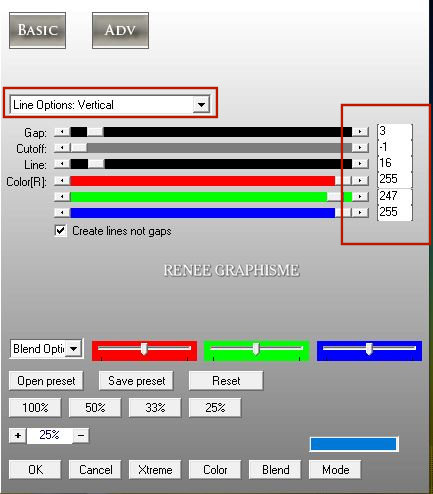
45. Effects – Plugins- AP[Lines] Lines - Silverlining with the settings shown below
ATTENTION: under Windows 10 and new versions of PSP the AP filters no longer work under the names
AP01 - AP02 etc.
You're PSP will then be closed with an error message
- Activate the bottom layer in the layer palette= Raster 1
46. Selections –load/save selection –load selection from disc and select my selection: ‘’Duracell 2’’
47. Selections-Promote selection to layer
48. Layers- Arrange-Bring to Top
49. Effects-Plugins- Unlimited
2.0 - Filter Factory Gallery U -Bulging Edge Shader..with these settings:
227/55
50. Adjust-Blur-Gaussian Blur-Radius 65%
51. Effects –Plugins-
Unlimited 2.0- Tramages -Wire Mesh..with these settings: 48/142/255/227
52. Effects – Artistic Effects
-Enamell use the settings below
53. Layers-Properties-Change the Blend Mode of this layer to " Hard Light "
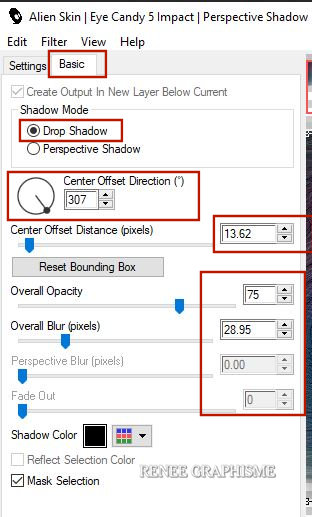
54. Effects – Plugins– Alien Skin EyeCandy 5 Impact – Perspective
Shadow with the settings shown below
-Activate the bottom layer in the layer palette= Raster 1
55. Open the tube ‘’ Duracell-Image 1’’ -Edit - Copy- Activate your work -Edit - Paste as a new layer
56. Pick Tool: (K) on your keyboard -Enter these parameters on the toolbar
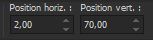 2/
70 2/
70
-Press ( M ) to close the Pick Tool
- Activate the top layer in the layer palette
57.Open the tube ‘’ Duracell-Image 2’’ -Edit - Copy- Activate your work -Edit - Paste as a new layer
- Pick Tool: (K) on your keyboard -Enter these parameters on the toolbar
 399/ 317
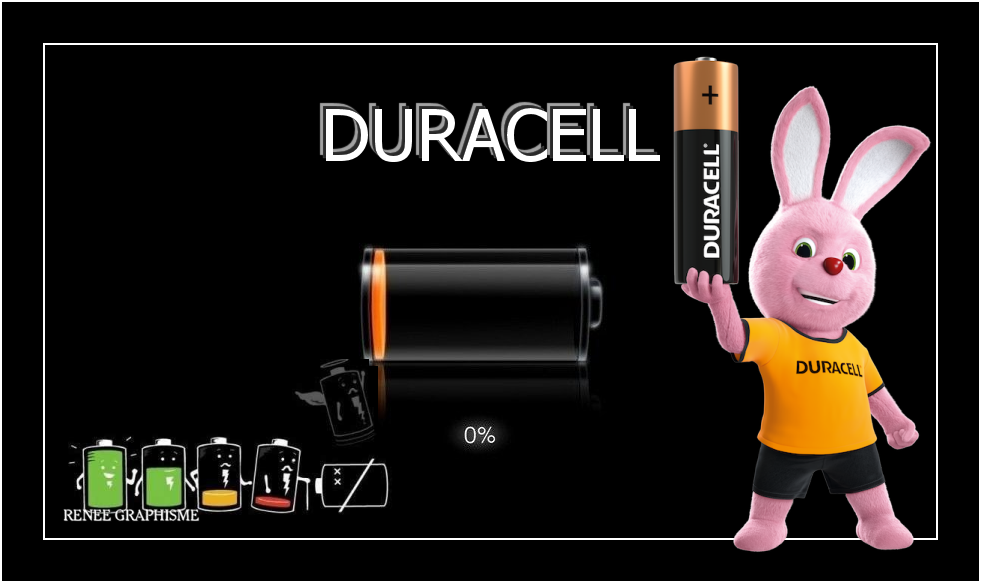
58. Open the tube ‘’Duracell-main’’ and the tube ’’ Duracell-lapin-out’’
and ''Duracell-etoiles''-Edit - Copy- Activate your work -Edit - Paste as a new layer -Put the tube on the right place (see finished image )
59. Open the tube ''le titre'' -Edit - Copy- Activate your work -Edit - Paste as a new layer and place at the top of your creation (see finished image )
60.
Layers-Properties-Change the Blend Mode of this layer to "Screen " and reduce the opacity to 57 %
61. Image - Add borders-Symmetric checked: 1 Pixel Color #042750 =2
-Image - Add borders-Symmetric checked: 10 Pixels Color #ffffff=3
-Image - Add borders-Symmetric checked: 1 Pixel Color #042750 =2
-Image - Add borders-Symmetric checked: 45 Pixels Color #ffffff=3
62. Open the tube
"Duracelle-Cadre-Motifs"- Edit - Copy- Activate your work -Edit - Paste as a new layer do not move
63. Layers-Merge- Merge All (flatten)
64. Image Resize a 999 Pixels Width
Save as JPG
That's it - Thank you / I hope you enjoyed this lesson
Renée
This lesson was written by Renée 18-06- 2021
and put in place
in 2021
*
Any resemblance with an existing lesson is a coincidence
* Do not forget to thank the people who work with us and for us -I have appointed the tubeurs and translators
Thanks
*
|
 Translations