|
Let's start the lesson.

1. Preperation:
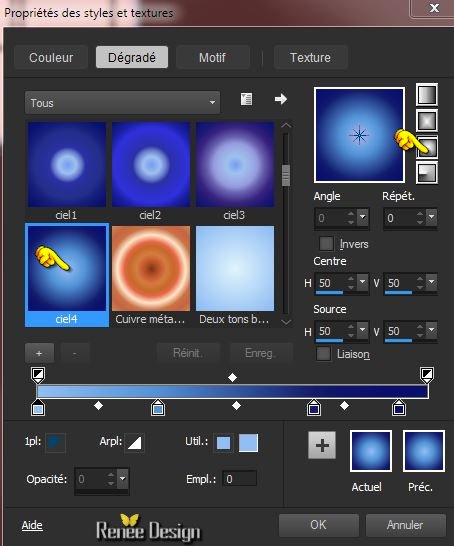
Set the Foregroundcolor to gradient and select: ‘’Corel_06_050’’=(Sky4)
Set your Foregroundcolor to Gradient - Style: Sunburst with settings below -Background color to white
the gradient is into the zipfile

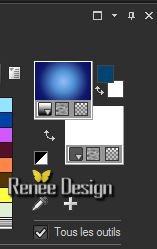
Set your foreground color to #004472- Your Material Palette look like this now
2. Open a transparent image of 1025 x 655 pixels
3. Flood Fill Tool - fill the layer with your forground gradient
4. Layers-Duplicate
5. Effects-Plugins –
Unlimited - ICNET FILTER - Buttons & Frames-3D Glass Frame
3 with these settings 255/193
6. Layers-Duplicate
7. Image -
Mirror
8. Effects-Plugins - Transparency - Eliminate Black
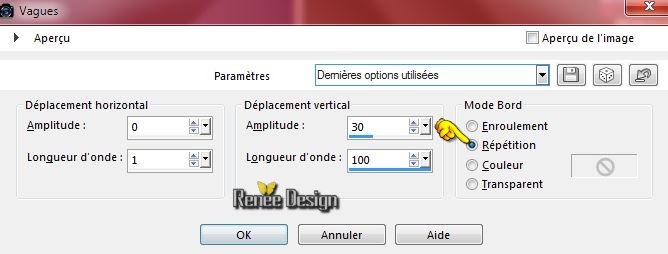
9. Effects-Distortion Effects-Wave with settings below-Edge Mode-Repeat
10. Layer Palette - Double click on this Layer and set the Blend Mode to "Hard Light " and the Layer Opacity to 51%
- Layer Palette-activate the layer underneath = Copy of Raster 1
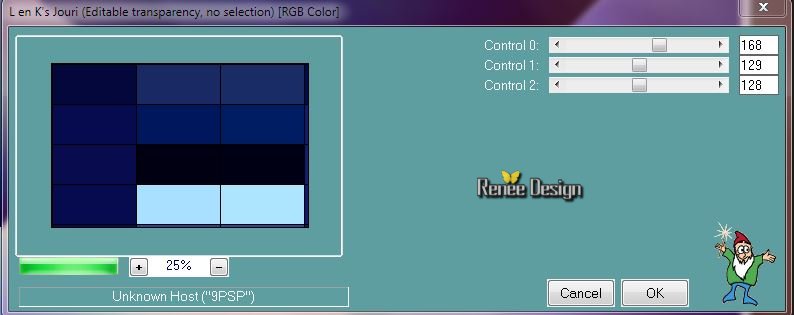
11. Effects- Plugins - L and K’s – Jouri with these settings
12. Effects- Plugins -Transparency – Eliminate Black
- Activate the top of the layer palette=Copy(2) of Raster 1
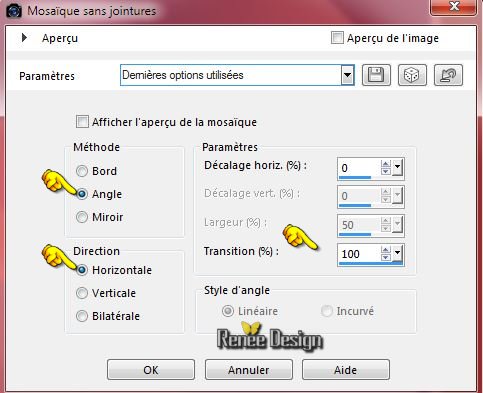
13. Effects- Image Effects- Seamless Tiling with these settings
14.
Selections –load/save selection –load selection from disc and choose: ‘’ mer_solitude_1’’
Hit the Delete Key of your Keyboard

Selections-Deselect All
15. Effects-Plugins - Simple -Blintz
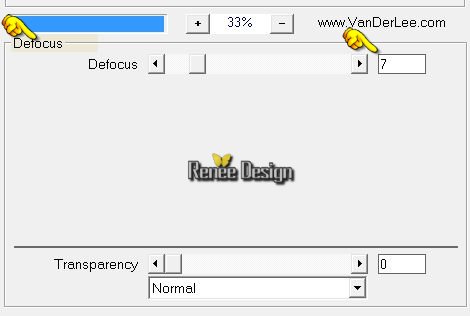
16. Effects-Plugins – Vanderlee-Unplugged X Defocus
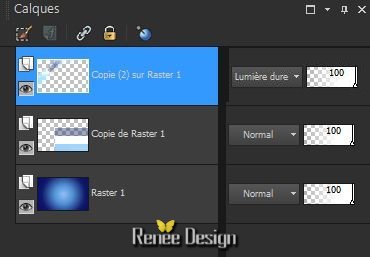
Layer palette look like this now
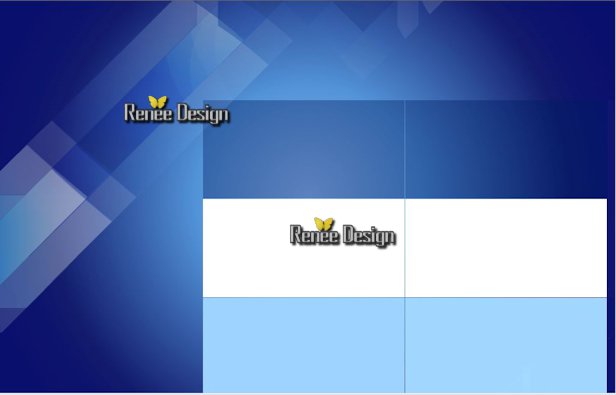
Your work look like this now
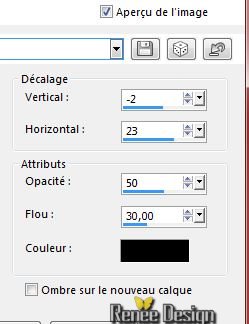
17. Effects -3D Effects-dropshadow with these settings
- Layer Palette-activate the layer underneath = (Copy of Raster 1)
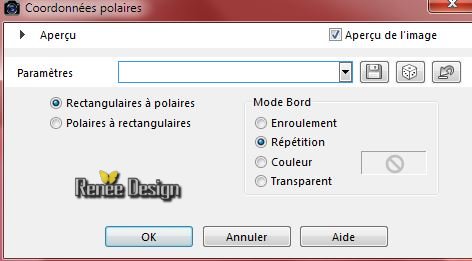
18. Effects- Distortions Effects-Polar Coordinates-Rectangular to Polar-Edge Mode: Repeat
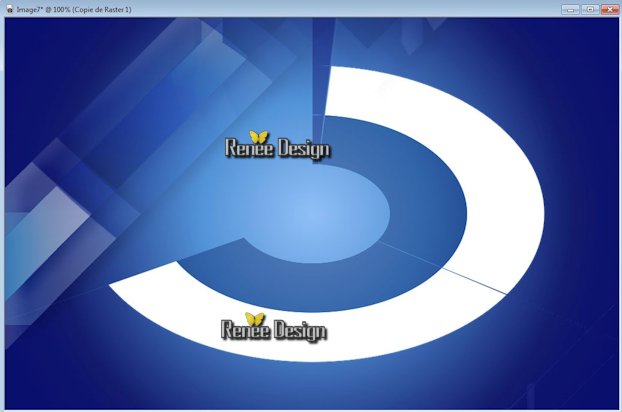
19.Activate your Magic Wand –Mode Add shift-Match Mode: RGB Value -Select the light blue parts as shown in the example below
Hit the Delete Key of your Keyboard
Selections-Deselect All
The Result
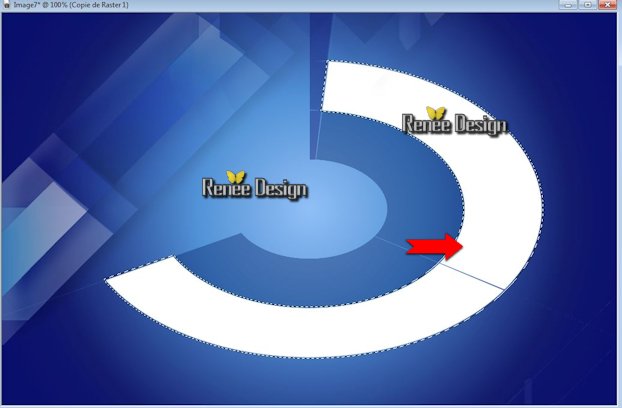
20. Activate your Magic Wand-Click in the white part as shown below
21.
Selections-Promote selection to layer
Your Material Palette look like this now
 (Pay attention: the color effect will depend on your foreground color ) (Pay attention: the color effect will depend on your foreground color )
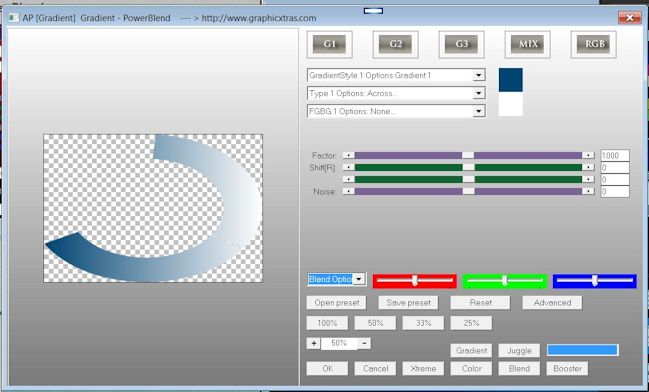
22. Effects-Plugins - AP16 Gradient Power Blend with these settings
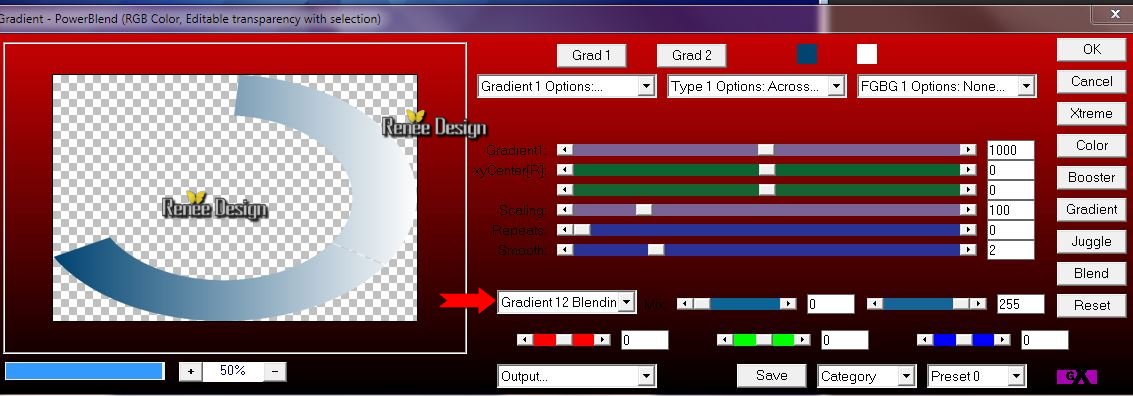
It's the same filter with different interface
23. Effects -3D Effects-dropshadow with these settings -2/23/50/30 black
-
Selections-Deselect All
24. Image -
Mirror
25. Layers-Merge-Merge Down
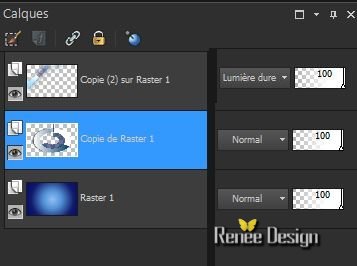
Layer palette look like this now
26. Effects-Plugins - Mura’s Meister- Perspective Tilling using the default setting
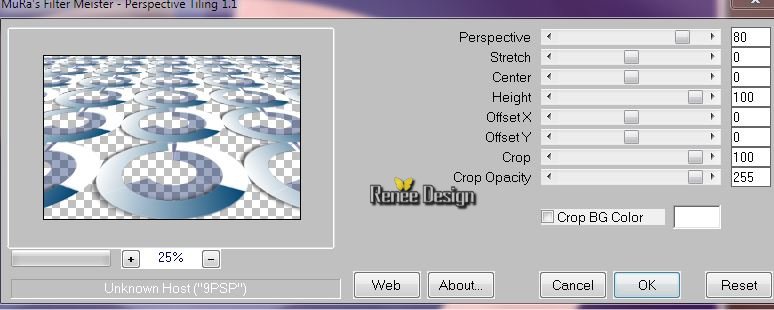
Layer Palette - Double click on this Layer and set the Blend Mode to "Overlay " and the Layer Opacity to 24%
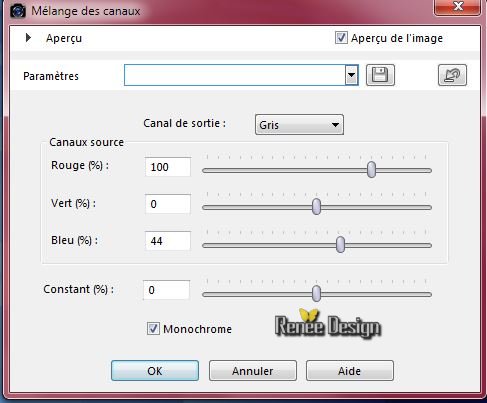
27. Adjust-Color-Channel Mixer with these settings
28. Activate the tube ‘’ mer de solitude_razzo’’
- Edit/copy- Edit/ paste as new layer on your working image
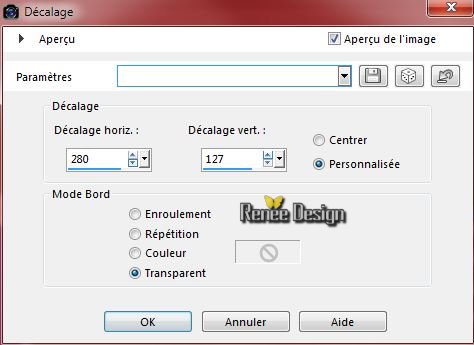
29. Effects-Image Effects-Offset with these settings
30. Effects -3D Effects-dropshadow with these settings 15/12/38/35 black
Attention !
31. Layer palette -Close Raster 2(with the tube image mer de
solitude_razzo’’)
32. Activate the top of the layer palette(Copy(2)of Raster 1)
33. Edit/copy Special-Copy Merged
34. Edit/paste as a new layer on your working image
35. Image
Mirror
36.
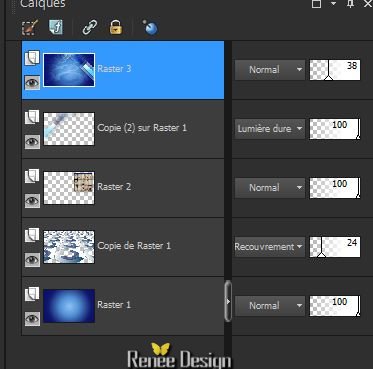
Layer Palette - Double click on this Layer and set the Layer Opacity of this Layer to 38%
- Layer Palette: Open raster 2
Layer palette look like this now
37. Layers-New raster layer
38. Selections –load/save selection –load selection from disc and choose: ‘’
Mer_Solitude_2’’
39. Activate the tube ’’ mer_solitude _paysage’’
- Edit/Copy-Edite/paste into selection
Selections-Deselect All
40. Layer Palette - Double click on this Layer and set the Blend Mode to "Luminance " and the Layer Opacity to 61%
41.Activate Tool - Change to Target
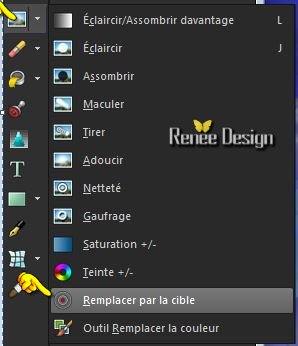
Pay attention: the color effect will depend on your foreground color (plain color in this case)

- With the left button of the mouse pressed glide gently over your image from top to bottom
Your result will depend on these moves– Be gentle and start again from bottom to top
The image has to meld together with the background see print screen
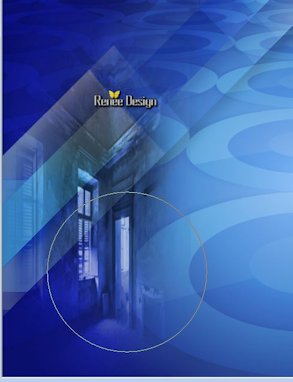
Push M to deselect the Tool
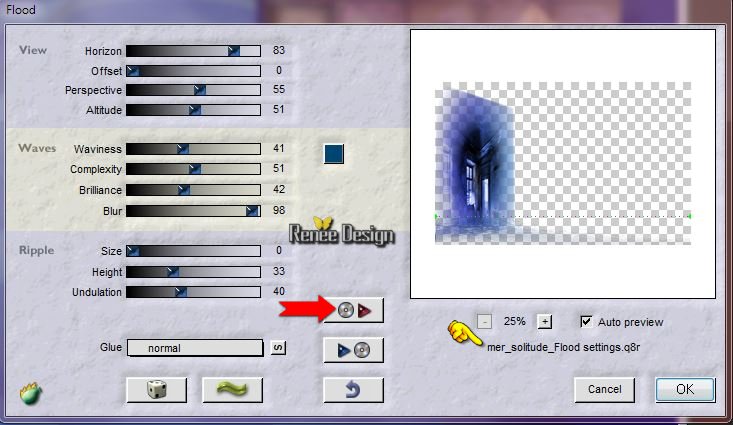
42. Effects-Plugins – Flaming Pear- Flood-click on the red arrow>>select my file- Preset
“mer_solitude_Flood settings” Or manual settings as shown in the example below
43. Effects-Edge Effects-Enhance
44.
Activate the tube ‘’
Renee_tube_In-A-Sea-of-Solitude.pspimage’’
- Image
Resize 70%
- Edit/copy- Edit/ paste as new layer on your working image
-
With your Move Tool:move to the left
45. Activate the tube ‘’ mer_solitude_image1’’- Edit/copy- Edit/ paste as new layer on your working image
- With your move tool move to the bottom
46. Layers-Arrange-Move Down
- Activate the top of the layer palette
47. Activate the tube ‘’renee_tube_lampe.pspimage’’
- Edit/copy- Edit/ paste as new layer on your working image
-
Activate your Pick Tool (K) Mode Scale -place it in the right place as shown in the example below
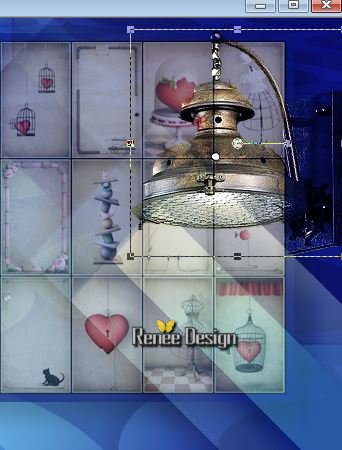
- Layer Palette - Double click on this Layer and set the Blend Mode to "Hard Light "
48.
Activate brush image ‘’
Renee-Tube_watercolor-washes01.jpg’’
49. -File- Export Custom Brush
-Give it a name
‘’watercolor-washes01’’
50. Layers-New raster layer
51.
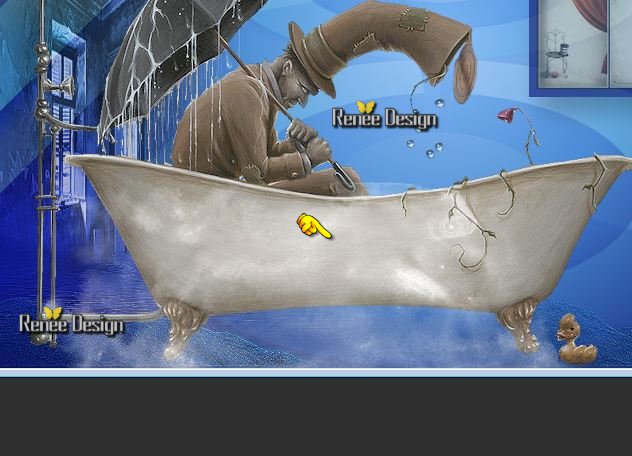
Activate the Brush Tool and choose the brush:‘’
Renee-Tube_watercolor-washes01.jpg’’with these settings-Rotation 90 !!!!

- Stamp your brush on the bottom left side by using your background color white as shown below
52. Layers-New raster layer
53.
Selections –load/save selection –load selection from disc and choose: ‘’
Mer_Solitude_3 »
54. Flood Fill Tool:
Fill the selections with the gradient and 1x with the background color white –on the same layer
Selections-Deselect All
55.
Layer Palette - Double click on this Layer and set the Layer Opacity of this Layer to 32%
56. Activate the tube ‘’mer_solitude_Bulles’’
- Edit/copy- Edit/ paste as new layer on your working image and move
- Layer Palette - Double click on this Layer and set the Blend Mode to "Soft Light "
57. Activate the tube
« Renee_tube_Robinet_steampunk »
- Activate ‘’robinet-2’’
- Image
Resize a 38%
- Edit/copy- Edit/ paste as new layer on your working image
- With your move tool place it in the right place -(see finished image)
58. Change the Foregroundcolor to
#83ddcf
59. Activate Brush image’’ mer-solitude_pinceau1’ in your PSP
- File- Export- Custom Brush
Give it a name’’ mer-solitude_pinceau1’’
60. Activate the Brush Tool and choose the brush:’’ mer-solitude_pinceau1’’ with these settings Rotation 0

-
Layers-New raster layer -Stamp your brush 2x on the bottom left side by using your foreground color
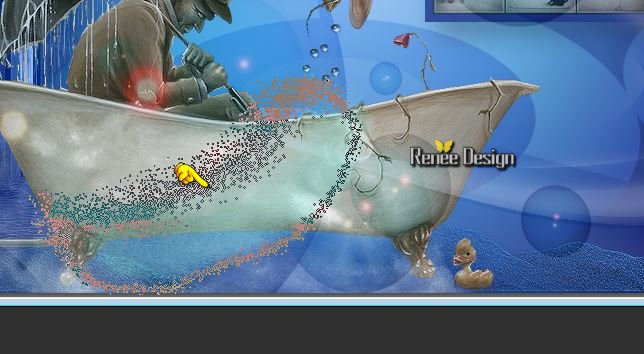
61. Effects-Edge Effects-Enhance
62.
Activate the Brush l'image ‘’ arrow-brush-06’’ in your PSP
-File- Export- Custom Brush
Give it a name ‘’ arrow-brush-06’’
63. Activate the Brush Tool and choose the brush: ‘’ arrow-brush-06’’with these settings -Rotation 0

64. Layers-New raster layer
65. Stamp your brush 1x on the bottom left side by using your foreground color and stamp 1x with your background color on the same layer
66. Double click on this layer and set the Blendmode to Overlay
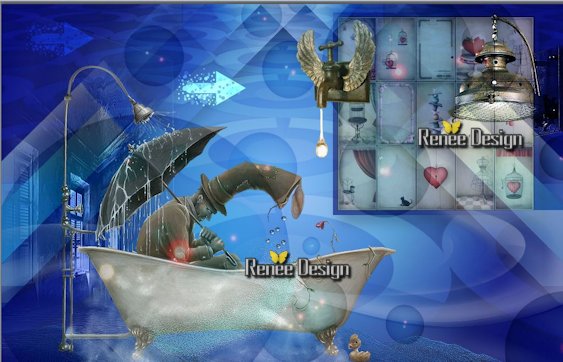
67. Image - Add borders-Symmetric checked:1 pixels #83ddcf
68. Image - Add borders-Symmetric checked:60 pixels white
69. With the magic wand -select the white border of 60 pixels
70.
Selections-Promote selection to layer
- Change the Foregroundcolor to gradient with the same settings

71. Airbrush Tool
Use settings below:Place your airbrush on the middle of the upper edge and place your brush in the middle of the bottom edge


Keep Selected !!
72. Effects-Plugins – AP[Utility] – Utility Both Sides
Post A
>>Choose in the menu Burn
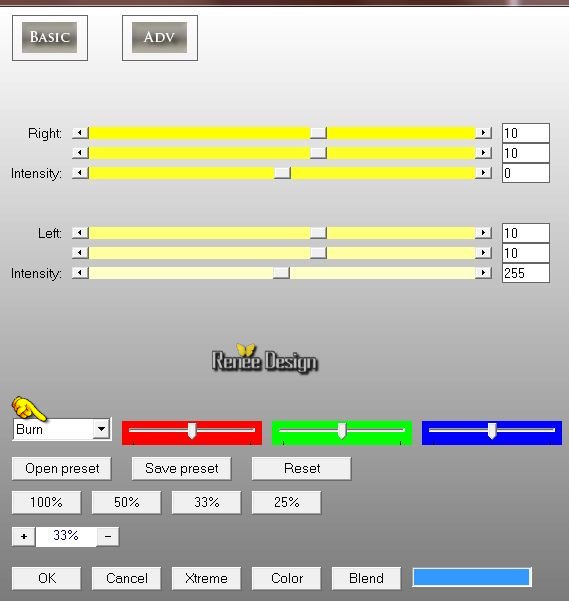
- Repeat this filter with the same settings
Selections-Deselect All
73. Layers-Duplicate
74. Image
Mirror -Set the Layer Opacity of this Layer to 50%
75. Layers-Merge-Merge Down
76. Layer Palette - Double click on this Layer and set the Blend Mode to "Hard Light "
77. Layers-Merge-Merge Down
(Do you have problems with this- image is into the zipfile and paste as a new layer on your working area
)
78. Effects-Plugins - AAA Frame – Foto Frame with settings below
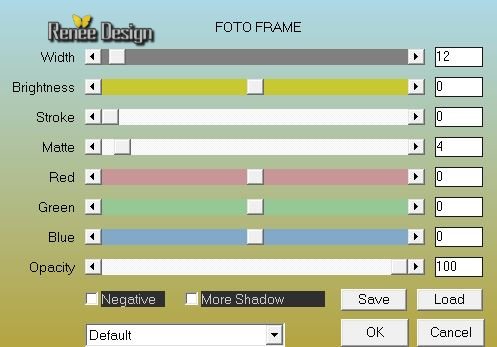
79. Image - Add borders-Symmetric checked:20 pixels white
80. Text Tool: Font ‘’Before the rain’’
- Color Palette: Foregroundcolor to gradient -Background color to white
81.Activate Text Tool: Type the text: ‘’Dans une mer
de solitude’’ Size ? see what is the best for you
82.
Effects -3D Effects-Dropshadow with these settings 1/1/100/10 black
83. Layers-Merge-Merge-All
84. Image
Resize a 995 pixels Width
Save as JPG
I hope you enjoyed this tutorial .
Renée
This lesson was written by Renée 09/05/2015
edited and update
on 2015
*
Any resemblance with an existing lesson is merely a coincidence *
* Don't forget to thank the people who work for us and with us. I named the tubeurs - Testers and the translators.
Thanks Renée.
|