|
Let's start the lesson
Dauphin et dauphins/Dolphin and dolphins

- Preparation
- Material Properties: Set your foreground color to color #436aa1= 1 – Set your background color to color #ffffff=2

1. Open the background image - ''Fond-
Dauphin et dauphins'' – Promote Background Layer =Raster 1
2. Layers- Duplicate
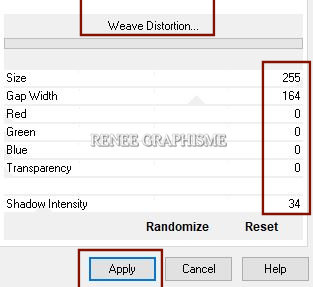
3. Effects –Plugins-
Unlimited 2.0 – VM Natural – Weave Distorsion with the settings shown below
4. Effects –Plugins-
Unlimited 2.0 – VM Extravaganza – Transmission with these settings : 169/0/18
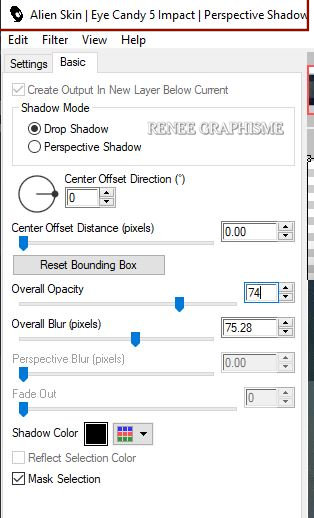
5. Effects - Plugins – Alien skin Eye Candy 5 Impact- Perspective
Shadow with the settings shown below
6. Layers- Duplicate
7. Effects –Plugins-
Unlimited 2.0 – VM Experimental - Every Picture Tells A
Story with these setting: 29
8. Layers-Properties-Change the Blend Mode to " Overlay "
- Activate the layer underneath (Copy of Raster 1)
9. Layers- Arrange- Bring to Top
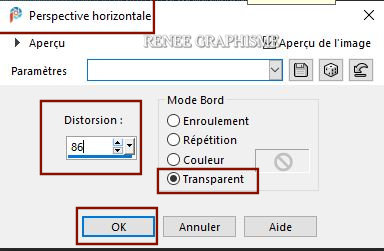
10. Effects – Geometric Effects – Perspective Horizontale use the settings below
11. Layers-Properties-Change the Blend Mode to " Hard Light "
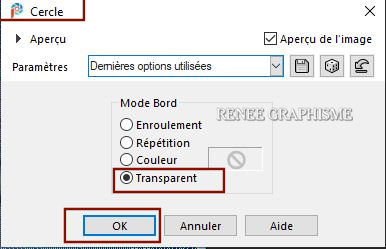
12. Effects – Geometric Effects– Circle-Transparent
11.
Image – Resize – Resize 78% – Resize all layers not checked
12. Objects – Align
- Left
13. Effects -Plugins – Alien skin Eye Candy 5 Impact- Perspective
Shadow with the same settings
14. Layers- Duplicate
16. Image – Resize – Resize 78% – Resize all layers not checked
17. Layers-Properties-Change the Blend Mode to "Screen "
18. Layers- New Raster Layer
19. Selections –load/save selection –load selection from disc and select my selection: ‘’Dauphin et dauphins 1’’
20. Flood Fill Tool
 –
Fill the selection with the background color #ffffff=2 –
Fill the selection with the background color #ffffff=2
21. Adjust- Blur- Gaussian Blur -Radius 6

22. Activate the tube ‘’
Renee-TUBES-Dauphins- rond-eau’’ -Edit - Copy- Activate your work -Edit - Paste as a new layer
23. Pick Tool: (K) on your keyboard -Enter these parameters on the toolbar
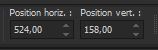 524/
158 524/
158
- Press ( M ) to close the Pick Tool
24. Lower the opacity of this layer to 89%
25. Layers- New Raster Layer
26. Selections –load/save selection –load selection from disc and select my selection: ‘’Dauphin et dauphins 2’’
27. Flood Fill Tool
–
Fill the selection with the foreground color=1 (click 6 times in the selection)
28. Effects –Plugins-
Unlimited 2.0 - &<Bkg Designer sf10 I>- Cruncher: 0 /28
29. Effects – Edge Effects – Enhance More
30. Layers- Duplicate
31.Layers- Merge- Merge Down
- -Activate the bottom layer in the layer palette= Raster 1
32. Layers- Duplicate
33. Effects –Plugins-
Unlimited 2.0 – DC Layer- Side Merge with these settings: 83/203/56
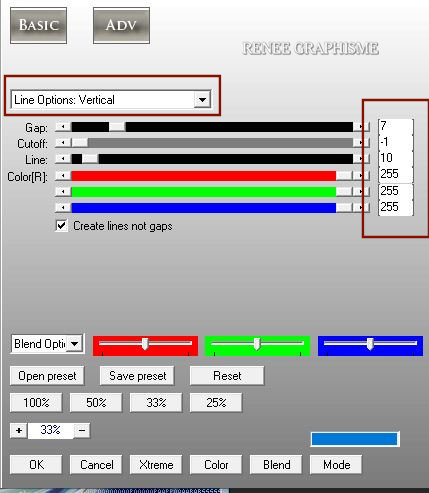
34. Effects – Plugins– AP[Lines] Lines – Silverlining use the settings below
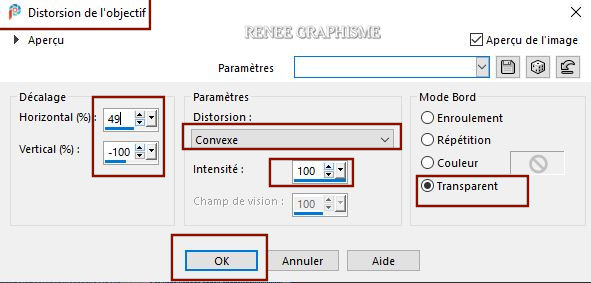
35. Effects – Distortion Effects– Lens Distortion (Distortion Type-Barrel ) with these settings
36. Repeat-Effects-Plugins- AP[Lines]
Lines – Silverlining with the same settings
37. Activate the tube
‘’ Renee-TUBES-Dauphins- famille’’
38. Image - Resize twice to 75%. Edit-Copy !
- Activate the top layer in the layer palette
- Edit - Paste as a new layer
- Put it in the right place ( see finished image )
39. Effects – Plugins– Alien Skin EyeCandy 5 Impact- Perspective
shadow- Preset : Drop Shadow Low – Shadow color= White
- Color Palette- Set your foreground color to color #42aae1= 3
40. Layers- New Raster Layer
41. Selections –load/save selection –load selection from disc and select my selection: ‘’Dauphin et dauphins 3’’
42. Flood Fill Tool
–
Fill the selection with the foreground color =3
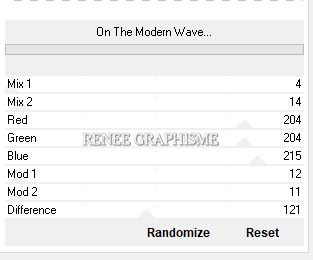
43. Effects –Plugins-
Unlimited 2.0 - Andrew's Filters 32 - On The Modern Wave..use the settings below.
-Color Palette- Set your foreground color to color #1b1c20= 4
44. Layers- New Raster Layer
45. Selections –load/save selection –load selection from disc and select my selection: ‘’Dauphin et dauphins 4’’
46. Flood Fill Tool
–
Fill the selection with the foreground color = 4
- Pick Tool: (K) on your keyboard -Enter these parameters on the toolbar
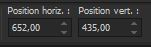 652/
435 652/
435
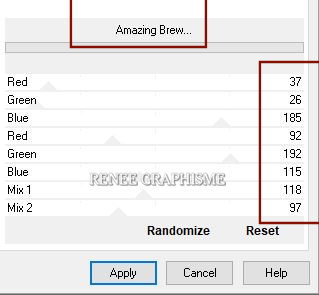
47. Effects –Plugins-
Unlimited 2.0- Andrew's Filter Collection 55 - Amazing
Brew..use the settings below..
48. Effects – Edge Effects – Enhance
49. Activate the tube‘’ Renee-TUBES-Alien-seductress’’ - Edit - Copy- Activate your work -Edit - Paste as a new layer
50. Pick Tool: (K) on your keyboard -Enter these parameters on the toolbar
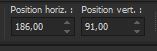 186/91 186/91
51.Layers-Properties-Change the Blend Mode to "Multiply" and Lower the Opacity to 73%
- Material Properties: Set your foreground color to color #87b8d5= 5- Background color remains white=2
52. Layers- New Raster Layer
53 Selections –load/save selection –load selection from disc and select my selection: ‘’ ’Dauphin et dauphins 5’’
54. Flood Fill Tool
–
Fill the selection with the foreground color =5 (click 2 or 3 times in the selection)
55. Layers- New Raster Layer
56. Selections –load/save selection –load selection from disc and select my selection: ‘’ ’Dauphin et dauphins 6’’
57. Flood Fill Tool
–
Fill the selection with the background color =2 (click 3 times in the selection)
58. Layers-Properties-Change the Blend Mode to " Screen"
59. Layers- New Raster Layer
60. Selections –load/save selection –load selection from disc and select my selection: ‘’ ’Dauphin et dauphins 7’’
61. Flood Fill Tool
–Fill the selection with the foreground color =3
62. Layers- New Raster Layer
63. Selections –load/save selection –load selection from disc and select my selection: ‘’ ’Dauphin et dauphins 8’’
64. Color Palette- Set your foreground color to color #42aae1=3
Flood Fill Tool
–
Fill the selection with the background color =2 ( click 2 times in the selection)
65. Adjust-Blur-Gaussian Blur-Radius 3
66. Activate the tube ‘’
Renee-TUBES-Dauphins-forme-poisson’’ -Edit - Copy- Activate your work -Edit - Paste as a new layer
- Place according to your taste( For Renée X=0 and Y = 120 )
67. Effects – Plugins– Alien Skin Eyecandy 5 Impact – Perspective
Shadow- Preset : Drop Shadow Lowest with the default settings
68. Activate the tube ‘’
Renee-TUBES-Dauphins-points-sol’’ -Edit - Copy- Activate your work -Edit - Paste as a new layer
69. Objects – Align
– Bottom
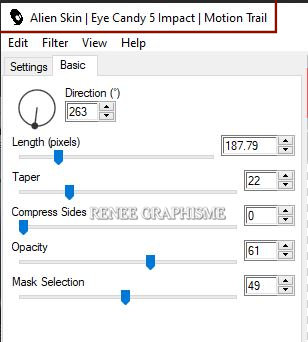
70. Effects – Plugins– Alien Skin – Eyecandy 5 Impact – Motion Trail use the settings below
71.Write the text with the attached font or paste my text in place
72. Image - Add Borders-Symmetric checked: 1 Pixel Color # 1b1c20 =4
73. Image - Add Borders-Symmetric checked: 10 Pixels Color #ffffff=2
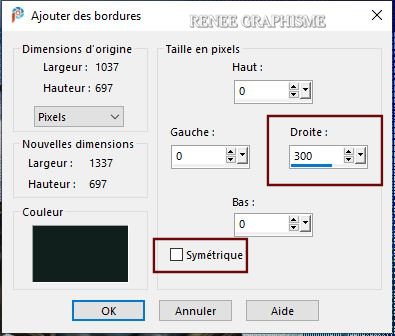
74. Image - Add Borders Asymmetrical -Color # 1b1c20 =4
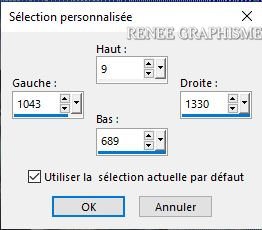
75. Activate Selection Tool -Custom Selection (S) -Rectangle with these setting 
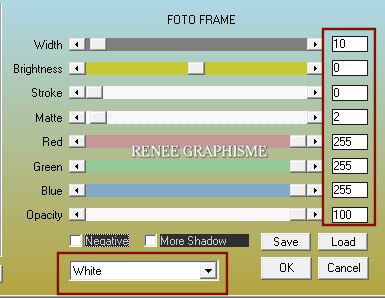
76. Effects – Plugins– AAA Frame - Foto Frame use the settings below
77. Activate the tube
‘’ Renee-TUBES-Dauphins- Decos-finale’’ -Paste the 3 tubes to decorate or others according to your taste
78. Image - Add Borders-Symmetric checked: 2 Pixels Color #436aa1=1
79. Image Resize -Resize 1005 Pixels Width
Save as JPG
That's it - Thank you / I hope you enjoyed this lesson
Renée
This lesson was written by Renée 26-06-2021
and put in place
2021
*
Any resemblance with an existing lesson is a coincidence
* Do not forget to thank the people who work with us and for us -I have appointed the tubeurs and translators
Thanks
*
|


 Translations