|
Let's start the lesson.

- Preparation - Color Palette: Set your Foreground color to color #cdcecc= 1 – Set your Background color to color #61365d=2
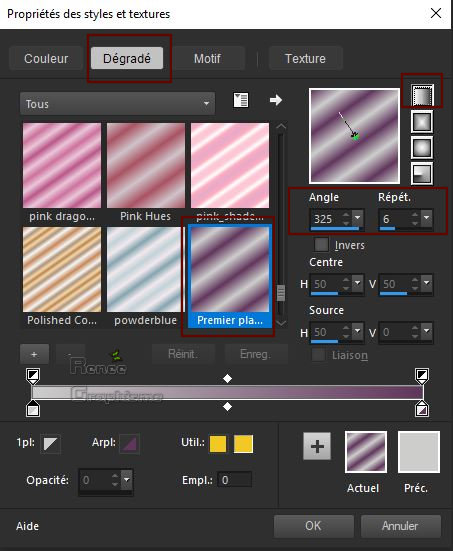
- Set your Foregroundcolor to foreground-background linear gradient configured like this
1. Open a new transparent image
1005 x 615 pixels
2. Activate Flood Fill Tool
 –
Flood fill the Layer with the gradient –
Flood fill the Layer with the gradient
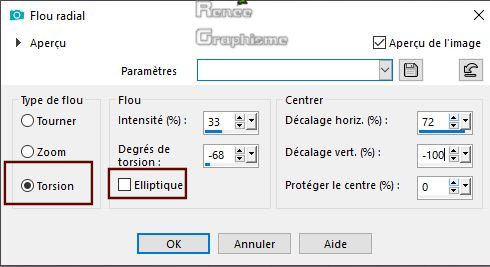
3. Adjust- Blur- Radial Blur use the settings below
4. Effects – Plugins – Jeux de lignes – Entrelacement using the default settings
5. Layers- Duplicate
6. Effects – Plugins – Gittes Plugins - Gittes Pop Art : 23
7. Adjust- Blur- Radial Blur with the same settings
8. Layers-Properties-Set the Blend Mode to " Hard Light "
8. Layers- Merge- Merge Down
9. Layers- Duplicate
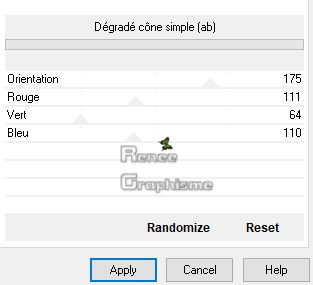
10. Effects –Plugins- Unlimited
2.0- Dégrades - Dégradé cône simple(ab) with these settings
11. Effects –Plugins – Transparency - Eliminate Black
12. Layers- Duplicate
13. Adjust- Blur- Gaussian Blur : Radius 100
14. Layers- Arrange- Move Down
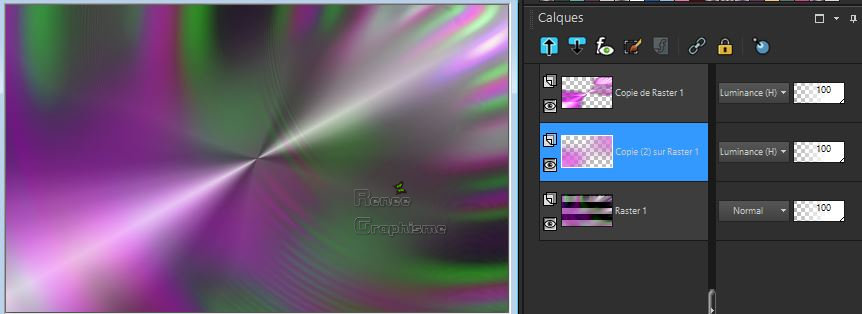
-Layer Palette look like this now-You should have this result
- To replace the top of the Layer-Palette
15. Layers- New Raster Layer
16. Color Palette: Set your Foreground color to white #ffffff
-Activate Flood Fill Tool  –
Flood fill the Layer with the foreground color #ffffff –
Flood fill the Layer with the foreground color #ffffff
17. Layers- New Mask Layer- From Image and select Mask ‘’
0_6b66c_31cbb023_L.jpg
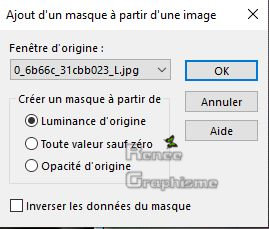
- Layers- Merge- Merge Group
18. Effects- Edge Effects- Enhance More
19. Adjust- Blur- Radial Blur with the same settings
20. Layers-Properties-Set the Blend Mode to " Hard Light " – and lower the Opacity to 61%
21. Effects – Plugins – Carolaine & sensibility –CS_Reflexion using the default settings
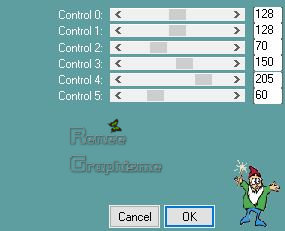
22. Effects – Plugins - Sapphire Filters 03 -SapphirePlugin_0215... /using the default settings
23. Adjust- Blur- Gaussian Blur : Radius 5
24. Layers- Merge- Merge Visible
25. Layers- Duplicate
26. Image- Resize to 80 %
27. Effects – Image Effects – Offset with these settings: H – 45 and V = 20
25.Effects- 3 D Effects- Drop Shadow with the se settings: 8/8/65/10 Color black
26. Layers- Duplicate
27. Image- Resize to 80 %
28. Effects – Image Effects – Offset with these settings: H – 45 and V = 20
29. Layers- Duplicate
30. Image- Resize to 80 % All layers not checked
31. Effects – Image Effects – Offset with these settings: H – 45 and V = 20
- Close the bottom layer in the Layer- Palette(Merged Layer)
- Activate an open layer in the Layer- Palette/Layers-Merge-Merge Visible
- Open the bottom layer in the Layer-Palette
- To replace the top of the Layer-Palette (Copy of Merged )
32. Layers- Duplicate
33. Effects –Plugins – Mura’s Meister – Perspective Tilling use the settings below
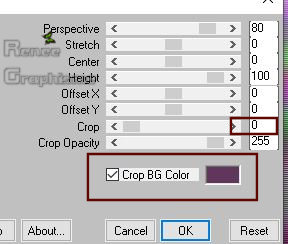
34. Effects – Image Effects – Offset with these settings: H = 0 and V = - 467
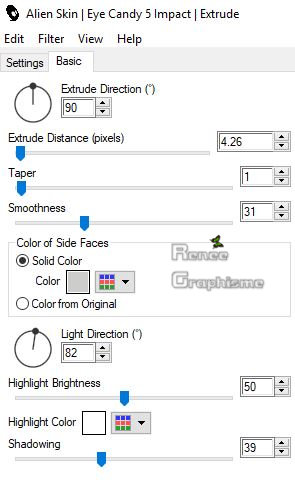
35. Effects – Plugins – Eyecandy 5 Impact – Extrude use the settings below / Color #cdcecc= 1
- Activate the bottom of the Layer-Palette (Merged Layer)
- Selections- Select All
- To replace the top of the Layer-Palette (Copy (2) of Merged Layer )
- Image - Crop to Selection
- Activate the middle layer in the Layer- Palette (Copy of Merged Layer)
36. Effects - Plugins - Nick Color Effex pro – Graduated 201h use the settings below (Sky
blue)
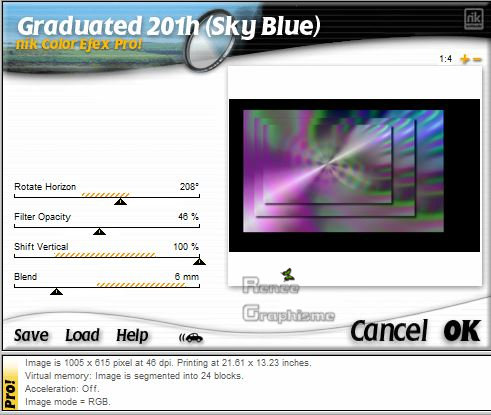
37.Effects- 3 D Effects- Drop Shadow with the se settings: 0/0/58/42 Color black
- To replace the top of the Layer-Palette
- Color Palette: Set your Foreground color to color #64b0aa=3 – Set your Background color to color #29483e=4
38. Layers- New Raster Layer
39. Activate Selection Tool -Custom Selection (S) -Rectangle with these settings

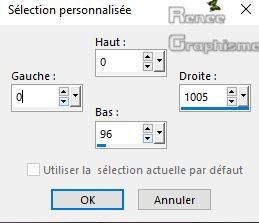
40. Activate Flood Fill Tool
 -Flood fill the selection with the Background color =4
41. Effects –Plugins – Graphic plus - Cross shadow use the settings below
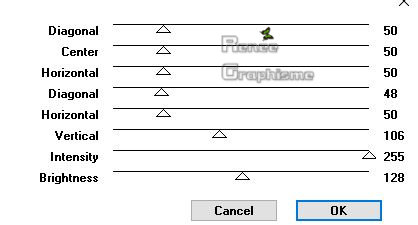
Selections Select None
42. Selections –load/save selection –load selection from disc and select my selection:
‘’tatouage_1’’
DO NOT ADD NEW LAYER
43. Activate Flood Fill Tool
 -Flood fill the selection with the Foreground color =3 (zoom if necessary ) -Flood fill the selection with the Foreground color =3 (zoom if necessary )
Selections- Select None
44. Effects – Plugins- Mura’s Meister – Perspective Tilling use the settings below
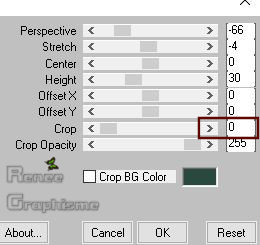
45. Layers-Maske- Load/Save Mask -Load Mask From Disk and choose Mask: ‘’0masque_2020’’
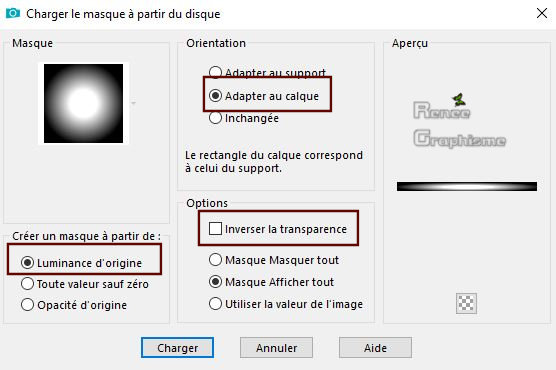
- Layers- Merge- Merge Group
46.
Effects- Edge Effects- Enhance
47. Activate the tube’’tatoo’’
– Image- Resize to 45%
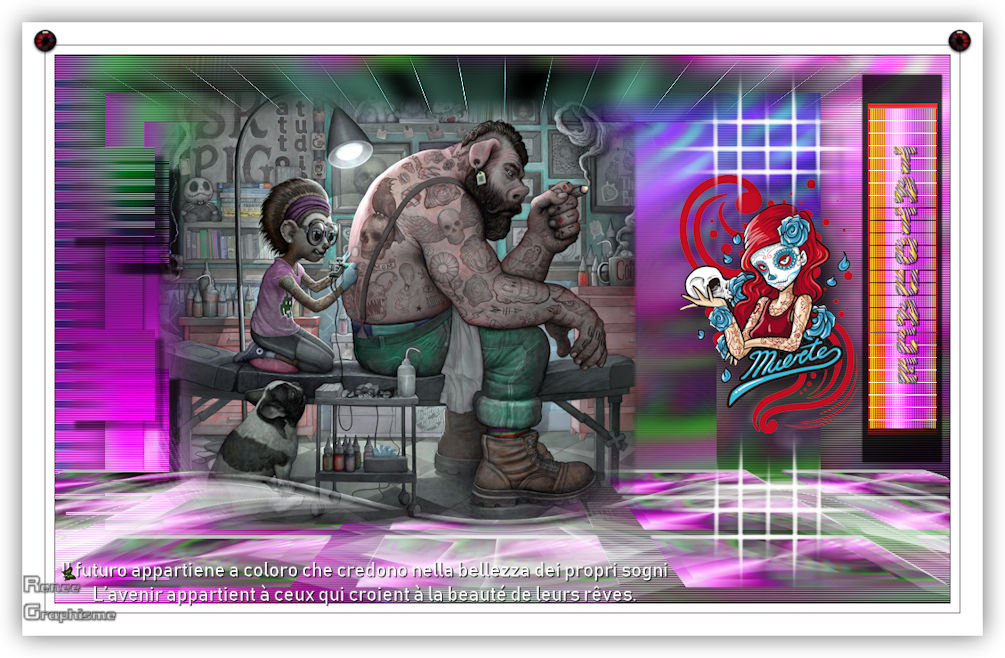
- Edit - Copy- Activate your work -Edit - Paste as a new layer - Activate your Move Tool (M) place it in the right place (see finished image)
48.
Effects -Plugins - Eyecandy 5 Impact –
Perspective shadow- Drop shadow blury
49. Effects- 3 D Effects- Drop Shadow with these settings: 17/26/30/10 Color white
50.
Layers- New Raster Layer
51. Selections –load/save selection –load selection from disc and select my selection:
‘’tatouage_2’’
52. Color Palette: Set your Foreground color to white #ffffff
-Activate Flood Fill Tool  - Flood fill the selection with #ffffff - Flood fill the selection with #ffffff
Selections Select None
53. Effects- 3 D-Effects- Drop Shadow with the same settings-Color black
- Activate the bottom of the Layer-Palette (Merged Layer)
54. Activate Selection Tool -Custom Selection (S) -Rectangle with these settings
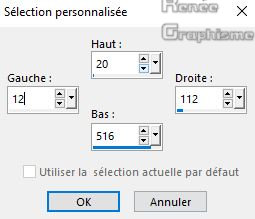
55. Selections- Promote Selection to Layer
Selections- Select None
56.
Layers- Arrange- Bring to Top
57. Effects- Plugins–
Mura’s Seamless – Tile rotate: 0/6/131
58. Effects- 3 D-Effects- Drop Shadow using the default settings
59. Layers- Duplicate
60.
Effects- Image Effects- Seamless Tiling use the settings below
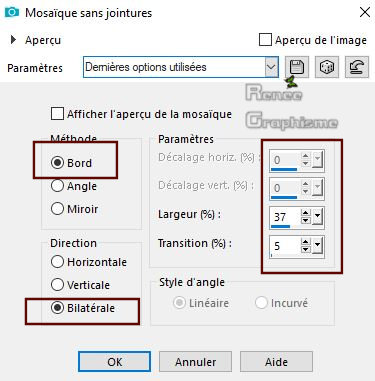
61. Layers-Properties-Set the Blend Mode to " Overlay "
62. Activate the tube ‘’
tube_tatouage_vague.png’’
- Edit - Copy- Activate your work -Edit - Paste as a new layer
- Place against the bottom edge of your work
63. Layers-Properties-Set the Blend Mode to " Screen "
64. Activate the Tube''
Renee_TUBES_Le_Tatoueur''
-
Image- Resize to 57%
- Edit - Copy- Activate your work -Edit - Paste as a new layer
65. Effects – Image Effects – Offset with these settings: H = - 126 and V = 32
66. Layers- Arrange -Move Down /Underneath the Group of Raster 1
- Activate the bottom of the Layer-Palette (Merged Layer)
67. Activate Selection Tool -Custom Selection (S) -Rectangle with these settings
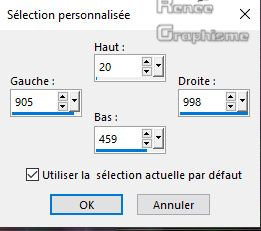
- Selections-Promote Selection to Layer
68. Layers- Arrange- Bring to Top
69. Effects –Plugins- Unlimited
2.0- Andrew's Filters 1- Boxed...: 236/232/224/55
Selections Select None
70.
Activate Selection Tool -Custom Selection (S) -Rectangle with these settings
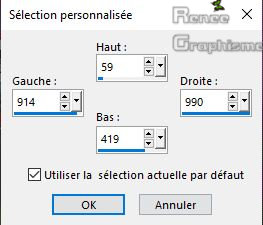
71. Effects –Plugins – L & K’s – Mayra use the settings below
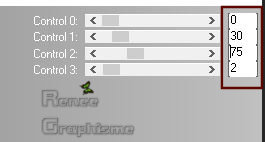
Selections Select None
72. Layers-Properties-Set the Blend Mode to " Multiply "
73. Activate the
tube ''texte tatouage'' - Edit - Copy- Activate your work -Edit - Paste as a new layer
- Activate your Move Tool (M) place your tube to the right side of your image
- Color Palette: Set your Foreground color to #29483e=4
74. Activate Pen Tool use the settings below – Line Style- Included into the zipfile

-Press the Shift Key on your Keybord and draw a straight line from Top left to the Bottom left
- Convert to Raster Layer
75. Effects - Distortion Effects - Wind direction- From Right checked - Wind Strength:100
76. Effects- Edge Effects- Enhance
77. Layers-Properties-Set the Blend Mode to " Hard Light "
- Activate your Move Tool (M) place your tube to the left side of your image and connect nicely ( see screen)

78. Adjust-Hue and Saturation – Vibrancy 41
79. Image - Add borders-Symmetric checked 1 Pixel Color #61365d= 2
80. Image - Add borders-Symmetric checked 10 Pixels #ffffff
81. Image - Add borders-Symmetric checked 1 Pixel Color #61365d= 2
82. Image - Add borders-Symmetric checked 50 Pixels #ffffff
83. Selections- Select All
84. Selections-
Modify - Contact with 25 Pixels
85. Effects- 3 D-Effects- Drop Shadow with these settings: 0/0/60/40 en Noir
Selections Select None
86. Activate the tube ‘’Tatouage_bouton’’
- Edit - Copy- Activate your work -Edit - Paste as a new layer
- Activate your Move Tool (M) place your tube to the top left of your image
-Image - Mirror - Mirror Horizontal ( Image - Mirror in previous PSP Versions)
87. Write a sentence yourself or take mine
88. Layers- Merge- Merge All
89. Image - Resize - Width 1005 Pixels - Resize all Layers checked
Save as JPG file and you're done!
I hope you enjoyed this lesson
Renée
This lesson was written by Renée 25 April 2019
Edited and Update
2019
*
*
Any resemblance with an existing lesson is a coincidence
* Do not forget to thank the people who work with us and for us I have appointed the tubeurs and translators
Thanks
|
 Translations


