|
Let's start the lesson.
-
- Material Properties:Set your foreground color to: #ffffff - Set your background color to: #000000
1.
Open the image ‘‘’fond_entrave_passive »- Window - Duplicate (or shift+D) - Close the original and proceed on the copy -Promote Background Layer =Raster 1
2.
Layers-New Raster layer
3.
Selections- Select All
4.
Activate the tube ‘’ar-24’’
-
Edit /Copy-Edit Paste into selection
Selections- Deselect All
5.
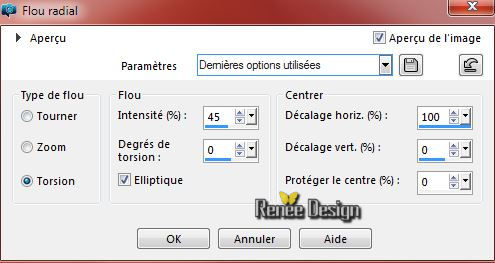
Adjust-Blur-Radial Blur with these settings
6.
Layers-New Raster layer
7.
Selections –load/save selection –load selection from disc and choose:« selection_entrave_passive’’»
8.
Activate Flood Fill Tool and fill the selection with the foreground color #ffffff
Selections- Deselect All
9.Layers-New Raster layer
10.
Selections –load/save selection –load selection from disc and choose: ‘’
selection_entrave_passive_1 »
Activate Flood Fill Tool and fill the selection with the foreground color #ffffff
Selections- Deselect All
11. Effects
–Plugins-Unlimited - ICNET FILTERS - Noise Filters- X-Noise a
169
- Activate the bottom of the layer-Palette=Raster 1
12. Layers-New Raster layer
13.
Selections –load/save selection –load selection from disc and choose:‘’selection_entrave_passive_2’’
14. Activate Flood Fill Tool and fill the selection with the foreground color #ffffff
Selections- Deselect All
15.
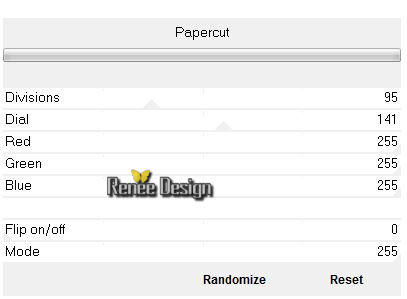
Effects –Plugins - Unlimited VM Texture- Papercut with these settings
16. Effects-Edge Effects-Enhance
17. Double click on this Layer and set the Blend Mode to "Hard Light "
18. Layers- Duplicate
19. Effects- Plugins – Simple –Pizza slice Mirror
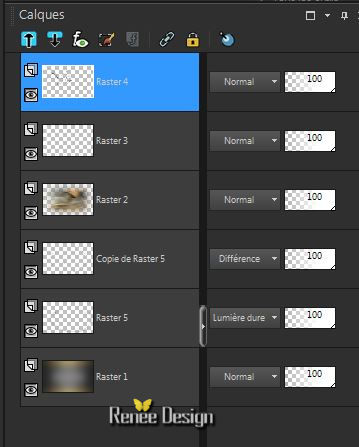
20. Double click on this Layer and set the Blend Mode to "Difference "
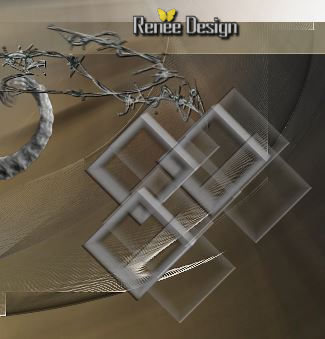
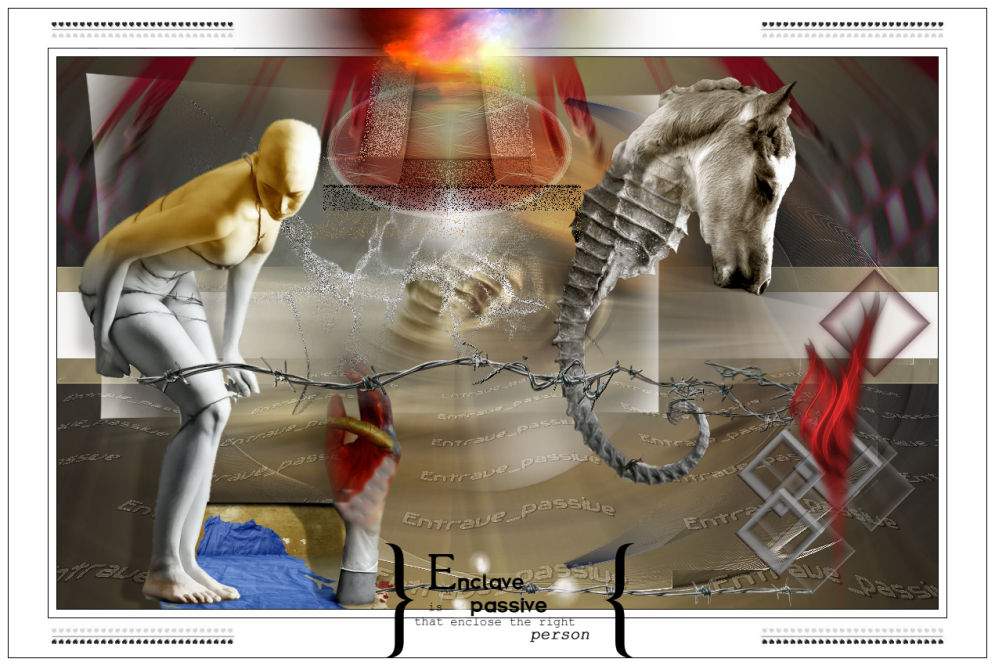
you should have this result:
- Activate the top of the layer-Palette
- Activate the tube ‘’ renee_tube_entrave_passive.pspimage’’(do not close, we will need it again soon)
21. Activate layer « cheval_licorne »
-Edit/copy- Edit/ paste as new layer on your working image
22. Effects- Image Effects- Seamless Tiling with these settings
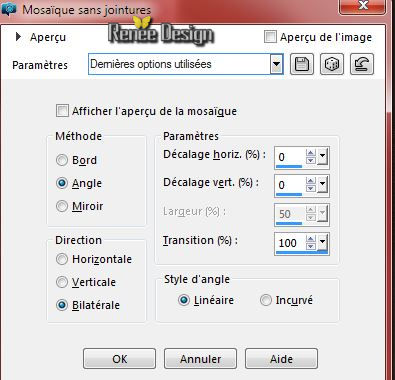
23. Adjust-Blur- Radial Blur with these settings
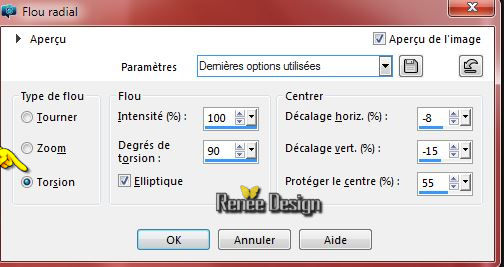
24. Double click on this Layer and set the Blend Mode to "Overlay"
25. Layers- Duplicate
26. Image
Mirror
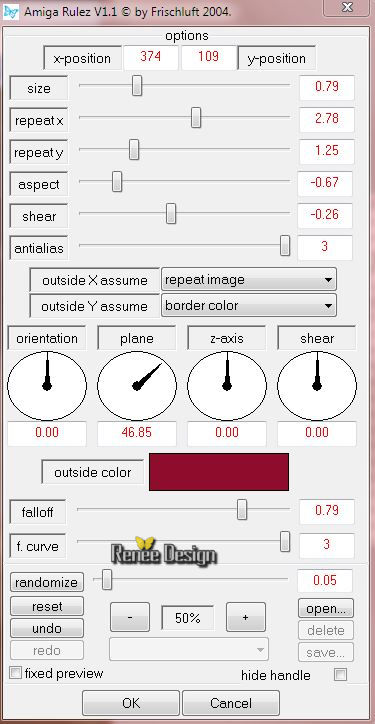
27. Effects- Plugins – Frischluft- Amiga Rulez with these settings
- color
#900c2d
- Layer palette – Make Copy of Raster 5 active
- Material Properties:Set your foreground color to: #ffffff-Set your background color to #e6d8ae
28.Layers-New Raster layer
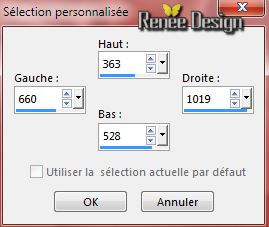
29.
Selection Tool ( S ) Custom selection use settings below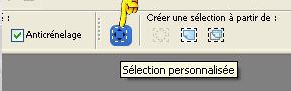
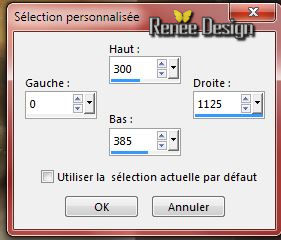
30. Activate Flood Fill Tool and fill the selection with the foreground color #ffffff
Selections- Deselect All
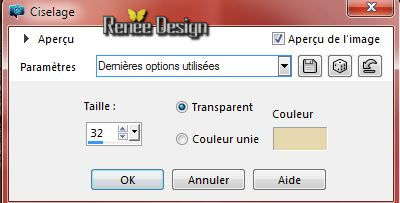
31. Effects- 3D Effects- Chisel with these settings-/backgroundcolor
- Activate the top of the layer-Palette
32. Layers-New Raster layer
33.
Selections –load/save selection –load selection from disc and choose:‘’ selection_entrave_passive_3’’
34. Effects- Plugins – Frischlulft- Glass Sphere with these settings
Color #d32f01
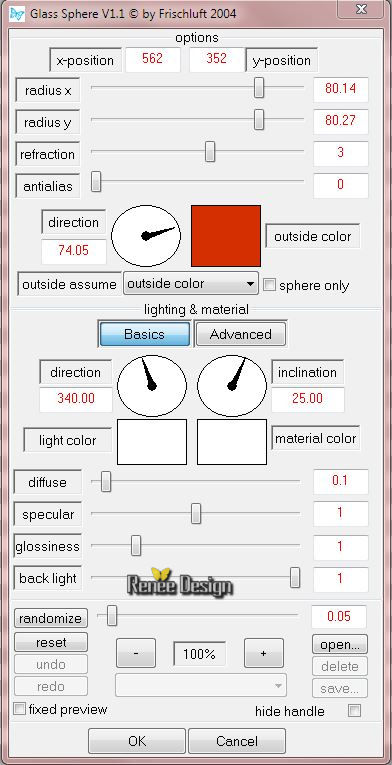
Selections- Deselect All
- Material palette:Set your foreground color to #931121
35. Layers- New Raster layer
36.
Selections –load/save selection –load selection from disc and choose:
‘’selection_entrave_passive_4’’
37. Activate Flood Fill Tool and fill the selection with the foreground color ( click 2x into selections
Selections- Deselect All
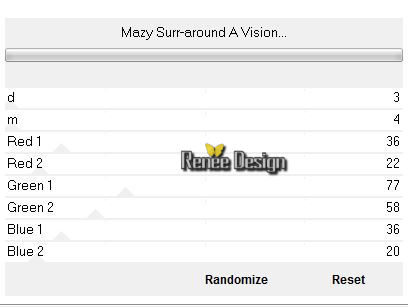
38.
Effects –Plugins- Unlimited - Plugins AB 01- Mazy Surr-around A
Vision...
39. Effects- Image Effects- Seamless Tiling with these settings

40. Activate the tube again ‘’
renee_tube_entrave_passive.pspimage’’
- Make layer ‘’femme’’ active
-
Edit/copy- Edit/ paste as new layer on your working image
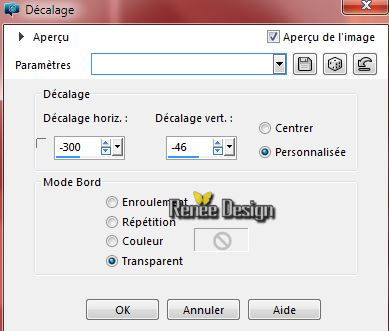
41.Effects- Image Effects- Offset with these settings
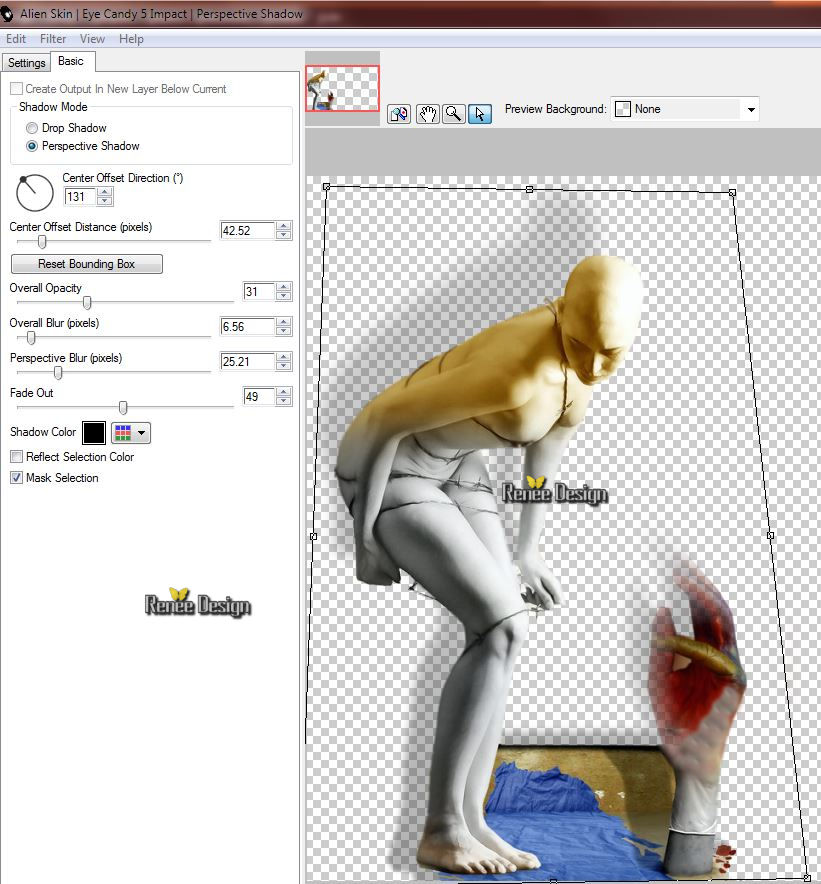
42.
Effects- Plugins – EyeCandy 5 Impact –Perpspective
shadows
-tab Settings/User settings choose my preset: ‘’Entrave_passive_persp’’
43. Activate the tube ‘’ barbele _renee_tube’’
-
Edit/copy- Edit/ paste as new layer on your working image
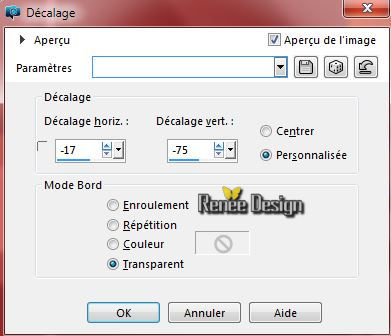
- Effects- Image Effects- Offset with these settings
44. On the same tube – Activate layer ‘’cheval_licorne’’
-Edit/copy- Edit/ paste as new layer on your working image
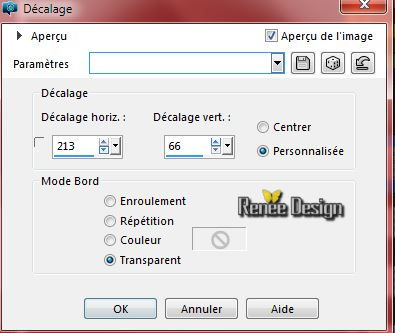
45. Effects- Image Effects- Offset with these settings
- Activate the layer underneath =(Raster 11-barbelé)
46.
Selection Tool ( S ) Custom selection use settings below
47. Effects- Distortions Effects-Polar Coordinates-Rectangular to Polar
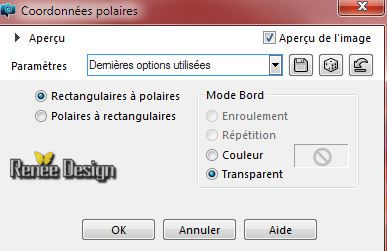
Selections- Deselect All
48. Effects - 3D-Effects -Drop shadow with these settings 1/1/100 /0 black
49. Layers- Arrange- Move Up
50. On the same tube_ activate layer
‘’cube_tuto_entrave_passive’’
- Edit/copy- Edit/ paste as new layer on your working image
51. On the same tube –Make layer ‘’barbelé » active
-
Edit/copy- Edit/ paste as new layer on your working image
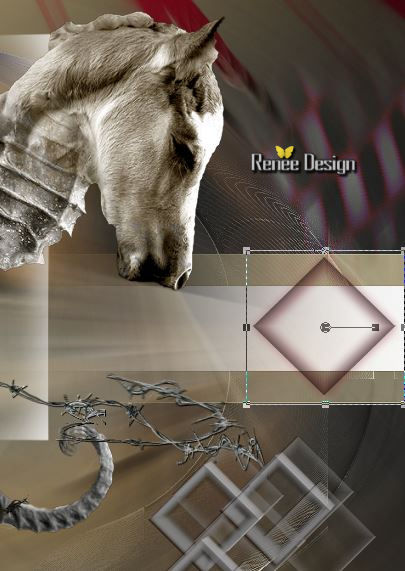
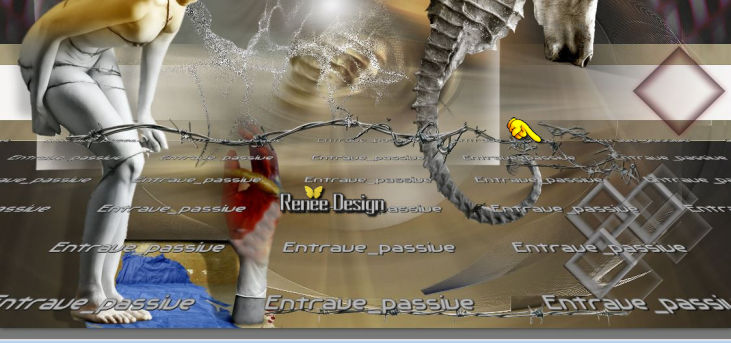
- Activate your Pick Tool (K) place it in the right place as shown in the example below

52. Activate the tube ‘’ deco_carre.png »
-
Edit/copy- Edit/ paste as new layer on your working image
53. Activate your Pick Tool (K) place it in the right place as shown in the example below
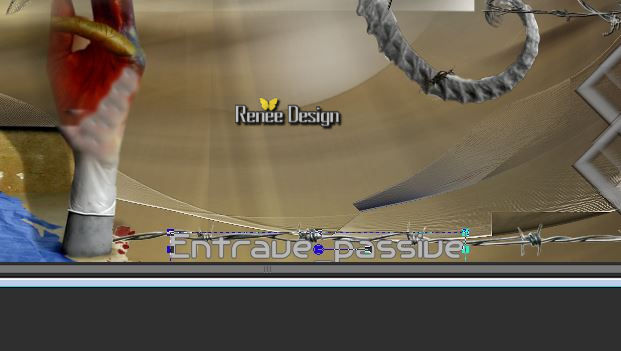
54. Activate the texte « entrave_passive »
-
Edit/copy- Edit/ paste as new layer on your working image
- Activate your Pick Tool (K) place it in the right place as shown in the example below
55. Effects - 3D-Effects -Drop shadow with these settings 1/1/100/0 black
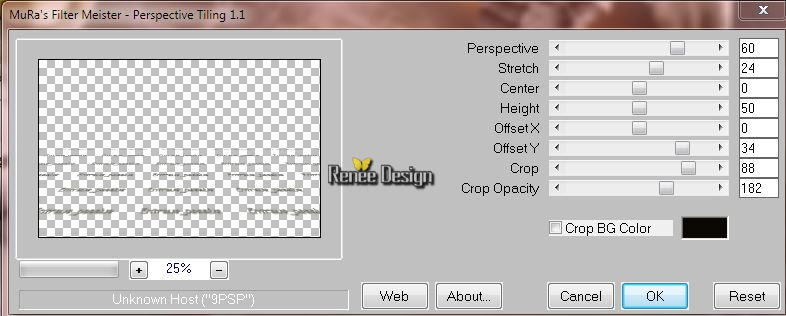
56. Effects- Plugins – Mura’s Meister – Perpective
Tilling with these settings
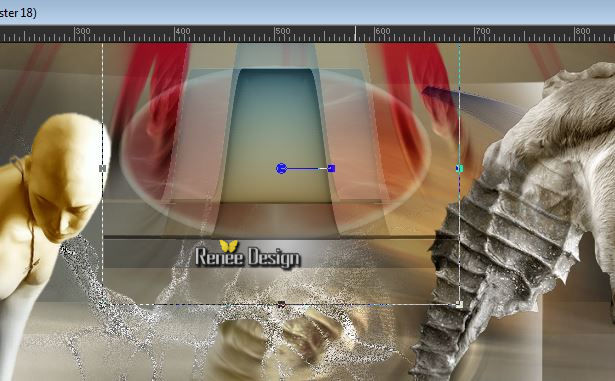
57. Pick Tool (K) mode scale - Use the arrow keys on the keyboard click to the bottom  as shown in the example below as shown in the example below
58. Layers- Arrange- Move Down-above Raster
9
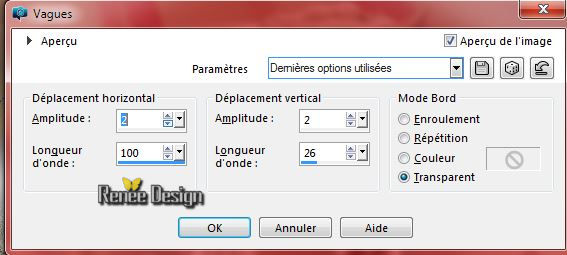
59. Effects- Distortion Effects-Wave with these settings
60.
Activate your Pick Tool (K) Mode Scale -Stretch against the left and right side of the working image
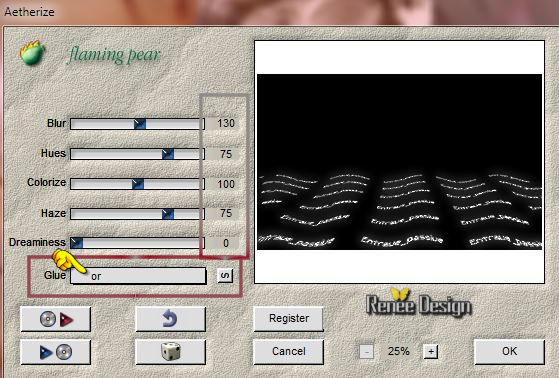
61.Effects- Plugins – Flaming Pear –
Aetherize with these settings
62. Double click on this Layer and set the Blend Mode to "Soft Light "
- Activate the top of the layer-Palette
- Material palette:Set your foreground color to #908f8a- Set your background color to #931121
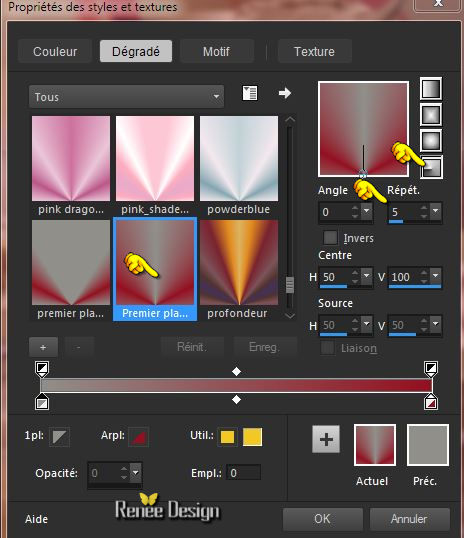
63.
Set your foreground to gradient 'Foreground-background' -Radial -with these settings
64. Layers-New Raster layer
65.Selections –load/save selection –load selection from disc and choose:‘’
selection_entrave_passive_5’’
66. -Activate Flood Fill Tool and fill the selection with the selection with the gradient
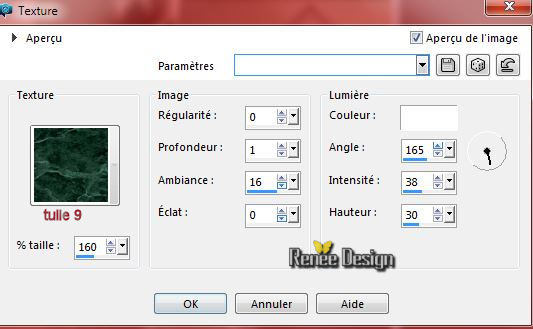
67. Effects
– Texture Effects – Texture/Tuile 9.bmp
Selections- Deselect All
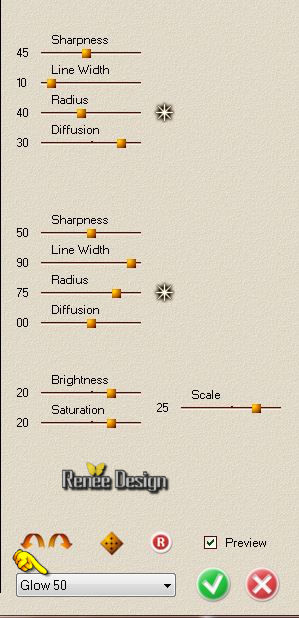
68. Effects- Plugins – Redfield – Fractalius with these settings
69. Double click on this Layer and set the Blend Mode to "Soft Light " -Set the layer opacity of this layer to 77%
70. Activate the tube ‘’deco_entrave.png »
-
Edit/copy- Edit/ paste as new layer on your working image
71. Activate your Pick Tool (K) place it in the right place as shown in the example below
72. Layers- Arrange- Move Down
73. Double click on this Layer and set the Blend Mode to "Dissolve"
74. Layer-Palette: Make layer 17 active
- Effects- Edge Effects- Enhance More
75. Activate the tube ‘’ deco_entrave_rouge’’
- Edit/copy- Edit/ paste as new layer on your working image
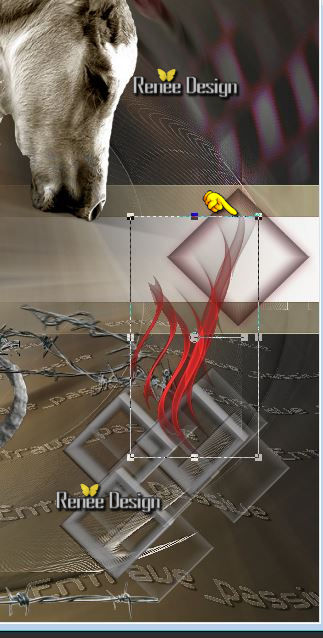
76. Activate your Pick Tool (K) place it in the right place as shown in the example below
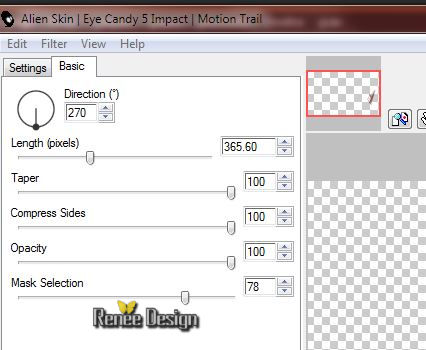
77. Effects- Plugins –EyeCandy 5- Impact – Motion trail
-tab Settings/User settings choose my preset: t
‘’entrave_passive_MTrail’’
78. Image - Add borders-Symmetric checked: 1 pixel black
79. Image - Add borders-Symmetric checked: 10 pixels white
80. Image - Add borders-Symmetric checked: 1 pixel black
81. Image - Add borders-Symmetric checked: 50 pixels white
82. Activate Brush: ‘’pinceau-entrave1’ in your PSP
-
File- Export Custom Brush (Give it a name) - ‘’pinceau-entrave1’
- Foreground color to #000000
83. Layers- New Raster layer! Activate Brush Tool and select my file:‘’pinceau-entrave1’ with these settings-Stamp your brush in the upper left corner by using your foreground color

84. Layers- Duplicate –Image Mirror
85. Layers- Merge- Merge- Down
86. Layers- Duplicate –Image Flip
87. Activate the tube ‘’titre’’ – Edit/copy- Edit/ paste as new layer on your working image
88. Activate the tube ‘’ nuage_entrave_passive.png’’
-
Edit/copy- Edit/ paste as new layer on your working image
place the at the top center
89. Image - Add borders-Symmetric checked: 1 pixel black
90. Image - Add borders-Symmetric checked: 10 pixels white
91. Image
Resize 995 pixels width
Save as JPG
I hope you enjoyed this lesson
Renée
This lesson was written by Renée 03/09/2015
edited and update
2015
*
Any resemblance with an existing lesson is merely a coincidence *
* Don't forget to thank the people who work for us and with us. I named the tubeurs - Testers and the translators.
Thanks Renée.
*
| 
 Translations


 When you see this logo the filter is imported in Unlimited

 All rights reserved