|
Let's start the lesson
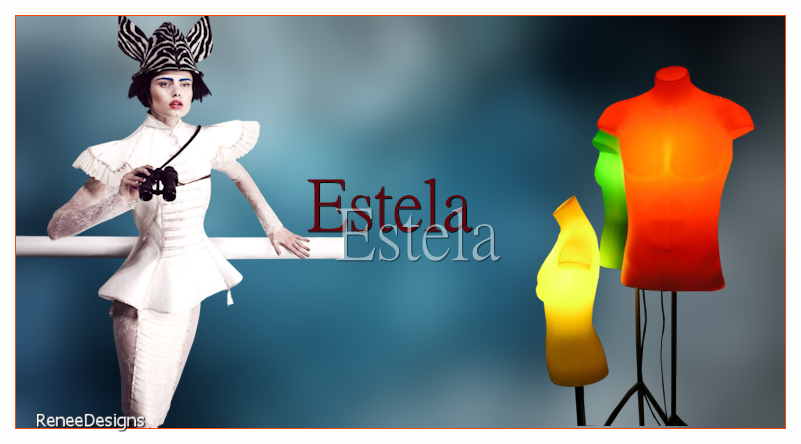
Estela
-
Preparation
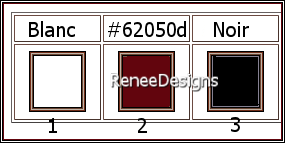
-Material Properties: Set your foreground color to color #ffffff=color 1 – Set your background color to color #62050d =2
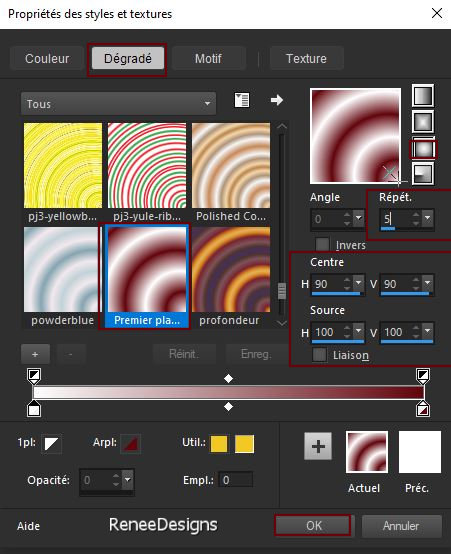
- Prepare a foreground/background sunburst gradient configured like this
1. File: Open a transparent image in this size 1100
x 600 Pixels
2. Flood Fill Tool
 –
Fill the layer with the gradient –
Fill the layer with the gradient
3. Adjust- Blur-Gaussian Blur-Radius 35%
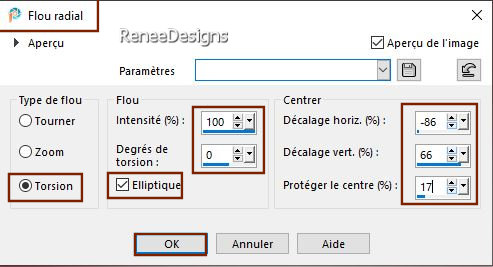
4. Adjust- Blur- Radial Blur use the settings below
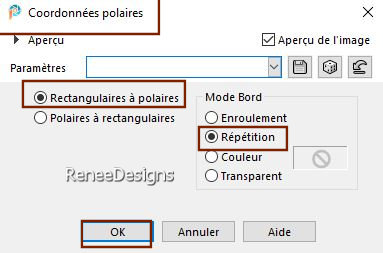
5. Effects- Distortions Effects-Polar Coordinates-Rectangular to Polar-Edge mode- Repeat
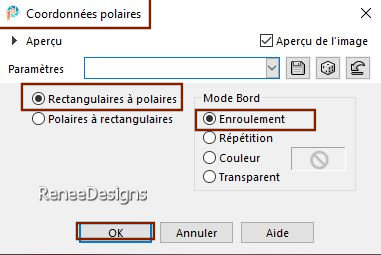
6. Repeat: - Effects- Distortions Effects-Polar Coordinates-Rectangular to Polar /Attention/Edge mode-Wrap
7. Effects - Plugins - Filters in Unlimited 2.0 -UnPlugged Tools -
Vertical Tile...
8. Effects - Plugins - Filters in Unlimited 2.0 – Visual Manipulation –
Transmission with these settings: 7/11/0
9. Layers- New Raster Layer
10. Properties Foreground-Close gradient, white is the foreground color#ffffff=1
Flood Fill Tool –
Fill the layer with the foreground color #ffffff=1
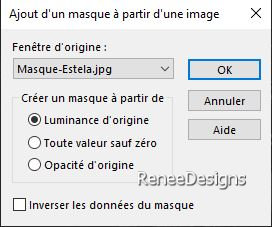
11. Layers- New Mask Layer- From Image and select Mask ’’Masque-Estela’’
- Layers- Merge- Merge Group
12. Layers-Properties-Set the Blend Mode to "Soft Light "
13. Adjust- Sharpness- Sharpen More
14. Layers- New Raster Layer
15. Selections –load/save selection –load selection from disc and select my selection: – Estela-1’’
16. Flood Fill Tool
–
Fill the selection with the foreground color #ffffff=1

17. Layers - Duplicate
18. Image - Mirror - Mirror vertical ( Image - Flip in older versions of PSP)
19. Effects - Plugins- Filters in Unlimited 2.0 - VM
Distortion – Edge Burner with these settings: 14/31/65/255/255/255
20. Effects - Plugins- Transparency – Eliminate White
21. Effects - Plugins- Filters in Unlimited 2.0 – Toadies- Weaver with these settings:
15/15/222
22. Layers-Properties-Set the Blend Mode to "Soft Light " - Reduce the Opacity of this layer to 85%
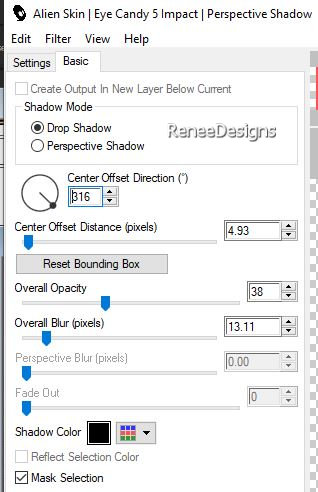
23. Effects - Plugins - Alien Skin EyeCandy 5 - Impact – Perspective
Shadow use the settings below
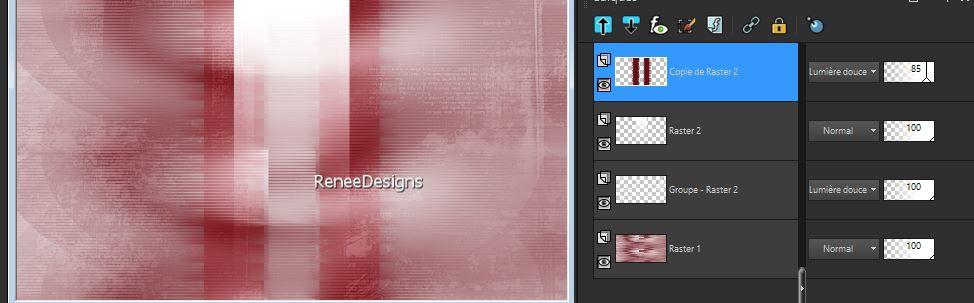
24. Your work and Layer Palette look like this now-You should have this result
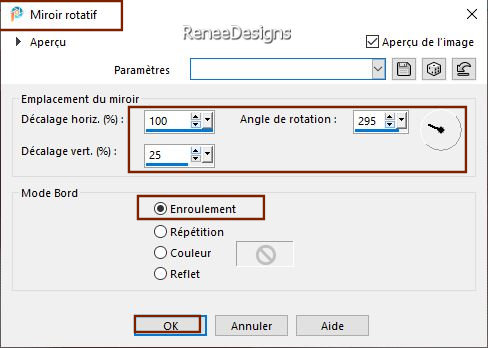
25. Effects– Reflection Effects – Rotating Mirror use the settings below
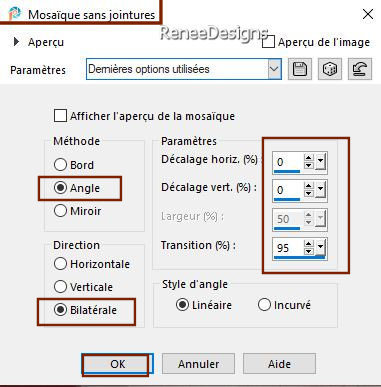
26.Effects- Image Effects- Seamless Tiling use the settings below
27.
Layers- Duplicate
-
Layers-Properties-Set the Blend Mode to "Dodge " – Reduce the Opacity of this layer to 61
%
28. Open the Tube ‘’Renee-Estela- Image1’’ - Edit - Copy- Activate your work -Edit - Paste as a new layer
29. Effects- Image Effects- Seamless Tiling – ‘’ Side by side ‘ checked
30.
Adjust- Blur-Gaussian Blur-Radius 20%
31. Effects - Plugins - Filters in Unlimited 2.0 - Tramages - Groovy
Bachelor Pad...with these settings: 63/121/132
32. Layers- New Mask Layer- From Image and select Mask:
1250181684_nikita_masques.jpg
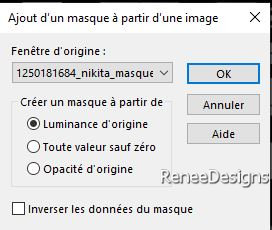
- Layers- Merge- Merge Group
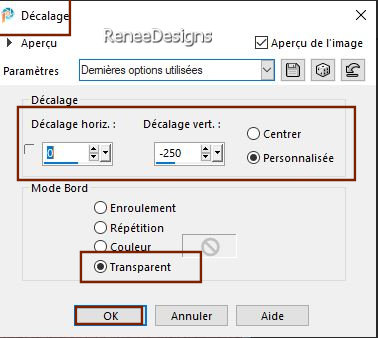
33. Effects – Image Effects
– Offset with thse settings
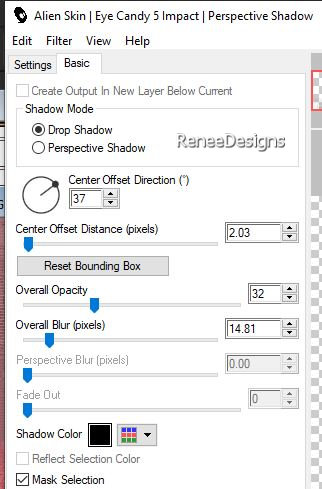
34. Effects - Plugins - Alien Skin EyeCandy 5 - Impact – Perspective
shadow use the settings below
-
Repeat: Effects - Plugins - Alien Skin EyeCandy 5 - Impact – Perspective shadow with the same settings
35. Open the Tube
‘’calguismistedwinter24112011’' - activate layer
‘’calque modifié pour le tuto estela’ of the Tube
- Edit - Copy- Activate your work -Edit - Paste as a new layer
36. Pick Tool: (K) on your keyboard -Enter these parameters on the toolbar
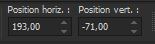 193/
- 71 193/
- 71
-Press ( M ) to close the Pick Tool
37. Layers-Properties-Set the Blend Mode to "Luminance Legacy "
38. Layers- Duplicate
39. Effects - Plugins - Filters in Unlimited 2.0 - Visual Manipulation
– Transmission with these settings: 4/25/0
40. Layers-Properties-Set the Blend Mode to " Hard Light "
41. Layers- New Raster Layer
42. Selections –load/save selection –load selection from disc and select my selection: – Estela-2’’
43. Flood Fill Tool
–
Fill the selection with the foreground color #ffffff=1 ( zoom in if necessary)
44. Effects - Distortion Effects - Wind - From Left checked - Wind Strength: 100
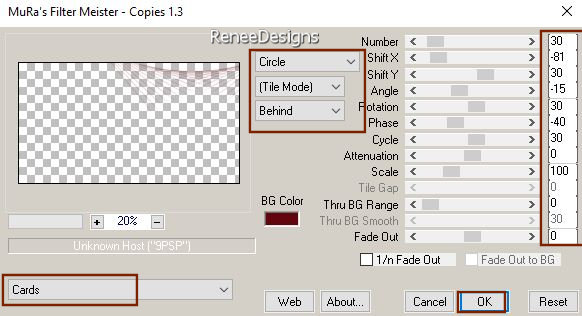
45. Effects - Plugins – Mura’s Meister – Copies use the settings below
46. Layers- New Raster Layer
47. Selections –load/save selection –load selection from disc and select my selection: – Estela-3’’
48. Flood Fill Tool
–
Fill the selection with the foreground color #ffffff=1 ( click 5 or 6 times)
49. Open the Tube ‘’ Renee-Estela- Image2.’’ -Edit - Copy- Activate your work -Edit - Paste as a new layer
50. Pick Tool: (K) on your keyboard -Enter these parameters on the toolbar
 696
/0 696
/0
51. Edit-Copy Special-Copy Merged
52. Paste as New Image( On this image, we continue for a moment)
53. Effects - Plugins -[I.C.NET Software]- Filters in Unlimited 2.0 -
Convolution Filters - Emboss (light) using the default settings ( 191)
54. Image - Resize to 20% - resize all layers checked
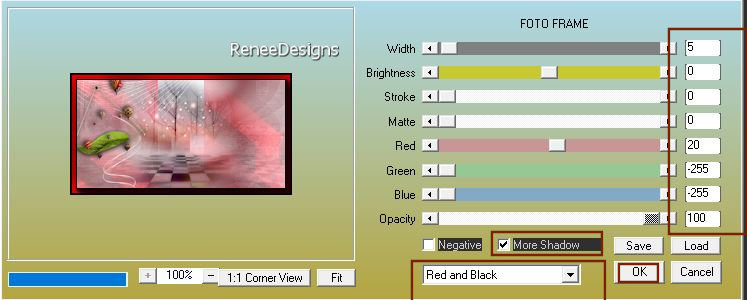
55. Effects – Plugins – AAA Frames - Foto Frame use the settings below
56. Selections -
Select All
57.
Selections - Modify - Contract 5 Pixels
58. Effects - Plugins - Alien Skin EyeCandy 5 - Impact - Glass -select -
Preset -Clear
59. Edit - Copy- Activate your work (original)-Edit - Paste as a new layer
60. Pick Tool: (K) on your keyboard -Enter these parameters on the toolbar
 9/76 9/76
Press ( M ) to close the Pick Tool
61.Open the Tube ’’ Yoka-LadyWithHat-040816’’ -Edit - Copy- Activate your work -Edit - Paste as a new layer
62. Pick Tool: (K) on your keyboard -Enter these parameters on the toolbar
 13/ 19
Press ( M ) to close the Pick Tool
63. Open the Tube ‘’Renee-Estela- Image3’’ -Edit - Copy- Activate your work -Edit - Paste as a new layer
- Place the tube near her finger(see finished image)
64. Layers- New Raster Layer
65. Selections –load/save selection –load selection from disc and select my selection: – Estela-4’’
66. Flood Fill Tool
–Fill the selection with the background color #62050d=2
( click 2 or 3 times)
67.
Effects -Texture Effects -Emboss
68.
Layers- New Raster Layer
69. Selections –load/save selection –load selection from disc and select my selection: – Estela-5’’
70. Flood Fill Tool
–
Fill the selection with the foreground color #ffffff=1 ( click 2 or 3 times)
71.
Layers- Merge- Merge Visible
72. Image- Toolbars - Script (checked)
Activate Toolbar Script: select the file:" ‘’ Estela-script-bordures’’ (
Put the script in your script folder –restricted script from PSP) (
Put the script in your script folder –restricted script from PSP)
 and click the little blue arrow and let it run.
If you receive an error message, please disregard it and click ok.
Or make the border settings Manual
-Image - Add borders-Symmetric checked 1 Pixel -Color black
-Image - Add borders-Symmetric checked 2 Pixels -Color white
-Image - Add borders-Symmetric checked 1 Pixels -Color #62050d= 2
-Image - Add borders-Symmetric checked 12 Pixels -Color white
-Image - Add borders-Symmetric checked 5 Pixels -Color #62050d= 2
-Image - Add borders-Symmetric checked 2 Pixels -Color white
-Image - Add borders-Symmetric checked 1 Pixel -Color #62050d= 2
-Image - Add borders-Symmetric checked 25 Pixels -Color white
73.Paste the author's watermark on your work and your own watermark.
74.
Open the Tube " texte" - Edit - Copy- Activate your work -Edit - Paste as a new layer and move / Ore write your own text.( font is included with the material)
75.Layers- Merge- Merge All (flatten)
76.Image- Resize to 1005 pixels width
-Save as JPG
I hope you enjoyed this lesson
Renée
This lesson was written by Renée 27/09/2022
Edited and Update
in 2022
*
Toute ressemblance avec une leçon existante est une pure
coïncidence
*
Any resemblance with an existing lesson is a coincidence
* Do not forget to thank the people who work with us and for us
-I have appointed the tubeurs and translators
Thanks
|
 Translations