|
Let's start the lesson
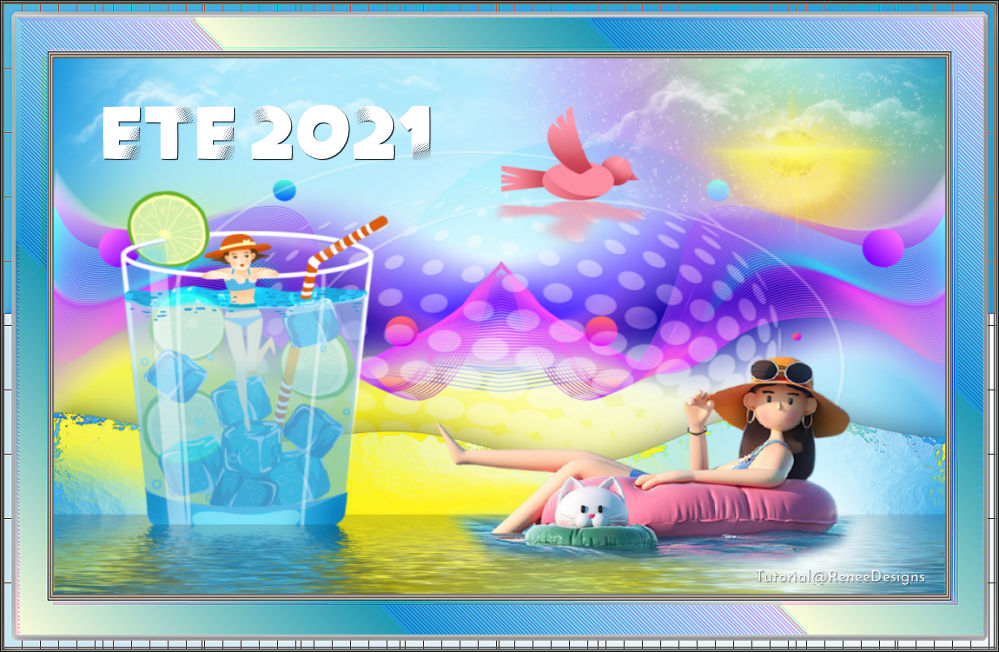
Été 2021/Summer 2021
ATTENTION: You will create 3 different images in this lesson - to make it easier I have created separate and named tube and selection folders
- Preparation
- Material Properties: Set your foreground color to color #0f4c6d = 1 – Set your background color to color #a0e5fb=2

1. Open the background image ''Fond-Eté-2021''- Promote Background Layer =Raster 1
2.
Selections –load/save selection –load selection from disc and select my selection: ‘’Ete-2021-1’’
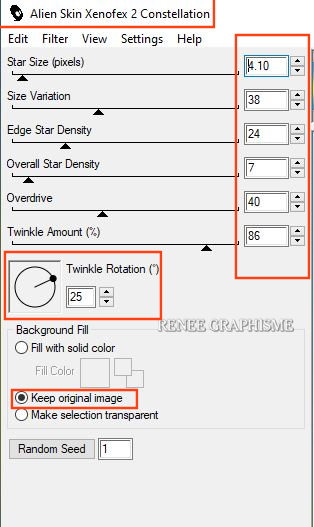
3. Effects – Plugins – Alien Skin Xenofex 2- Constellation with the settings shown below
4. Selections
-Promote selection to layer

5. Layers-Properties-Change the Blend Mode to " Luminance "
- In the layers palette-activate Raster 1
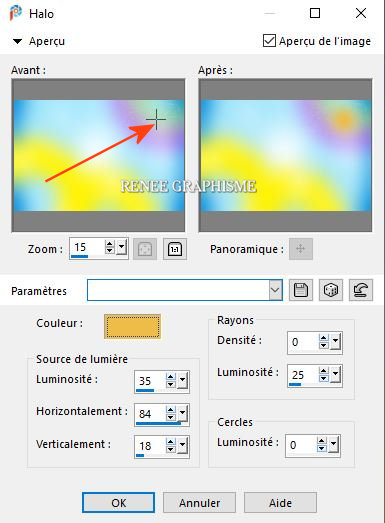
6. Effects – Illumination Effects Sunburst –with the settings shown below- Color : #edbd49
- Activate the top layer in the layer palette
7. Open the tube ‘’ Ete-2021-Image 1’’ -Edit - Copy- Activate your work -Edit - Paste as a new layer
8. Pick Tool: (K) on your keyboard -Enter these parameters on the toolbar
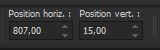 807
/ 15 807
/ 15
Press ( M ) to close the Pick Tool
9. Layers-Properties-Change the Blend Mode to " Normal " – and Lower the Opacity to 75%
10. Layers- New Raster Layer
11. Selections –load/save selection –load selection from disc and select my selection: ‘’Ete-2021-2’’
12. Color Palette-set the foreground color to color #faf446=4
Activate the Flood Fill Tool  –
Opacity at 65% – Fill the selection with colour No 4 –
Opacity at 65% – Fill the selection with colour No 4
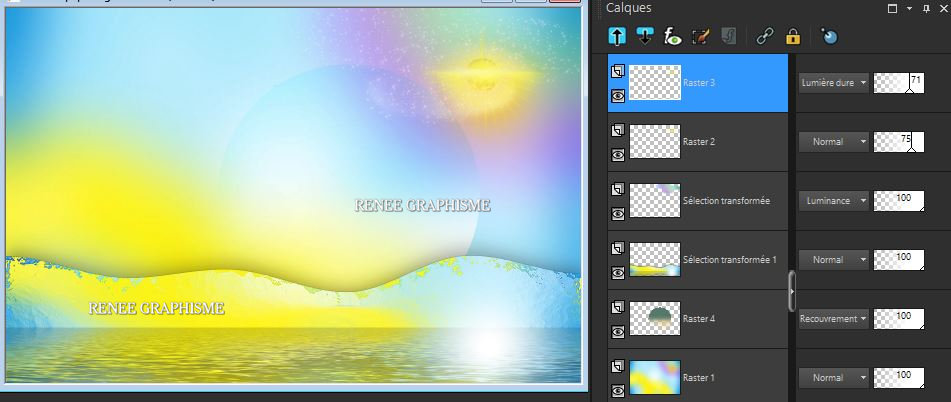
13. Layers-Properties-Change the Blend Mode to "Hard Light " – and Lower the Opacity to 71%
- In the layers palette-activate Raster 1
14.
Selections –load/save selection –load selection from disc and select my selection: ‘’Ete-2021-3’’
15. Selections- Promote selection tot layer
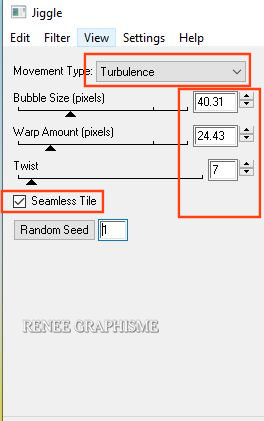
16. Effects – Plugins – EyeCandy 4000 - Jiggle with the settings shown below
17. Effects – Edge Effects – Enhance
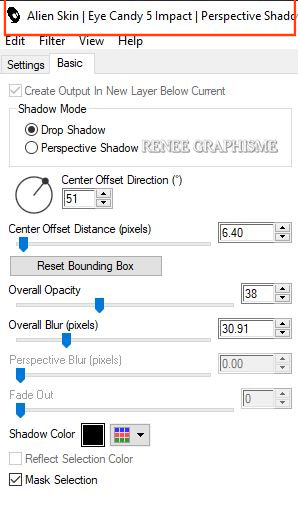
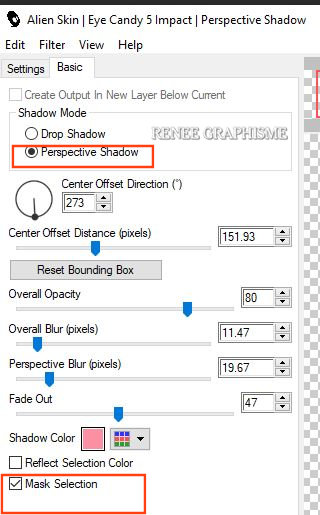
18. Effects – Plugins – Alien Skin Eyecandy5 Impact – Perspective
Shadow with the settings shown below
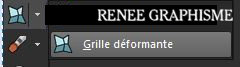
19. Activate Mesh Warp
- Click on the preset ‘’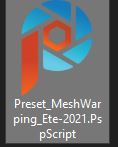 ’’
(Place in the presets folder) ’’
(Place in the presets folder)
- Effect will apply
- Press ( M ) to close the Pick Tool
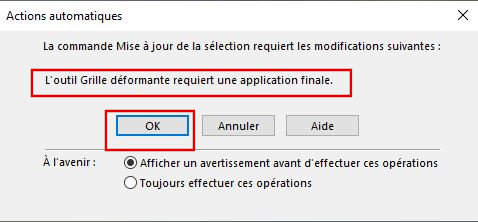
- The following amendments are necessary to proceed with item 20
The Mesh Warping Tool must do a final apply
-Click Ok and now the edit from step 19 is complete
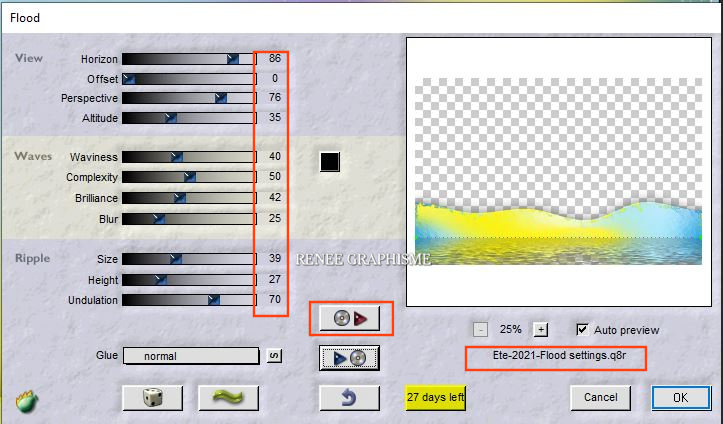
20. Effects –Plugins – Flaming Pear – Flood- click on the red triangle and find my file-Preset : Ete-2021-Flood
settings
or put the settings in manually
- Stay on this layer
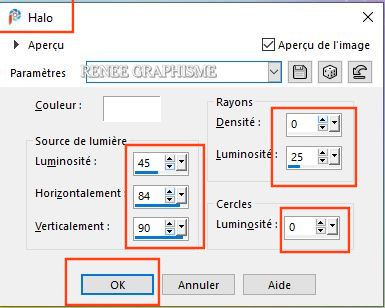
21. Effects – Illumination Effects Sunburst –with the settings shown below- Color White
- Activate the bottom layer in the layer palette= Raster 1
22.
Open the tube ‘’ Ete-2021-Image 2’’-Edit - Copy- Activate your work -Edit - Paste as a new layer
23. Pick Tool: (K) on your keyboard -Enter these parameters on the toolbar
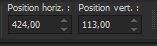 424/113 424/113
Press ( M ) to close the Pick Tool
24. Layers-Properties-Change the Blend Mode to " Overlay "
Your work and Layer Palette look like this now-You should have this result
- Activate the top layer in the layer palette
Leave this work aside for the moment (we will create a bird)
25. File-Open a new transparent image in the size 274 x 204 pixels
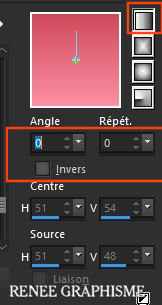
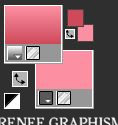
- Material Properties: Set your foreground color to color #fc8fa2 -No 5 – Set your background color to color #ce4a5b-No 6
-Prepare a linear gradient - configure like this
25 A .
Selections –load/save selection –load selection from disc and select my selection: ‘’
Ete-2021-oiseau-1’’
-. Open the tube ’’ Ete-2021- Corps-oiseau’’ -Edit copy - Edit paste into selection
- Effects - Edge Effects - Enhance
25 B.Layers- New Raster Layer
- Selections –load/save selection –load selection from disc and select my selection: ‘’ Ete-2021-oiseau-2’’
-
Activate Flood Fill Tool - Opacity at 100%–
Fill the selection with the gradient
25 C. Layers- New Raster Layer
- Selections –load/save selection –load selection from disc and select my selection: ‘’ Ete-2021-oiseau-3’’
- Activate Flood Fill Tool
–
Fill the selection with the gradient
25 E. Layers- New Raster Layer
- Selections –load/save selection –load selection from disc and select my selection: ‘’ Ete-2021-oiseau-4’’
-
–
Be careful to reverse the colours of the gradient (FG-Color 6-BG-Color 5)
- Activate Flood Fill Tool
-Fill the selection with the gradient
25.D .Layers- New Raster Layer
- Selections –load/save selection –load selection from disc and select my selection: ‘’ Ete-2021-oiseau-5’’
- Activate Flood Fill Tool
–
Fill the selection with the gradient
25.D Layers- New
Raster Layer-- In the Layers palette - move the layer
below raster 1 (the wing should come under the body of
the bird)
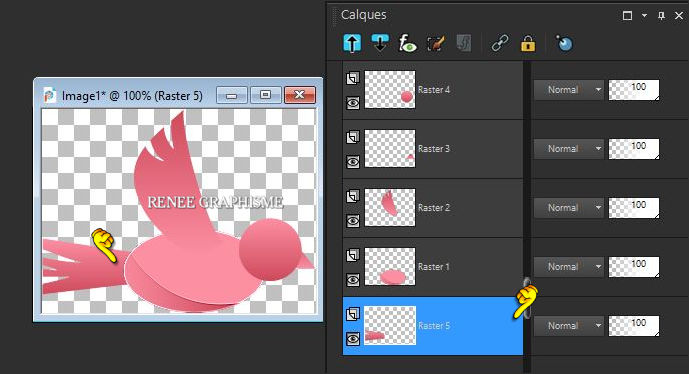
The bird is built
26 Layers- Merge- Merge Visible
27. Image - Resize a 52 %
Edit-Copy
- Activate the image you set aside in step 24.
28.Edit - Paste as a new layer
29. Effects – Plugins – EyeCandy 5 Impact – Perspective Shadow –Tab-Settings-User settings and select my file-
Preset : oiseau-ete-2021-shadow
Adjust the shadow color if you used a different color of the bird you created
30. Pick Tool: (K) on your keyboard -Enter these parameters on the toolbar
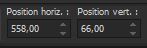 558
/ 66 558
/ 66
Press ( M ) to close the Pick Tool
- In the layers palette- activate Raster 4 (second to last in the layers palette)
31. Layers- New Raster Layer
32. Color palette -Set the foreground color to color #ffffff No 3
Activate the Flood Fill Tool
–
Fill the layer with the foreground color -No 3
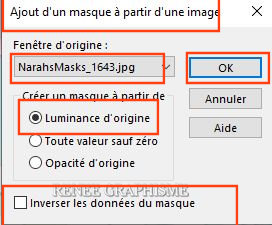
33. Layers- New Mask Layer-From Image and select Mask
‘’NarahMasks_1643.jpg’’
- Layers- Merge- Merge Group
34. Effects-3D-Effects – Drop Shadow with these settings: 1/1/85/3 Black
35. Layers-Properties-Change the Blend Mode to " Soft Light"
-Activate the top of the layer palette
36. Layers- New Raster Layer
37. Selections –load/save selection –load selection from disc and select my selection: ‘’Ete-2021-4’’
38. Activate Flood Fill Tool
–
Fill the selection with the foreground color -No 3
39. Open the tube ‘’Ete-2021-Tube-femme-et-chat’’ -Edit - Copy- Activate your work -Edit - Paste as a new layer
(or another tube of your choice)
- Place the tube at the bottom right- (see finished image)
Leave it aside for now (we will build the glass)
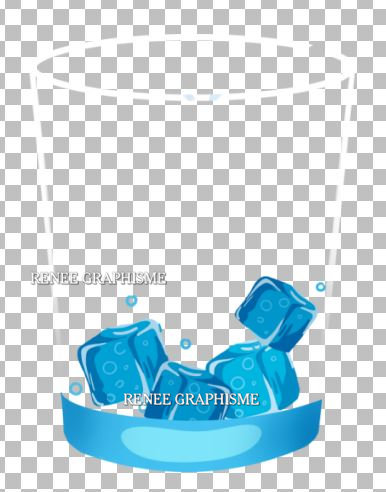
40. File-Open a new transparent image in the size 406 x 542 pixels - Name it "Fond"
41. Open the tube‘’ Ete-2021-verre’’- Edit - Copy- Activate your work -Edit - Paste as a new layer
42. Pick Tool: (K) on your keyboard -Enter these parameters on the toolbar
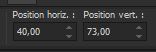 40/73 40/73
-Press ( M ) to close the Pick Tool
- In the layer palette- activate layer "Fond"
43. Open the tube ’’Glaçon’’
- Edit - Copy- Activate your work -Edit - Paste as a new layer
- Duplicate 3 times and Place like this
44. Merge the 4 Ice Cube layers into 1 layer
-Material Properties: Set your foreground color to color #1e9ad3 -No7 – Set your background color to color #12cffa-No 8
- Prepare a linear gradient - configure like this
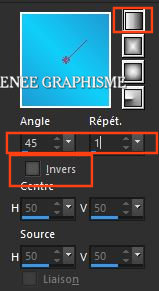
-Activate the top of the layer palette
45. Layers- New Raster Layer
46.
Selections –load/save selection –load selection from disc and select my selection: ‘’Ete-2021-verre-1’’
47. Activate Flood Fill Tool
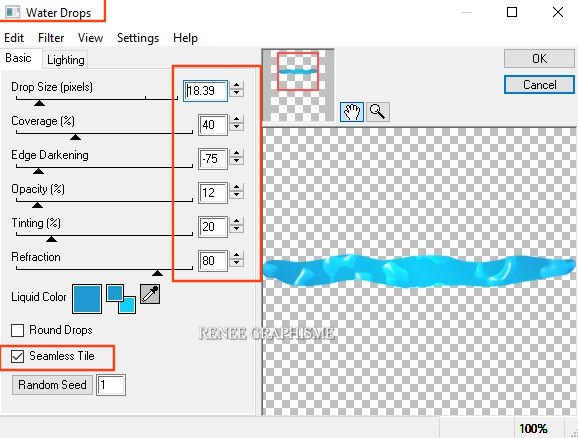
- Fill the selection with the gradient
48. Effects – Plugins– EyeCandy 4000 – Water Drops with the settings shown below ( foreground and background colours)
49. Open the tube ‘’Paille’ -Edit - Copy- Activate your work -Edit - Paste as a new layer
50. Pick Tool: (K) on your keyboard -Enter these parameters on the toolbar
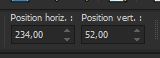 234/52
Press ( M ) to close the Pick Tool
51. Open the tube ‘’Citrons’’ -Edit - Copy- Activate your work -Edit - Paste as a new layer
- Pick Tool: (K) on your keyboard -Enter these parameters on the toolbar
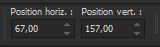 67/ 157
52. Layers-Properties-Change the Blend Mode to " Overlay "
53. Open the tube ‘’Groupe-Glaçons’’ -Edit - Copy- Activate your work -Edit - Paste as a new layer
- Pick Tool: (K) on your keyboard -Enter these parameters on the toolbar
 66/ 167
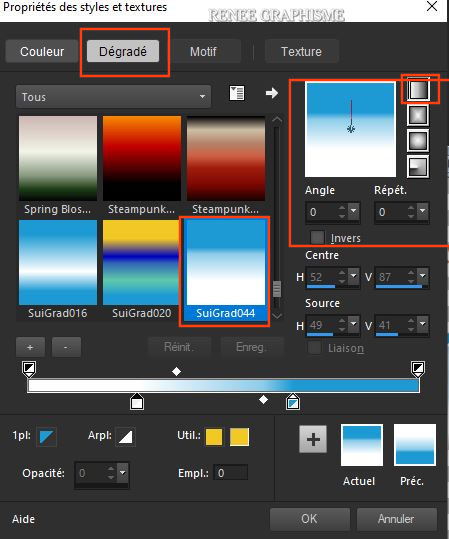
- Material Properties
– Foreground on gradient and select gradient ‘’SuiGrad 044’’ Set your background color to color #ffffff-No3 – Prepare a linear gradient - configure like this
54. Layers- New Raster Layer
55.
Selections –load/save selection –load selection from disc and select my selection: ‘’Ete-2021-verre-2’’
56. Activate Flood Fill Tool
-
Fill the selection with the gradient
- Color palette -
Inverting the gradient
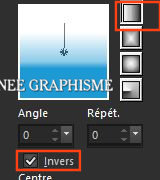
- On the same layer
57. Activate Flood Fill Tool
–
Fill the selection with the inverted gradient
58. Layers-Properties- Lower the Opacity to 77%
59. Layers- New Raster Layer
60.
Selections –load/save selection –load selection from disc and select my selection: ‘’Ete-2021-verre-3’’
61. Activate Flood Fill Tool
–
Opacity at 45%
– Fill the selection with the background color #ffffff- No 3
- Material Properties: Set your foreground color to color #1e9ad3 No 7
62. Layers- New Raster Layer
63.
Selections –load/save selection –load selection from disc and select my selection: ‘’Ete-2021-verre-4’’
64. Activate Flood Fill Tool
–
Opacity at 100%
–Fill the selection with the foreground color No 7
65. Open the tube tube ‘’Rondelle-Citron’’ Edit - Copy- Activate your work -Edit - Paste as a new layer
Move Tool (M) place on the edge of the glass
66. Open the tube ‘’Filette-pour-verre’’ -Edit - Copy- Activate your work -Edit - Paste as a new layer
- Pick Tool: (K) on your keyboard -Enter these parameters on the toolbar
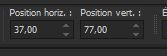 37/77
37/77
Place the girl under the layer of "effet liquide bleu" in the layer palette -See the following example
Pay attention to the position of the layers so that the effects are coherent –The girl's feet rest on the ice cubes
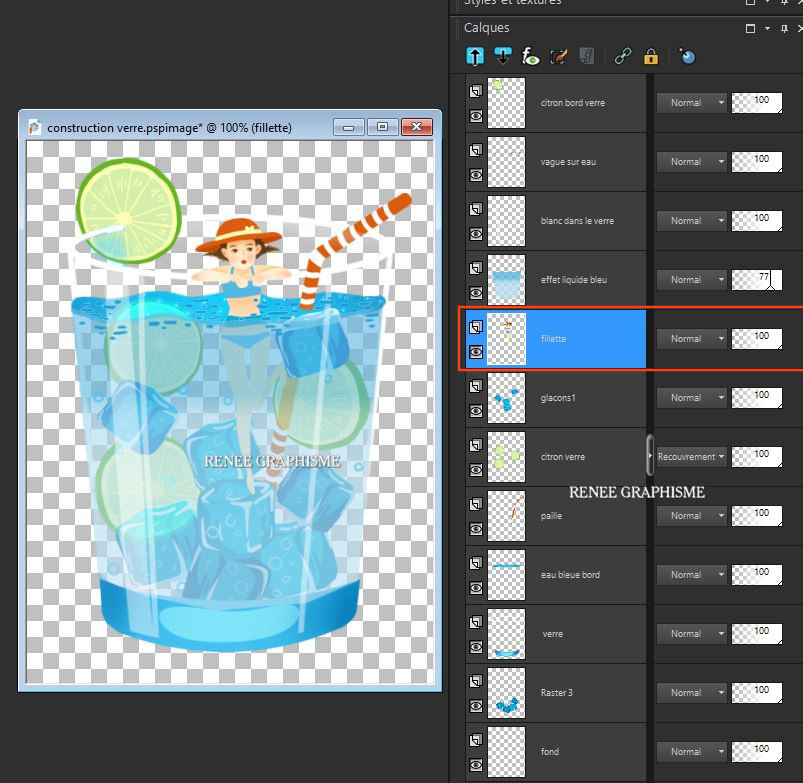
- Is everything in the right place?
67. Layers- Merge- Merge Visible
68. Edit-Copy –
Activate the image you set aside in step 40 -Edit - Paste as a new layer
- Place the tube to your liking
69. Effects – Plugins- Flaming Pear Flood with the same settings (
(except Horizon to be modified according to the placement of your tube)
- In the layers palette-activate Raster 4
70. Open the tube ‘’
Ete-2021-Effet-Lumineux’’ -Edit - Copy- Activate your work -Edit - Paste as a new layer
71. Pick Tool: (K) on your keyboard -Enter these parameters on the toolbar
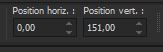 0/ 151
72. Layers- Merge- Merge Visible
73. Edit-Copy !!
74. Open the tube " Cadre/Frame " in your Psp
75. Activate the Magic Wand - select the inside of the frame
76. Edit- Paste -Into Selection (Image is still in your PSP memory)
77. Image
Resize a 999 Pixels Width
Save as JPG
That's it - Thank you /
I hope you enjoyed this lesson
Renée
This lesson was written by Renée 24-05-2021
and put in place
in 2021
*
*
Any resemblance with an existing lesson is a coincidence
* Do not forget to thank the people who work with us and for us -I have appointed the tubeurs and translators
Thanks
|
 Translations