|
Let's start the lesson
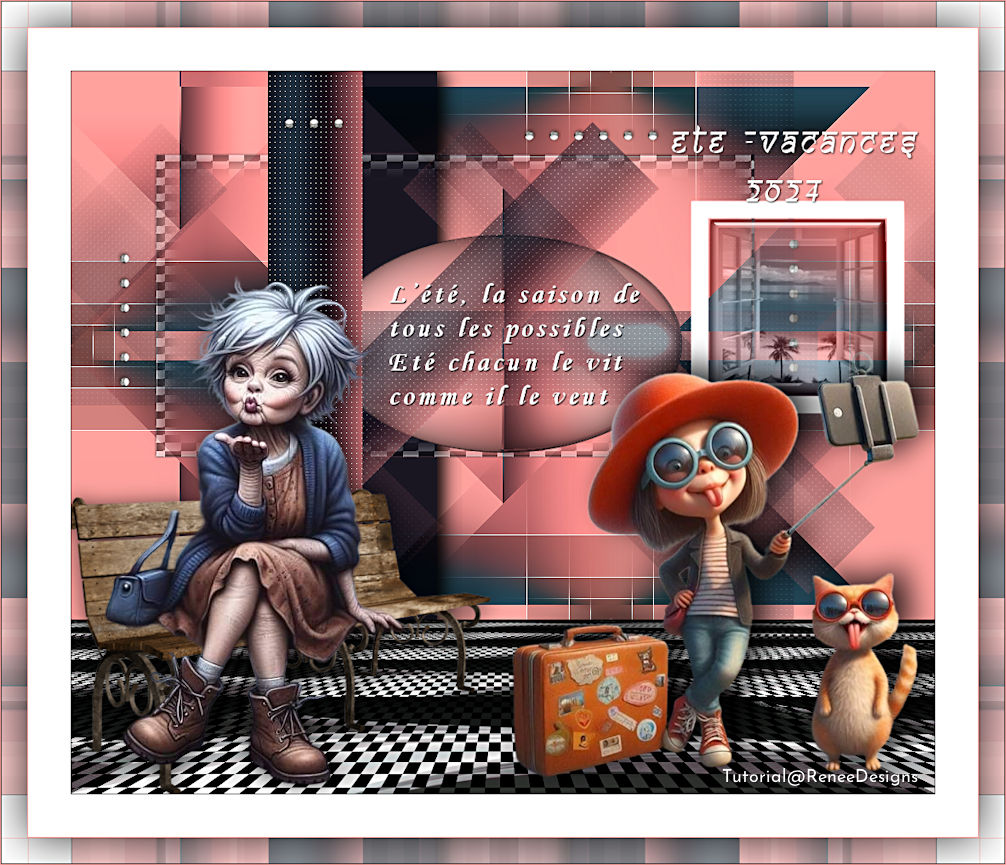
ETE -
Vacances -SUMMER - Holidays - 2024
- Preparation
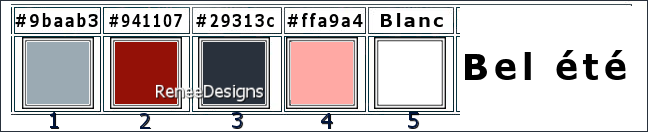
-Material Properties: Set your Foreground color to color
1– Set your Background color to color 2
1.
File-Open a new transparent image in this size : 1015 x 645 Pixels
2.
Effects- Plugins – Medhi – Wavy Lab 1 using the settings
below
3.
Effects- Plugins – Medhi – Sorting Tiles using the
settings below
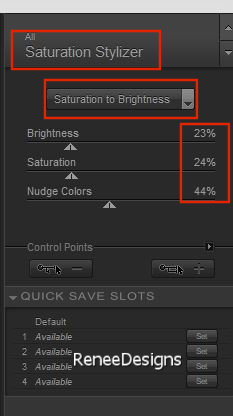
4.
Effects- Plugins - Nick Softwar Color Effex
Pro.3 0 – Saturation Stylizer using the settings below
5.
Selections –load/save selection –load selection from
disc and select my selection: ‘’Ete-2024-1’’
6.
Selections-Promote Selection to Layer
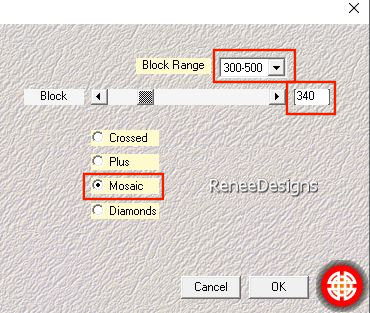
7.
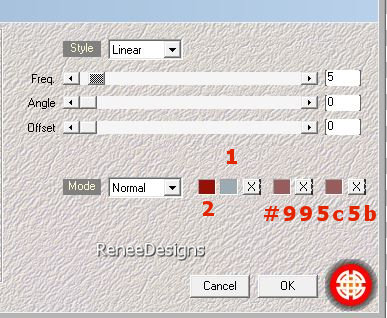
Effects- Plugins Carolaine and Sensibility –
CS-LDots using the settings below

8.
Image - Free Rotate – Left 90°
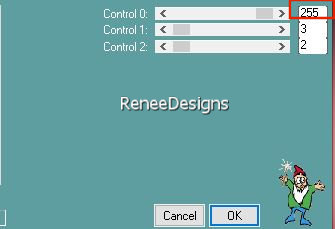
9.
Pick Tool: (K) on your keyboard -Enter these parameters
on the toolbar
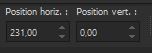 Position
X
231 --- Position Y 0 Position
X
231 --- Position Y 0
Press
( M ) to close the tool
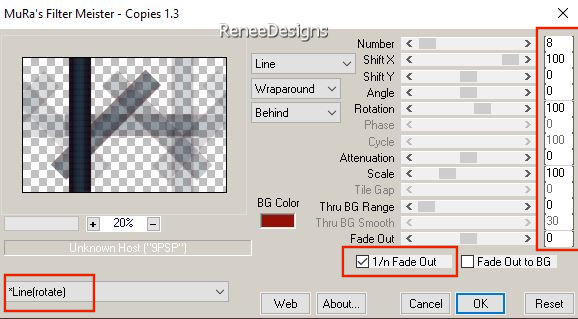
10.
Effects- Plugins – Mura’s Meister – Copies
using the settings below
-
Activate the bottom layer in the layer palette ( Raster
1)
11.
Effects- Plugins – Simple – Pizza Slice Mirror
-Edit-Repeat- Simple – Pizza Slice Mirror
12.
Effects- Plugins – AAA Filters – AAA Framer use the
settings below
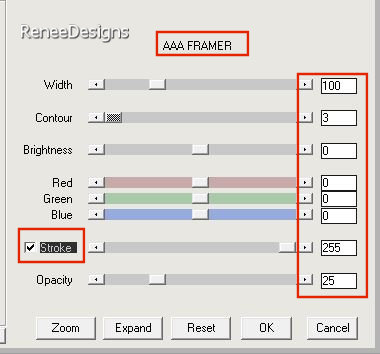
13.
Repeat- Effects- Plugins – AAA Filters – AAA
Framer just Change -Width 50
14. Repeat-
Effects- Plugins – AAA Filters – AAA
Framer just Change -Width 25
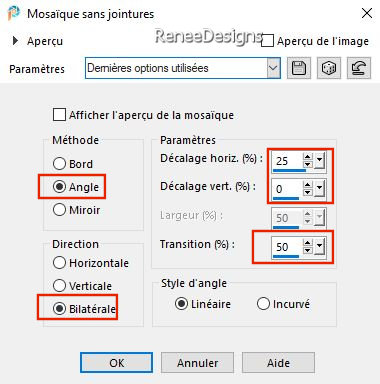
15.
Effects– Image Effects- Seamless Tiling use the settings
below
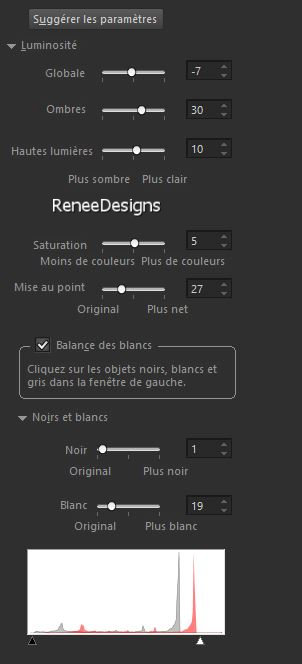
16.
Adjust- Smart Photo Fix using the settings below
17.
Layers- New Raster Layer
18.
Selections –load/save selection –load selection from
disc and select my selection: ‘’Ete-2024-2’’
19.
Flood Fill Tool  –Fill the selection with color number 3
20.
Layers-Properties-Set the Blend Mode to " Hard Light "
21.
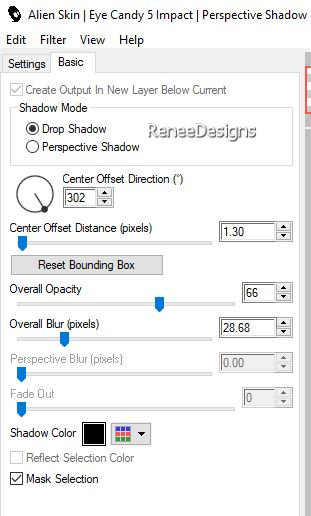
Effects- Plugins - Alien Skin EyeCandy 5 –
Impact – Perspective Shadow using the settings below
22.
Activate the bottom layer in the layer palette ( Raster
1)
23.
Selections –load/save selection –load selection from
disc and select my selection: ‘’Ete-2024-3’’
24.
Selections-Promote Selection to Layer
(Caution,
save your work this filter may close your PSP)
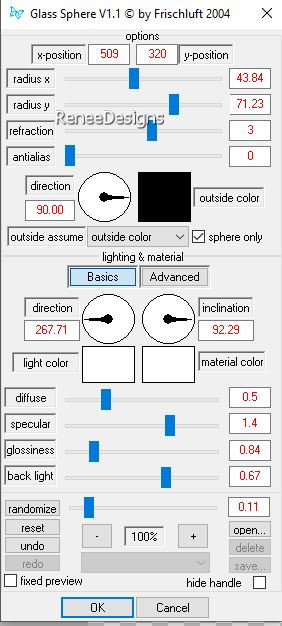
25.
Effects- Plugins – Frischluft – GlasSphere
Give this filter time to
run
(Do
you have a problem with this filter? There is an image
in the folder )
26.
Layers- New Raster Layer
27.
Effects- 3D-Effects – Cutout using the settings below

28.
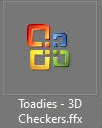
Effects- Plugins - Filters in Unlimited 2.0 –
Toadies - 3D Checkers: with these settings: 19/27/16
29.
Effects- User Defined Filter - Emboss 3
30.
Effects - Edge Effects - Enhance
-
You're there - Place your layers like this
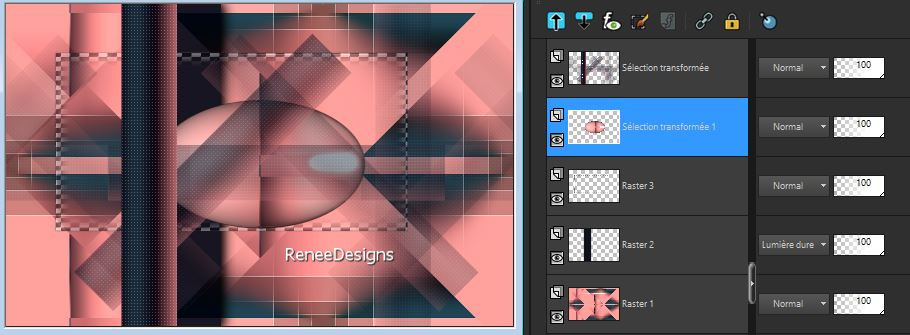
-
Activate the top of the layer palette
31.
Text Tool-With font attached – ‘’MTCORSVA'' (in
psp as monotype corsiva) (foreground
and background color on white)
Write
the text
‘’
L’été, la saison de tous les possibles
Eté chacun le vit comme il le veut"
Summer,
the season of possibilities
Summer is for everyone''.
- or
use the text of Renée
32.
Effects- 3D- Effects- Drop Shadow with these settings: 1 /1 /100 / 1
-Color black
33.
Open the tube; ‘’ Ete-2024- Image-deco’’
-Edit - Copy- Activate your work -Edit
- Paste as new layer
-
Pick Tool: (K) on your keyboard -Enter these parameters
on the toolbar
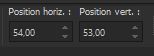 Position
X 54
--- Position Y 53 Position
X 54
--- Position Y 53
34.
Layers- Merge - Merge Visible
35.
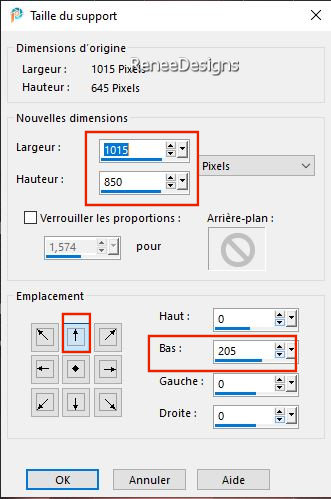
Image - Canvas Size using the settings below
36.
Layers- New Raster Layer
37.
Activate your Magic Wand – Tolerance at 0 and Feather at
0 / Select the bottom empty part
38.
Open
‘’
smArt_maszk_55’’ -Edit - Copy- Activate your work -Edit
- Paste into Selection
39.
Effects- Plugins - L & K’s – Pia: 18
40.
Effects- Plugins – Mura’s Meister - Perspective
Tiling using the default settings
41.
Adjust– One Step Photo Fix
-Repeat-Adjust–
One Step Photo Fix
42.
Layers- New Raster Layer
43.
Selections –load/save selection –load selection from
disc and select my selection: ‘’Ete-2024-4’’
44.
Flood Fill Tool
–
Fill the selection with color 5 ( white )
45.
Activate your Magic Wand – Tolerance at 0 and Feather at
0 – Click inside the frame
46.
Layers- New Raster Layer
47.
Open the tube
‘’Image-Bel-ete-paysage’’
-Edit - Copy-
Activate your work -Edit - Paste into Selection
48.
Layers-Properties-Set the Blend Mode to " Luminance
legacy " -Reduce the opacity of this layer to 67%
49.
Layers- Arrange- Move Down
50.
Layers- New Raster Layer
51.
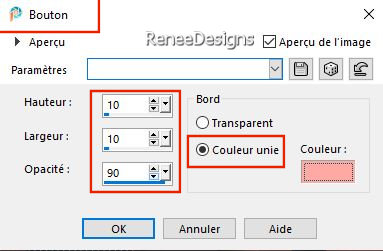
Effects – 3D -Effects– Buttonize using the settings
below – Color no. #ffa9a4
52.
Effects- Plugins - Alien Skin EyeCandy 5 –
Impact – Glass- Preset : Clear
-
Return to the layer above
53.
Layers- Merge-Merge Down and repeat
54.
Text Tool -With font attached ‘’SAMARO’’ ( font
is visible in your psp as Samarkan) Write the title ‘’Ete
Vacances 2024 ‘’ - Place on top of the frame
(
see finished image)
55.
Effects- 3D- Effects- Drop Shadow with these settings: 1/1/80/5
Color black
56.
Choose several tubes , place as a new layer, resize if
necessary and give a drop shadow of your choice
57.
Image - Add Borders-Symmetric checked: 1 Pixel -Colour
no.3
Image
- Add Borders-Symmetric checked: 1 Pixel -Colour no.4
Image
- Add Borders-Symmetric checked: 50 Pixels -Colour no.5
Image
- Add Borders-Symmetric checked: 1 Pixel -Colour no.4
Image
- Add Borders-Symmetric checked: 30 Pixels -Colour no.5
Image
- Add Borders-Symmetric checked: 1 Pixel -Colour no.3
Image
- Add Borders-Symmetric checked: 1 Pixel -Colour no.4
58.
With the magic wand - Select the border of the 30
Pixels
59.
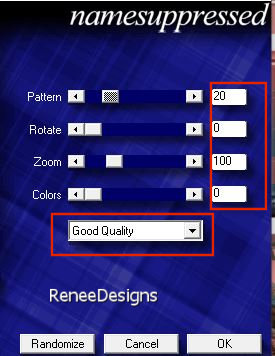
Effects- Plugins – namesuppressed – Plaid Lite using the
settings below
60.
Selections- Select All
61.
Selections – Modify – Contract 32 Pixels
62.
Effects- 3D- Effects- Drop Shadow with these settings: 0 / 0/ 80 / 80
Color black
63.
Adjust- Sharpness– Unsharp Mask- Radius=3 / Strenght= 30 /Clipping
= 6 /Luminance only unchecked
64.
Image - Resize 85 %
-
Add the author's watermark to your work and your own
watermark
65.
Layers- Merge-Merge All ( flatten)
Save
as JPG

I hope you enjoyed this
lesson
Renée
This lesson was written by
Renée 09/05/2024
Edited and Update
in 2024
*
Any resemblance with an
existing lesson is a coincidence
* Do not forget to thank the people who work with us and
for us - I have appointed the tubeurs and translators
Thanks
*
|

 Translations