|
Let's start the lesson.
- Preparation
- Material Properties: Foreground material into gradient and select ’’vbs47’’/ Prepare a foreground linear gradient configured like this Set your background color to color #f5a8b1= 3

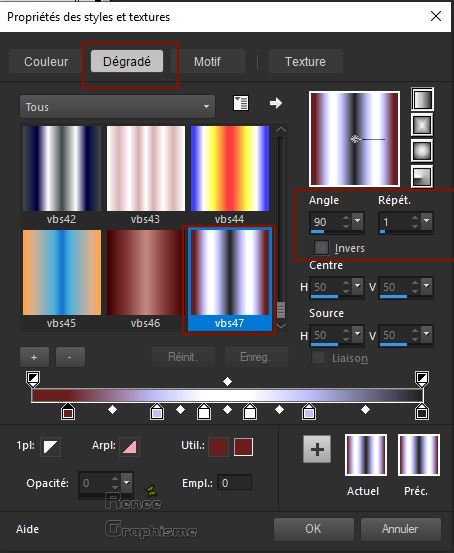
1. File- Open a new transparent Image of 1005 x 675 pixels
2. Activate Flood Fill Tool
 – Flood fill the layer with the gradient
3. Effects –Plugins- Ulimited 2. 0- Toadies – Weaver with these settings: 44/26/191
4. Effects- Edge Effects- Enhance
5. Effects –Plugins- Unlimited 2.0 - Filter Factory Gallery S -
itsa Edge thing...: 13/ 16
6. Layers- Duplicate
7.
Image - Mirror - Mirror Horizontal ( Image - Mirror in previous PSP Versions)
8. Layers-Properties-Lower the Opacity of the layer to 50%
9. Layers- Merge- Merge Down
10. Effects – Plugins – Medhi – Sorting tiles
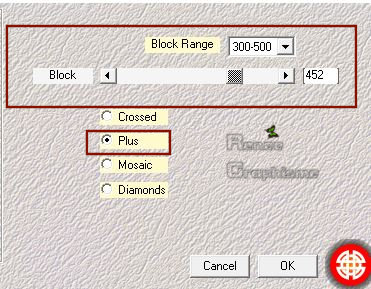
11. Effects – Plugins – Simple – Pizza slice
mirror
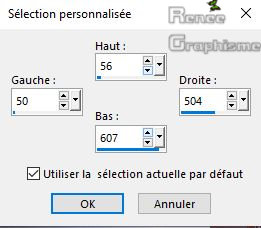
12. Activate Selection Tool -Custom Selection (S) -Rectangle with these settings

13. Selections- Promote Selection to Layer
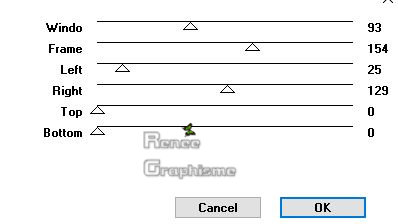
14. Effects – Plugins – Mock – Windo use the settings below
Selections- Select None
15. Effects -Plugins- Unlimited 2.0 - It@lian Editors Effect –
Effeto fantasma 15/15
16. Adjust- Sharpness-Sharpen More
-
Activate the bottom layer in the layer palette = Raster 1
17. Selections –load/save selection –load selection from disc and select my selection: ‘’ Facetie_1’’
18. Selections- Promote Selection to Layer
Selections- Select None
19. Layers- Duplicate
20. Effects – Image Effects – Offset with these settings:H = 35 and V = 0
21. Layers- Duplicate
22. Effects – Image Effects – Offset with these settings:H = 35 and V = 0
23. Layers- Merge- Merge Down and Repeat
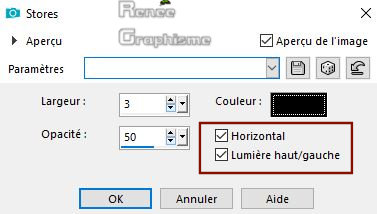
24. Effects -Texture Effects-Blinds use the settings below / Color Black
25. Layers-New Raster Layer
Color Palette:-Set your foreground color to color #ffffff =4
26. Activate Flood Fill Tool / Opacity 40% –Flood Fill the Layer with the foreground color #ffffff
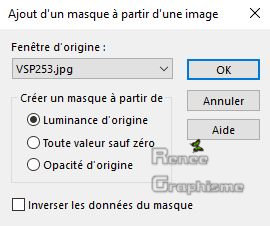
27. Layers- New Mask Layer-From Image and select Maske
-
Layers-Merge Merge Group
28.Layers-Properties-Set the Blend Mode to " Overlay "
-
To replace the top of the layer-palette
29. Layers-New Raster Layer
30. Selections –load/save selection –load selection from disc and select my selection: ‘’ Facetie_2’’
-
Color Palette:Foreground material into gradient and select ’’vbs47’’ with the same settings (from the start)
31.Activate Flood Fill Tool - Opacity 50% –Flood Fill the selection with the gradient
32. Effects –3D Effects –Drop Shadow with these settings : 0/0/100/15 Color White
Selections- Select None
33. Effects – Edge Effects – Dilate
34. Layers- Duplicate
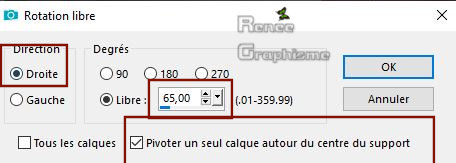
35. Image - Free Rotate use the settings below
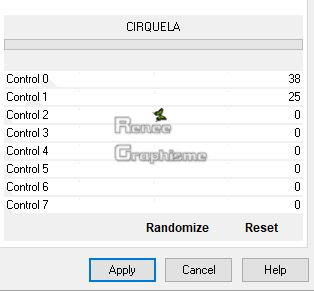
36. Effects –Plugins- Unlimited 2.0- [AFS IMPORT]- CIRQUELA
37. Effects –Distortion Effects – Wave with these settings
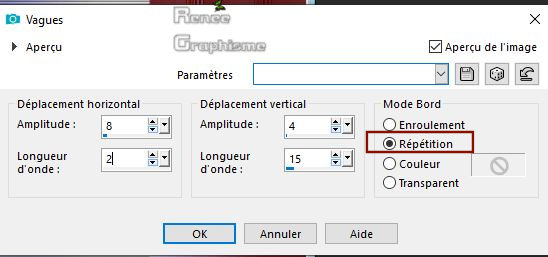
38. Layers-Properties-Set the Blend Mode to " Overlay "
39. Effects – Plugins– Nick Software Color
Effex Pro 3.0 – Reflector Effects
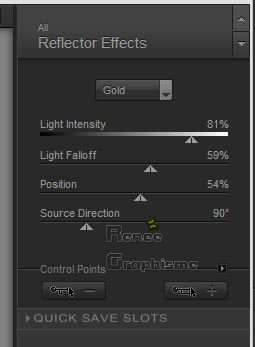
40. Layers-New Raster Layer
41. Selections –load/save selection –load selection from disc and select my selection: ‘’ Facetie_3’’
42.Color Palette: Set the foreground color to color #ffffff=4- Activate Flood Fill Tool / Opacity 100% - Flood Fill the selections with #ffffff / Opacity 100% - Flood Fill the selections with #ffffff
43. Effects – Plugins – Carolaine & Sensibility
use the settings below (Attention: it's the background color that gives the color of the effect of this filter)
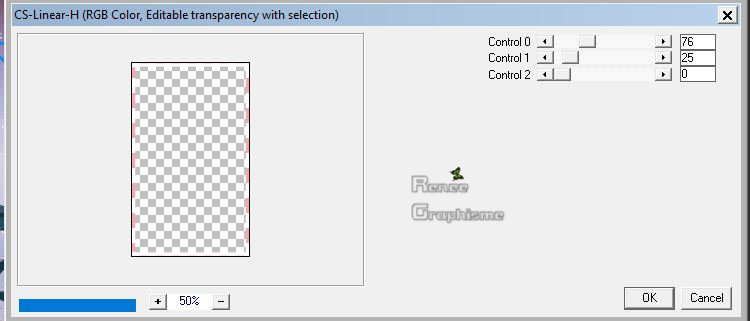
Selections- Select None
44. Effects – Plugins– EyeCandy 5 Impact –
Blacklight Tab-Settings-User Settings and select my Preset ‘’facetie_light’
Or manual settings as shown in the example below
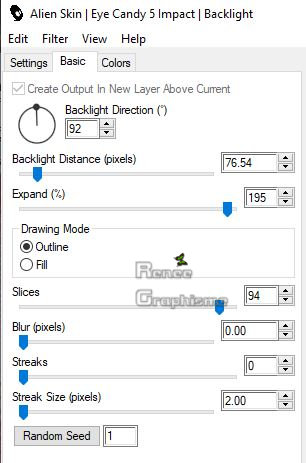
-
Color Palette: Set your Foregroundcolor to color #fc79fd =6
45. Layers-New Raster Layer
46. Selections –load/save selection –load selection from disc and select my selection: ‘’ Facetie_4’’
47. Activate Flood Fill Tool and fill the selection with the foreground color #fc79fd =6 (3
clicks)
Selections- Select None
48. Adjust- Blur- Gaussian Blur - Radius 13
49. Activate the tube ‘’ renee_TUBES_sol_facecie.pspimage’’
-
Edit - Copy- Activate your work -Edit - Paste as a new layer
50. Objects - Align -Bottom
51. Layers-New Raster Layer
52. Selections –load/save selection –load selection from disc and select my selection: ‘’ Facetie_5’’
53.Color Palette:Set the foreground color to color #ffffff=4 -Activate Flood Fill Tool  -Flood Fill the selection with #ffffff -Flood Fill the selection with #ffffff
54. Layers-Properties-Set the Blend Mode to " Overlay "
Selections- Select None
55. Layers-New Raster Layer
56. Selections –load/save selection –load selection from disc and select my selection: ‘’ Facetie_6’’
57.Color Palette:Set the foreground color to color # 469de9=7 -Activate Flood Fill Tool -Flood Fill the selection with #469e9 = 7
Selections- Select None
58. Layers-New Raster Layer
59. Selections –load/save selection –load selection from disc and select my selection: ‘’ Facetie_7’’
60. Color Palette:Set the foreground color to color #ffffff=4 -Activate Flood Fill Tool - Flood Fill the selection with #ffffff
Selections- Select None
61. Layers-Properties-Set the Blend Mode to " Overlay " - Lower the Opacity of the layer to 61%
62. Activate the tube ‘’
renee_TUBESetoiles_facetie.pspimage’’
-
Edit - Copy- Activate your work -Edit - Paste as a new layer
Do not move, it is in the right place
63. Layers-Properties-Set the Blend Mode to " Screen " – Lower the Opacity of the layer to 67%
64. Activate the tube ‘’
renee_TUBES_confettis_facetie.pspimage’’
-
Edit - Copy- Activate your work -Edit - Paste as a new layer
65. Objects - Align - Top
66. Open the tube (three tubes on one layer) ’’personages
_facetie’’
-
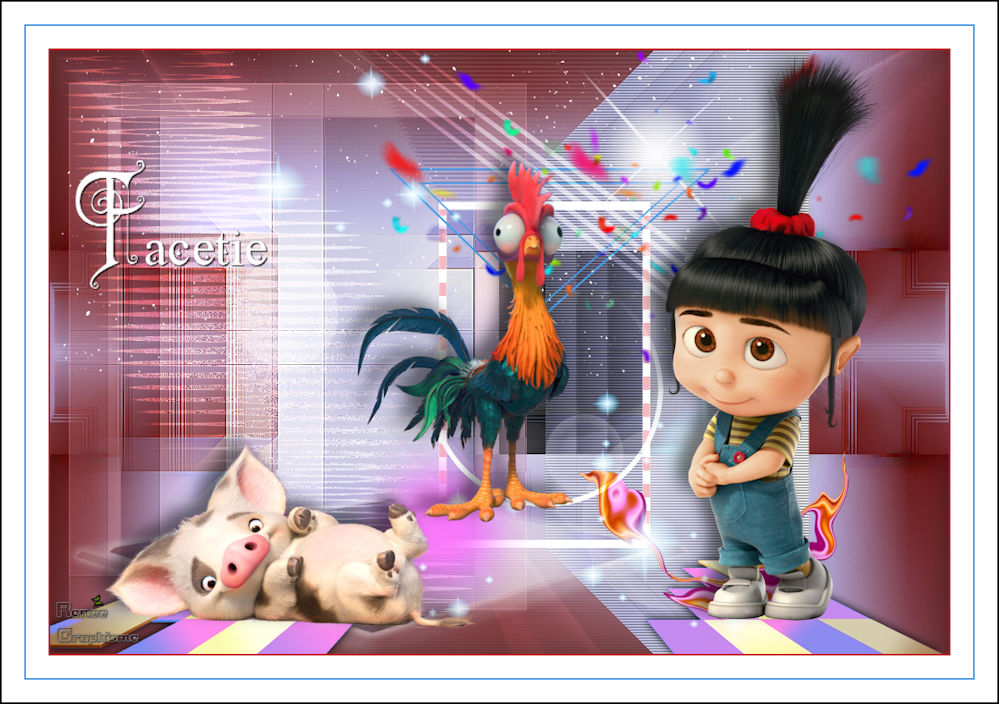
Edit - Copy- Activate your work -Edit - Paste as a new layer and move ( see finished image)
67. Effects – Plugins -Eyecandy 5 Impact –
Perspective shadow use the settings below
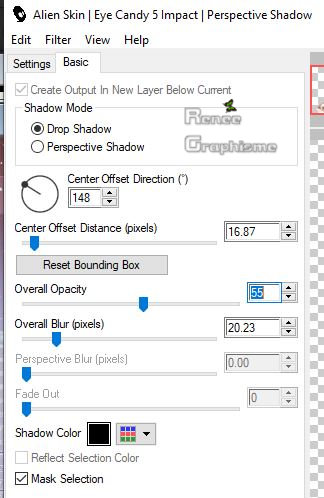
68. Image - Add borders-Symmetric checked: 2 Pixels Color #ca2e36=
2
69. Image - Add borders-Symmetric checked: 25 Pixels #ffffff
70. Image - Add borders-Symmetric checked: 2 Pixels Color #469de9= 7
71. Image - Add borders-Symmetric checked: 25 Pixels #ffffff
72. Image - Add borders-Symmetric checked: 2 Pixels Color black =5
73. Activate the tube " titre " and paste as a new layer/ Ore write your own text
( the two fonts used are included into the zipfile )
74. Layers- Merge- Merge All
75. Image Resize to 999 pixels width.
Save as JPG
I hope you enjoyed this lesson
Renée
This lesson was written by Renée 28-03- 2019
Edited and Update
2019
*
Any resemblance with an existing lesson is a coincidence
*
Do not forget to thank the people who work with us and for us I have appointed the tubeurs and translators
Thanks
*
|

 Translations


