|
Let's start the lesson.
Find
the desolation ...

-
Preparation
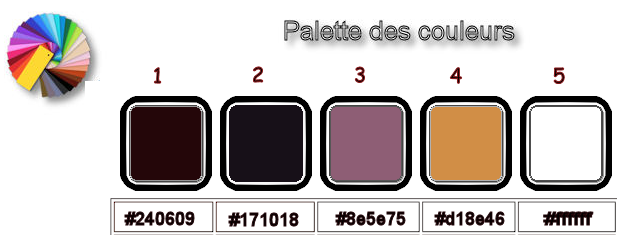
- Material Properties: Set your foreground color to color #240609 = No1 – Set your background color to color #171018= No 2
1.
Open BG-Image ‘’ Fond_Finding desolation .jpg’’-
Window - Duplicate (or shift+D) - Close the original and proceed on the copy -Promote Background Layer = Raster 1
2.
Layers- New Raster Layer
3.
Activate Flood Fill Tool
 -
Flood Fill the layer with the foreground color -
Flood Fill the layer with the foreground color
4.
Effects –Plugins- Unlimited 2.0 - Alf's Power Grads- 4 Sweep
Grads...s... using the default settings (all 0)
5.
Effects –Plugins -or in Unlimited –
Simple- Pizza slice Mirror
-
Repeat this filter a second time
6.
Image - Resize to 80% Resize all layers not checked
7.
Selections –load/save selection –load selection from disc and select my selection: ‘’ Finding
desolation_1’’
8.
Selections- Promote selection to layer
9.
Activate the layer underneath
DELETE

Selections- Deselect all
- To replace the top of the layer-palette
10.
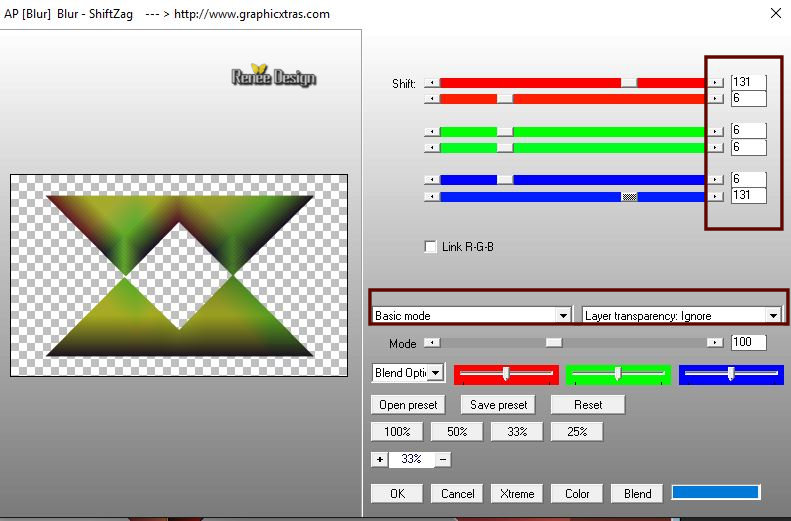
Effects -PLugins –AP[Blur] Blur- ShiftZag use the settings below
- Activate the layer underneath
11.
Layers-Properties-Set the Blend Mode to " Screen "
12.
Effects- 3D- Effects- Drop Shadow with these settings: 4/4/100/26 black
13.
Effects –Plugins - L&K’s – Sanne : 49/ 137
-
To replace the top of the layer-palette
14.
Effects- Distortion Effects-Polar Coordinates-Polar to Rectangular
15. Activate Pick Tool (K) choose my preset ‘’Preset_Pick_Find the desolation’’- (extract into your folder presets)
-
Click on the preset and effect will apply
16.
Layers-Duplicate
17.
Image - Mirror - Mirror Horizontal (Image - Mirror in older versions of PSP)
18.
Effects –Distortion Effects –Punch 100
19.
Layers-Properties-Set the Blend Mode to "Multiply"
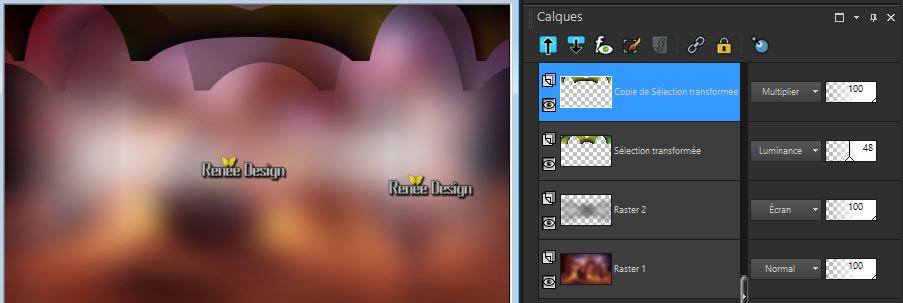
Activate the Layer underneath (promoted selection layer )Layers-Properties-Set the Blend Mode to" Luminance"- Lower the Opacity of the layer to 48
- Your work and Layer Palette look like this now-You should have this result
- Stay on this Layer (promoted selection layer)
20.
Adjust- Blur- Gaussian Blur: Radius 3
- To replace the top of the layer-palette = copy of promoted selection layer )
21.
Adjust- Blur- Gaussian Blur: Radius 3
22.
Open and Activate ‘’ Finding-desolation-Image 1’’
-
Edit - Copy- Activate your work -Edit - Paste as a new layer
23.
Effects – Image Effects – Offset with these settings: H = 0 and V = -250
24.
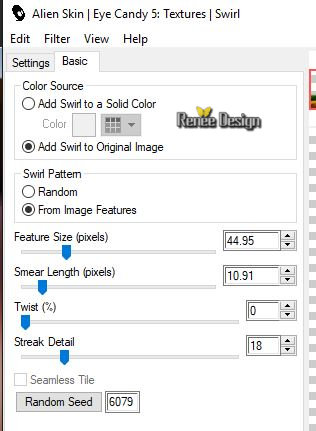
Effects – Plugins – EyeCandy5 Impact – Textures
- Swirl
25.
Effects – Edge Effects- Enhance
26.
Layers- New Raster Layer
27.
Selections –load/save selection –load selection from disc and select my selection: ‘’ Finding
desolation_2’’
28.
Open the tube ‘’ Finding-desolation-Image 2.png’’
-
Edit - Copy- Activate your work -Edit - Paste into selection
Selections- Deselect All
29.
Layers- Arrange- Move Down
30.
Layers-Properties-Set the Blend Mode to "Difference"- Lower the Opacity of the layer to 67
- To replace the top of the layer-palette
-
Properties foreground: Set your Foreground color to color #ffffff
31.
Layers- New Raster Layer
32.
Flood Fill Tool
 -
Opacity 50% – Flood Fill the Layer with #ffffff -
Opacity 50% – Flood Fill the Layer with #ffffff
33.
Layers- New Mask Layer-From Image and select Mask ‘’ claire_masque_imagination.png’’
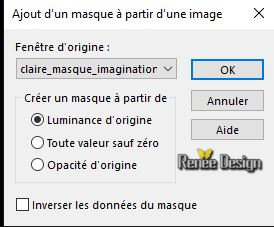
-Layers- Merge -Merge Group
34.
Image - Mirror - Mirror Horizontal (Image - Mirror in older versions of PSP)
35.
Effects – Image Effects- Seamless Tiling use the settings below
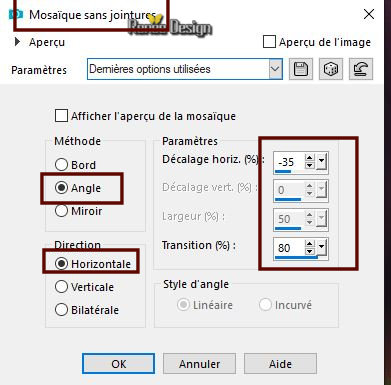
36.
Activate Selection Tool -Custom Selection (S) -Rectangle with these settings
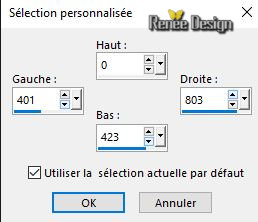
DELETE

Selections- Deselect All
37.
Effects –Plugins- Unlimited 2.0 - Color Effects - Intensity to
Hue : 128/128/128
-
To replace the bottom of the layer-palette = Raster 1
38.
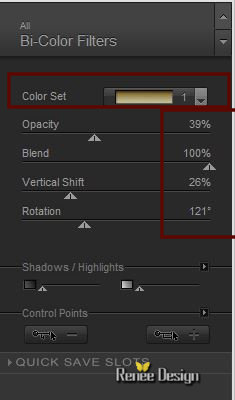
Effects – Plugins – Nick Software - Color effect
pro 3.0 – Bicolor filters –Color set Brown 1
39.
Selections –load/save selection –load selection from disc and select my selection: ‘’ Finding
desolation_3’’
40.
Effects -Plugins – VDL Adrenaline – Snowflakes
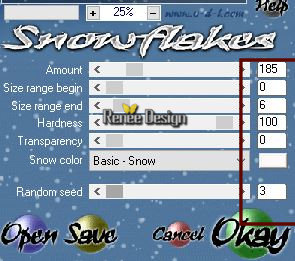
Keep Selected
41.
Effects –Plugins – Universe – Nebula
( if you have problems with this filter you can apply clouds brushes - in red - this will give a similar effect )
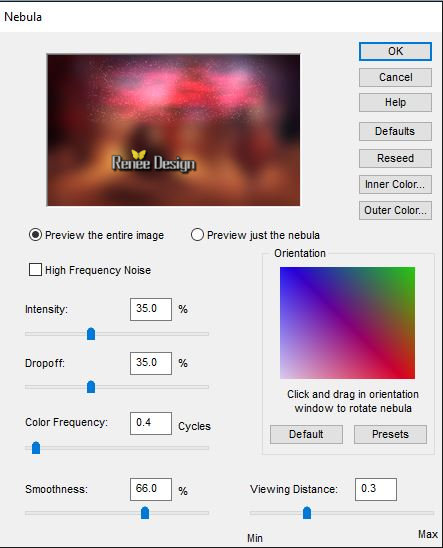
- Selections-Deselect All
To replace the top of the layer-palette
42.
Open the tube ‘’ Finding-desolation-Image 3’’
-
Edit - Copy- Activate your work -Edit - Paste as a new layer
-Move Tool-
Move it in the upper right corner
43.
Open the tube ‘’ Finding-desolation-Image 4.png’’
-
Edit - Copy- Activate your work -Edit - Paste as a new layer
44.
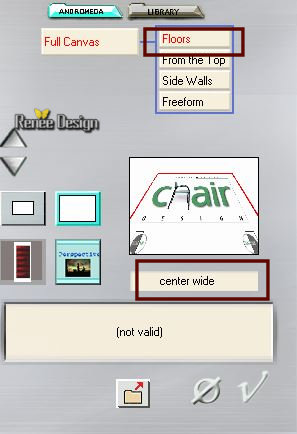
Effects – Plugins – Andromeda – perspective –
Floors
-
Repeat this filter a second time with the same settings
45.
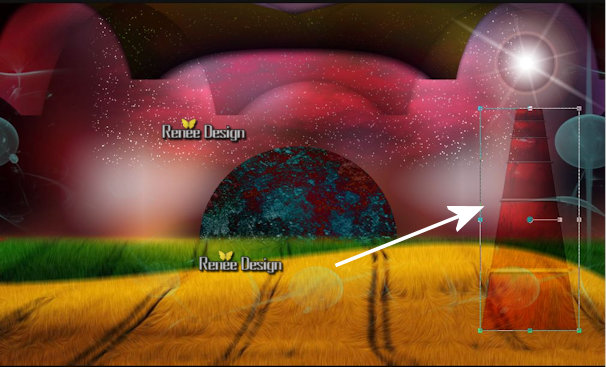
Activate Pick Tool (K) – Scale– Resize like this
Order to obtain this effect as shown in the example below
- The Result
46.
Layers-Properties-Set the Blend Mode to Overlay
47.
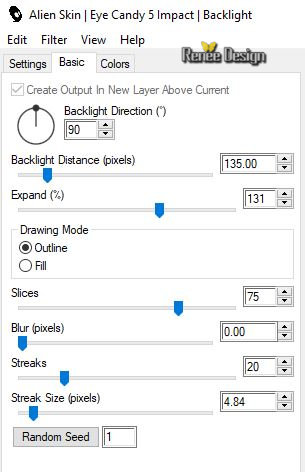
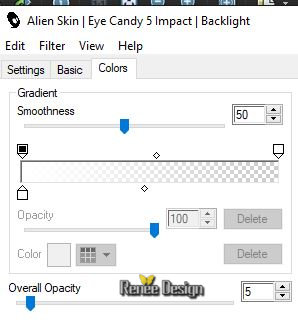
Effects –Plugins – Eyecandy 5 Black light-Tab- Settings- User Settings and select my
Preset ‘’Find_desolation_blacklight
(Or manual settings as shown in the example below)
48.
Layers- Arrange- Move Down
- To replace the top of the layer-palette
49.
Open the tube ‘’ Finding-desolation-Image 5 png.’’
-
Edit - Copy- Activate your work -Edit - Paste as a new layer
50.
Objects -Align -Bottom
-
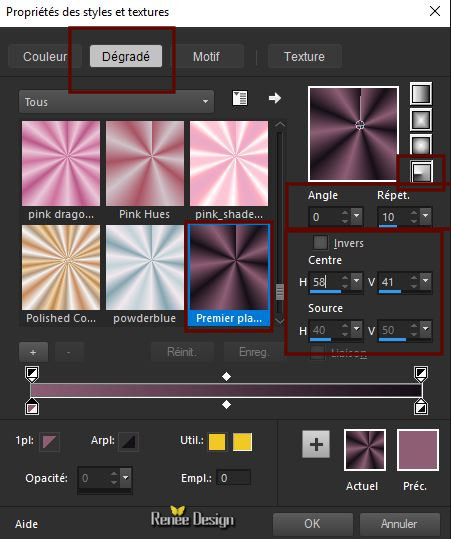
Material Properties: Set your foreground color to color #8e5e75 = No 3 – Set your background color to color #171018= No 2
51.
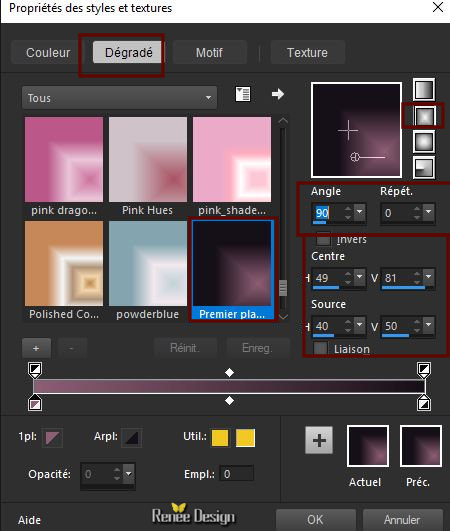
Set your Foregroundcolor to foreground-background regtangular gradient configured like this
52. Layers- New Raster Layer
53.
Selections –load/save selection –load selection from disc and select my selection: ‘’ Finding
desolation_4’’
54.
Flood Fill Tool
 Opacity 100 – Flood Fill the selection with the gradient Opacity 100 – Flood Fill the selection with the gradient
Selections-Deselect All
55.
Layers-Properties-Set the Blend Mode to "Overlay"
56.
Effects – 3 D-Effects – Drop Shadow with these settings: 1/1/100/12 black
-
Properties foreground: Set your Foreground color to color #ffffff
57.
Layers- New Raster Layer
58.
Selections –load/save selection –load selection from disc and select my selection: ‘’ Finding
desolation_5’’
59.
Flood Fill Tool (click the center of the selection) –Flood Fill the selection with #ffffff
Selections- Deselect All
60.
Open the tube ‘’ Renee_TUBES_finding4.pspimage’’
61.
Image-Resize to 55%
-
Edit - Copy- Activate your work -Edit - Paste as a new layer
-
Move Tool-Move to the right side
62.
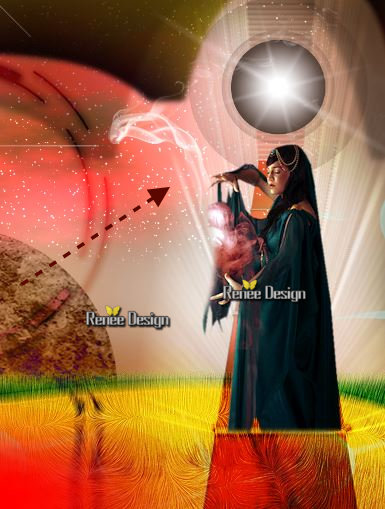
Open the tube ‘’ effet_fumee_Find_the_desolation’’
-
Edit - Copy- Activate your work -Edit - Paste as a new layer and move as shown in the example below
63.
Open the tube ‘’ Finding-desolation-Image 6.png’’
-Edit - Copy- Activate your work -Edit - Paste as a new layer
64.
Image - Mirror - Mirror Horizontal (Image - Mirror in older versions of PSP)
65.
Effects –Image-Effects -Offset with these settings: H = - 457 and V = -
87
66.
Open the tube ‘’ Renee_TUBES_finding3.pspimage’’
67.
Image-Resize to 55 %
-
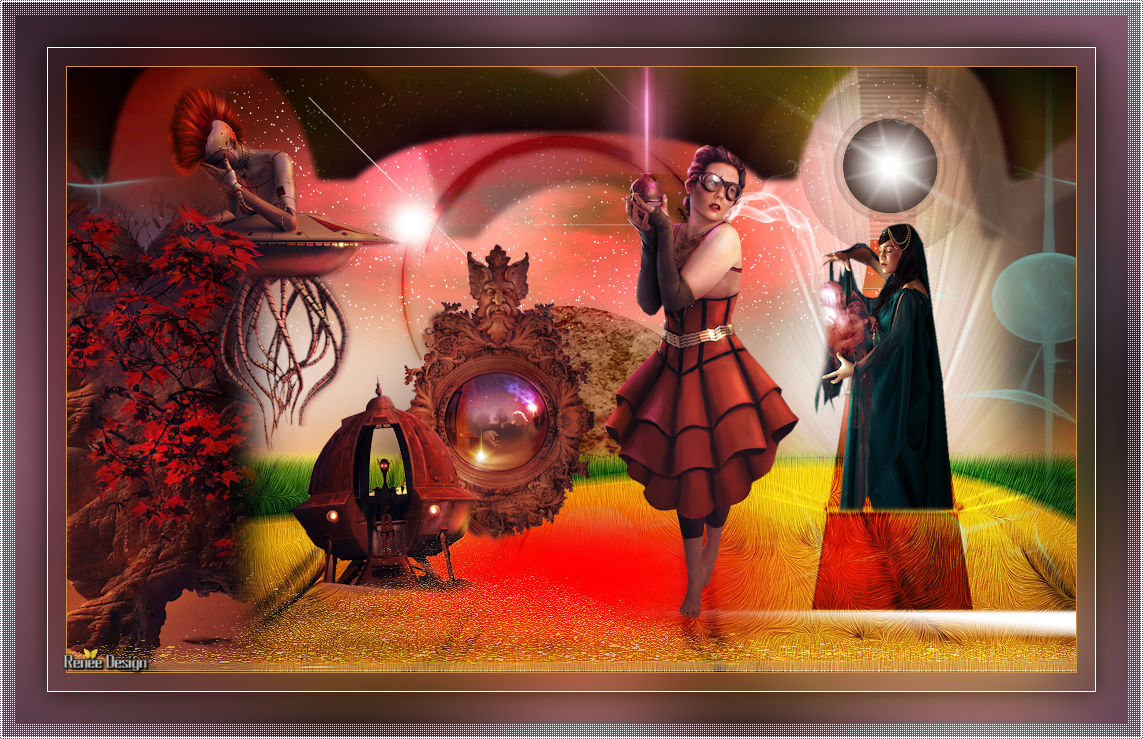
Edit - Copy- Activate your work -Edit - Paste as a new layer and move to the left ( see finished image )
(I left some leaves to facilitate the placement of the tube on the previous tube)‘
68.
Open the tube ‘’ Renee_TUBES_finding1’’
-
Edit - Copy- Activate your work -Edit - Paste as a new layer and move
69.
Open the tube ‘’ Renee_TUBES_finding.pspimage’’
70.
Image Resize to 68%
-
Edit - Copy- Activate your work -Edit - Paste as a new layer and move
You have a file '' Lens Flares '' choose an effect to apply to the tube of your choice)
-
Edit - Copy- Activate your work -Edit - Paste as a new layer and move ( see finished image )
71.
Open the tube ‘’ effet_or_Find_the_desolation.pspimage’’
- Edit - Copy- Activate your work -Edit - Paste as a new layer and move at the bottom of the edge of your work (Is already set correctly -Blend Mode Lighten and the opacity 59)
72.
Effects –Edge Effects -Enhance
73.
Image - Add borders-Symmetric checked 1 pixels #d18e46 = No 4
-
Material Properties: Set your foreground color to color #8e5e75 = No 3 – Set your background color to color #171018=No 2
74.
Set your Foregroundcolor to foreground-background radial gradient configured like this
75.
Selections – Select All
76.
Image - Add borders-Symmetric checked 18 Pixels #ffffff
77.
Selections -Invert
78.
Flood Fill Tool - Flood Fill the selection with the gradient
79.
Adjust-Blur-Gaussian Blur : Radius 38
Selections-Deselect All
80.
Image - Add borders-Symmetric checked 1 Pixel #ffffff
81.
Image - Add borders-Symmetric checked 45 Pixels #8e5e75
82.
With the Magic Wand -select the border of 45 pixels

83.
Flood Fill Tool
 -
Flood Fill the selection with the gradient -
Flood Fill the selection with the gradient
84.
Adjust-Blur-Gaussian Blur : Radius 38
85.
Selections - Invert
86.
Effects – 3D-Effects -Drop Shadow with these settings: 0/0/62/32 black
Selections- deselect All
87. Image - Add borders-Symmetric checked 1 pixel #ffffff
88.
Image - Add borders-Symmetric checked 1 Pixel Color # 8e5e75= No 3
89.
Effects – Plugins - [AFS IMPORT] sqborder 2 settings
11/17/215 the rest at 0
Save as JPG
I hope you enjoyed this lesson
Renée
This lesson was written by Renée 04/12/2018
Edited and Update
2018
*
Any resemblance with an existing lesson is a coincidence
* Do not forget to thank the people who work with us and for us I have appointed the tubeurs and translators
Thanks
|

 Translations


