|
Let's start the lesson.
Flying my dream – Piloter mon rêve

-
Preparation
- Color Palette: Set your Foreground color to color #906b7d=1 – Set your Background color to color #8989ad= 2
1. Open the Image '‘Fond_flying-my-dream’’- Window - Duplicate (or shift+D) - Close the original and proceed on the copy -Promote Background Layer
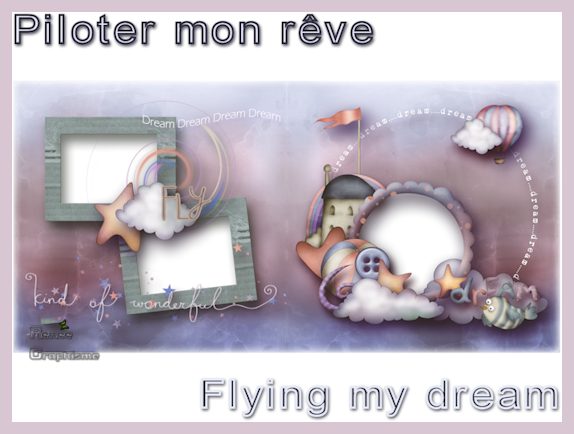
2. Open the tube ‘’My-dream- Image 1.pspimage’’ - Edit - Copy- Activate your work -Edit - Paste as a new layer
3. Effects- Image Effects- Seamless Tiling use the settings below

4. Adjust-Blur- Radial Blur use the settings below

5. Layers-Properties-Change the Blend Mode to " Overlay "
6. Effects- Edge Effects- Enhance More
-
Layers- Merge - Merge Visible
7. Layers- New Raster Layer
-
Color Palette: Set your Foreground color to gradient and select :
’’aynewone12’’
-
Set your Foregroundcolor to foreground Linear gradient configured like this

8. Activate Flood Fill Tool  - Fill the layer with the gradient
9. Effects –Plugins- Unlimited 2.0 – Toadies – Weaver with these settings : 51/26/226
10. Effects – Edge Effects- Enhance
11. Effects –Plugins- Unlimited 2.0 - Filter Factory Gallery S
-itsa Edge thing..with these settings:. 16/19
12. Layers-Duplicate
13. Image - Mirror - Mirror vertical ( Image - Flip in older versions of PSP)
-
Lower the Opacity to 26%
14. Layers- Merge- Merge Down
15. Effects –Plugins- Unlimited 2.0 - Simple – Pizza slice mirror
16. Effects – Plugins- Medhi – Sorting Tiles use the settings below

17. Layers-Properties-Change the Blend Mode to "Normal"-Lower the Opacity between 70-60 %
( If your filter does not give the same result /If you follow the lesson , the colors will be fine)
18. Effects – Edge Effects- Enhance More
19. Adjust-Backlighting-Backlighting Filter with these settings

20. Effects – Plugins-Unlimited 2.0 - Two Moon - Rotate and Fade
Away..with these settings: 201/146
21. Layers- Merge- Merge Down
22. Layers- Duplicate
23. Selections –load/save selection –load selection from disc and select my selection: ‘’Flying my
dream – 1’’
DELETE
24. Effects - 3 D Effects – Drop Shadow with these settings : 3/45/55/8 Color #906b7d = 1
Selections- Select None
25. Layers- Duplicate
26. Effects- Image Effects- Seamless Tiling -Side By Site
27. Image Reseize to 73 % - All Layers not checked
28. Effects - 3 D Effects – Drop Shadow with these settings : 3/45/55/8 Color #906b7d = 1
- Repeat: Effects - 3 D Effects – Drop Shadow with these settings : -3/- 45 / 55 / 8 Color #906b7d = 1
29. Layers- Merge- Merge Down
30. Effects –Plugins- Unlimited 2.0 – Simple - 4 Way Average
31. Layers-Properties-Change the Blend Mode to " Luminance "
-
Color Palette: Set your Foreground color to color #e5e9f5=3 – Set your Background color to color #383644= 4
-
Set your Foregroundcolor to foreground-background rectangular gradient configured like this

32. Layers- New Raster Layer
33. Activate Flood Fill Tool
 –
Fill the layer wirh the gradient –
Fill the layer wirh the gradient
34. Layers- New Mask Layer -From Image and select Mask ''Narah_Mask_0386''

-
Layers- Merge- Merge Group
35. Effects – Plugins – L en K’s – Mayra with these settings:
16/38/82/3
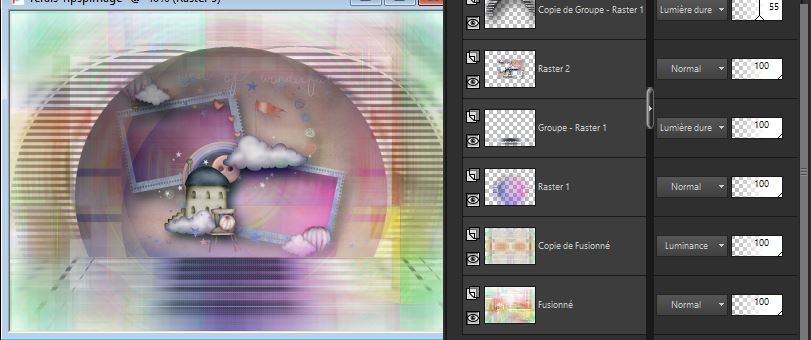
36. Layers-Properties-Change the Blend Mode to " Hard Light "
37. Layers- Duplicate
38. Effects - Distortion Effects-Polar Coordinates-Rectangular to Polar-Transparent

39. Selections –load/save selection –load selection from disc and select my selection: ‘’Flying my
dream – 2’’
DELETE
Selections- Select None
40. Effects – Plugins – Alien skin Eyecandy 5
Impact – Backlight Tab- Settings- User Settings and select my file - Preset ‘’ Flying my dream –Backlight’’
41. Effects – Plugins– Carolaine & Sensibility
– CS-Linear- H use the settings below

42. Effects – Plugins – Alien skin Eyecandy 5-
Perspective shadow-Tab- Settings -Preset : Drop shadow low using the default settings
43. Layers-Properties-Change the Blend Mode to " Hard Light " and Lower the Opacity to 55%
-
Activate the layer underneath
44. Effects – Plugins – Mura’s Meister –
Perspective Tiling use the settings below

45. Effects –Plugins - AP [Lines] Lines –
Silverlining use the settings below

46. Layers- New Raster Layer
47. Selections –load/save selection –load selection from disc and select my selection:
‘’Flying my dream – 2’’
48. Open the tube ‘’My-dream- Image 3’’ -Edit - Copy- Activate your work -Edit - Paste into Selection
49. Effects –Plugins- Unlimited 2.0 - It@lian Editors Effect -
Effetto Fantasma 76/41
Selections- Select None
50. Open the tube ‘’My-dream- Image 2 " -Edit - Copy- Activate your work -Edit - Paste as a new layer
51. Pick Tool: (K) on your keyboard -Enter these parameters for the X:226,00 and Y:127,00 positions on the Toolbar
- Press any key to close the Pick Tool

-Your work and Layer Palette look like this now-You should have this result

-
In the Layer-Palette: activate Raster 1
52. Activate Selection Tool -Custom Selection (S) -Rectangle with these settings


53. Adjust- Blur- Gaussian Blur- Radius 65
Selections- Select None
54. Layers- Arrange- Move Down (below Group- Raster 1)
-To replace the top of the layer-palette
55. Open the tube ‘’My-dream- Image 4 ’’ and My-dream- Image avion’’ -Edit - Copy- Activate your work -Edit - Paste as a new layer
-
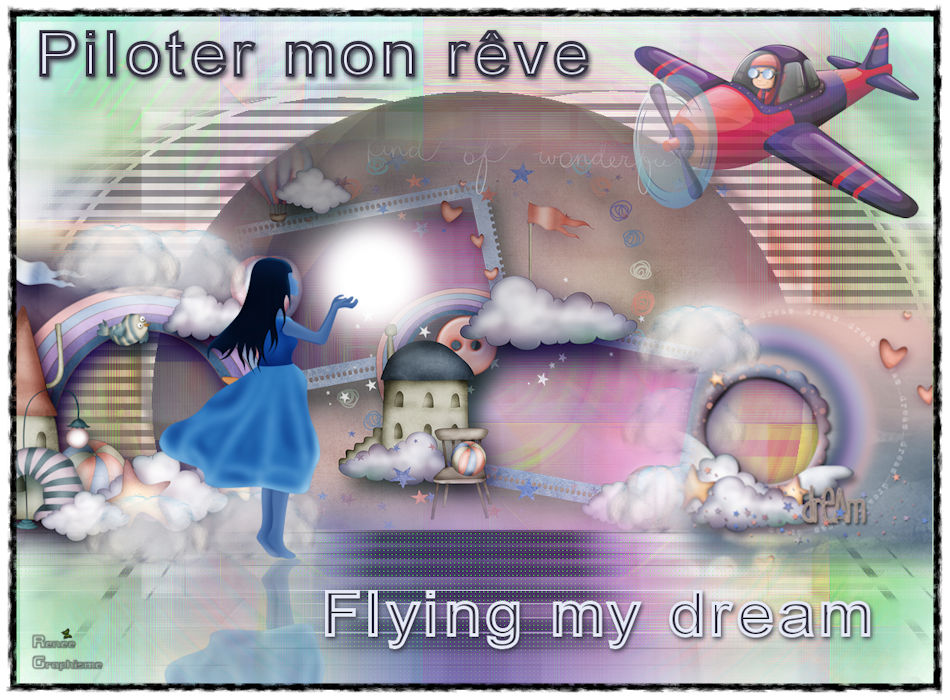
Activate your Move Tool (M) move it in the right place (see finished image )
56. Open the tube ''My-dream- Image -filleenbleu '' Edit - Copy- Activate your work -Edit - Paste as a new layer
-Activate your Move Tool (M) move it in the right place (see finished image )
57. Open the tube ‘’
My-dream- Image- lueur ‘’ -Edit - Copy- Activate your work -Edit - Paste as a new layer
-Layers- Arrange- Move Down ( under the layer of the girl)
58. Open the tube "Titre" - Copy it and Paste it as a new Layer -Or Activate your Text Tool- For Renée Font "Argyle-Socks-Thick.otf " (Included into the zipfile)
Size and Colors to your taste -Write your text
59. Put the Script "Bords fangeux" in your Script folder –Restricted script from PSP
-View - Toolbars - Script checked !! in your psp
-Activate toolbar Script, choose my file in the list
"Bords fageux"
Click the little blue arrow and let the script run

60. Image - Resize 950 Pixels WIDTH.
Save as JPG
I hope you enjoyed this lesson
Renée
This lesson was written by Renée
25-09-2019
Edited and Update
2019
*
Any resemblance with an existing lesson is merely a coincidence
* Do not forget to thank the people who work with us and for us. I have appointed the tubeurs and translators
Thanks
*
|


 Translations


