|
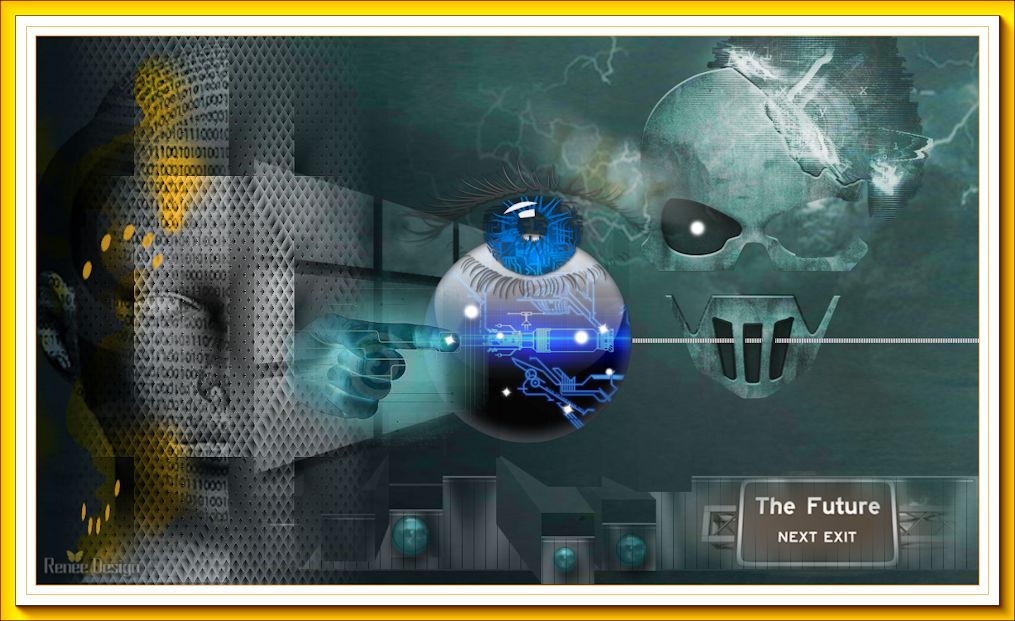
Future.... next exit
Let's start the lesson.
Open the colorpalette
1. Open the Image : ''fond_futur_next_exit''/Promote Background layer = Raster 1
2. Layers- New raster layer
3. Selections- Select All
- Activate the tube ''didier.misted
03-avril- 2014.pspimage'' Edit/Copy-Edit paste into selection
Selections- Deselect All
4. Effects- Image Effects-Seamless Tiling select my file( Side by side ) / Preset ''cote a cote
''
5. Effects-Plugins -L and K's Andreas / 20 / 168
6. Effects- Edge Effects-Enhance
8.
Activate Pick Tool (K): select my file-
'' Preset_Pick_futur_exit''/ Click on the preset and OK
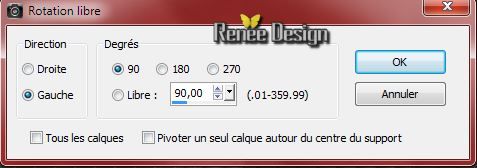
9. Image - Image Free Rotate use settings below
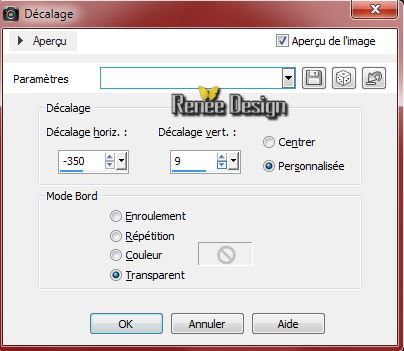
10. Effects- Image Effects-Offset use settings below
11.Activate the tube ''futur_next_image1.pspimage''/Edit - Copy -Edit - Paste as new layer on your working area
-
Layer Palette :Double click on this Layer and set the Blend Mode to "Soft Light"
With your move tool place it to a good place like this

12.
Activate the tube ''didier.misted 05-avril-
2014.psp''/Edit/copy-Edit paste as a new layer. With your move tool place it on the top right
13.
Layer Palette :Double click on this Layer and set the Blend Mode to "Luminance Legacy " Opacity of the layer down to 61%
14.
Activate the tube ''futur_next_image2.pspimage''/Edit/copy-Edit paste as a new layer.
-With your move tool place it on the top right
-Layer Palette :Double click on this Layer and set the Blend Mode to "Luminance Legacy " Opacity of the layer down to 77%
15.
Layers- New raster layer
16.
Selections - load/save selection - load selection from disk and choose my selection: 'futur_1''/Activate Flood Fill Tool and fill the selection with foreground color #f5b01d
-
Selections-Deselect All
17.
-Layer Palette -Double click on this Layer and set the Blend Mode to "Overlay "
18.
Layers- New raster layer
19.
Selections - load/save selection - load selection from disk and choose my selection: ''futur_2'' Material Properties: Background color to color :#395c56/ Activate Flood Fill Tool and fill the selection with the background color
20.
Selections - load/save selection - load selection from disk and choose my selection: ''futur_2''/ Flood fill tool opacity 50% - Activate Flood Fill Tool and fill the selection with color white
21.
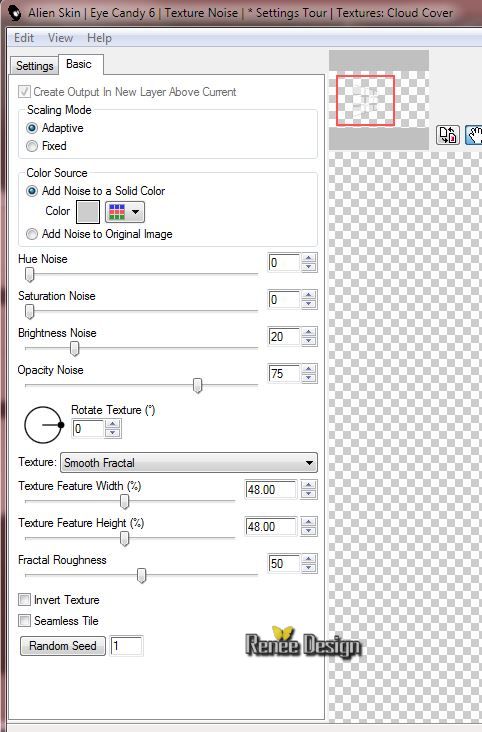
Effects- Plugins Alien Skin/Eyecandy 6/Texture Noise/Setting Tour
-Textures :Cloud Cover
Do not you have this filter? -Image in the folder-Edit/Copy-Edith paste as a new layer and move
Selections- Deselect All
22.
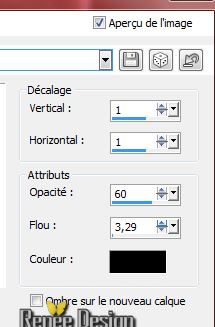
Effects - 3D Effects - Drop shadow default
-
Layer Palette :Double click on this Layer and set the Blend Mode to "Soft Light "
23.
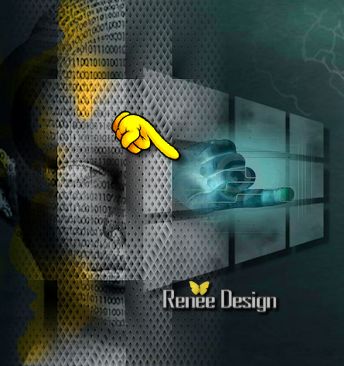
Activate the tube ''futur_next_doigts.pspimage''/Edit - Copy -Edit - Paste as new layer on your working area- Image Flip
-With your move tool place it to a good place like this
24.
Layers - New Raster layer
25.
Selections - load/save selection - load selection from disk and choose my selection: "futur_3''
-
Activate the tube ''futur_next_image3.pspimage''/Edit/Copy-Edit paste into selection
Selections- Deselect All
26.
Layers-Arrange- Move Down
-Activate the top of the layer-Palette
27.
Activate the tube ''562182-bigthumbnail.pspimage'' activate ''oeil_futur''
-Edit - Copy -Edit - Paste as new layer on your working area and move
28.
Effects - 3D Effects - Drop shadow use settings below
29.
Layers- New raster layer
30.
Selections - load/save selection - load selection from disk and choose my selection: ''futur_4''/Activate Flood Fill Tool and fill the selection with color white
31.
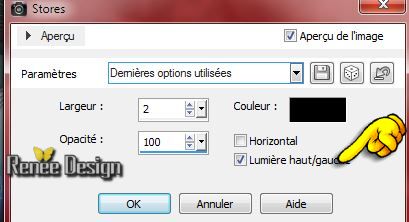
Effects- Textur Effects-Blinds use settings below
Selections- Deselect All
32.Eraser Tool:
Erase the parts on the mask like this
33.
Layers- Merge-Merge Visible
34.
Layers - New Raster layer
34.
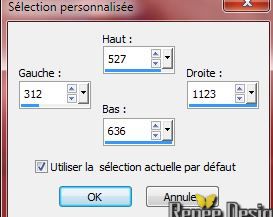
Selection Tool ( S ) Custom selection use settings below
34.
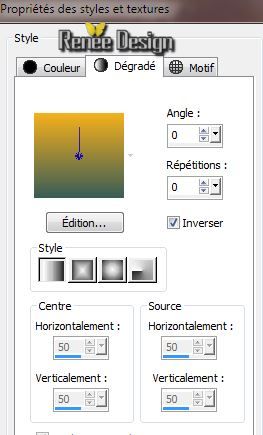
Material Properties: Foreground color #f5b01d. Background color: #395c56.
Prepare a Linear Gradient as configured like this.
35.
Activate Flood Fill Tool and fill the selection with the gradient
36.
Selections- Modify-Contract 2 pixels
37.
Effects-Plugins - EyeCandy 5 - Impact - Glass- tab-User-User Settings click on the preset
'' futur_glass''
38.
Layer Palette :Double click on this Layer and set the Blend Mode to "Luminance Legacy " Opacity of the layer down to 40%
39.
Effects-Plugins - Photoeffex Scanlines use settings below

40. Effects- Plugins Unlimited 2.0
- Filter Factory Gallery A - Pool Shadow

Selections- Deselect All
41.
Effects-Plugins - Stylize - Extrude
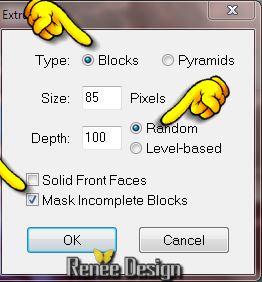 it may be that your effect is slightly different it may be that your effect is slightly different
42.
Activate the tube ''texte_futur_next_exit.pspimage''/Edit - Copy -Edit - Paste as new layer on your working area With your move tool move it in the right corner
43.
Layers - New Raster layer
44.
Selections - load/save selection - load selection from disk and choose: ''futur_5" .Activate Flood Fill Tool and fill the selection with color white (click 3 times in the selection )
Selections- Deselect All
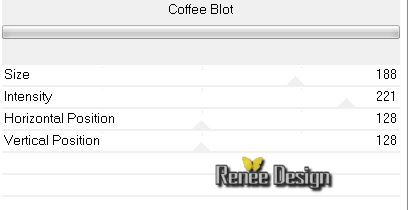
45. Effects- Plugins Unlimited 2.0
/Photo Agin kit-Coffee Blot
46.
Activate the tube ''futur_3 billes ''/Edit - Copy -Edit - Paste as new layer on your working area
If your effect on item 41 is different, select the balls, place them one by one on your work and merge the three layers
47.
-Layer Palette -Double click on this Layer and set the Blend Mode to "Overlay "
48.
Layers- New raster layer
49.
Selections - load/save selection - load selection from disk and choose my selection: ''futur_6''/ Activate Flood Fill Tool and fill the selection with color #f5b01d
Selections- Deselect All
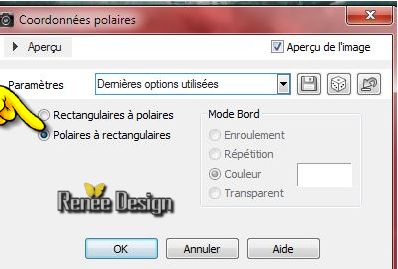
50.
Effects-Distortion Effects- Polar Coordinates-Polar to Rectangular
-
Reduce the opacity of this layer to 73%
51.
Layers- New raster layer
52.
Selections - load/save selection - load selection from disk and choose my selection: ''futur_7"/Flood fill tool opacity 100%/ Activate Flood Fill Tool and fill the selection with color white
Selections- Deselect All
53.Layers - Merge -Merge Visible
Material Properties: Foreground color white. Background color: #f5b01d
54.
Image - Add borders-Symmetric checked 1 pixel BG-Color
55.
Image - Add borders-Symmetric checked 10 pixels FG-Color
56.
Image - Add borders-Symmetric checked 1 pixels BG-Color
57.
Image - Add borders-Symmetric checked 30 pixels FG-Color
58.
Image - Add borders-Symmetric checked 1 pixels BG-Color
59.
Effects-Plugins - AAA Frame - Foto Frame use settings below

- Image
Resize 1015 pixels Width
Save as a JPG file
I hope you enjoyed this lesson
Renée
This lesson was written by Renée 28/07/2014
Created the
08/2014
*
Any resemblance with an existing lesson is merely a coincidence *
* Don't forget to thank the people who work for us and with us. I named the tubeurs - Testers and the translators.
Thanks Renée. |
 Translations


 All rights reserved