|
Let's start the lesson.
GOTHIQUE 35
1. Open the BG-Image
‘’Fond-Gothique 35’’- Promote Background Layer =Raster 1
2. Layers- New Raster Layer
Selections- Select All
3. Open the tube ‘’ Gothique35-Image1.’’ - Edit - Copy- Activate your work -Edit - Paste into Selection
Selections- Deselect All
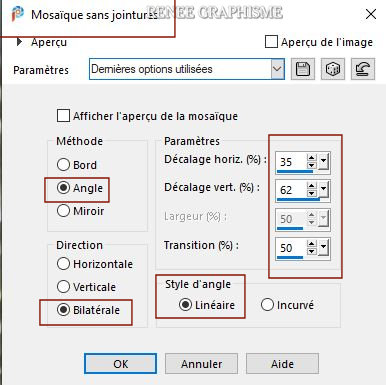
3a. Effects- Image Effects- Seamless Tiling use the settings below
4. Adjust- Blur-Motion Blur use the settings below
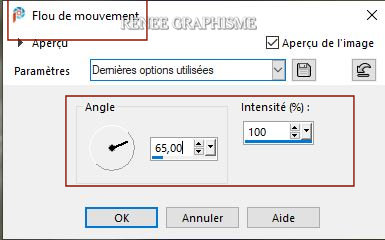
- Repeat 3 more times (total of 4 times)
5. Effects –Plugins-
Unlimited 2.0 - Graphics Plus - Vertical Mirror with these settings: 128/0
- Repeat a second time with the same settings
6. Effects- Edge Effects- Enhance More
7. Layers-Properties-Set the Blend Mode to " Overlay " – Reduce the Opacity of this layer to 77%
8. Open the tube ‘’ Gothique35-Image2’’ -Edit - Copy- Activate your work -Edit - Paste as a new layer
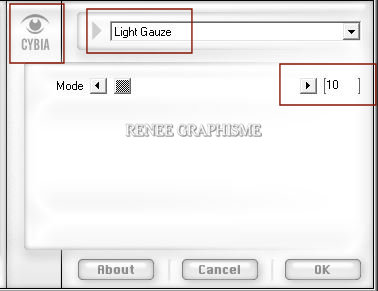
9. Effects – Plugins – Cybia Screenworks – Light Gauze use the settings below
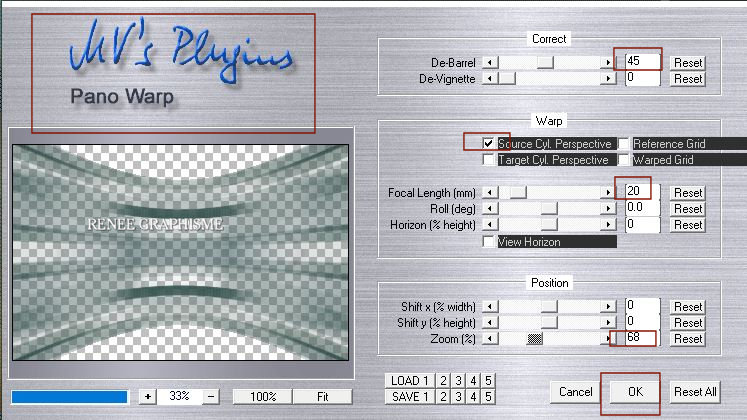
10. Effects – Plugins– MV’s Plugins – Panopwarp use the settings below
11. Effects- 3 D Effects- Drop Shadow with these settings: 2/2/65/25 Color Black
12. Layers-Properties-Set the Blend Mode to " Difference " – Reduce the Opacity of this layer to 61%
13. Effects –Plugins-
Unlimited 2.0 - Graphic Plus – Emboss with these settings: 34/34/0/0
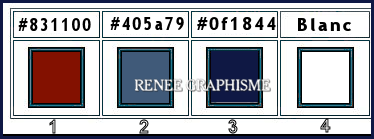
- Material Properties: Set your foreground color to color #831100 =1 – Set your background color to color #405a79= 2
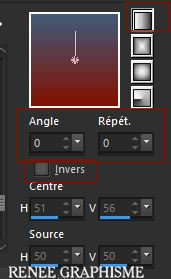
- Set your Foregroundcolor to foreground-background linear gradient configured like this
14. Layers- New Raster Layer
15. Flood Fill Tool
 –Fill the layer with the gradient –Fill the layer with the gradient
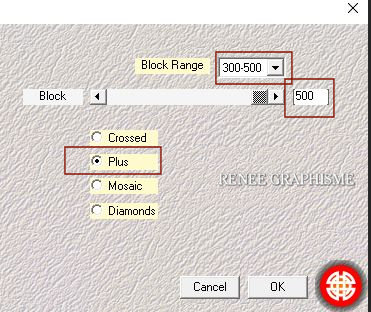
16. Effects – Plugins – Medhi – Sorting Tiles use the settings below
17. Layers- Duplicate
18. Image - Mirror - Mirror Horizontal (Image - Mirror in older versions of PSP)
– Image - Mirror - Mirror Vertical ( Image - Flip in older versions of PSP)
19. Layers-Properties-Set the Blend Mode to " Overlay "
20. Layers- Merge- Merge Down
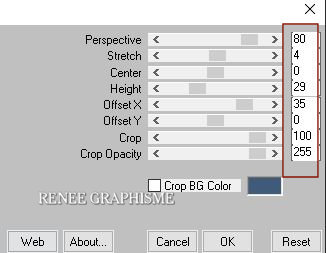
21. Effects –Plugins- Mura’s Meister – Perspective Tiling use the settings below
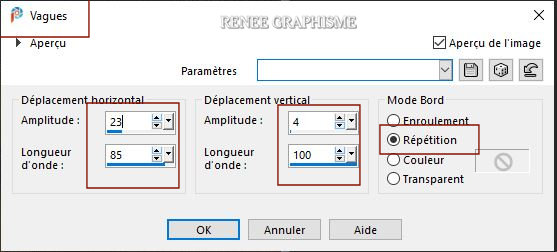
22. Effects – Distortion Effects– Wave use the settings below
23.
Selections –load/save selection –load selection from disc and select my selection: ‘’Gothique
35- 1’’
DELETE (10 times)
Selections- Deselect All
24. Layers- New Raster Layer
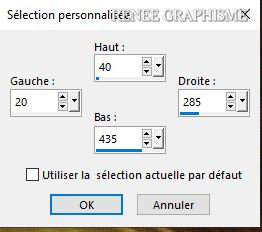
25. Activate Selection Tool -Custom Selection (S) -Rectangle with these settings

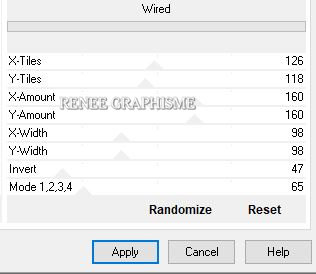
26. Effects –Plugins-
Unlimited 2.0 – VM Instant Art –Wired use the settings below
Selections- Deselect All
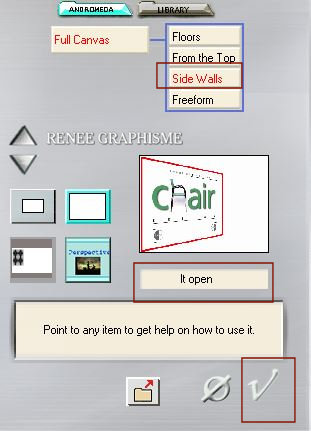
27. Effects -
Plugins– Andromeda Perspective-Side Walls-It open
28. Objects – Align
- Left
29.
Selections –load/save selection –load selection from disc and select my selection: ‘’Gothique
35- 2’’
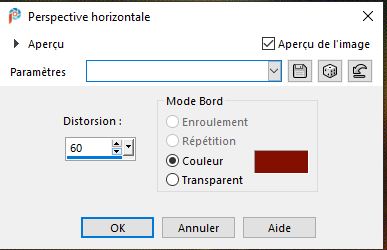
30. Effects – Geometric Effects - Perspective Horizontal -Distortion 60- FG-Color= 1
31. Selections -Promote selection to layer
Selections- Deselect All
- Layer Palette- activate the layer underneath
32. Selections –Select All- Selections Float-Defloat
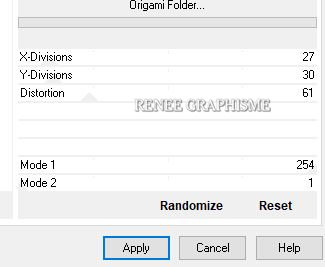
33. Effects -Plugins-
Unlimited 2.0 -VM Instant Art – Origami Folder using the default settings
Selections- Deselect All
- Use the eraser to smooth out the unclean edge at the bottom
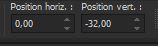
34. Pick Tool (K) Enter these parameters for the X:0,00 and Y: -32 positions on the Toolbar
Press ( M ) to close the Pick Tool
35. Layers-Properties-Change the Blend Mode to "Hard Light " – and Lower the Opacity to 75%
36. Effects- 3 D Effects- Drop Shadow with the default settings
37. Layers- Duplicate
38. Image - Mirror - Mirror Horizontal (Image - Mirror in older versions of PSP)
- Layer Palette- activate the layer above (Promoted Selection)
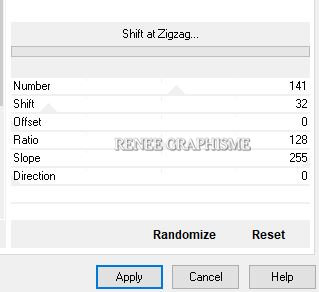
39. Effects -Plugins- Unlimited 2.0 - MuRa's Seamless - Shift at
Zigzag..use the settings below.
40. Layers-Properties-Set the Blend Mode to " Overlay " – Reduce the Opacity of this layer to 40%
41. Activate Pick Tool(K) - Scale mode - Stretch and place as shown in the example below
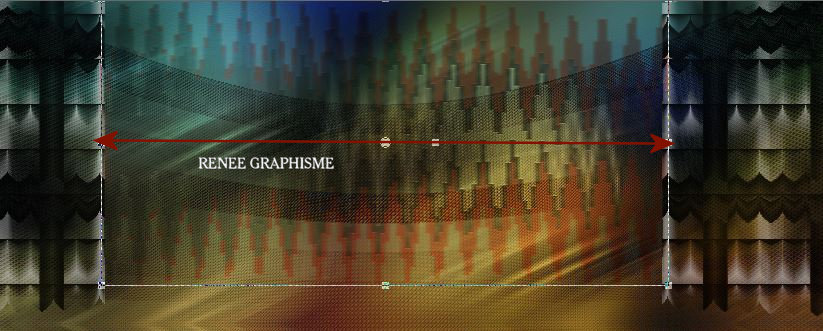
-
Press ( M ) to close the Pick Tool
Effects- 3 D Effects- Drop Shadow with these settings : 1/1/73/2 Color Black
42. Open the tube ‘’ Gothique-35-Image
3’’ -Edit - Copy- Activate your work -Edit - Paste as a new layer
43. Objects – Align
– Top
44. Effects – Plugins – FM Tile Tools – Blend Emboss using the default settings
45. Layers- Arrange- Move Down
- To replace the top of the layer palette
46. Layers- New Raster Layer
47.
Selections –load/save selection –load selection from disc and select my selection: ‘’Gothique
35- 3’’
48.Materials: Change foreground color into FG-Color #831100=1
Flood Fill Tool
– Opacity 35 %– fill the selection with the Foreground color =1
49. Selections-Modify – Select-Selection Borders /
Outside -Border width 15
50.Flood Fill Tool
– fill the selection with the Background color = 2
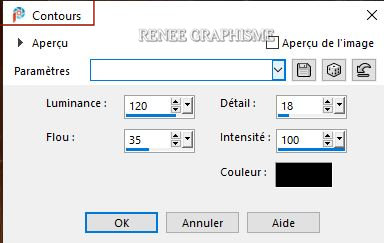
51. Effects- Artistic Effects – Contours with these settings / Color Black
52. Effects – Edge Effects – Enhance
53. Layers-Properties-Change the Blend Mode to " Overlay"
Selections- Deselect All
54. Effects – Plugins - L& K’s- Sanne 0/4
55. Effects- 3 D Effects- Drop Shadow with these settings : 0/0/70/25 Color WHITE !!!!
Flood Fill Tool Opacity 100%
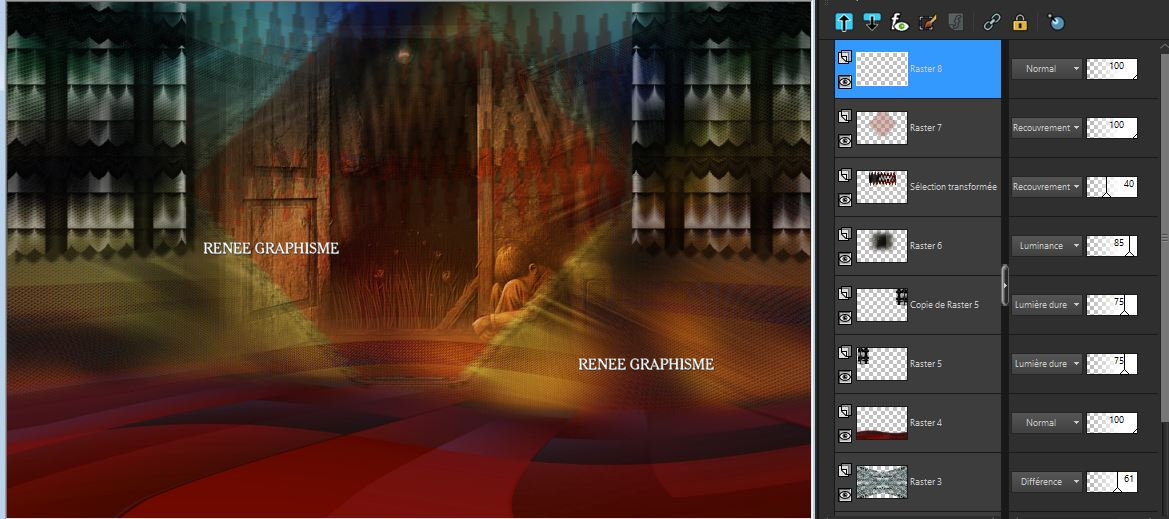
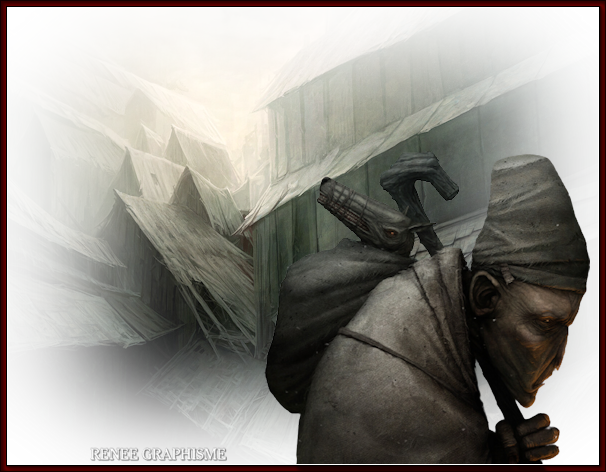
- Your work and Layer Palette look like this now-You should have this result
56. Layers- New Raster Layer
57.
Selections –load/save selection –load selection from disc and select my selection: ‘’Gothique
35- 4’’
58.Flood Fill Tool -
Fill the selection with the Foreground color =1
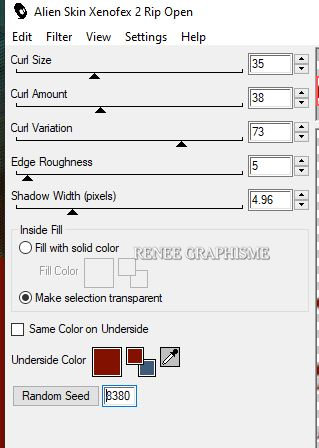
59. Effects – Plugins – Alien skin Xenofex2 – Rip Open use the settings below
Selections- Deselect All
60. Effects – 3 D Effects – Drop Shadow with the same settings
61. Open the tube ‘’Renee-TUBES-semenov-winter’’
- Image
Resize 70 %
62. Edit - Copy- Activate your work -Edit - Paste as a new layer
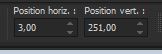
63. Pick Tool (K) Enter these parameters for the X:3,00 and Y: 251,00 positions on the Toolbar
64. Layers- Arrange- Move Down
65. Layers-Properties-Set the Blend Mode to " Dodge "
- Layer Palette- Acivate Raster 3
66. Layers- New Raster Layer
67. Set your Foreground color to color #ffffff=4
Flood Fill Tool
–
fill the layer with the Foreground color #ffffff=4
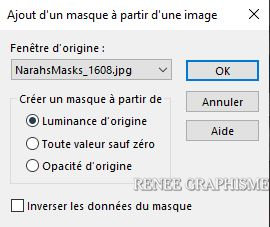
68. Layers- New Mask Layer- From Image and select Mask
‘’NarahsMasks_1608’’
- Layers- Duplicate
- Layers- Merge-Merge Group
- To replace the top of the layer palette
69. Open the tube ‘’ Gothique-35-Image
4.’’ -Edit - Copy- Activate your work -Edit - Paste as a new layer
- Pick Tool (K) Enter these parameters for the X: 431,00 and Y: -4,00 positions on the Toolbar 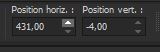 
70. Layers- New Raster Layer
71.
Selections –load/save selection –load selection from disc and select my selection: ‘’Gothique
35- 5’’
72.Flood Fill Tool
–fill the selection with the Foreground color #ffffff=4
Selections- Deselect All
73. Adjust-Blur- Gaussian Blur : Radius 25
74. Open the tube ‘’
Renee-TUBES-semenov-2-noname.’’ -Edit - Copy- Activate your work -Edit - Paste as a new layer
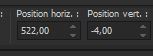
- Pick Tool (K) Enter these parameters for the X: 522,00 and Y: -4,00 positions on the Toolbar
75. Layers- New Raster Layer
76. Selections –load/save selection –load selection from disc and select my selection: ‘’Gothique
35- 6’’
77.Flood Fill Tool
– fill the selection with the Foreground color #ffffff=4
Selections- Deselect All
78. Layers- New Raster Layer
79. Selections –load/save selection –load selection from disc and select my selection: ‘’Gothique
35- 7’’
80.Flood Fill Tool
–
fill the selection with the Foreground color #ffffff=4
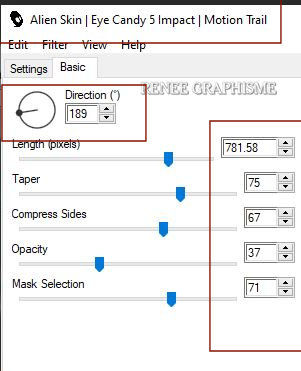
81. Effects – Plugins – Alien Skin Eyecandy5 Impact – Motion Trail -Tab Settings/User settings select my file ––Preset :
Goth-35-Motiontrail’’
Or manual settings as shown in the example below
Selections- Deselect All
82. Layers-Properties-Change the Blend Mode to " Dissolve" and Lower the Opacity to 8%
83. Image - Add borders-Symmetric checked: 1 Pixel Color Black
84. EDIT - COPY!!!!
85 Open the tube "Cadre Gothique 35 " in your Psp
86. Activate the Magic Wand with these settings - select the inside of the frame

87. Edit- Paste -Into Selection (Image is still in your PSP memory)
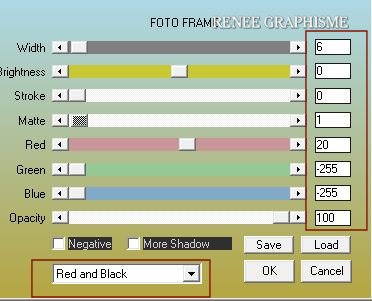
88. Effects – Plugins- AAA Frame - Foto Frame use the settings below
89. Effects- 3 D Effects- Drop Shadow with these settings : 0/0/70/25 Color Black
Selections- Deselect All
Add my watermark
90. Layers- Merge- Merge All
91. Image –
Resize -90% Resize all layers checked.
Add your name or watermark, save as JPG file and you're done
I hope you enjoyed this lesson
Renée
This lesson was written by Renée
24-11-2020
Edited and Update
2020
*
Any resemblance with an existing lesson is a coincidence
*
Do not forget to thank the people who work with us and for us
I have appointed the tubeurs and translators
Thanks
*
|

 Translations