|
Let's get started with the lesson.
-
Gothique 42

1. Open image
‘’Fond-Gothique-42’’- Promote Background Layer = Raster 1
2. Layers - New raster layer
- Material Properties: Set the foreground color to color 1 - Set the background color to color 2
3. Replace your foreground color with a foreground/background rectangular gradient configured like this.
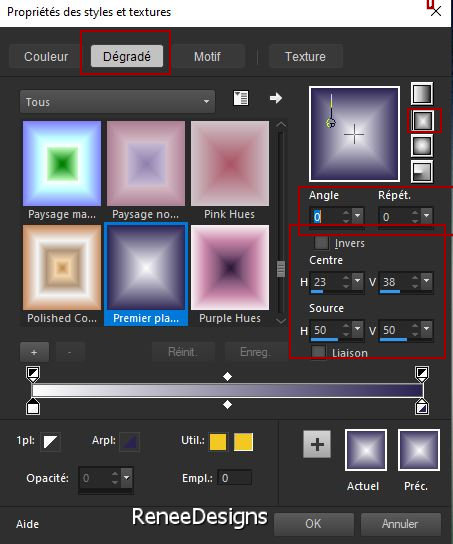
4. Flood Fill Tool
 –
Fill the layer with the gradient. –
Fill the layer with the gradient.
5. Effects - Plugins- Filters in Unlimited 2.0 - Alf's Power Toys-
Split Distortion : 29
6. Layers-Properties-Set the Blend Mode to "Hard Light "
7. Layers-Duplicate
8. Activate the tube ‘’Gothique-42-sol’’ - Edit - Copy- Activate your work -Edit - Paste as new layer
9. Objects – Align – Bottom
10. Selections –load/save selection –load selection from disc and select my selection: ‘’Gothique-42-1’’
- Foreground properties - Set your foreground color to color 3
11. Layers-New raster layer
12. Flood Fill Tool –Fill the layer with color 3
13. Effects - Plugins- Alien Skin EyeCandy 5 - Impact - Chrome –Tab/Settings/User Settings and select my file
Preset ‘’Gothique-42.Chrome’’
14. Effects -3D- Effects -
Drop Shadow with these settings: 5/5/40/10 color white

15. Layers-New raster layer
- Foreground properties - Set your foreground color to color white
16. Flood Fill Tool
 –
Fill the layer with color white –
Fill the layer with color white
17. Layers-New Mask Layer-From Image and select Mask ‘’Renee-Masque-Gothique-42’’
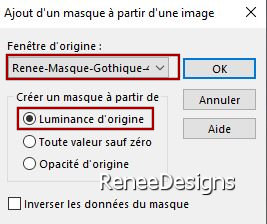
- Layers-Merge-Merge Group
18.Activate the tube ‘’Gothique-42- Image 1’’ - Edit - Copy- Activate your work -Edit - Paste as new layer
19. Pick Tool: (K) on your keyboard - Enter the following parameters on the toolbar
 0/ 330
- Press the ( M ) button to close the tool
20. Effects – Plugins– Flaming Pear – Flexify 2 use the settings below
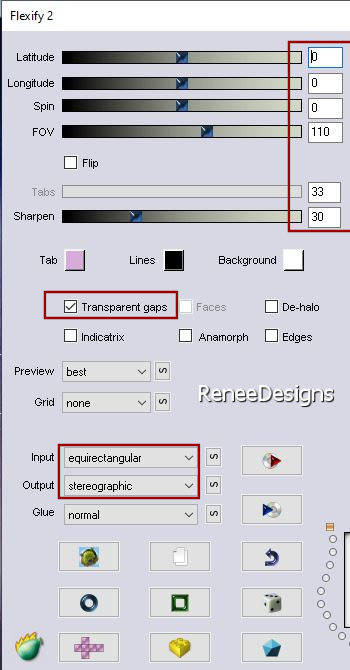
21. Effects- 3D- Effects- Drop Shadow with these settings: 2/2/38/10 black
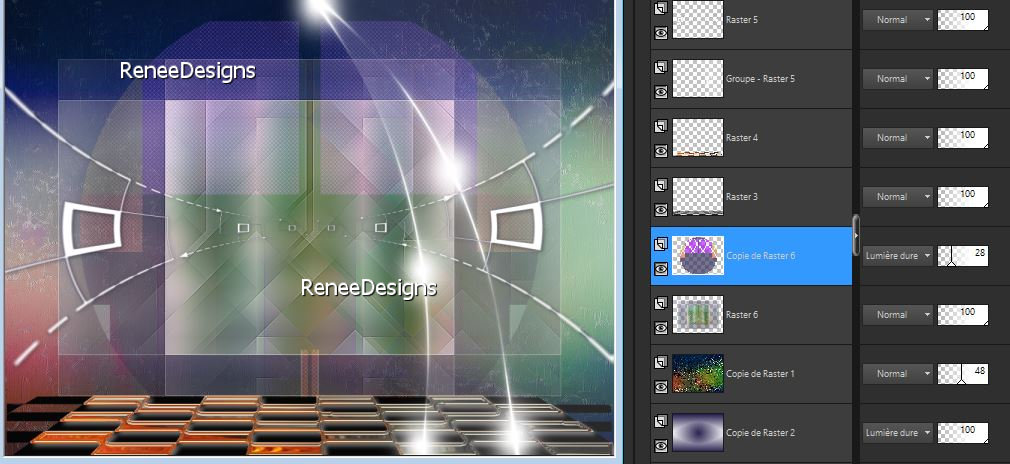
- Activate Raster 1 in the layers palette
22. Layers-Duplicate
23. Layers- Arrange - Move up 2 times (above copy of
raster 2)
24. Effects –Art Media Effects –
Brush strokes with these settings- color white
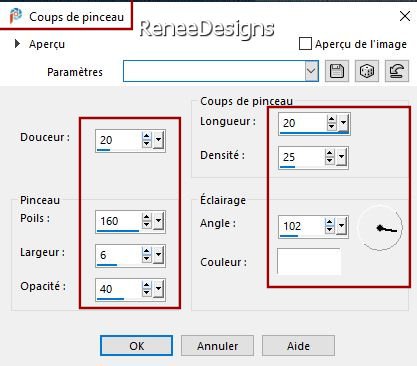
25. Effects - Edge Effects–Enhance
26. Reduce the opacity of this layer to 48%
27. Layers-New raster layer
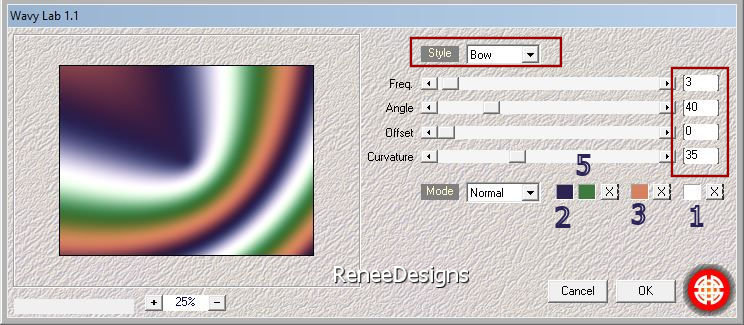
28. Effects – Plugins– Medhi – Wavy Lab 1.1 use the settings below
29. Effects – Plugins– Simple – Pizza Slice Mirror
30. Effects – Plugins– Simple – Blintz
31. Image - Mirror - Mirror Horizontal (Image - Mirror in older versions of PSP)
32. Effects – Plugins– Simple – Blintz
33. Effects - Plugins- Filters in Unlimited 2.0 - It@lian Editors
Effect – Effetto Fantasma : 0 /225
34. Image - Resize by 65% - Uncheck - Resize all layers
35. Effects - Plugins- Filters in Unlimited 2.0 - It@lian Editors
Effect – Effetto Fantasma: 45/23
36. Effects – Edge Effects - Enhance More
37. Layers-Duplicate
38. Effects – Plugins– VM Instant Art – Vernissage using the default settings
39. Effects – Plugins- Transparency - Eliminate white
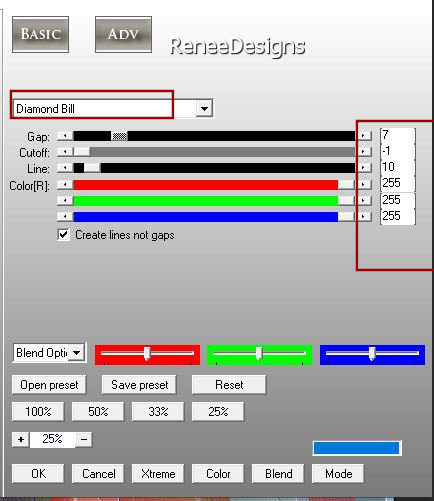
40. Effects - Plugins- AP[Lines] Lines – Silverlining use the settings below
41. Layers-Properties-Set the Blend Mode to "Hard Light – Reduce the opacity of this layer to 28%
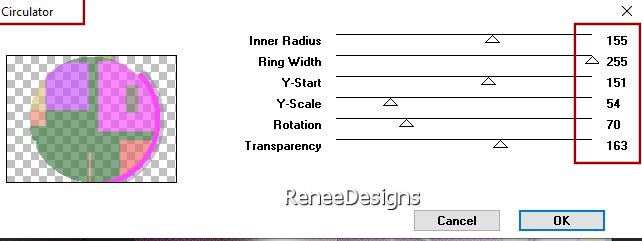
42. Effects – Plugins– Déformation – Circulator use the settings below
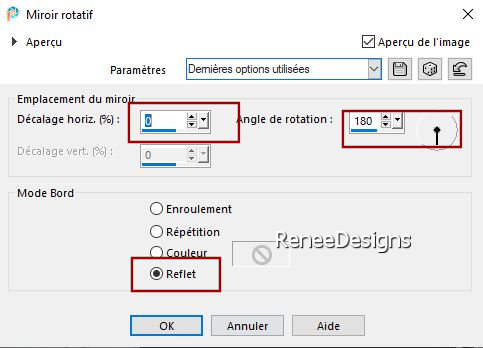
43. Effects – Reflection Effects – Rotating Mirror with these settings
Your work and layer palette should now look like this
- Foreground properties - Set your foreground color to color 4
- Activate the top of the layers palette
44. Layers-New raster layer
45. Selections –load/save selection –load selection from disc and select my selection: ‘’Gothique-42-2’’
46. Flood Fill Tool
 –
Fill the selection with the foreground color 4 –
Fill the selection with the foreground color 4
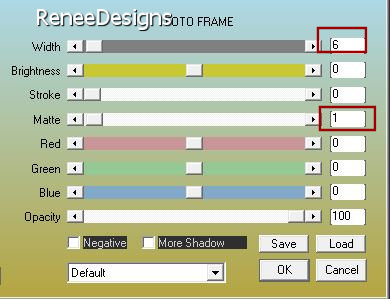
47. Effects – Plugins– AAA Frame – Foto Frame use the settings below

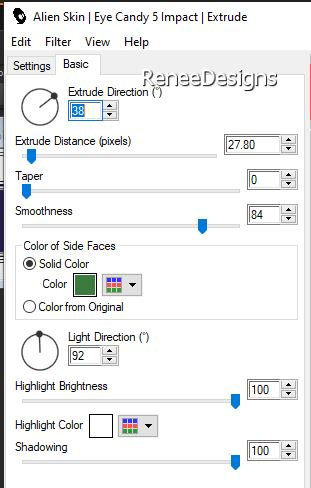
48. Effects - Plugins- Alien Skin EyeCandy 5 – Impact – Extrude use the settings below–
Colors: #3d7a3e and color white
49. Layers-Duplicate
50. Image - Mirror - Mirror Horizontal (Image - Mirror in older versions of PSP)
51. Layers-Merge-Merge Down
52. Layers-Properties-Set the Blend Mode to " Luminance Legacy "
53. Activate the tube ’’Gothique-42-Deco’’ - Edit - Copy- Activate your work -Edit - Paste as new layer
54. Pick Tool: (K) on your keyboard - Enter the following parameters on the toolbar
 531
/ 203 531
/ 203
- Press the ( M ) button to close the tool
55.Activate the tube ‘’Gothique-42-cercles’’ -Edit - Copy- Activate your work -Edit - Paste as new layer
56. Pick Tool: (K) on your keyboard - Enter the following parameters on the toolbar
 318/0 318/0
- Press the ( M ) button to close the tool
-
Leave layer in Overlay Mode
57.Activate the tube ‘’Gothique-42-personnages’’ - Edit - Copy- Activate your work -Edit - Paste as new layer
(Or any other tube)
- Objects – Align – Bottom
58. Layers-New raster layer
59. Selections –load/save selection –load selection from disc and select my selection: ‘’Gothique-42-3’’
60. Set your foreground color to color white
Flood Fill Tool
 –
Fill the selection with color white –
Fill the selection with color white

61. Layers-Duplicate
62. Image - Mirror - Mirror Horizontal (Image - Mirror in older versions of PSP)
Image - Mirror - Mirror vertical ( Image - Flip in older versions of PSP)
63. Layers -Merge-Merge Down
64.(At the two tubes )Activate Eraser tool - remove excess points from faces ( see finished image)
65. Layers-New raster layer
66. Selections –load/save selection –load selection from disc and select my selection: ‘’Gothique-42-4’’
67. Flood Fill Tool
 –
Fill with the color of your choice (in harmony with your color choices)Renée has chosen number 3 –
Fill with the color of your choice (in harmony with your color choices)Renée has chosen number 3

68. Image - Add Borders-Symmetric checked:1 Pixel -color black
69. Selections –
Select All
70. Image - Add Borders-Symmetric checked:45 Pixels -color 2
71. Image - Add Borders-Symmetric checked:15 Pixels-color white
Selections - Invert
72. Effects – Plugins– Simple – Pizza Slice Mirror
- Repeat : Simple – Pizza Slice Mirror
73. Selections -
Promote selection to layer
74. Effects - Plugins- Filters in Unlimited 2.0 &<Bkg Designers sf10
IV> @ Instant Tile using the default settings
75. Selections –load/save selection –load selection from disc and select my selection: ‘’Gothique-42-5’’
76. Effects –Art Media Effects – Brush strokes with these settings- color white
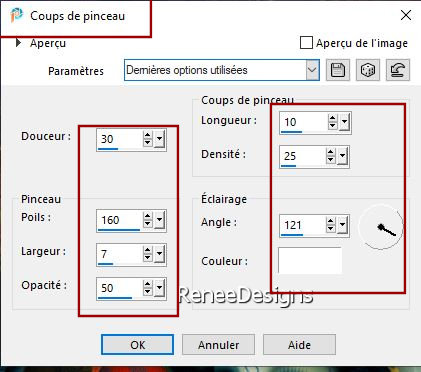
77. Effects – Edge Effects –Enhance

78. Open the tube with the ‘’Texte ‘’ Paste as a new layer /or write your own
- Add the author's watermark to your work and your own watermark.
79. Layers-Merge-Merge All (flatten)
80. Image -Resize 95 % - Resize all layers checked.
Save as JPG
I appreciate your attention and engagement with this lesson.
Renée
Renée has written this lesson on 14/08/2024
I have edited and updated it.
in 2024
*
*
Any resemblance to an existing lesson is purely coincidental.
Do not forget to thank the people who work with us and for us.
I have appointed the tubeurs and translators.
Thank you
*
|


