|
Let's start the lesson
-
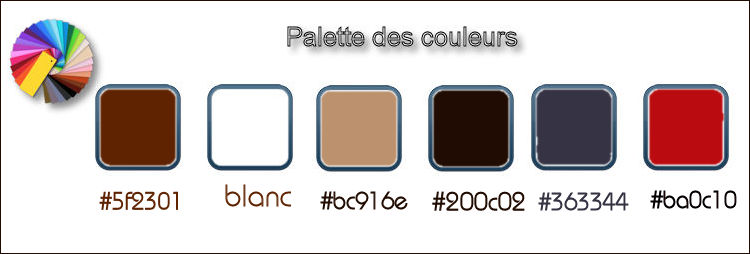
-Color Palette- Set your foreground color to #5f2301-
Set your background color to #ffffff
1.
Open Image ‘’Fond_Gothique_23 .jpg’’-
Window - Duplicate (or shift+D) - Close the original and proceed on the copy -Promote Background Layer = Raster 1
2.
Effects- Plugins – Mura’s Seamless – Shift
128/128
3. Effects- Plugins –Simple
Blintz
4.
Selections –load/save selection –load selection from disc and select my selection: ‘’
Gothique23_1’’
-
Selections- Promote Selection to Layer
Selections- Deselect All
5. Effects- Plugins – Simple 4 Way Average
6. Effects –Texture Effects – Weave ( color white and black )
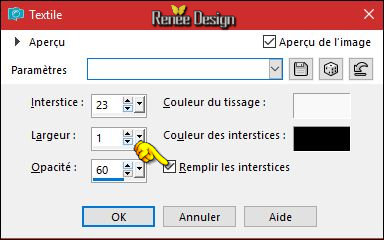
7. Layers- Duplicate
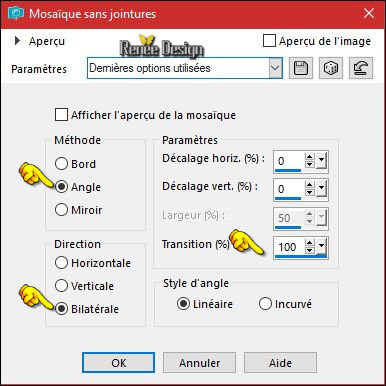
8. Effects- Image Effects- Seamless Tiling use settings below
9. Layers- Merge- Merge Down
10. Activate your Magic Wand with these settings

Select the transparent part
11. Effects- 3 D Effects- Cutout with these settings
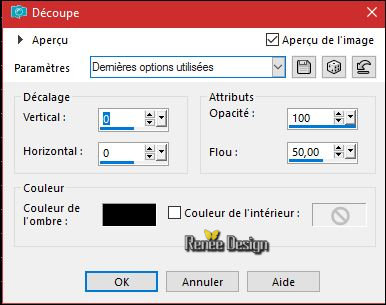
Selections- Deselect All
12. Open the tube ‘’ Renee_tube_abre_magique.pspimage »
- Edit - Copy- Activate your work -Edit - Paste as a new layer (do not move)
13. Open the tube ‘’ Gothique_23_Image1’’
- Edit - Copy- Activate your work -Edit - Paste as a new layer (do not move)
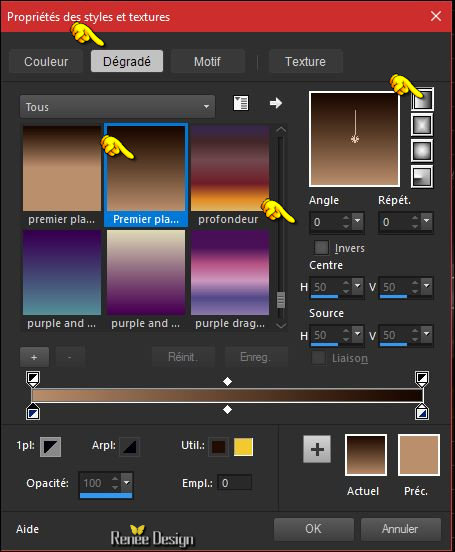
-Color Palette- Set your foreground color to #bc916e - Set your background color to #200c02
- Set your Foregroundcolor to forground-background linear gradient configured like this
14. Layers- New Raster Layer
15. Flood Fill Tool – Opacity of the color at 75% Fill the layer with the gradient
16.
Effects –Plugins- Unlimited - Filter Factory Gallery U-FlipChop
Radial... 78/ 193
17.
Effects- Plugins – Flaming Pear Flexify 2/Preset ‘’
Gothique_23_Flexify 2 settings’’
click on the red arrow  and select my file-‘’ Gothique_23_Flexify 2 settings’’ can be used in any folder of your choice by clicking it. -3 Open it will be ok in your filter and select my file-‘’ Gothique_23_Flexify 2 settings’’ can be used in any folder of your choice by clicking it. -3 Open it will be ok in your filter
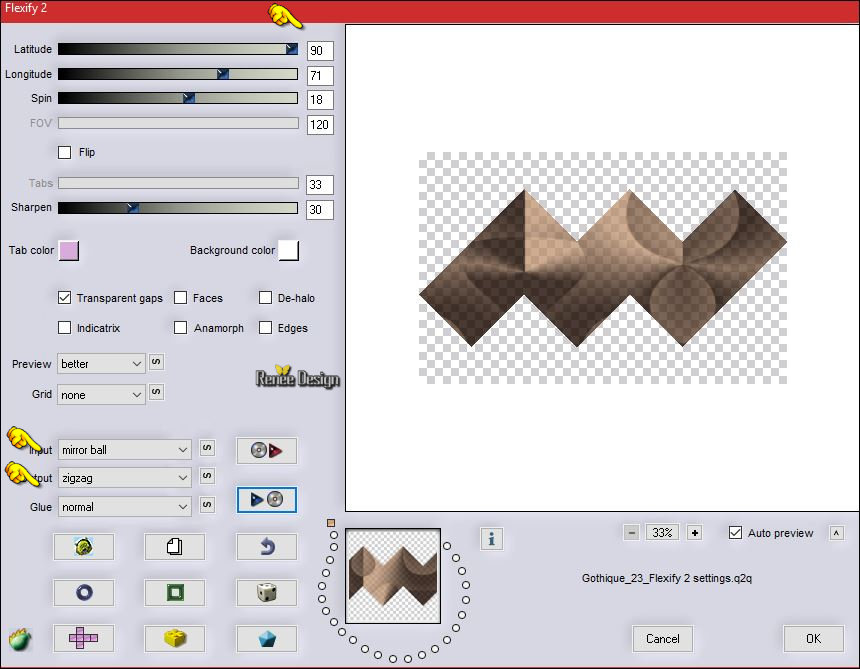
18.
Layers-Properties-Set the Blend Mode to " Screen "
- Close the bottom layer in the layer palette = Raster 1
- Activate an open layer in the layer palette
19. Layers-Merge-Merge Visible
- Open the bottom layer =Raster 1
-Activate the top layer in the layer palette (=merged layer )
20.
Effects- Plugins –Andromeda –Perspective - Side
Walls- It open close
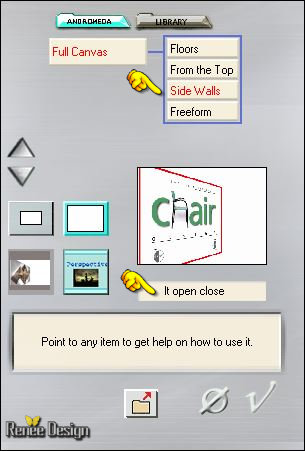
- Repeat this filter - Andromeda with the same settings
21. Effects
– 3D Effects – Drop Shadow with these settings 1/1/100/0 -Color #0e45a4
- Activate the bottom layer in the layer palette= Raster 1
- Color Palette- Set your foreground color to
#363344
22. Layers- New Raster Layer
23.
Selections –load/save selection –load selection from disc and select my selection:
‘’Gothique23_2’’
24. Flood Fill Tool – Opacity of the color at 100%- Fill the selection with the foreground color #363344
25. Effects
– Texture Effects –Weave (colors white and #363344)
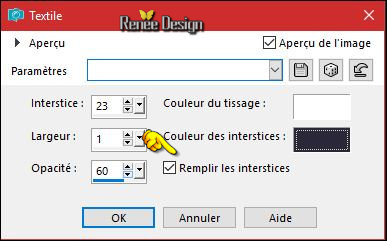
26. Effects-Edge Effects- Enhance More
Selections- Deselect All
27. Effects- Plugins EyeCandy 5 –Impact –Extrudes with these settings (FG-Color )
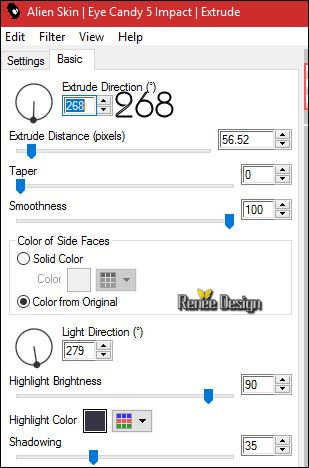
28. Layers- Duplicate
29. Images
Resize to 80 %- all layers not checked
30. Effects- Image Effects- Offset white these settings: H = 48 and V = - 77
31.
Layers-Properties-Set the Blend Mode to " Exclusion"
32. Layers- Merge- Merge Down
33. Effects- Edge Effects- Enhance
34. Open the tube ‘’ Gothique_23_Image 2.pspimage’’
- Edit - Copy- Activate your work -Edit - Paste as a new layer.
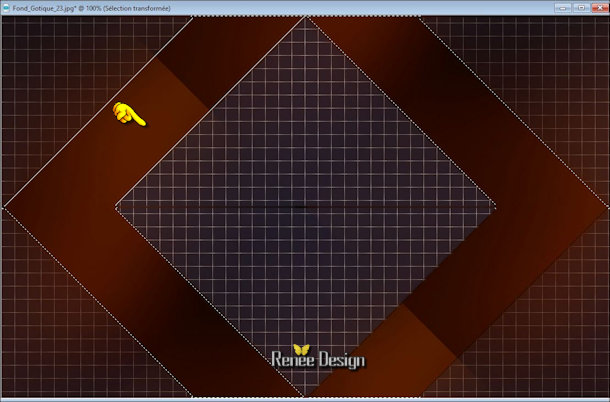
Move as shown in the example below-You should have this result
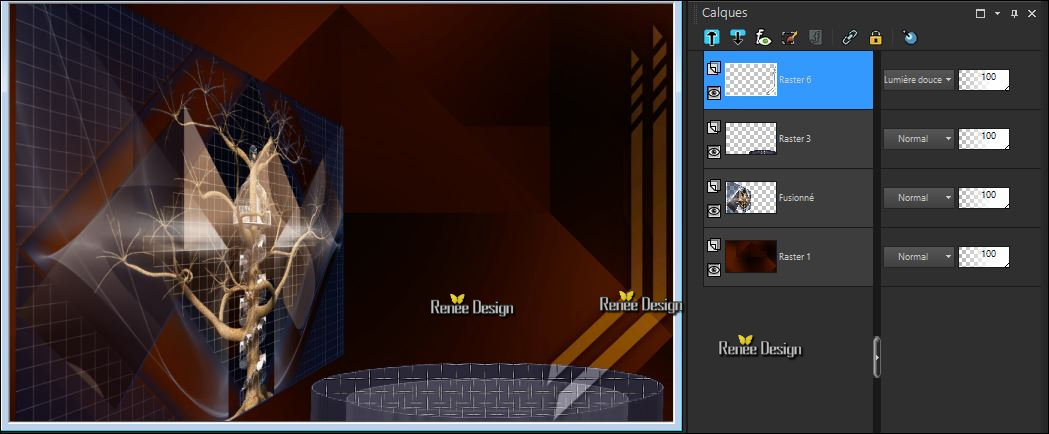
35.
Layers-Properties-Set the Blend Mode to " Soft Light "
- Properties Foreground: Set your foreground color to #ffffff
36. Activate the Brush image ‘’ Gothique_23_pinceau_1.jpg’’ in your psp
- File- Export Custom Brush (Give it a name)
- Activate Brush Tool and select my brush (B) ‘’ Gothique_23_pinceau_1.jpg’’ with these settings

37. Layers- New Raster Layer
38.Stamp your brush at the top right side by using your foreground color #ffffff (see example)
39.
Layers-Properties-Set the Blend Mode to " Dodge "
40. Effects- Edge Effects- Enhance
41. Effects
–Plugins – Tramage – Pool Shadow use settings below
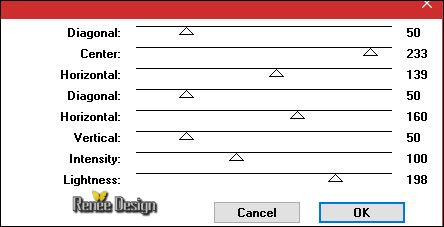
42. Open the tube ‘’ Renee_tube_Black _Angel.pspimage’’
- Image
Resize to 85 %
- Edit - Copy- Activate your work -Edit - Paste as a new layer
-
Move it in the right place
-Color Palette- Set your foreground color to #ba0c10- Set your background color to black
43. Layers- New Raster Layer
44.
Selections –load/save selection –load selection from disc and select my selection: ‘’ Gothique23_3’’
45. Activate Flood Fill Tool and fill the selection with the foreground color #ba0c10
Keep Selected
46.
Layers- New Raster Layer
47. Activate Brush Tool and choose the brush: -Shape Round ( click here 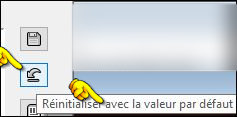 Reset to default ) Reset to default )
-
with these settings

- Draw a shape somewhat similar to this by using the background color black
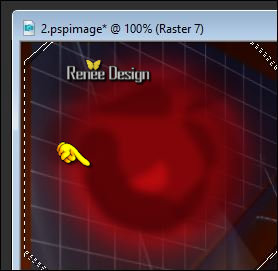
48. Adjust- Blur- Gaussian Blur: Radius 12
Selections- Deselect All
49.
Layers-Properties-Set the Blend Mode to " Dissolve "
50. Layers- Merge- Merge Down
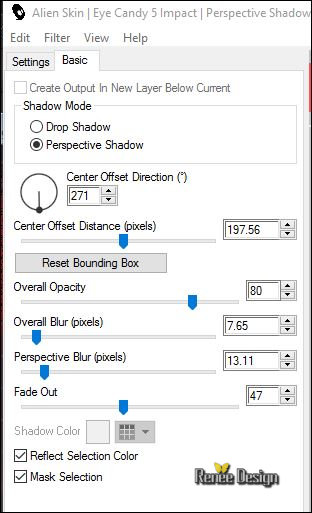
51. Effects- Plugins – AlienSkin EyeCandy 5 Impact – Pespectiv
shadow-tab Settings/User settings choose my Preset ‘’Gothique_23_Perspctive Shadow’’
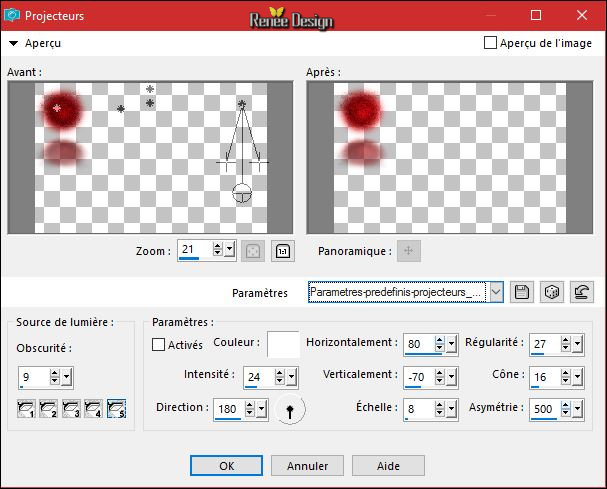
52. Effects- Illumination Effects- Lights and select my file -Preset
‘’Parametres-predefinis-projecteurs_Gothique23’’
C:\Users\YourName\Documents\My PSP-files \presets
- Color Palette- Set your foreground color to #ffffff
53. Activate Pen Tool with these settings -Line Style-Current Styled Line -
Draw a line at the top of the work with the foreground color - like this ( Press the Shift Key for a straight line )

54. Convert to Raster Layer
55.
Effects- Plugins – EyeCandy 3 – Motion
Trail
if you receive an error message, .jpg) Click OK and the filter opens Click OK and the filter opens
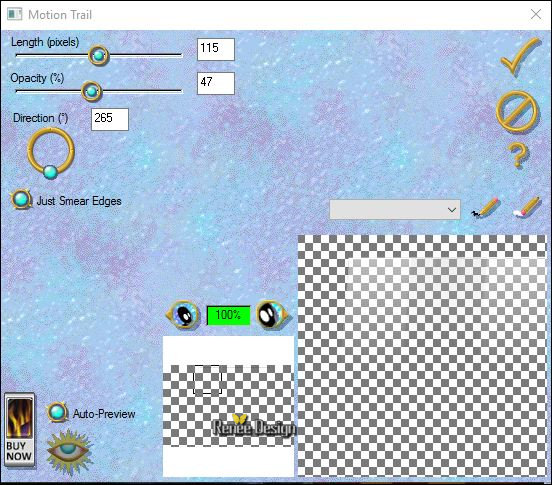
56. Layers-Properties-Set the Blend Mode to " Dodge" -Set the Opacity of this layer to 77%
57. Effects- Distortion Effects -Wave use settings below
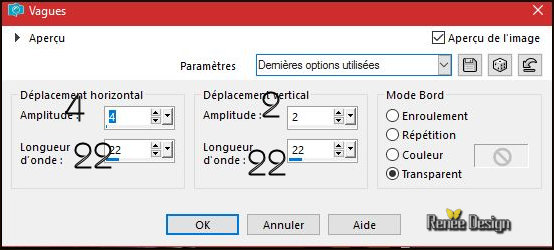
58. Open the tube ‘’ Renee_tubes_Gothique23-Oiseaux’’
- Edit - Copy- Activate your work -Edit - Paste as a new layer
-Place to your taste
58. Image - Add borders-Symmetric checked:1 pixel #5f2301
59. Image - Add borders-Symmetric checked:20 pixels #ffffff
60. Image - Add borders-Symmetric checked:1 pixel #5f2301
61. Image - Add borders-Symmetric checked:50 pixels #ffffff
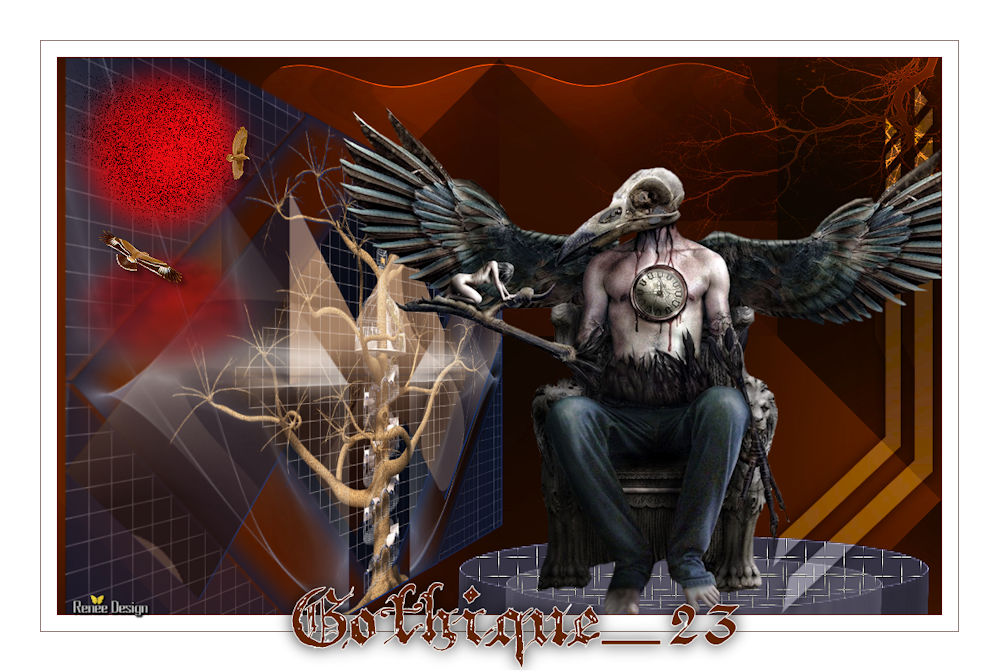
62. Open the tube ‘’le tube du titre’"Edit - Copy- Activate your work -Edit - Paste as a new layer- or write your own text
63. Layers- Merge -Merge All ( flatten)
64. Image
Resize to 999 pixels width
Save as JPG
I hope you enjoyed this lesson
Renée
This lesson was written by Renée 02/01/2017
Edited and Update
2017
*
Any resemblance with an existing lesson is a coincidence
* Do not forget to thank the people who work with us and for us I have appointed the tubeurs and translators
Thanks Renée *
*
| 
 Translations


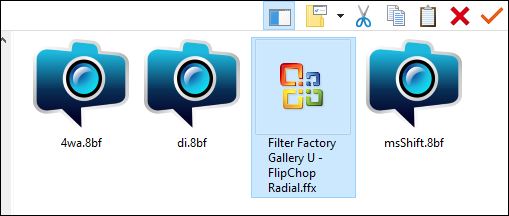

 If a plugin supplied appears with this icon it must necessarily be imported into Unlimited *


 Reset to default )


.jpg) Click OK and the filter opens
Click OK and the filter opens 


 All rights reserved
