|
Let's start the lesson.
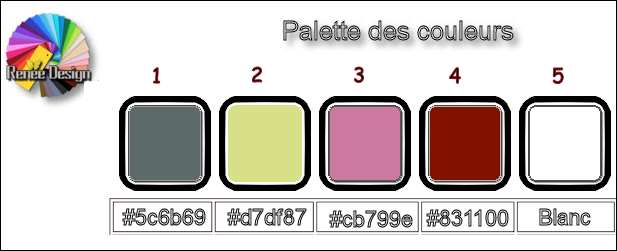
Preparation/ Material Properties: Set your foreground color to #5c6b69= Nr 1 - Set your background color to #cb799e = Nr 3

1.
Open the BG- Image ‘’Fond_Gohique_27 ‘’- Window - Duplicate (or shift+D) - Close the original and proceed on the copy -Promote Background Layer =Raster 1
2.
Layers- Duplicate
3.
Effects- Image Effects- Seamless Tiling use the settings below
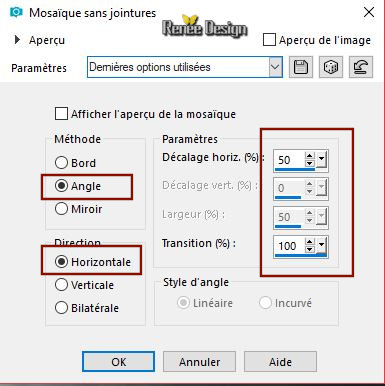
4. Adjust- Blur- Gaussian Blur- Radius 16
5.
Effects – Art Media Effects- Brush strokes use the settings below- Color white
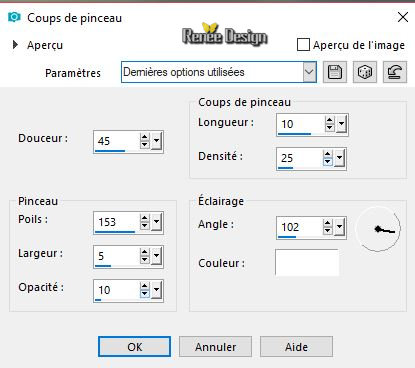
6.
Image Resize to 85 % / Resize All Layers not Checked
7.
Effects –Plugins -Unlimited - ICNETFILTERS - Buttons & Frames-
3D Glass Frame 1 with these settings 65/41
8.
Effects –Plugins - Unlimited – Filter Factory Gallery B - James
Bondage..use the settings below .
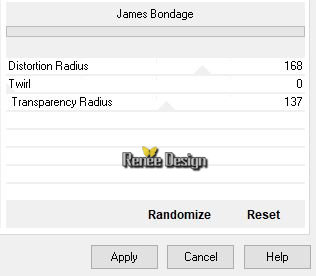
9.
Image Resize to 85 % - Resize All Layers not Checked
10.
Effects –Plugins- Unlimited – ColorRave -Color Cocktail 2.1 with these settings
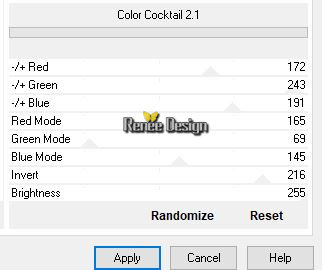
11.
Effects –Texture Effects - Mosaic Glass use the settings below
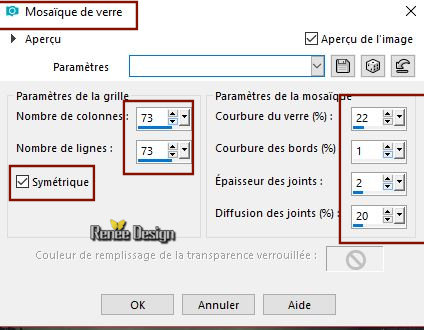
12.
Adjust- Sharpness- Sharpen
13.
Layers- New Raster Layer
14.
Selections –load/save selection –load selection from disc and select my selection: ‘’Gothique_27’’
15.
Effects –Plugins – Medhi – Wavy Lab 1.1 with these settings
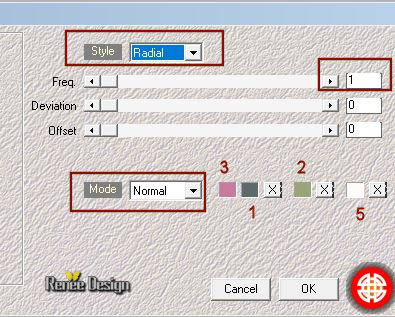
16.
Adjust- Blur- Gaussian Blur- Radius 15
Keep Selected
17.
Layers- Duplicate
18.
Layers- New Mask Layer from Image and select Mask:
‘’Mtm_Amoon’’
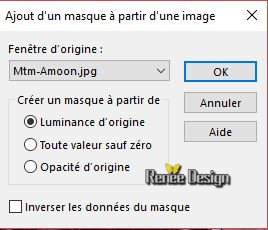
-
Layers- Merge- Merge Group
19.
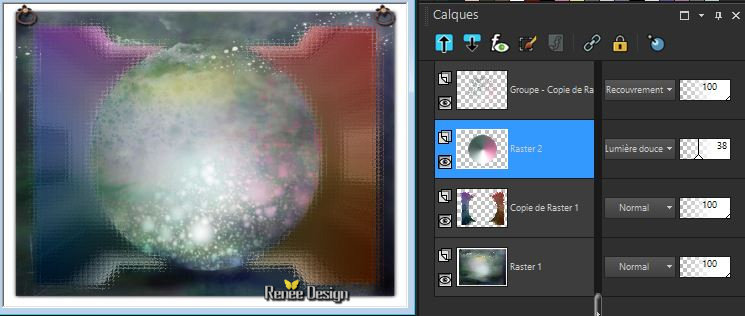
Layers-Properties :
-
Group Copy of Raster 2– Set the Blend Mode to "Overlay "
-
Raster 2 – Set the Blend Mode to "Soft Light " -Set the Opacity of this layer to 38%
Selections- Deselect All
-
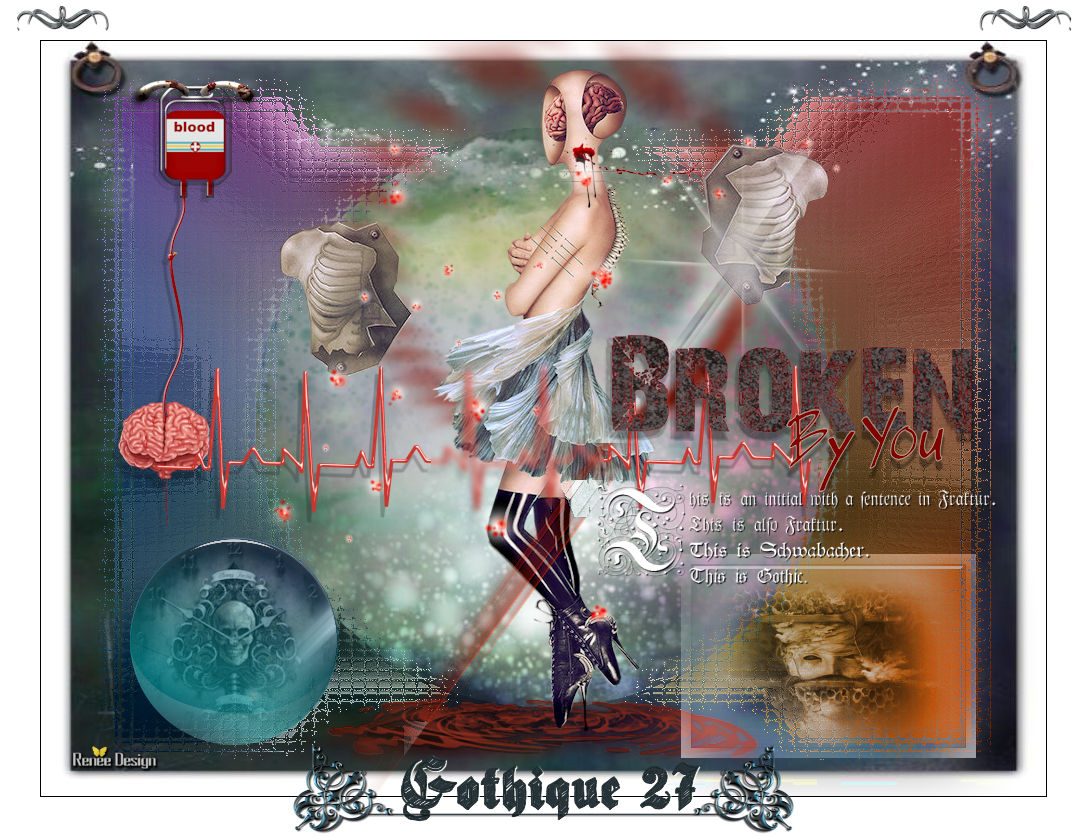
Your work and Layer Palette look like this now-You should have this result
20.
Activate the tube ‘’Gothique_27_Flaque’’
-
Edit - Copy- Activate your work -Edit - Paste as a new layer
21.
Effects- Image Effects- Offset with these settings : H= 0 and V = -314
22.
Activate the tube ‘’Renee_TUBES_Ataxia.pspimage’’
23.
Image Resize to 78%
- To replace the top of the Layer Palette
-
Edit - Copy- Activate your work -Edit - Paste as a new layer
24.
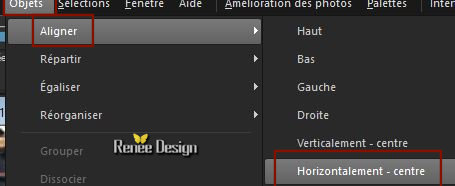
Objects – Align – Horiz-Center in Canvas
25.
Activate the tube ‘’
Renee_TUBES_ Gothique27.pspimage’( do not close)
-
Activate the Layer ‘’droit ‘ -of the tube .Edit - Copy- Activate your work -Edit - Paste as a new layer
-
Effects- Image Effects- Offset with these settings :H = 221 and V = 194
-
Activate the Layer ‘’gauche’’ of the tube - Edit - Copy- Activate your work -Edit - Paste as a new layer
-
Effects- Image Effects- Offset with these settings :H = - 198 and V = 119
26.
Layers- New Raster Layer
27.
Selections –load/save selection –load selection from disc and select my selection: ‘’Gothique_27_1’’
28.-Properties Foreground: Set the FG-Color to #ffffff
Activate Flood Fill Tool  –Flood Fill the selection with #ffffff ( click 2 or 5 times ) –Flood Fill the selection with #ffffff ( click 2 or 5 times )
Selections- Deselect All
29.
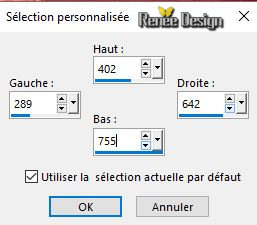
Activate Selection Tool -Custom Selection (S) -Rectangle with these settings
-Color- Palette: Set your BG- Color to #831100= Nr.4
30.
Effects –Plugins -Unlimited -
[AFS
IMPORT]-
BUGEYE using the default settings
31.
Effects- Edge Effects- Enhance More
Selections- Deselect All
32.
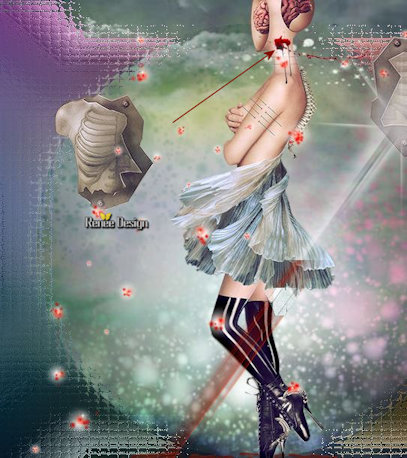
Activate the tube ‘’Gothique_27_Gouttes_sang’’
-
Edit - Copy- Activate your work -Edit - Paste as a new layer
-
With the Move Tool (M) move it as shown in the example below
33.
Activate the tube ‘’
Gothique_27_loupe.pspimage’’
-
Edit - Copy- Activate your work -Edit - Paste as a new layer
-
With the Move Tool (M) move it to the bottom left side
34.
Selections- Select All- Selections Float- Selections Defloat
35.
Activate the tube ‘’
Gothique_27_Image1.pspimage’’
36.
Layers- New Raster Layer
-
Edit - Copy- Activate your work -Edit - Paste into selection
-
Set the Opacity of this layer to 65%
-
Layers- Merge- Merge Down
37.
Effects – Plugins – Eye Candy 5 Impact – Glass use the settings below
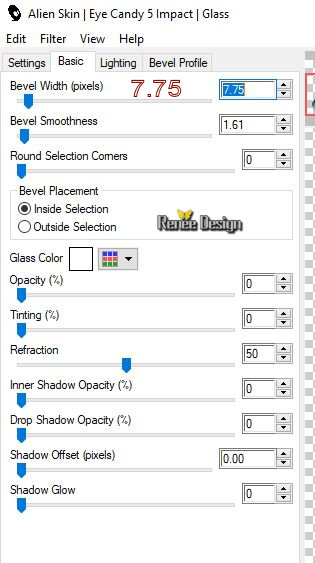
Selections- Deselect All
-
Material Properties: Set your foreground color to #831100= Nr4 - Set your background color to #ffffff = Nr 5
38.
Layers- New Raster Layer
39.
Activate Selection Tool -Custom Selection (S) -Rectangle with these settings
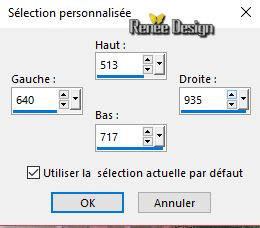
40.
Activate Flood Fill Tool
 Flood Fill the selection with the FG-Color
41.
Effects –Plugins – Render – 2d HyperClouds (into the zip)
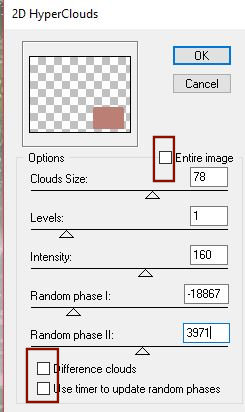
42.
Layers-Properties-Set the Blend Mode to " Exclusion "
43.
Selections- Modify- Contract with 10 pixels
44.
Effects- 3 D Effects- Drop Shadow with these settings: 2/2/100/100 Color # 5c6b69
= Nr 1
45.
Selections- Invert- Repeat:
Effects- 3 D Effects- Drop Shadow with the same settings
46.
Selections- Invert
47.
Layers- New Raster Layer
48.
Activate the tube ‘’
Renee_TUBES_atrophy’’
-
Edit - Copy- Activate your work -Edit - Paste into selection
49.
Layers- Merge- Merge Down
50.
Layers-Properties-Set the Blend Mode to " Luminance "-Set the Opacity of this layer to 69%
51.
Effects –Plugins – Eyecandy 5 Impact –Glass
with the same settings
Selections- Deselect All
52.
Layers- New Raster Layer
53.
Selections –load/save selection –load selection from disc and select my selection: ‘’Gothique_27_3’’
-
Color Palette- Swap Colors
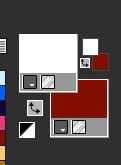
54.
Activate Flood Fill Tool
 -Flood Fill the selection with the background color -Flood Fill the selection with the background color
Selections- Deselect All
55.
Effects –Plugins- Unlimited - VM Stylize- Zoom Blur with these settings : 10/19 (be careful it's the background color that gives the color of the effect of this filter )
56.
Adjust- Blur- Radial Blur use the settings below
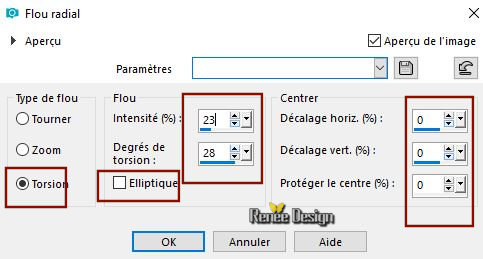
57.
Layers- Arrange Move Down ( placed under raster 4 )( the tube of the woman)
- To replace the top of the Layer Palette
58.
Activate the tube ‘’Gothique_27_Image2.pspimage’’
-
Edit - Copy- Activate your work -Edit - Paste as a new layer
59.
Effects- Image Effects- Offset with these settings :H= 0 and V = 114
60.
Layers- New Raster Layer
61.
Brush Tool and select my file: –‘’Pinceau _Gothhique -27’ with these settings

-
Stamp your brush in the right side by using your foreground color #ffffff
-
Move it in the right place
62.
Effects- 3 D Effects- Drop Shadow with these settings: 1/1/100/1 black
63.
Image - Add borders-Symmetric checked 1 Pixel Color black
64.
Image - Add borders-Symmetric checked 40 pixels Color white
65.
Activate the "titre"-Edit - Copy- Activate your work -Edit - Paste as a new layer
-
Layers- Merge- Merge All (flatten)
Save as JPG
I hope you enjoyed this lesson
Renée
This lesson was written by Renée 15-06-2018
Edited and Update
2018
*
Any resemblance with an existing lesson is a coincidence
*
Do not forget to thank the people who work with us and for us I have appointed the tubeurs and translators
Thanks
*
|
 Translations


