|
Let's start the lesson.
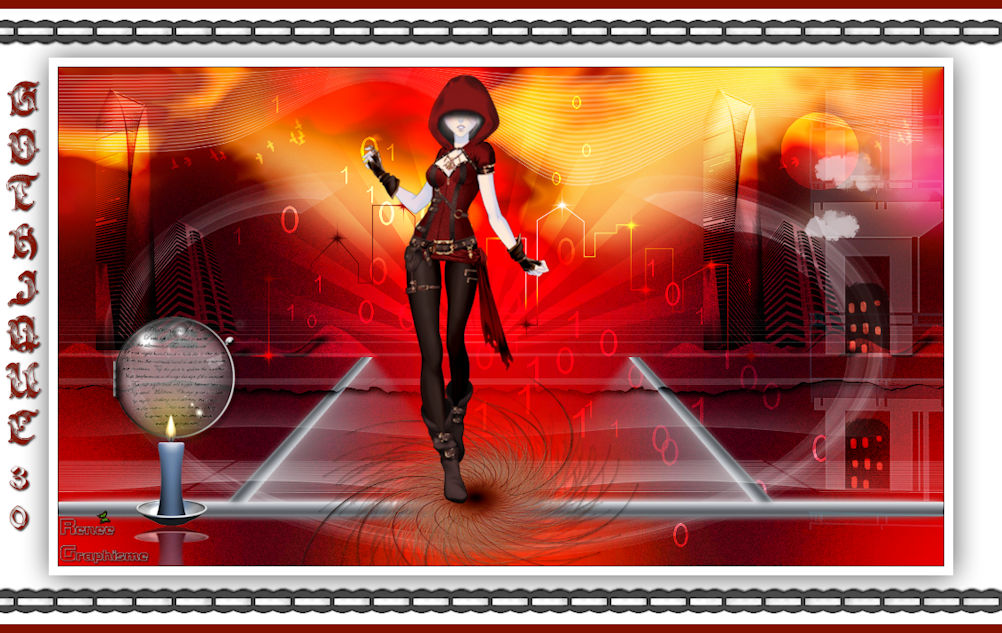
Gothique 30
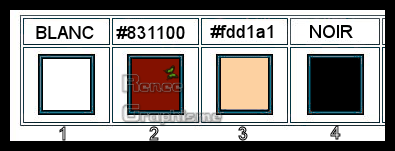
Used Colors:

- Preparation
- Color Palette: Set your foreground color to white #ffffff= 1 – Set your background color to #831100= 2
1. Open Image ‘’fond-gothique-30’’-
Window - Duplicate (or shift+D) - Close the original and proceed on the copy -Promote Background Layer = Raster 1
2. Effects –Plugins- Unlimited2.0-ICNETFILTERS
- Color Filters – Color Booster : 129
3. Layers- Duplicate
4. Effects-Plugins –
Fotomatic – Nightscope use the settings below
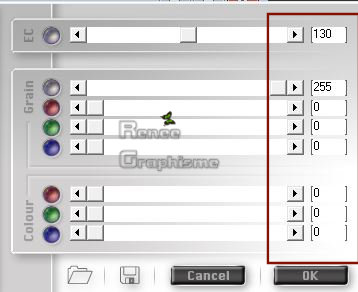
5. Layers-Properties-Set the Blend Mode to " Overlay" and lower the Opacity to 38%
6. Layers- New Raster Layer
7. Selections –load/save selection –load selection from disc and select my selection: ‘’gothique 30_1’’
8. Activate Flood Fill Tool
 -
Flood fill the layer with the foreground color -
Flood fill the layer with the foreground color
Selections- Select None
Rename this layer "trace" This layer will be deleted later
9. Layers- New Raster Layer
9a. Activate your Brush Tool-Shape Round- set as below -Blend Mode "Soft Licht "-Opacity 40 ( Reset the Brush Tool
 to get this brush)

-apply the brush slightly over the white line as shown in the example below
- Your work and Layer Palette look like this now-You should have this result

- Delete layer underneath with name" trace"
- In the Layer-Palette: Activate Raster 2
10. Effects- Plugins -
Color Rave- Atmospherizer 1.1 use the settings below ( or in Unlimited )
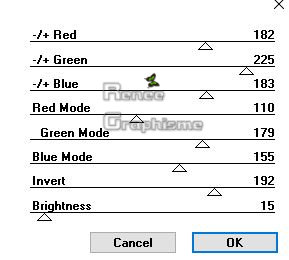
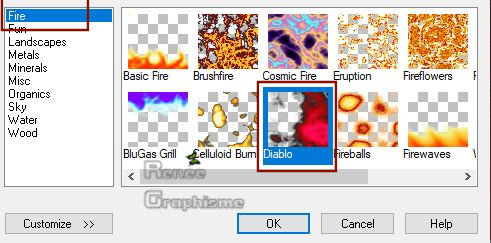
11. Effects-Plugins – X
Tras – Elemental
12. Layers- Duplicate
13.
Image - Mirror - Mirror Horizontal ( Image - Mirror in previous PSP Versions)
14.Layers- Merge- Merge Down
15. Effects- Plugins –
Fotomatic – Sky Grad use the settings below
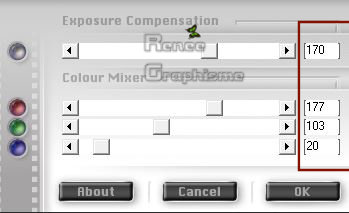
16. Activate Pen Tool use the settings below – Line
Style -Straight Line

-Click with your cursor on 450 pixels
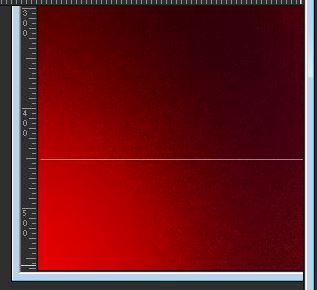
- Press the Shift Key on your Keybord and draw a white line, as shown in example above
- Convert to Raster Layer
17. Effects -Plugins-
Mura’s Meister – Copies use the settings below
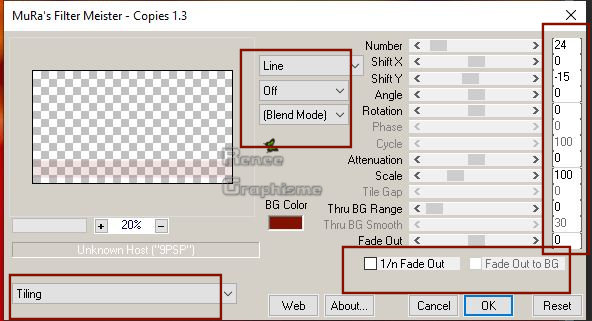
18. Layers- Duplicate
19. Effects-Plugins –
Mura’s Meister – Perspective Tilling
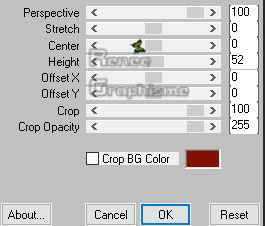
- In the Layer Palette: activate the Layer underneath
20.
Effects – Image Effects – Offset with these settings: H = 0 and V = 350
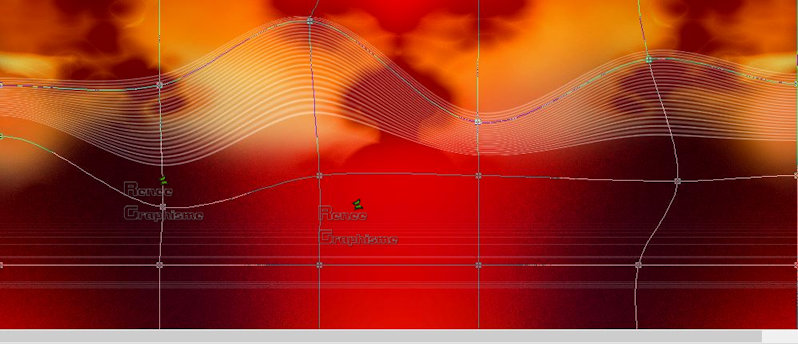
21. Tools / Mesh Warp and select my -
Preset ‘’gothique_30_deformation’’ and OK
- Or manually -Reset first to the default settings and rework like this
22. Layers-Properties-Set the Blend Mode to " Screen" and lower the Opacity to 77%
23. Activate the tube ‘’
Gothique_30_tours’’
- Edit - Copy- Activate your work -Edit - Paste as a new layer
24. Effects – Image Effects – Offset with these settings: H = 0
and V = 105
25. Layers-Properties-Set the Blend Mode to "Overlay "
- Activate the top of the Layer-Palette
26. Activate the tube ‘’
Gothique_30_barres.png’’
-Edit - Copy- Activate your work -Edit - Paste as a new layer
27. Effects – Image Effects – Offset with these settings: H = 0
and V = - 136
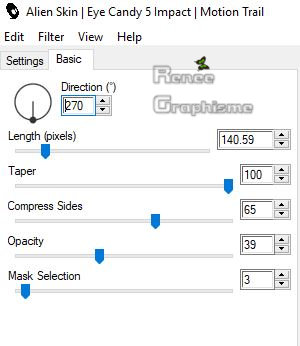
28. Effects-Plugins –
EyeCandy 5 Impact – Motion trail use the settings below
-Color Palette-Set your Foreground color to #fdd1a1= 3
29. Layers- New Raster Layer
30.
Selections –load/save selection –load selection from disc and select my selection: ‘’gothique 30_2’’
31.Activate Flood Fill Tool
 -
Flood fill the selection with the Foreground color = 3
Selections Select None
32. Layers-Properties-Set the Blend Mode to "Overlay "
33. Activate the tube ‘’
Gothique_30_nuages.png’’
- Edit - Copy- Activate your work -Edit - Paste as a new layer
- Move Tool / place your tube to the top right of your image
34. Layers-Properties-Set the Blend Mode to " Screen" and lower the Opacity to 65%
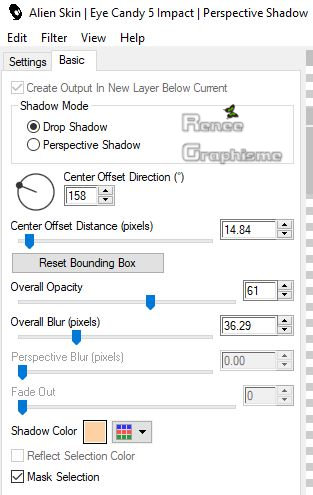
35. Effects-Plugins –
EyeCandy 5 Impact – Perspective shadow use the settings below – Foreground color
36. Activate the tube ‘’
Gothique_30_etages.png’’
-Edit - Copy- Activate your work -Edit - Paste as a new layer
37. Objects -Align -Right – put the tube raised slightly(see finished image )
38.
Layers-Properties-Set the Blend Mode to " Screen"
39. Adjust- Sharpness- Sharpen More
40.
Activate the tube ‘’ Gothique_30_fenêtres.png’’
-Edit - Copy- Activate your work -Edit - Paste as a new layer
- Activate your Move Tool (M) place it in the right place (see finished image)
41. Layers-Properties-Set the Blend Mode to " Overlay "
Color Palette- Set your Foreground color to black #000000=4
42. Layers- New Raster Layer
43. Selections –load/save selection –load selection from disc and select my selection: ‘’gothique 30_3’’
44.Activate Flood Fill Tool  - Flood fill the selection with black ( 2 clicks)
Selections Select None
45. Activate the tube ‘’
Gothique_30_vagues.png’’
-Edit - Copy- Activate your work -Edit - Paste as a new layer
- Activate your Move Tool (M) place it in the right place (see finished image)
46. Layers-Properties-Set the Blend Mode to " Screen" and lower the Opacity to 51%
47. Layers- New Raster Layer
48. Selections –load/save selection –load selection from disc and select my selection: ‘’gothique 30_4’’
49.Color Palette- Set your Foreground color to white #ffffff
-Activate Flood Fill Tool  – Flood fill the selection with the foreground color( 3 or 4 clicks)
Selections- Select None
50.
Layers-Properties-Set the Blend Mode to " Overlay "
51.
Layers- New Raster Layer
52. Selections –load/save selection –load selection from disc and select my selection: ‘’gothique 30_5’’
53.Activate Flood Fill Tool
 –
Flood fill the selection with the Foreground color #ffffff –
Flood fill the selection with the Foreground color #ffffff
Selections- Select None
54. Effects –Plugins- Unlimited 2.0 –
Dégradés- Dégradé cône simple (ab) using the default settings
- Repeat this Filter with the same settings
55. Activate the tube ‘’
Renee_TUBES_Gothique 30.pspimage’’
- Edit - Copy- Activate your work -Edit - Paste as a new layer
56. Layers- Duplicate
57. Adjust-Blur-Gaussian Blur: Radius 20
58. Layers-Properties-Set the Blend Mode to " Dodge "
-
Layers- Arrange- Move Down
59. Activate the tube ‘’
Renee_TUBES_Loupe_gothique 30’’
- Edit - Copy- Activate your work -Edit - Paste as a new layer
- Move Tool / place your tube to the left side of your image
- In the Layer-Palette -Activate Raster 2
60. Activate the tube
‘’Renee_TUBES_chiffres_gothique 30.png’’
- Edit - Copy- Activate your work -Edit - Paste as a new layer
- Activate your Move Tool (M) place the tube to your choice - Set the Blend Mode to "Soft Light "
- In the Layer-Palette -Activate Raster 2
61. Activate the tube ‘’ gothique-30
_lumiere.png’’
-Edit - Copy- Activate your work -Edit - Paste as a new layer
62. Effects – Image Effects – Offset with these settings:
H = 0 and V = -55
63.
Image - Add borders-Symmetric checked: 1
pixel Color = black #000000
64. Image - Add borders-Symmetric checked: 65 pixels Color =white #ffffff
65. Selections- Select All
66. Selections- Modify-Contract with 55 Pixels
67. Effects- 3 D Effects- Drop Shadow with these settings: 1/1/65/45 Color black
Selections Select None
68. Activate the tube ''cadre
final' -Edit - Copy- Activate your work -Edit - Paste as a new layer -Do not move
69. Activate the tube " titre png " Paste as a new Layer /Ore write your own text
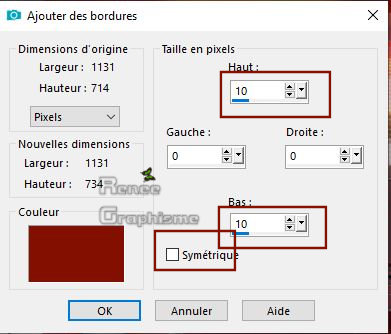
70. Image - Add Borders - Symmetric not checked - Color #831100 =2
71. Image - Resize - Width 1002 Pixels - Resize all Layers checked
Save as JPG file and you're done!
31/03/2019
I hope you enjoyed this lesson
Renée
This lesson was written by Renée 2019
Edited and Update
2019
*
Any resemblance with an existing lesson is a coincidence
* Do not forget to thank the people who work with us and for us I have appointed the tubeurs and translators
Thanks
*
|
 Translations


