|
Let's start the lesson.


-
Preparation
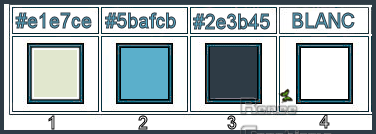
- Color Palette: Set your Foreground color to color #e1e7ce=1 – Set your Background color to color #2e3b45=3
-
Set your Foregroundcolor to foreground-background linear gradient configured like this.
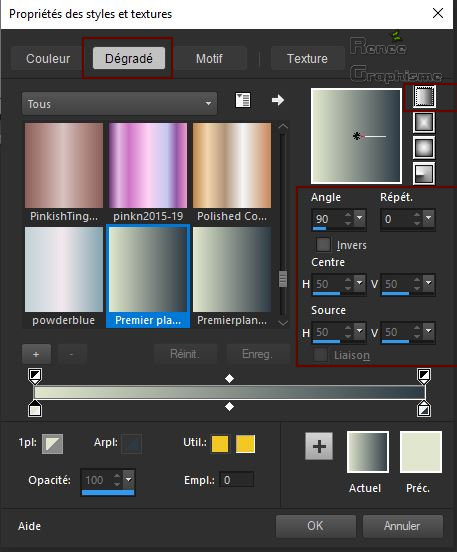
1. File: Open a New Transparent Layer 1005 x 705 Pixels
2. Activate Flood Fill Tool –
Flood fill the layer with the gradient –
Flood fill the layer with the gradient
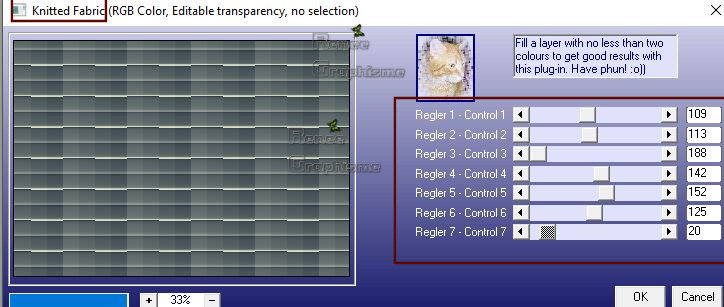
3. Effects – Plugins – Backgroundmaniac- Knitted
Fabric use the settings below
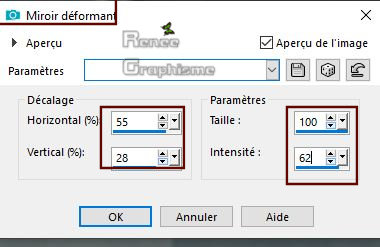
4. Effects – Distortion Effects – Warp use the settings below
5. Effects – Plugins – Balder Olrik –
Displacement Noise 2.1 with these settings
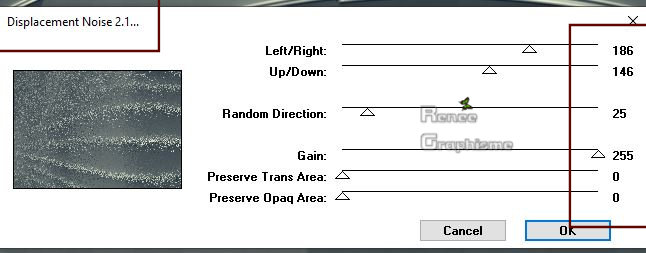
6. Effects –Plugins - Unlimited 2.0 - &<Sandflower Specials°v° >-Pool Shadow Framed
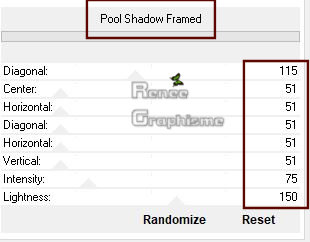
7. Effects – Image Effects- Seamless Tiling - Side By Side
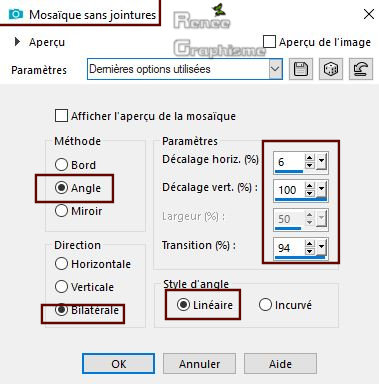
-
Repeat: Seamless Tiling use the same settings
8. Layers- Duplicate
9. Adjust- Blur- Radial Blur use the settings below
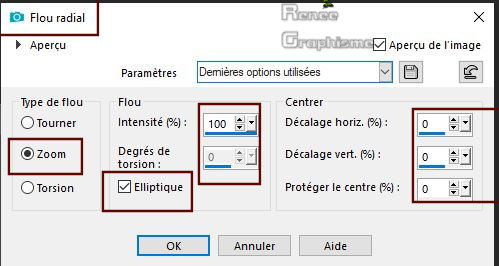
10. Effects –Plugins- Unlimited 2.0- &<Sandflower Specials°v° > -
Pool Shadow –use the default settings
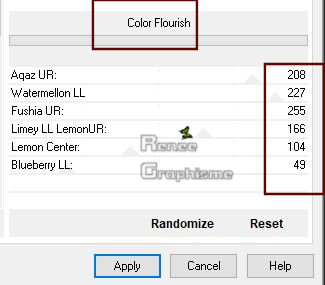
11. Effects –Plugins- Unlimited 2.0 - &<Sandflower Specials°v° >-Color
Flourish use the settings below
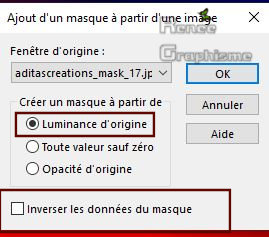
12. Layers- New Mask Layer-From Image and select Mask: ‘’aditascreations_mask_17’’
-
Layers- Merge- Merge Group
13. Effects- Edge Effects- Enhance
14. Layers- Duplicate
15. Layers- Merge- Merge Down
16. Effects –Plugins- Unlimited 2.0 - &<Bkg Designer sf10 I>-
ALFs Border Mirror Bevel and use the settings : 128/64
17. Effects –3 D Effects Drop Shadow with these settings : 5/ 12/ 70 /36 Color Black
-
In the Layer-Palette: activate the Layer underneath= Raster 1
18.Selections –load/save selection –load selection from disc and select my selection: ‘’
Gothique-31-1’’
19. Selections- Promote selection to Layer
20.
Effects –Plugins -Unlimited 2.0 – Tramages - Quilt......
46/199/126
21. Layers- Duplicate
22. Layers- Merge- Merge Down
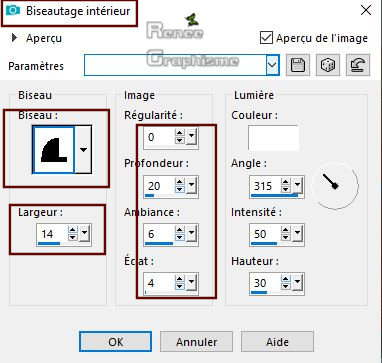
23. Effects –3 D Effects – Inner Bevel use the settings below
Selections- Select None
24. Objects – Align – Horiz. Center in Canvas
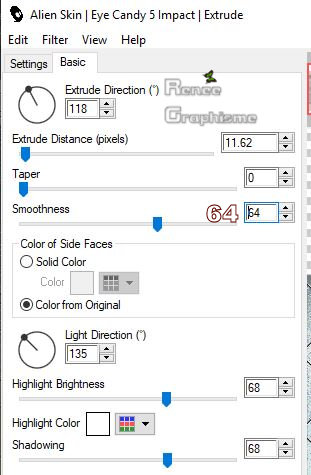
25. Effects – Plugins – Alien skin Eye Candy 5
Impact – Extrude use the settings below
26. Layers- New Raster Layer
27. Color Palette: Set your Foreground color to color #ffffff
-Activate Flood Fill Tool
 –
Flood fill the Layer with #ffffff –
Flood fill the Layer with #ffffff
28. Layers- New Mask Layer-From Image and select Mask: ‘’aditascreations_mask_44’’
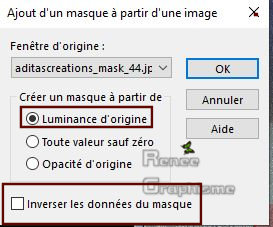
-
Layers- Merge- Merge Group
29. Selections- Select All
-
Selections- Float
-
Selections- Defloat
30.
Effects -Plugins – Alien Skin Image Doctor -
Spot Lifter use the settings below
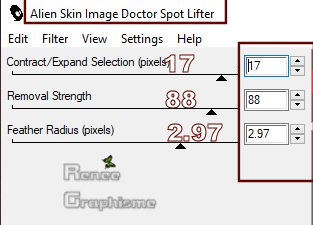
DESELECTIONNER
31. Effects –3 D Effects –Drop Shadow with these settings : 2/2/100/5 Color Black
32. Open the Tube ‘’ Gothique-31-Image 1’’
-
Edit - Copy- Activate your work -Edit - Paste as a new Layer (Do not move it is in the right place)
33. Adjust- Blur- Radial Blur use the settings below
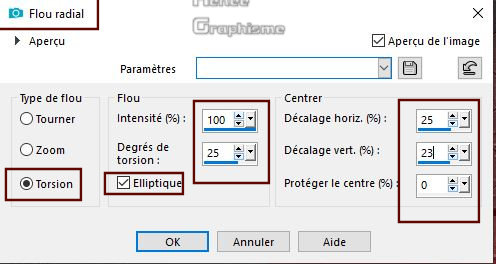
34. Effects – Plugins– Graphic plus – Cross
Shadow use the settings below
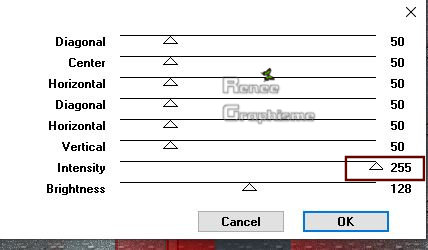
35. Effects –Plugins- Unlimited – ICNET-Filters - Tile & Mirror-
Seamless Blend (horizontal)
36. Layers-Properties-Set the Blend Mode to " Hard Light "
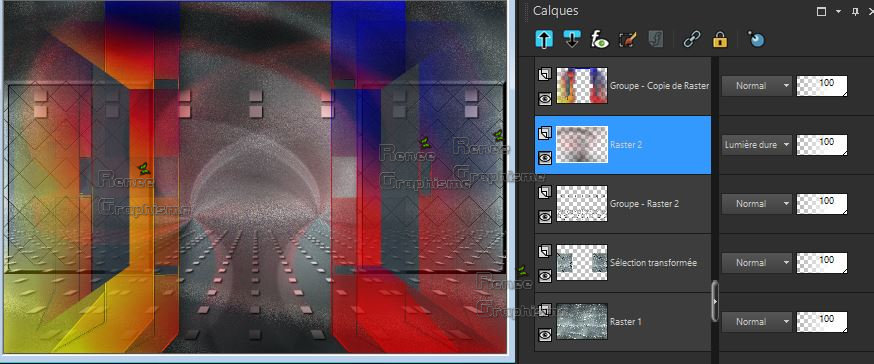
Your work and Layer Palette look like this now-You should have this result
-
To replace the top of the layer-palette
37. Layers- New Raster Layer
38.Selections –load/save selection –load selection from disc and select my selection: ‘’
Gothique-31-2’’
39. Activate Flood Fill Tool
 Opacity 40% - Flood fill the selections with #ffffff
Change the Opacity of the Color to
100%
40.
Effects –Plugins- Unlimited 2.0 - &<Bkg Designer sf10 III> - SW
Hollow Dot
Selections- Select None
41. Effects –3 D Effects –Drop Shadow with the same settings
-
In the Layer-Palette: Activate ‘’Group – Raster 2"
42.Open tube ‘’Gothique-31-Image 2.pspimage’’ Edit - Copy- Activate your work -Edit - Paste as a new Layer
43. Objects – Align -Bottom
-
To replace the top of the layer-palette
44. Open the tube ‘’TUBES_Tuto-Gothique31’ (Do not close )
Activate Raster 1 of the tube
-
Image Resize to 60%
45. Edit - Copy- Activate your work -Edit - Paste as a new Layer
-
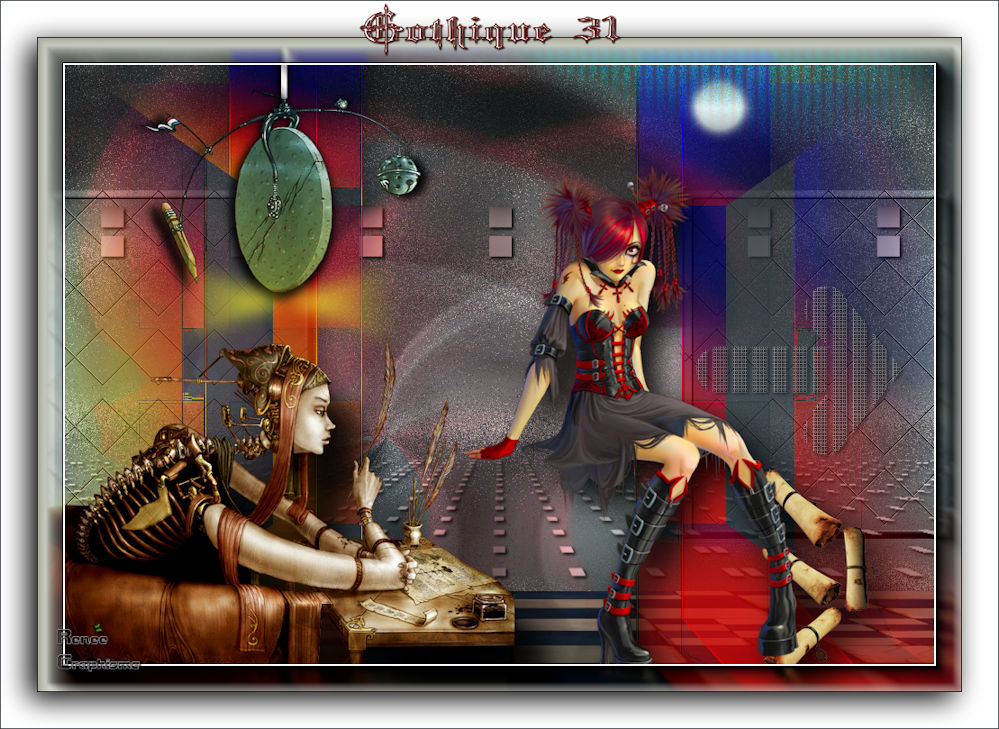
Activate your Move Tool (M) move the tube to the bottom left side (see finished image)
46. Effects – Plugins – Alien skin Eye candy 5
Impact – Perspective shadow – Preset : Drop Shadow
Higher
-Back on tube -Activate Raster 2 of the same tube
47. Edit - Copy- Activate your work -Edit - Paste as a new Layer
-
Activate your Move Tool (M) place the tube in the right place (see finished image)
48. Effects –Plugins – Alien skin Eye candy 5
Impact – Perspective shadow – Preset : Drop Shadow Blury
49. Open tube ‘’Renee_TUBES_ Gothique-31-Roue’’ Edit - Copy- Activate your work -Edit - Paste as a new Layer
-
Activate your Move Tool (M) move the tube to the top left side (see finished image)
- Color Palette: Set your Foreground color to color #e1e7ce=1 – Set your Background color to color #2e3b45=3
-
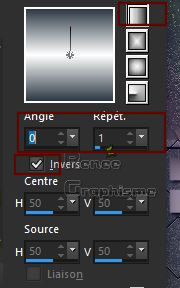
Set your Foregroundcolor to foreground-background linear gradient configured like this.
50. Layers- New Raster Layer
51.Selections –load/save selection –load selection from disc and select my selection: ‘’
Gothique-31-3’’
52. Activate Flood Fill Tool
 -
Flood fill the selection with the gradient ( click 2 or 3 times) -
Flood fill the selection with the gradient ( click 2 or 3 times)
Selections- Select None
-
Color Palette: Set your Foreground color to color #5bafcd=2
53. Layers- New Raster Layer
54.Selections –load/save selection –load selection from disc and select my selection: ‘’
Gothique-31-4’’
55. Activate Flood Fill Tool
 –
Flood fill the selection with the foreground color #5bafcd =2 ( click 2 times) –
Flood fill the selection with the foreground color #5bafcd =2 ( click 2 times)
Selections- Select None
56. Effects –Plugins- Unlimited 2.0 - Andrew's Filter Collection
56 - Behind Random Lines..use the default settings
57. Image - Add borders-Symmetric checked 1 Pixel Color #2e3b45 = 3
58. Image - Add borders-Symmetric checked 10 Pixels Color #e1e7ce=
1
59. Selections- Select all
60. Image - Add borders-Symmetric checked 40 Pixels Color #ffffff
61. Effects – 3D Effects – Drop Shadow with these settings : 8/ -9/100/45 Color Black
62. Effects –Plugins– AAA Frame – FOTOFRAME
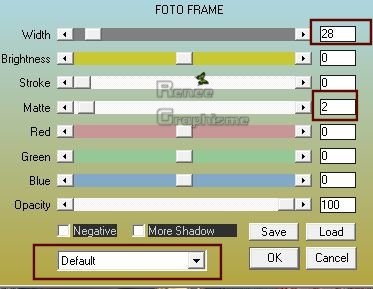
Selections- Select None
63. Image - Add borders-Symmetric checked 1 Pixel Color #2e3b45 = 3
64. Activate Text Tool - Renée choose font ''minster6''(Included into the zipfile) Write : Gothique 31
(Renée used the colors red and white)
65. Layers- Merge- Merge All (flatten)
66. Image -Resize to 999 Pixels Width.
Save as JPG
I hope you enjoyed this lesson
Renée
This lesson was written by Renée 25 - 07 -2019
Edited and Update
2019
*
Any resemblance with an existing lesson is a coincidence
* Do not forget to thank the people who work with us and for us
I have appointed the tubeurs and translators
Thanks
|

 Translations


