|
Gothique_8
Let's start the lesson .

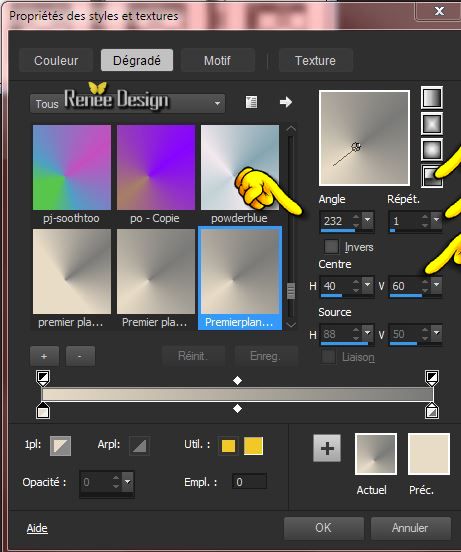
1. Material Properties: Foreground color to this color:#e9dcc7 Background color to this color : #7a7a78
- Prepare a Radial Gradient as configured like this.
2. Open a new transparent image of 945
x 725 pixels
- Activate Flood Fill Tool and fill the layer with the gradient
3. Effects- Plugins-
AP [Utility]-Reflexion
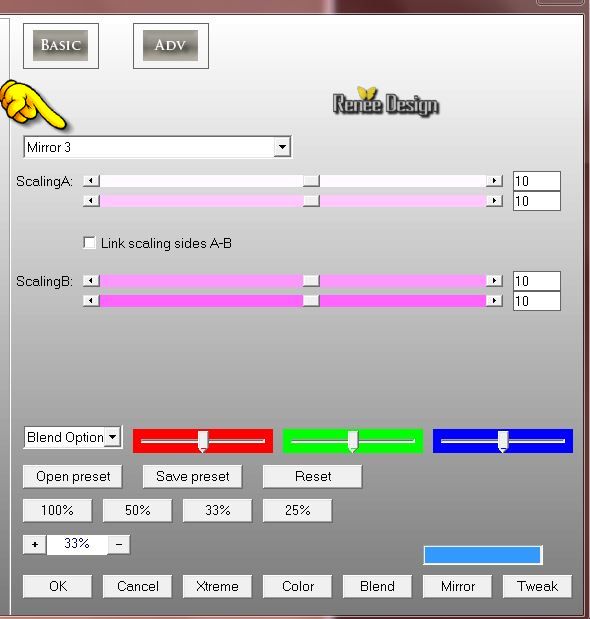
4. Repeat : Plugins-
AP [Utility]-Reflexion and choose: ''Mirror5 ''
5. Layers-Duplicate
6. Adjust- Blur- Gausian Blur: Radius: 19
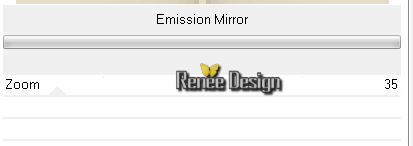
7. Effects- Plugins - Unlimited 2.0 -
Filter factory Gallery C /Emission Mirror
8.
Effects- Edge Effects- Enhance
9.
Image -Negative Image
10.
Activate the tube ''Renee_gothique_8_demon.pspimage''
-
Edit/copy-Edit paste as a new layer on your working area
11.
Selections - load/save selection - load selection from disk and choose my selection: ''gothique_8_1''
12.
Promote selection to Layer
-
Layer Palette -Double click on this Layer and set the Blend Mode to "Screen "
Selections-Deselect All
13.Layers-Duplicate - Layer Palette -Double click on this Layer and set the Blend Mode to "Normal "
14.
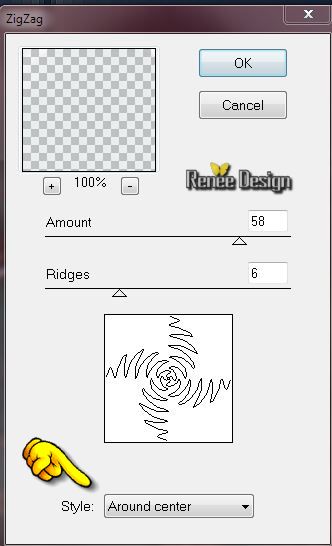
Effects- Plugins - Distort - Zig Zag
15.
Layer Palette: activate Raster 2
(image''Renee_gothique_8_demon)
-Activate your Pick Tool (K) Mode Scale -Stretch against the four edges of the working image
16.
Activate the bottom of the Layer-Palette =Raster 1
17.
Layers- Arrange- Move Up (above copy of
Raster 1)
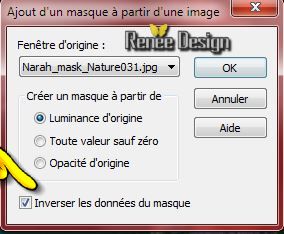
18. Layers-New Mask Layer From Image and choose Mask:''Narah_mask_Nature031.jpg''
-
Layers- Merge- Merge Group
19.
Effects- User Defined Filter - Emboss 3 Default
20.
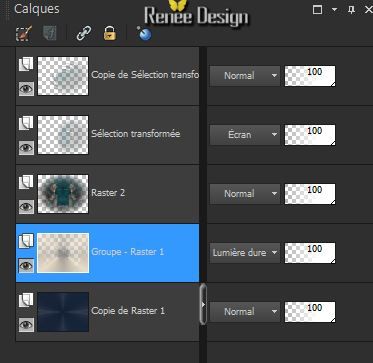
Layer Palette -Double click on this Layer and set the Blend Mode to "Hard Light "
This is the result:
21.
Layers- Merge-Merge Visible
22.
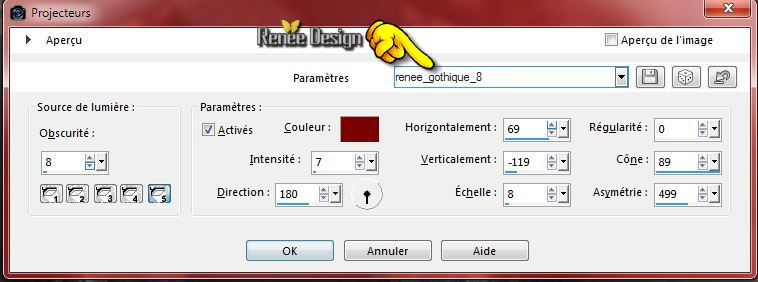
Effects- Illumination Effects- Lights- and choose my preset ''Preset_Lights_renee_gothique_8''/Color #7B0000
23.Layers- New Raster layer
24.
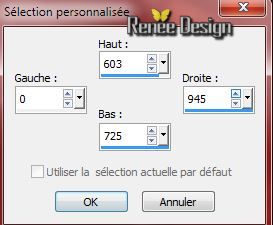
Selection Tool ( S ) Custom selection use settings below 
25.
Pot of Paint Opacity 30% - Activate Flood fill tool and fill the selection with color white
Selections-Deselect All
26.
Effects - Image effects - Seamless tiling with these settings
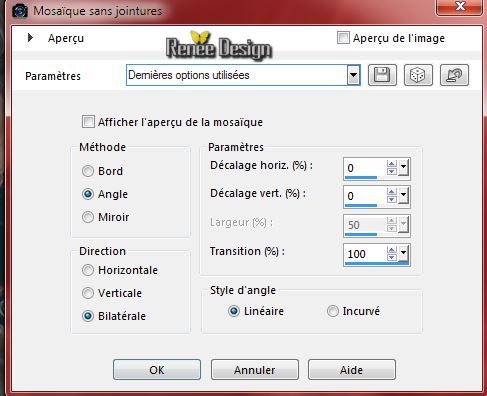
27.
Effects- Distortion Effects- Warp use settings below
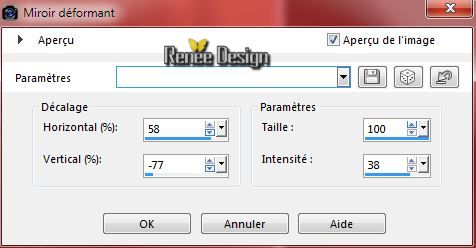
28.
Layer Palette -Double click on this Layer and set the Blend Mode to "Screen "
29.
Layers- Merge-Merge Visible- Rename
''Raster 1''
30.
Layers-Duplicate
-
Image Resize 70% -(Resize all the layers not checked)
31.
Layers- New Raster layer
32.
Selections - load/save selection - load selection from disk and choose my selection: ''gothique_8_2''
- Pot of Paint Opacity 100%- Activate Flood fill tool and fill the selection with this color :#18545a
Selections-Deselect All
33.
Effects- Plugins- - EyeCandy 5 - Extrude-tab Settings/User Settings and choose my Preset
''renee_gothique_8_extrude''
34.
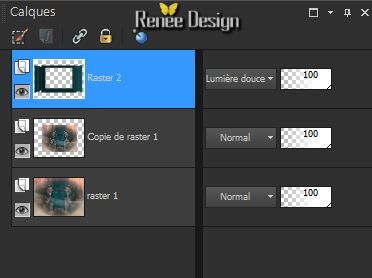
Layer Palette -Double click on this Layer and set the Blend Mode to "Soft Light "
This is the result:
35.
Layers- Merge- Merge Down
36. Effects-Distortion Effects-Lens Distortion-Pincushion use settings below
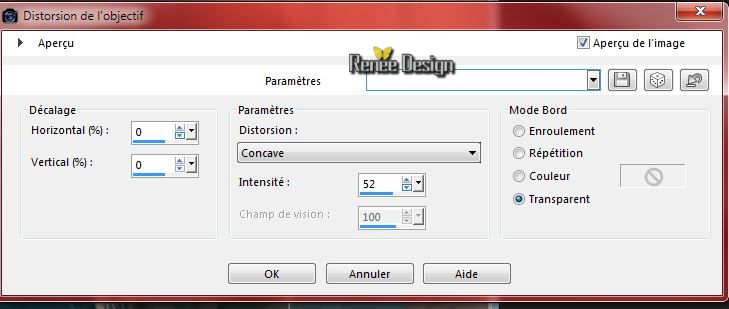
37.
Effects - 3D Effects - Drop shadow with these settings:
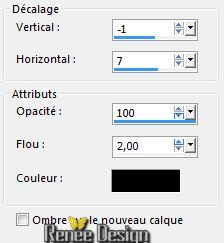
38.
Effects - Images Effects - Offset use settings below
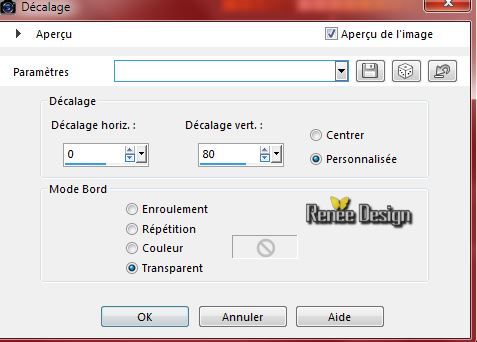
39. Effects- Plugins - Flaming Pear
Flood- and select my preset: ''Gothique_8_Flood settings.q8r''
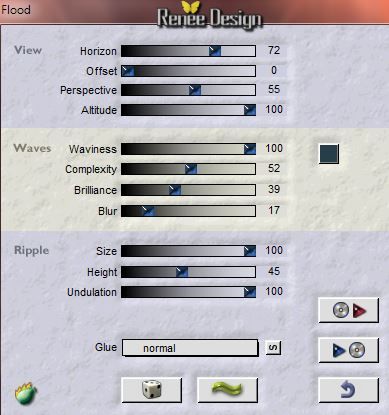
- Activate the bottom of the Layer-Palette = "raster 1"
40.
Adjust- Blur- Gaussian Blur: Radius: 32%
-
Stay on this layer= raster 1
41.
Activate the tube '' gothique_8_bordures.pspimage''-
Edit/copy-Edit paste as a new layer on your working area
-Layer Palette -Double click on this Layer and set the Blend Mode to"Luminance Legacy " Reduce the opacity of this layer to 51%
42.
Effects - Images Effects - Offset use settings below

- Activate the top of the Layer-Palette
43.Activate the tube ''tube danimage arbe magique.pspimage''-
Edit/copy-Edit paste as a new layer on your working area
44.
Effects - Images Effects - Offset use settings below H = 0 and V = -100
/ Transparent
45. Effects- Plugins - Flaming Pear Flood -and select my preset:
''Gothique_8_-Flood-2.q8r''
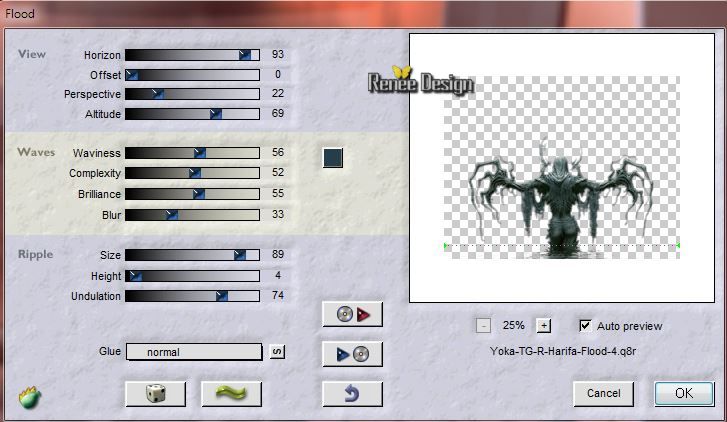
46.
Activate the tube ''gothique_8_billes''
-Edit/copy-Edit paste as a new layer on your working area
47.
Effects - Images Effects - Offset use settings below H= 0 and V = -220
/ Transparent
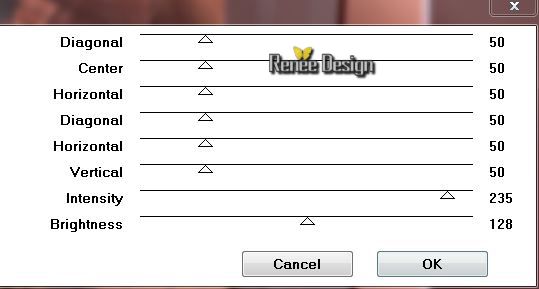
48.
Effects- Plugins - Graphic plus - Cross shadow
49. Activate the tube
''1Patries_HW49-encore_by_monstror-28-3-10-small''
50. Image Resize 68%
-
Edit/copy-Edit paste as a new layer on your working area
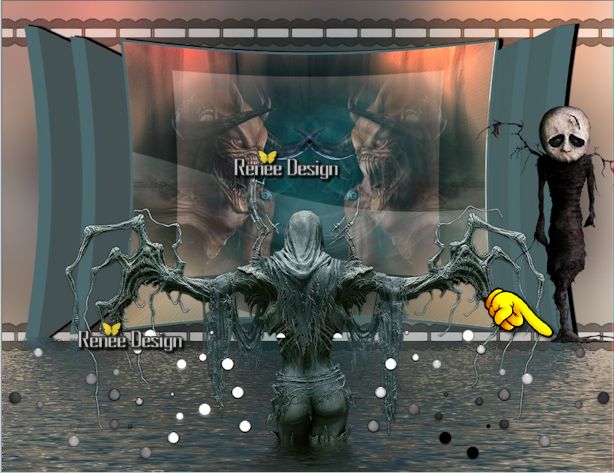
-
With your Move Tool move as shown in the example below
51.
Activate the tube "SCS_GIBT_GothJourExp_IronCandle"
-
Edit/copy-Edit paste as a new layer on your working area
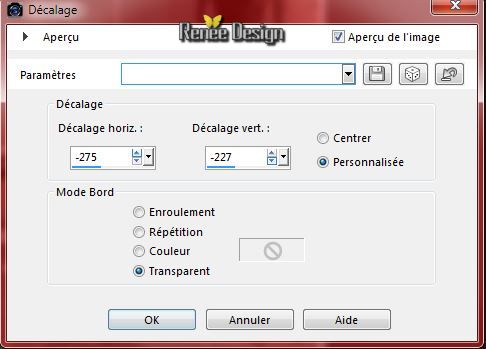
52.
Effects - Images Effects - Offset use settings below
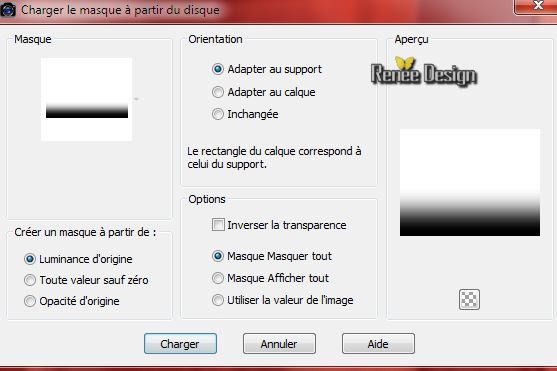
53.
Layers- Layers-load/save Maske Load Mask from Disk and select Mask:''!!!!.mask.ket01''
-
Layers- Merge- Merge Group
54.
Effects- Plugins Graphic plus - Cross
Shadow( with the same settings )
55.
Layers- Merge-Merge Visible
56.
Image - Add borders-Symmetric checked: 10 pixels color black
57.
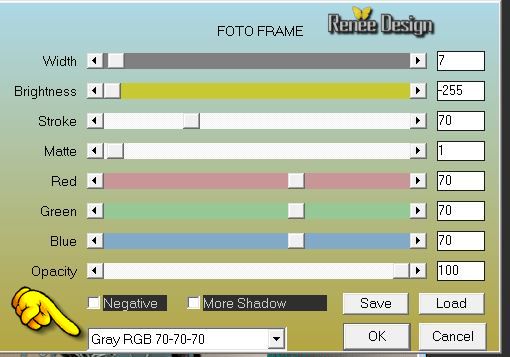
Effects- Plugins - AAA Frame - Foto
Frame
58.
Image - Add borders-Asymmetric- Color #18545a
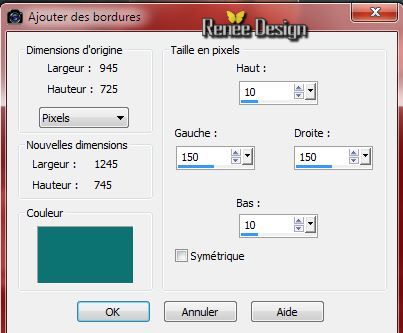
59.With the magic wand select Asymmetric border
60.
Layers- New Raster layer
61.
Material Properties: Foreground color to this color : #3e2a70 Background color to this color : #7a7a78
-
Prepare a Radial Gradient as configured like this.
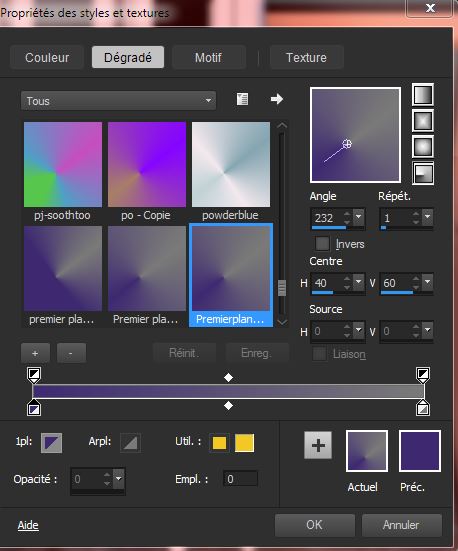
62.
Activate Flood fill tool and fill the selection with the gradient
63.
Adjust- Blur- Gausian Blur: Radius: 60%
64.
Selections- Invert
65. Effects- Plugins - Eyecandy 5 Perspective shadow-tab Settings/User Settings and choose my Preset ''
gothique_8_renee_persp"
Selections-Deselect All
66.
Activate the tube '' vleerrmuis_sissy'' - Edit/copy-Edit paste as a new layer on your working area and move
-Layers- Duplicate 2x and place .Blend Mode your choice
67. Open the alphabet
'' Cherokee_Filagree
Alphapour '' select the letters- Edit - Copy -Edit - Paste as new layer on your working area and move .Ore write your own text
68.
Layers- Merge-Merge All
69.
Image - Add borders-Symmetric checked: 1 pixel color black
70.
Image Resize 995 pixels Width
Save as JPG
I hope you enjoyed this lesson
Renée
This lesson was written by Renée 25/09/2014
Created the
10/2014
*
Any resemblance with an existing lesson is merely a coincidence *
* Don't forget to thank the people who work for us and with us. I named the tubeurs - Testers and the translators.
Thanks Renée.
*
|