|
Let's start the lesson
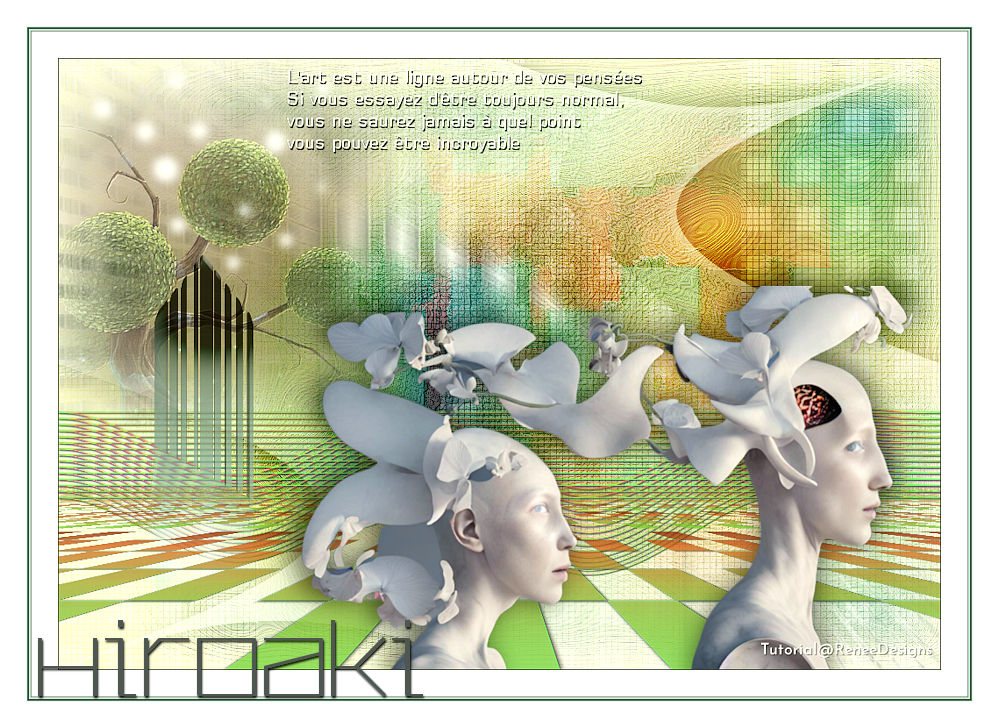
HIROAKI
1.
Open the Background Image ‘’Fond-Hiroaki’’ –Promote Background Layer =Raster 1
2.
Layers- Duplicate
3.
Image - Mirror - Mirror vertical ( Image - Flip in older versions of PSP)
-
Layers-Properties-Reduce the Opacity of this layer to 55%
4.
Layers- Merge- Merge Down
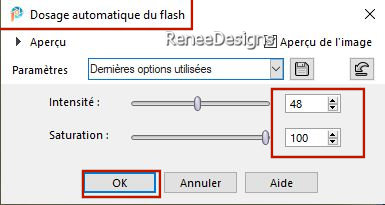
5.
Adjust – Fill Flash use the settings below
6.
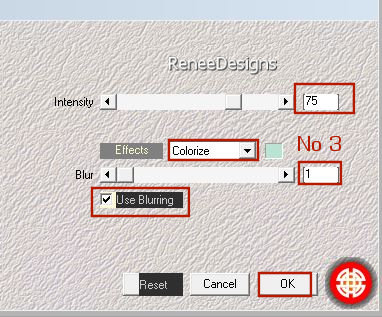
Effects – Artistic Effects– Enamel use the settings below – Color #bfbb64
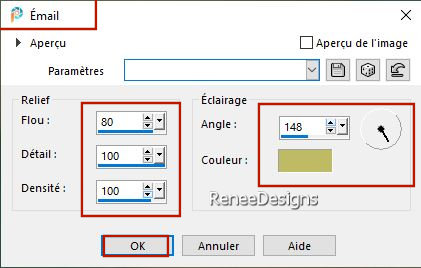
-
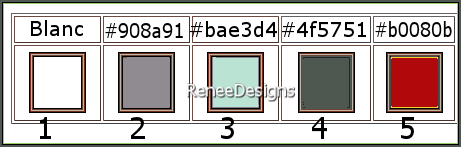
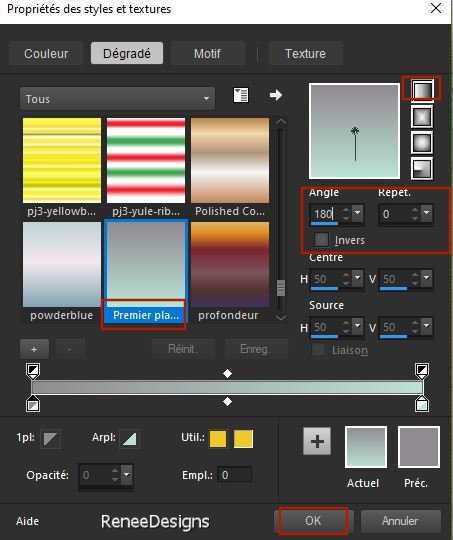
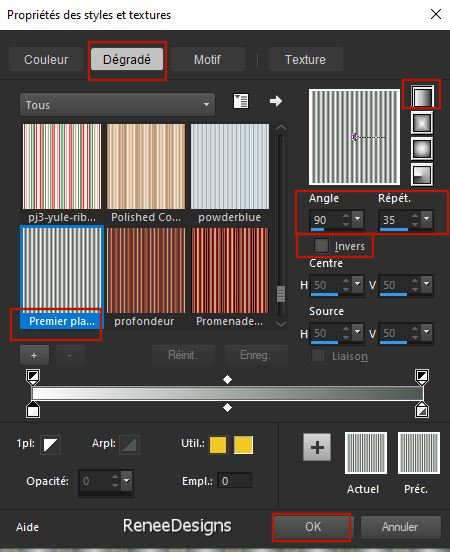
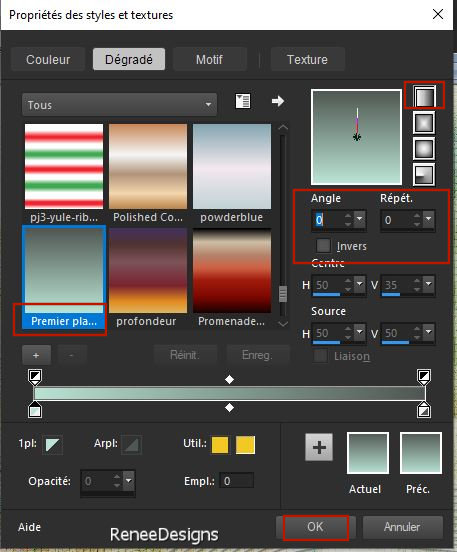
Material Properties: Set your foreground color to color #908a91=color 2 – Set your background color to color #bae3d4=color 3
-Properties Foreground- Prepare a foreground/background linear gradient configured like this
7.
Layers- New Raster Layer
8. Flood Fill Tool
 –
Fill the layer with the gradient –
Fill the layer with the gradient
9.
Effects - Distortion Effects- Wave use the settings below

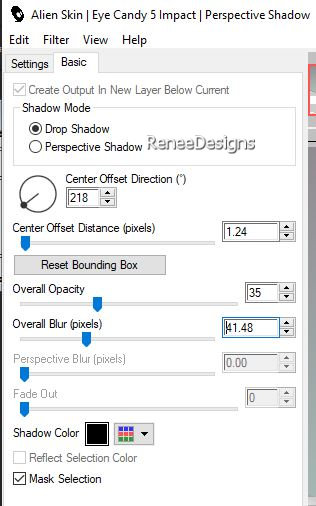
10.
Effects - Plugins - Alien Skin EyeCandy 5 -
Impact – Perspective Shadow use the settings below
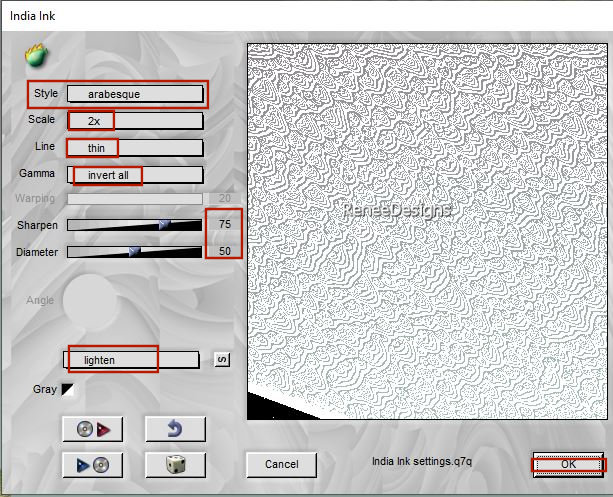
11.
Effects –Plugins – Flaming Pear- Indian Ink with these settings
( if needed its activation code is 36478740)
12.
Layers-Properties-Set the Blend Mode to " Hard Light " - Reduce the Opacity of this layer to 48%
13.
Layers – Duplicate
14.
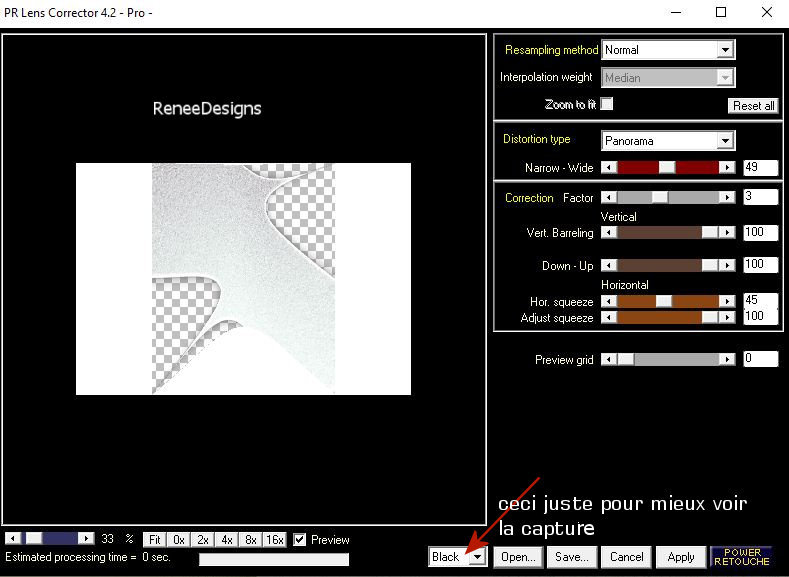
Effects – Plugins – Power Retouche – PR Lens
Corrector use the settings below
15.
Effects –Plugins Unlimited 2.0 - Sapphire Filters 08 -
SapphirePlugin_0792... using the default settings
16.
Layers-Properties-Set the Blend Mode to " Overlay " - Reduce the Opacity of this layer to 51%
-
Material Properties: Set your foreground color to color #b0080b=color 5 – Set your background color to color #4f5751=color 4
-
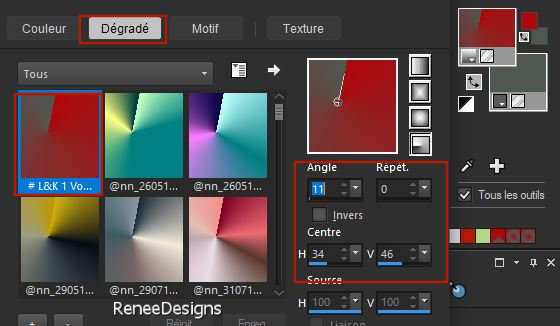
Properties Foreground - Select Gradient # L&K 1 Voorgrond-achtergrond
-
Properties Foreground- Prepare a foreground/background radial gradient configured like this
17.
Layers- New Raster Layer
18.
Flood Fill Tool
-
Fill the layer with the gradient
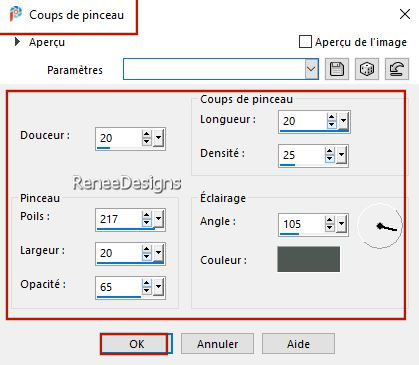
19. Effects – Art Media Effects– Brush Strokes use the settings below / Color #4f5751= 4 (allow time for the effect to be realized)
20.
Image-Rotate left
21.
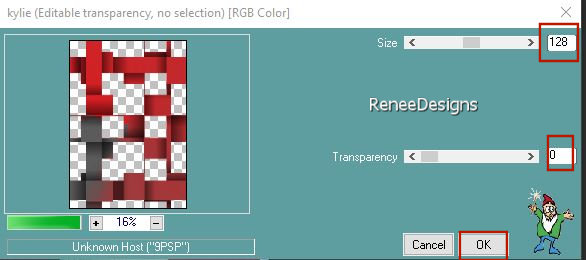
Effects – Plugins– Photoshopfun II – Kylie use the settings below

22.
Effects – Plugins – Photoshopfun II – Kylie use the settings below
23.
Effects – Art Media Effects– Brush Strokes with the same settings - Color #4f5751= 4
24.
Image – Rotate right
25.Image - Resize by 75% - Uncheck - Resize all layers
26.
Effects - Plugins - Filters inUnlimited 2.0 - VM
Toolbox - Softborder... use the default settings
27.
Layers-Properties-Set the Blend Mode to "Overlay "
28.
Adjust- Sharpness- Sharpen More
29.
Effects - Plugins – Transparency- Eliminate
White
-
Material properties: Set foreground color to #ffffff=color 1 -The background color remains at color 4
-
Prepare a foreground/background linear gradient configured like this
30.
Layers- New Raster Layer
31.
Flood Fill Tool
–Fill the layer with the gradient
32.
Selections –load/save selection –load selection from disc and select my selection: ‘’ Hiroaki-1’’


33.
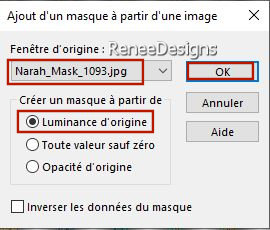
Layers- New Mask Layer -From Image and select Mask ’’ Narah_Mask_1093’’
-
Layers- Merge- Merge Group
34.
Effects – Edge Effects– Enhance
35.
Effects – Plugins – Medhi – Edges FX use the settings below -Color #bae3d4= 3
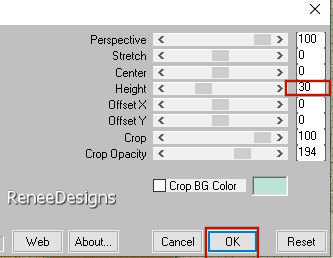
36.
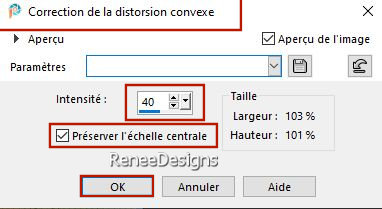
Adjust- Barrel Distortion Correction with these settings
- View-Turn on your ruler in your PSP
37.
Aktivate your Pen Tool (V): - Line Style:– Solid line – Width 2 -Foreground color on color white

- Place your pen at 500 pixels - Shift key pressed - Draw a horizontal line
-
Convert to Raster Layer
38.
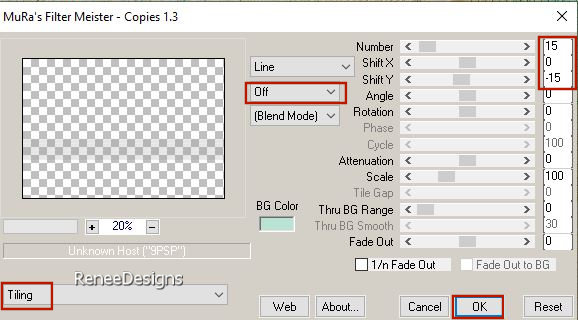
Effects – Plugins – Mura’s Meister – Copies use the settings below
39.
Layers- Duplicate
40.
Layers- Arrange- Move Down
- To replace the top of the layer-palette
41.
Mesh Warp Tool - select my file ''Hiroaki'' -Click on preset - Effect will apply-(Place in the presets folder)

42.
Layers- Merge- Merge Down
43.
Effects – 3D-Effects – Drop Shadow with these settings: 1/1/100/1 -Color #4f5751= 4
44.
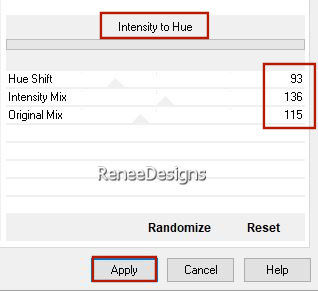
Effects - Plugins - Filters in Unlimited 2.0 -
Color Effects - Intensity to Hue use the settings below
-
Material properties: Set foreground color to #bae3d4 =color 3 -The background color remains at color 4
-
Properties Foreground- Prepare a foreground/background linear gradient configured like this
45.
Layers- New Raster Layer
46.
Selections –load/save selection –load selection from disc and select my selection: ‘’ Hiroaki-2’’
47.
Flood Fill Tool
–
Fill the selection with the gradient
48.
Effects - Plugins- Alien Skin EyeCandy 5 -
Impact – Extrude -Tab- Settings- User settings and select my file-Preset ‘’Hiroaki-Extrude’’
49.
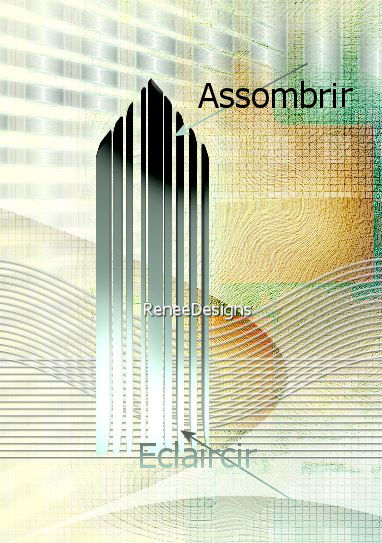
Activate Lighten/Darken Brush Tool (L) with these settings

Left click to Lighten (gently drag the mouse up and down) on the base of the tube
Right click to Darken (on the top of the tube)
- You have approximately this result
50.
Selections –load/save selection –load selection from disc and select my selection: ‘’ Hiroaki-3’’
51.
Adjust- Blur- Gaussian Blur- Radius 8%
52.
Layers-Properties-Reduce the Opacity of this layer to 73%
53.
Open the Tube ‘’
Renee-TUBES-Novembre-2022- 3’’ -Edit - Copy- Activate your work -Edit - Paste as a new layer
54.
Pick Tool: (K) on your keyboard -Enter these parameters on the toolbar
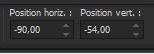 -
90 /- 54 -
90 /- 54
Press ( M ) to close the Pick Tool
55.
Layers- Arrange- Move Down
56.
Effects – Plugins - FM Tile Tools – Blend Emboss
using the default settings
57.
Layers-Properties-Reduce the Opacity of this layer to 65%
- To replace the top of the layer-palette
58.
Layers- New Raster Layer
59.
Selections –load/save selection –load selection from disc and select my selection: ‘’ Hiroaki-4’’
60.
Color Palette- Set your Foreground color to color #ffffff=1
Flood Fill Tool –
Fill the selection with the foreground color #ffffff=1
61.
Adjust- Blur- Gaussian Blur- Radius 5%
62.
Layers- New Raster Layer
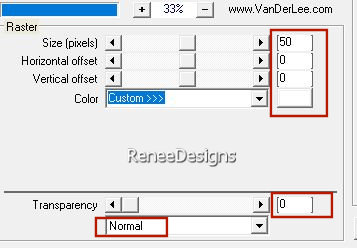
63.
Effects – Plugins – Vanderlee – Unplugged X-
Raster use the settings below- Color White
64.
Selections –load/save selection –load selection from disc and select my selection: ‘’ Hiroaki-5’’
65.
Material properties: Set foreground color to #bae3d4 =color 3 -The background color remains at color 4
-
Properties Foreground- Prepare a foreground/background linear gradient with the same settings (step 44)
Flood Fill Tool – Opacity 50% –Fill the selection with the gradient
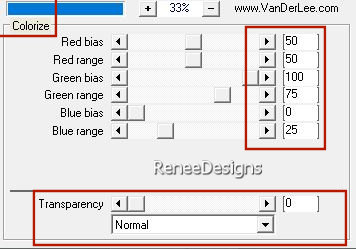
66.
Effects – Plugins– Vanderlee – Unplugged X-
Colorize use the settings below
67.
Effects – 3D-Effects – Drop Shadow with these settings: 2/1/100/12 Color Black
68.
Effects – Plugins- Mura’s Meister – Perspective
Tiling use the settings below
69.
Open the Tube‘’Renee-TUBES-Hiroaki-Texte’’ - -Edit - Copy- Activate your work -Edit - Paste as a new layer – Place according to your taste
70.Open one of the tubes from the folder -Paste as a new layer - Resize as needed
71.
Apply a Drop Shadow – ( Renée chose this Drop Shadow- Plugins Eyecandy 5 – Preset
‘’Hiroaki- Shadow’’)
72.
Image - Add borders-Symmetric checked: 1 Pixel -Color #4f5751 =4
Image - Add borders-Symmetric checked: 30
Pixels -Color #ffffff =1
Image - Add borders-Symmetric checked: 1
Pixel -Color #908a91 =2
Image - Add borders-Symmetric checked:2
Pixels -Color #bae3d4 =3
Image - Add borders-Symmetric checked:2
Pixels -Color #4f5751 =4
Image - Add borders-Symmetric checked: 1
Pixel -Color #bae3d4 =3
Image - Add borders-Symmetric checked: 30
Pixels -Color #ffffff =1
73.
Image- Resize to 999 Pixels width
74.
Effects – Plugins- AAA Filters – Custom –
Landscape using the default settings
75.
Activate Text Tool –with font of your choice -Renée chose the font "Community Thin" Size 92 – ( font is included with the material)
Write - HIROAKI
76.
Effects – 3D-Effects – Drop Shadow with these settings: 2/1/100/3 Color Black
77.
Paste the author's watermark on your work and your own watermark.
78.
Layers- Merge- Merge All (flatten)
Save as JPG
I hope you enjoyed this lesson
Renée
This lesson was written by Renée 26/10/2022
Edited and Update
in 2022
*
*
Any resemblance with an existing lesson is a coincidence
* Do not forget to thank the people who work with us and for us
-I have appointed the tubeurs and translators
Thanks
|
 Translations