|
Intelligence
artificielle-Artificial intelligence 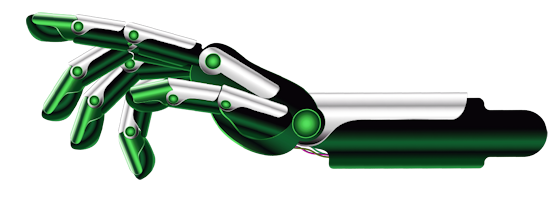
Let's start the lesson.

- Preparation
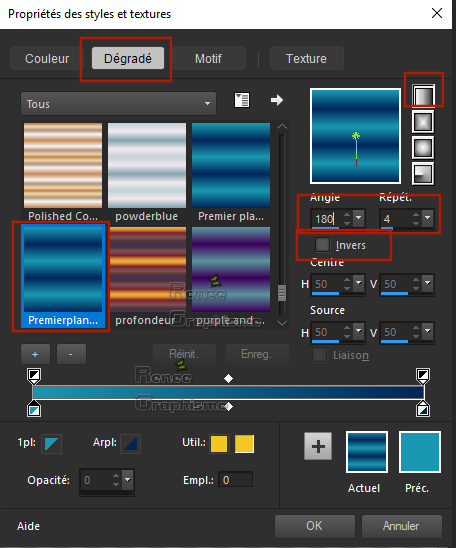
- Material Properties: Set your foreground color to color #1b98b1= 1 – Set your background color to color #002659= 2
- Prepare a foreground/background linear gradient configured like this
1. File- Open a new transparent Image of 1010 x 690 Pixels
2. Activate Flood Fill Tool
 –
Flood fill the layer with the gradient –
Flood fill the layer with the gradient
3. Selections- Select All
4. Activate the tube
‘’ Renee_TUBES_Intelligence_ artificielle 2’’
- Edit - Copy- Activate your work -Edit - Paste Into Selection
Selections- Select None
5. Effects-Image Effects-Seamless Tiling using the default settings
6. Adjust-Blur -Gaussian Blur : Radius 35
7. Layers- Duplicate
–(close this layer )
- In the Layer-Palette: activate the layer underneath = Raster 1
9. Effects –Plugins-
Unlimited 2.0 - Filter Factory Gallery M- Loom... with these settings:
0/30/1
10.Effects- Edge Effects Enhance
- To replace the top of the layer-palette –(open the layer )
11. Effects –Plugins-
Unlimited 2.0 – FunHouse- BugEye... : 192
12. Effects- Edge Effects Enhance
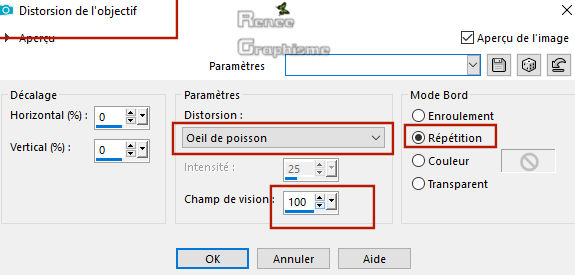
13. Effects- Distortion Effects -Lens Distortion use the settings below ( Fisheye Spherical)
14. Layers-Properties-Set the Blend Mode to " Screen"
- In the Layer-Palette: activate the layer underneath = Raster 1
15. Activate the tube
‘’ Intellingence_artificielle _lumiere’’
- Edit - Copy- Activate your work -Edit - Paste as a new layer
- Do not move, it is in the right place
16. Layers-Properties-Set the Blend Mode to "Hard Light "
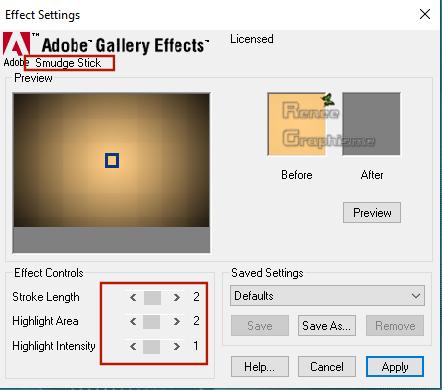
17. Effects –Plugins – Gallery effects- Classic art –Smudge stick
18. Activate the tube
‘’ Renee_TUBES_Intelligence_ artificielle 3’’
- Edit - Copy- Activate your work -Edit - Paste as a new layer
- Do not move, it is in the right place
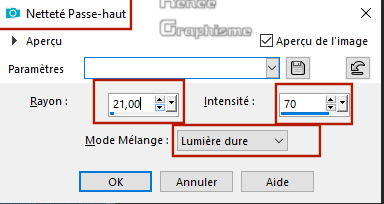
19. Adjust- Sharpness-High Pass Sharpen use the settings below
You may minimize your working area for a moment, but do not close, we will need it again soon
20. File- Open a new transparent Image of 421x 536 pixels
21. Selections –load/save selection –load selection from disc and select my selection: ‘’
artificielle 1’’
22.Set your foreground color to color # 7f0300=5 -Activate Flood Fill Tool
–
Flood fill the selection with the foreground color = 5
Selections- Select None
23. Layers- New Raster Layer
24. Selections –load/save selection –load selection from disc and select my selection: ‘’
artificielle 2’’
25. Set your foreground color to color # d620c7=6 -Activate Flood Fill Tool –
Flood fill the selection with the foreground color = 6
26.Layers-Properties-Lower the Opacity of the layer to 50%
Selections- Select None
27. Layers- New Raster Layer
28. Selections –load/save selection –load selection from disc and select my selection: ‘’
artificielle 3’’
29.Set your foreground color to color #949494=8 - Activate Flood Fill Tool
Opacity 50% – Flood fill the selection with the foreground color = 8
30. Selections- Modify-Contract with 2 pixels
- Layers- New Raster Layer
31. Set your foreground color to color #002659=2 -Activate Flood Fill Tool
Opacity 100%- Flood fill the selection with the foreground color = 2
32. Layers-Properties-Lower the Opacity of the layer to 87%
Selections- Select None
33. Layers- New Raster Layer
34. Selections –load/save selection –load selection from disc and select my selection: ‘’
artificielle 4’’
35. Set your foreground color to color # 7f0300 =5 -Activate Flood Fill Tool
-Flood fill the selection with the foreground color= 5
Selections- Select None
36. Layers- New Raster Layer
37. Selections –load/save selection –load selection from disc and select my selection: ‘’
artificielle 5’’
38. Set your foreground color to color # d620c7=6 -Activate Flood Fill Tool
Opacity 60%- Flood fill the selection with the foreground color= 6
39. Layers-Properties-Lower the Opacity of the layer to 69%
Selections- Select None
40. Layers- New Raster Layer
41. Selections –load/save selection –load selection from disc and select my selection: ‘’
artificielle 6’’
42. Activate Flood Fill Tool
Opacity 100 % – Flood fill the selection with the foreground color= 6
- Layers-Properties-Lower the Opacity of the layer to 67 %
Selections- Select None
43. Layers- New Raster Layer
44. Selections –load/save selection –load selection from disc and select my selection: ‘’ artificielle 7’’
45.Set your foreground color to color #002659=2 -Activate Flood Fill Tool
–Flood fill the selection with the foreground color = 2
Selections- Select None
46. Activate the tube
‘’ Renee_TUBES_Intelligence_ artificielle
_tete_tour.pspimage’’
- Edit - Copy- Activate your work -Edit - Paste as a new layer
47. Effects – Image Effects – Offset with these settings: H = 20 and V = 157
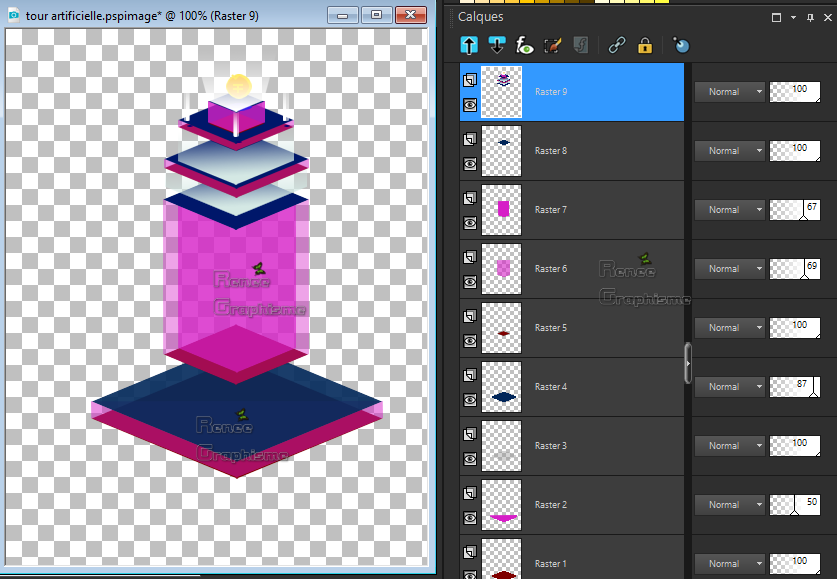
- Layer Palette look like this now-You should have this result
48. Layers- Merge- Merge Visible
49. Edit-Copy
-
Activate your minimized image you created earlier on in the lesson
- Activate the top of the layer-palette
50. Edit - Paste as a new layer
51. Effects – Image Effects – Offset with these settings: H = - 350 and V = -96
52. Layers- Duplicate
53. Image Resize to 68% (resize all layers not checked)
54. Effects – Image Effects – Offset with these settings: H = 41 and V = - 71
55. Layers- New Raster Layer
56. Selections –load/save selection –load selection from disc and select my selection: ’’artificielle 8’’
57. Set your foreground color to color #1b98b1=1 -Activate Flood Fill Tool
–
Flood fill the selection with the foreground color= 1
Selections- Select None
58. Effects- Edge Effects- Enhance More
59. Activate the tube
‘’ Renee_TUBES_Intelligence_ artificielle4.pspimage’
- Edit - Copy- Activate your work -Edit - Paste as a new layer
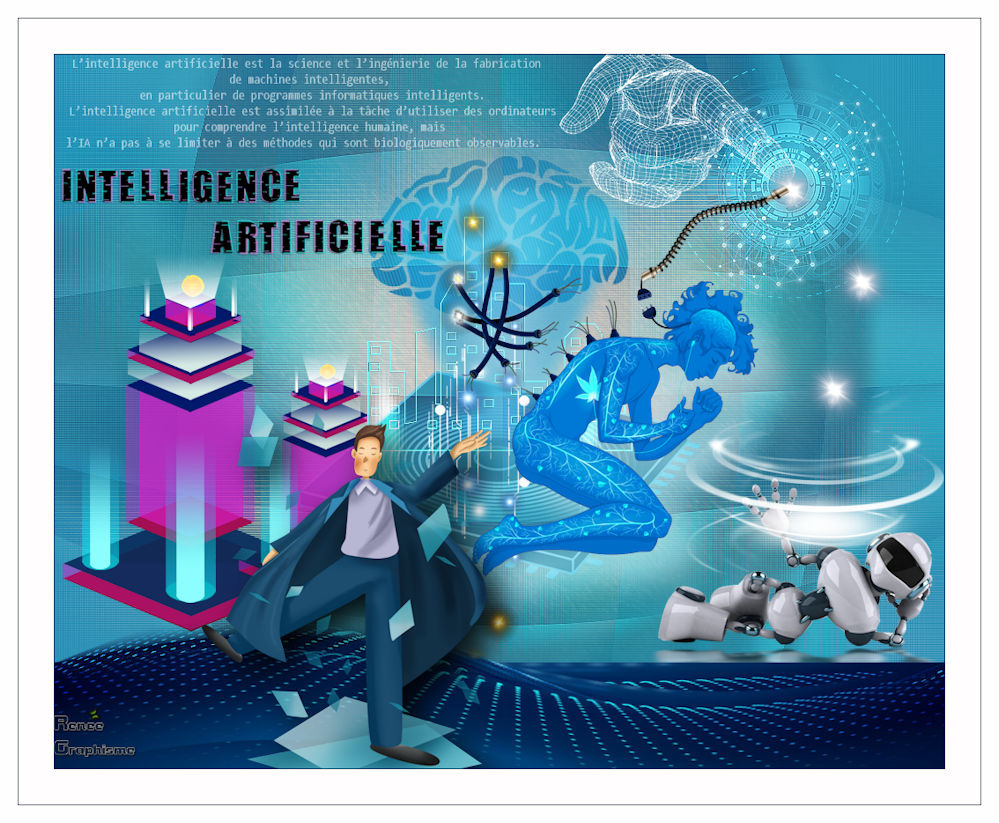
- Move it in the right place ( see finished image)
60. Layers- New Raster Layer
61. Selections –load/save selection –load selection from disc and select my selection: ‘’ ’’artificielle 9’’
62. Set your foreground color to color #ffffff=4 -Activate Flood Fill Tool
-
Flood fill the selection with the foreground color= 4
63. Adjust- Blur- Gaussian Blur : Radius 4
Selections- Select None
64. Effects
–Plugins-Unlimited2.0- ICNETFILTERS- Lens effects- Refractor 1
65. Layers-Properties-Set the Blend Mode to "Overlay "
66. Activate the tube
‘’ Renee_TUBES_Intelligence_ artificielle 5.pspimage’’
- Edit - Copy- Activate your work -Edit - Paste as a new layer
67. Effects – Image Effects – Offset with these settings: H = - 18 and V = - 94
68. Effects – 3 D-Effects – Drop Shadow with these settings: 1/ -1/ 60 /2 color black
69. Activate the tube
‘’ Renee_TUBES_Intelligence_ artificielle _human’’
- Edit - Copy- Activate your work -Edit - Paste as a new layer / Move it in the right place ( see finished image)
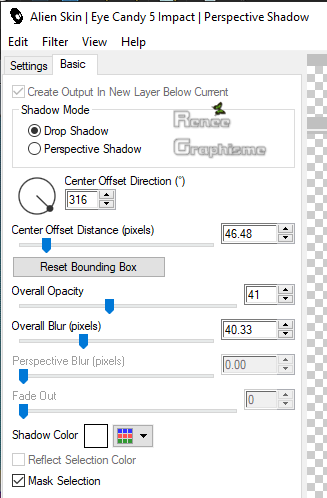
70. Effects - Plugins – Eye Candy 5 impact – Perspective shadow use the settings below/Color white
71. Activate the tube
‘’ Renee_TUBES_Intelligence_ artificielle_petit_robot’’
- Edit - Copy- Activate your work -Edit - Paste as a new layer
72. Objects -Align -Right
73. Objects- Align-Bottom
74. Layers- New Raster Layer
75. Selections –load/save selection –load selection from disc and select my selection: ‘’artificielle 10’’
76. Activate Flood Fill Tool
–
Flood fill the selection with the foreground color= 4 ( click 2 times )
Selections- Select None
Watch if your robot tube is well placed - moved if needed
77. Activate the tube
‘’ Renee_TUBES_Intelligence_ artificielle 6.pspimage’’
- Edit - Copy- Activate your work -Edit - Paste as a new layer
78. Effects – Image Effects – Offset with these settings: H = 328 and V = 195
79. Layers-Properties-Set the Blend Mode to " Screen "
80. Effects- Edge Effects- Enhance
81.
Layers- New Raster Layer
82. Selections –load/save selection –load selection from disc and select my selection: ‘’artificielle 11’’
83. Activate Flood Fill Tool
-Flood fill the selection with the foreground color= 4
Selections- Select None
84. Layers- Duplicate
85. Layers- Merge- Merge Down
86.
Layers- New Raster Layer
87. Selections –load/save selection –load selection from disc and select my selection: ‘’artificielle 12’’
88. Activate Flood Fill Tool
Set your foreground color to color # 002659= 2 -Flood fill the selection with the foreground color=2 (click 1 time )
Set your foreground color to color # ffffff=4 -Flood fill the selection with the foreground color= 4 (click 1time )
Selections- Select None
89. Activate
the tube
‘’ Renee_TUBES_Intelligence_ artificielle 7.pspimage’’
- Edit - Copy- Activate your work -Edit - Paste as a new layer - Move it in the right place ( see finished image)
(
Erase the top plug above the lady,
leaving only one plug )
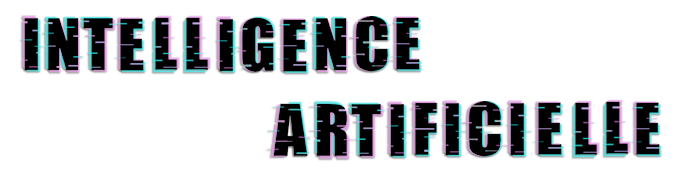
90. Activate the tube ‘’ Texte_Intelligence_artificielle’Edit - Copy- Activate your work -Edit - Paste as a new layer
Move tool / place your tube on the top left side of your image
91. Activate the tube " titre
" ( Resize the text of Renée by 68% ) Ore write your own text
92. Layers- Merge- Merge Visible
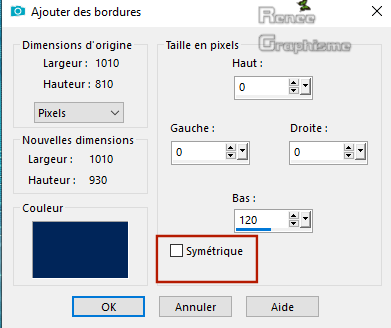
93. Image - Add borders-Symmetric not checked !!! with these settings- Color #002659= 2
94. With the Magic Wand with these settings-select the border of 120 pixels

95. Layers- New Raster Layer
96. Activate the image ‘’
Masque_Intelligence_ artificielle’’ /Edit - Copy- Activate your work -Edit - Paste Into Selection
97. Selections- Promote Selection To Layer
Selections- Select None
98. On this Layer (promoted Selection)
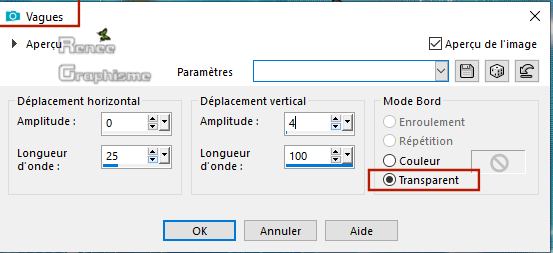
99. Effects- Distortion Effects- Wave use the settings below
100. Selections –load/save selection –load selection from disc and select my selection: ‘’artificielle 13’’
101. Effects- Distortion Effects- Wave with the same settings
102.Effects- Edge Effects- Enhance More
Selections- Select None
103. Activate the tube
‘’ Renee_TUBES_Intelligence_ artificielle 1.pspimage’
104. Image
Resize to 55%
- Edit - Copy- Activate your work -Edit - Paste as a new layer - Move it in the right place ( see finished image)
105. Effects -Plugins- - Eyecandy 5 Impact /Drop shadow blury
106. Image - Add borders-Symmetric checked: 1 pixel Color #002659= 2
107. Image - Add borders-Symmetric checked: 40 pixels Color #ffffff=4
108. Image - Add borders-Symmetric checked: 1 pixel Color #002659= 2
109. Image - Add borders-Symmetric checked: 20 pixels Color #ffffff=4
Image Resize to 999
Pixels Width
Save as JPG
I hope you enjoyed this lesson
Renée
This lesson was written by Renée 19-03-2019
Edited and Update
2019
*
Any resemblance with an existing lesson is a coincidence
* Do not forget to thank the people who work with us and for us I have appointed the tubeurs and translators
Thanks
*
|
 Translations


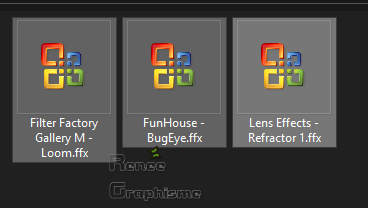


 If a plugin supplied appears with this icon it must necessarily be imported into Unlimited *