|
Let's start the lesson.

-Preparation
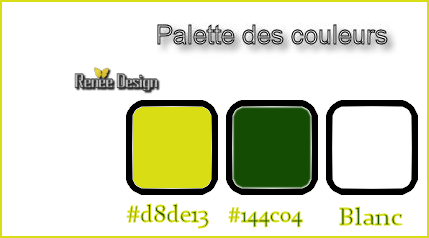
- Used Colors
-Color Palette:Set your Foreground color to #d8de13 -Set your Background color to #144c04
1.
Open the image ‘’Fond_2017’’- Window - Duplicate (or shift+D) - Close the original and proceed on the copy -Promote Background Layer = Raster 1
2.
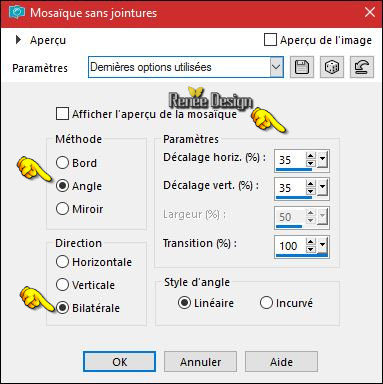
Effects- Image Effects- Seamless Tiling use the settings below
3.
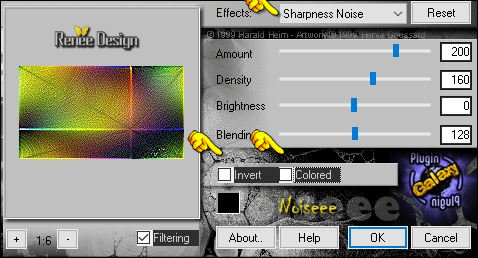
Effects –Plugins – Pugin Galaxy –
Noiseee use the settings below
4.
Layers- Duplicate
5.
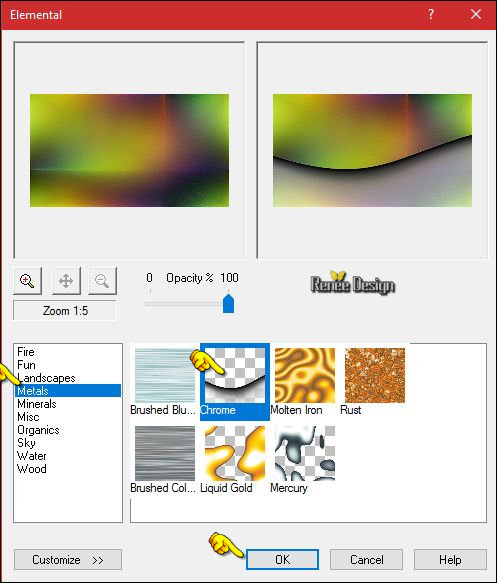
Effects –Plugins – XE Xtras- Elemental-
6.
Layers-Properties-Set the Blend Mode to "Luminance"
-
Properties Foreground: Change the foreground color into #ffffff
7.
Layers- New Raster Layer
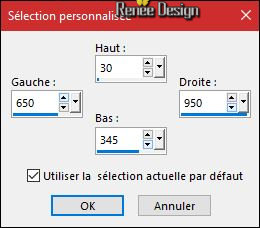
8.
Activate Selection Tool -Custom Selection (S) -Rectangle with these settings
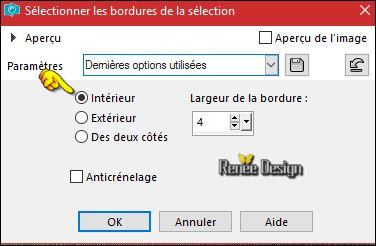
9.
Selections-Modify-Select Selection Borders with these settings-In side
10.
Activate Flood Fill Tool and fill the selection with the foreground color #ffffff 
Selections- Deselect All
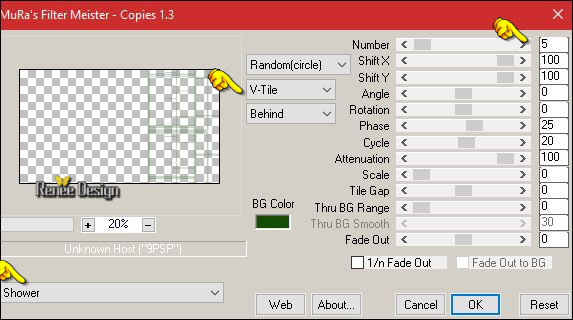
11.
Effects – Plugins - Mura’s Meister – Copies use the settings below
12.
Effects – 3D Effects -Drop Shadow with these settings 1/1/100/15 black
13.
Layers- New Raster Layer
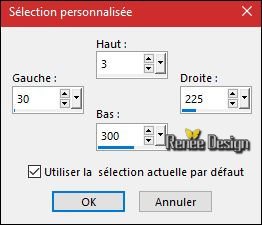
14.
Activate Selection Tool -Custom Selection (S) -Rectangle with these settings
-
Properties Foreground: Change the foreground color into #d8de13
15.
Pot of Paint - Change the opacity to 50 % Activate Flood Fill Tool and fill the selection with the foreground color #d8de13
Selections- Deselect All
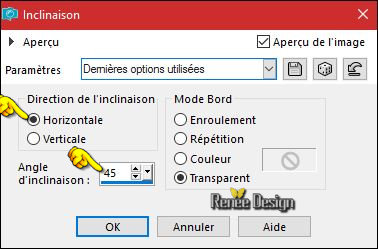
16.
Effects –Geometric Effects –Skew use the settings below
17.
Layers- Duplicate
18.
Image - Mirror - Mirror vertical ( Image - Flip in older versions of PSP)
19.
Layers- Merge- Merge- Down
20.
Effects –Plugins – Carolaine and Sensibility- CS
Linear – H
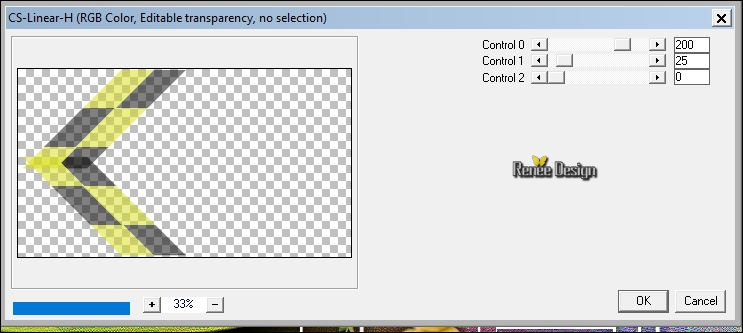
21.
Effects –Plugins - Unlimited - It@lian Editors Effect- Mosaico
10/13/127
22. Adjust-Sharpness- Sharpen
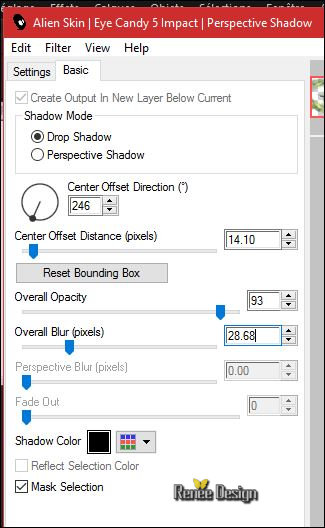
23. Effects
–Plugins –EyeCandy 5 Impact –Perspective
shadow use the settings below
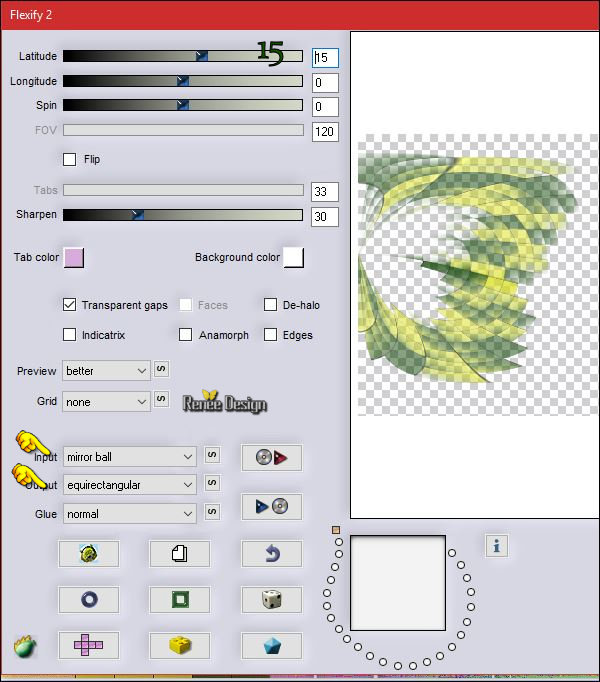
24. Effects
–Plugins –Flaming Pear – Flexify2 use the settings below
25. Effects
–Plugins– EyeCandy 5 – Perspective shadow use the same settings
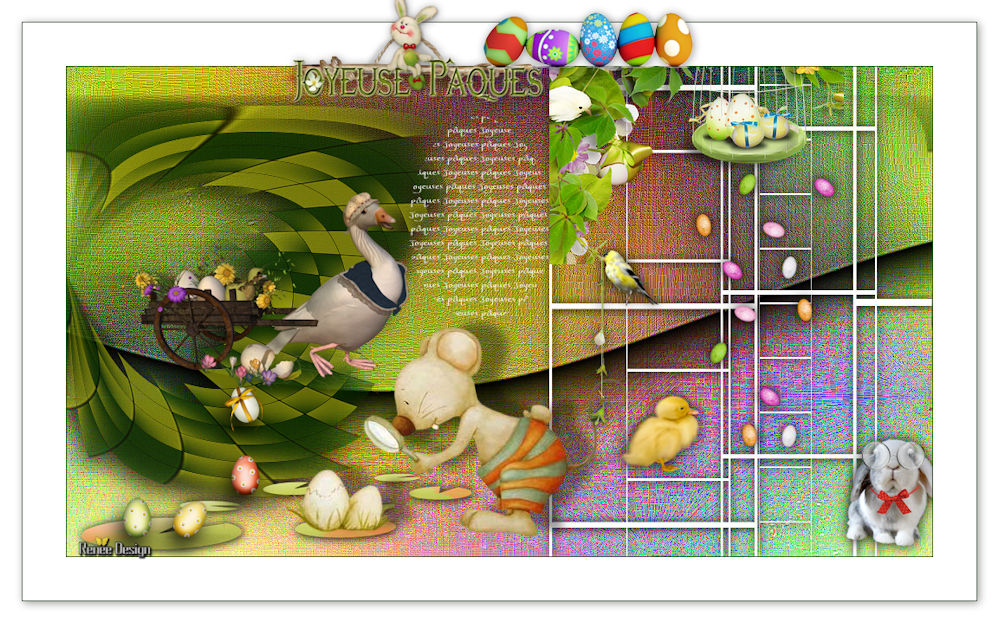
26. Open your tube ‘’ Renee_tube_Paques2017_Image1’’
-
I have 5 layers with different tubes//
Edit - Copy- Activate your work -Edit - Paste as a new layer
and place to your own taste
(
You can choose between a tube with a "duck" and a tube with a "chicken"
)
-
Is all in place ??
27.
Open your tube ‘’ Liza tube looking at egg
9-3-2011’’
- Edit - Copy- Activate your work -Edit - Paste as a new layer
28. Effects
–3D Effects – Drop Shadow with these settings: - 6/30/40/15 black
29. Image - Add borders-Symmetric checked: 1 pixel #144c04 (BG-Color)
30. Image - Add borders-Symmetric checked: 50 pixels #ffffff
31. Image - Add borders-Symmetric checked: 1 pixel #144c04 (BG-Color)
32.
Selections- Select All
33. Image - Add borders-Symmetric checked: 25 pixels #ffffff
34. Effects –3D Effects – Drop Shadow with these settings: 2/2/40/15 black
Selections- Deselect All
35. Open the tube ‘’le tube du titre’" -Edit - Copy- Activate your work -Edit - Paste as a new layer- or write your own text
36. Layers- Merge -Merge All ( flatten)
37. Image
Resize to 999 Pixels width.
Save as JPG
Happy Easter

I hope you enjoyed this lesson
Renée
This lesson was written by Renée 18/03/2017
Edited and Update
2017
*
Any resemblance with an existing lesson is a coincidence
* Do not forget to thank the people who work with us and for us I have appointed the tubeurs and translators
Thanks Renée *
*
| 

 Translations


 If a plugin supplied appears with this icon it must necessarily be imported into Unlimited *

 All rights reserved