|
Let's start the lesson
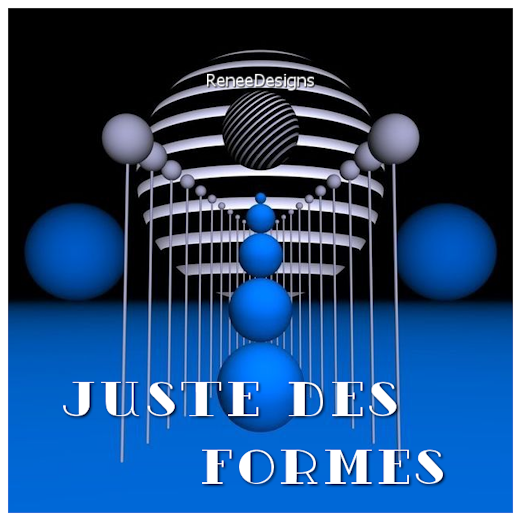
Juste des formes/Just forms

1. Open the Background-Image ‘’
Fond-Juste-des-formes’’- Promote Background Layer = Raster 1
2. Adjust- Blur- Radial Blur use the settings below
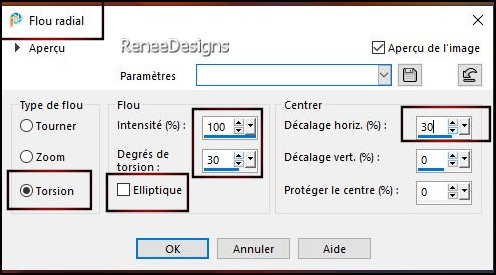
3. Effects – Edge Effects
- Enhance More
4. Effects - Plugins - Filters in Unlimited 2.0 - ICNET-Filters-Tile &
Mirror - Distortion Mirror (horizontal) : 41
5. Effects - Plugins - Filters in Unlimited 2.0 - ICNET-Filters-Tile &
Mirror - Seamless Blend (vertical)
6. Effects - Plugins – FM Tile Tools – Saturation Emboss
7. Layers– Duplicate
8. Effects– Distortion Effects– Pixelate use the settings below
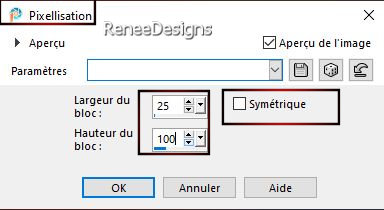
9. Effects – Plugins – Simple – Blintz
10. Effects - Plugins - Filters in Unlimited 2.0 - ICNET- Filters-Tile
& Mirror - Seamless Blend (vertical)
11. Effects - Plugins - Filters in Unlimited 2.0 - ICNET- Filters-Tile
& Mirror - Seamless Blend (horizontal)
12. Layers-Properties-Set the Blend Mode to " Darken "
13. Effects- User Defined Filter –
Emboss 3
14. Layers- New Raster Layer
15. Material Properties: put your foreground color to color # ffffff=1
Flood Fill Tool  – Fill the layer with the foreground color# ffffff=1 – Fill the layer with the foreground color# ffffff=1
16. Layers- New Mask Layer -From Image and select Mask: Renee-Masque-Forme-1.jpg
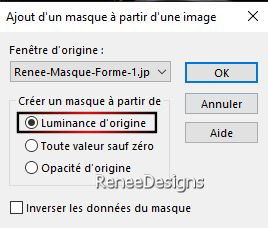
- Layers- Merge- Merge Group
17. Layers-Properties-Set the Blend Mode to " Overlay " -Reduce the opacity of this layer to 46%
18. Effects – 3D-Effects –
Drop Shadow with these settings: 2/2/85/5 Color Black
- Material Properties: Set your Foreground color to color #ffffff= 1 – Set your Background color to color #000000=2
19. Layers- New Raster Layer
20. Selections –load/save selection –load selection from disc and select my selection: ‘’Formes-1’’
21. Flood Fill Tool
 –
Fill the selection with the foreground color #ffffff=1 (2 to 3 clicks) –
Fill the selection with the foreground color #ffffff=1 (2 to 3 clicks)

22. Layers– Duplicate
23. Image - Mirror - Mirror Horizontal (Image - Mirror in older versions of PSP)
24. Layers- Merge- Merge Down
25. Layers-Properties-Set the Blend Mode to " Normal " -Reduce the opacity of this layer to 69%
26. Layers- New Raster Layer
27. Selections –load/save selection –load selection from disc and select my selection: ‘’Formes-2’’
28. Flood Fill Tool
 –
Opacity at 60% -Fill the selection with the foreground color #ffffff=1 –
Opacity at 60% -Fill the selection with the foreground color #ffffff=1

29. Effects –Edge Effects – Enhance
30. Layers-Properties-Reduce the opacity of this layer to 65%
31. Layers – Duplicate
32. Effects – Distortion Effects - Pinch- strength % 30
33. Layers-Properties-Set the Blend Mode to " Dissolve " -Reduce the opacity of this layer to 26%
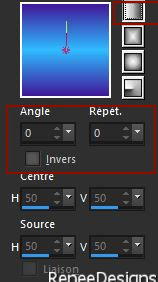
- Properties foreground: Change foreground material into Gradient and select ‘’ bkgr141 ‘’-Prepare a Linear Gradient configured like this
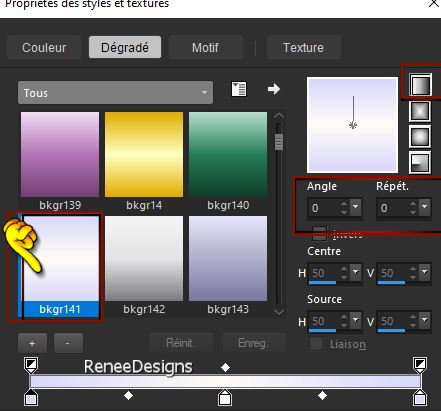
34. Layers- New Raster Layer
35. Selections –load/save selection –load selection from disc and select my selection: ‘’Formes-3’’
36. Flood Fill Tool - Fill the selection with the gradient
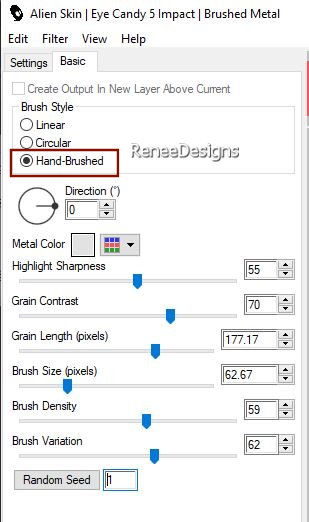
37. Effects - Plugins - Alien Skin EyeCandy 5 – Impact - Brushed
Metal – Preset : Handbrushed Steel ,Dense- Color #e2e2e2
38. Effects –3-D Effects –
Drop Shadow with these settings: 1/1/100/0 Color Black

39. - Properties foreground: Change foreground material into Gradient and select ‘’ bkgr28 ‘’-Prepare a Linear Gradient configured like this
40. Layers- New Raster Layer
41. Selections –load/save selection –load selection from disc and select my selection: ‘’Formes-4’’
42. Flood Fill Tool
 -
Opacity 100% -
Fill the selection with the gradient (2 clicks) -
Opacity 100% -
Fill the selection with the gradient (2 clicks)

43. Effects – Image Effects
– Offset use the settings below
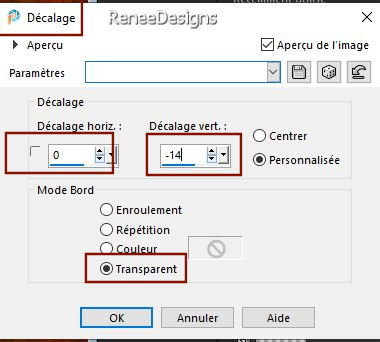
44. Effects –3-D Effects – Drop Shadow with these settings: 1/1/100/1 Color Black
45. Layers- New Raster Layer
46. Effects – Artistic Effects – Balls and Bubbles /Check only one bubble (If you have a problem with this process, there is an image in the folder and paste it as a new layer, but do not move it .
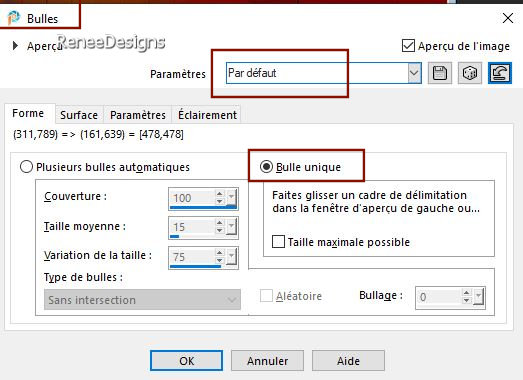
Do not move
47. Open the tube ‘’Renee-TUBES-Formes-Personnage’’ - Edit - Copy- Activate your work -Edit - Paste as new layer
48. Pick Tool: (K) on your keyboard -Enter these parameters on the toolbar
 286/87
Press ( M ) to close the tool
49. Layers -Arrange and Move down below raster 5 (that of the bubble)
50. Layers-Properties-Reduce the opacity of this layer to 83%
Your work and layer palette now look like this - You should have this result
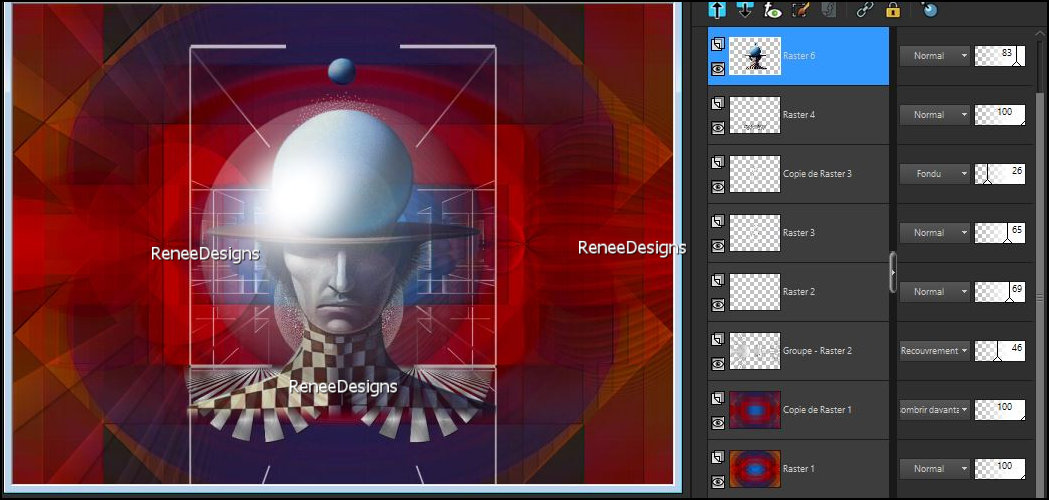
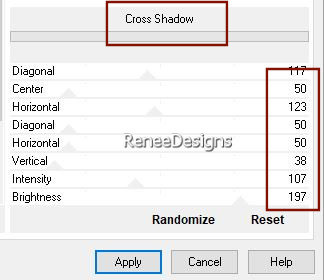
45. Effects - Plugins - Filters in Unlimited 2.0 Effets – Graphic Plus –
Cross Shadow use the settings below
- Activate the top layer in the layer palette
51. Open the tube ‘’Renee-TUBES- Grille-
droite’’ - Edit - Copy- Activate your work -Edit - Paste as new layer
52. Objects – Align-
Right (pull it up slightly)
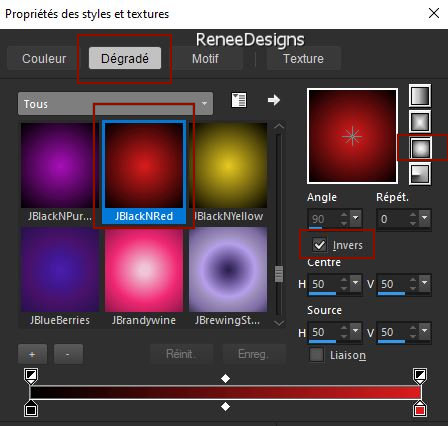
- Properties foreground: Change foreground material into Gradient and select ‘’JBlackNRed’’ – Prepare a Sunburst Gradient configured like this
53. Layers- New Raster Layer
54. Selections –load/save selection –load selection from disc and select my selection: ‘’Formes-5’’
55. Flood Fill Tool
 -
Fill the selection with the gradient -
Fill the selection with the gradient

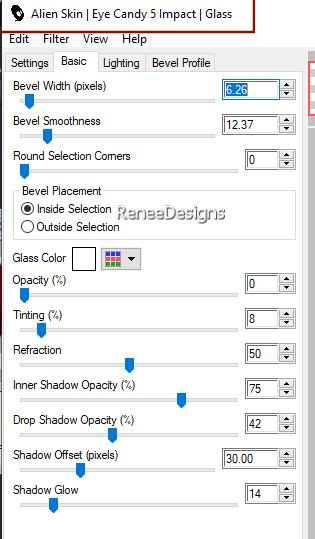
56. Effects - Plugins - Alien Skin EyeCandy 5 – Impact – Glass use the settings below
57. Layers-Properties-Set the Blend Mode to "Overlay "
58. Layers- New Raster Layer
59. Selections –load/save selection –load selection from disc and select my selection: ‘’Formes-5’’
60. Properties Foreground : Set your Foreground Color to color #ffffff=1
Flood Fill Tool - Fill the selection with the Foreground color #ffffff=1

61. Effects - Plugins - Alien Skin EyeCandy 5 – Impact – Glass with the same settings
62. Image - Mirror - Mirror vertical ( Image - Flip in older versions of PSP)
63. Layers-Properties-Set the Blend Mode to "Hard Licht " -Reduce the opacity of this layer to 57%
64. Open the tube ‘’Renee-TUBES-Formes-Billes.’’ - Edit - Copy- Activate your work -Edit - Paste as new layer
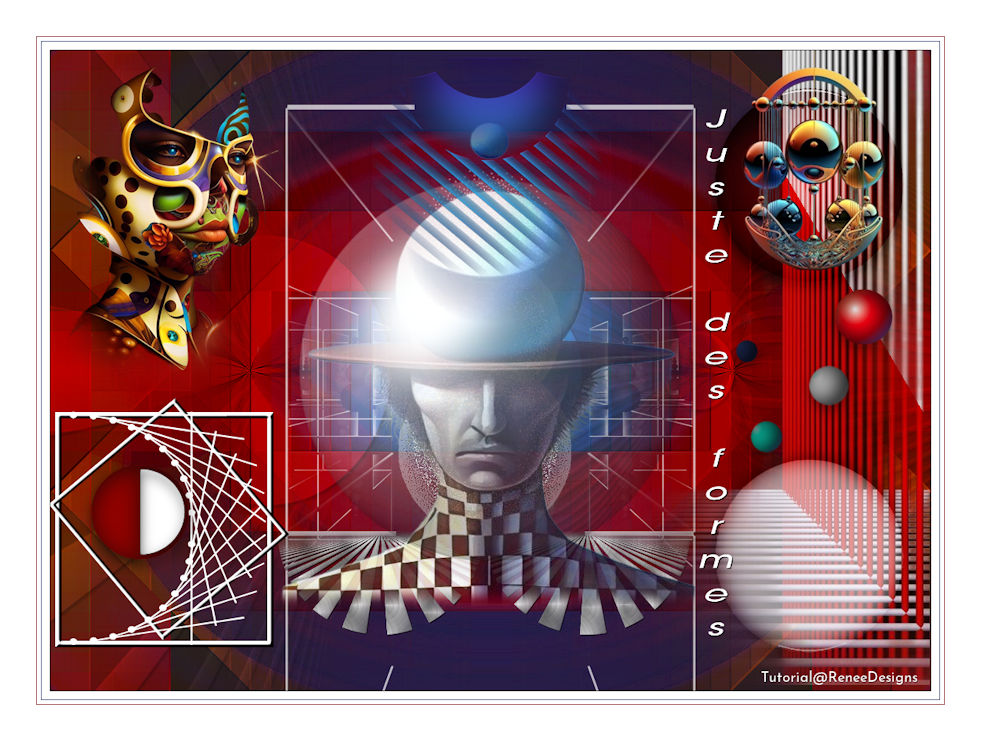
– Move the tube in the right place ( see finished image)
Or use your shape tool to draw different shapes of your choice - and place them.
65. Layers- New Raster Layer
66. Selections –load/save selection –load selection from disc and select my selection: ‘’Formes-6’’
67. Flood Fill Tool
 –
Fill the selection with the Foreground color #ffffff=1 –
Fill the selection with the Foreground color #ffffff=1
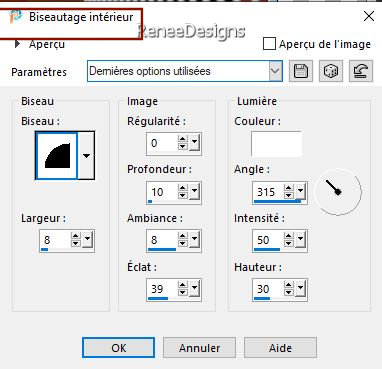
68. Effects – 3D-Effects –
Inner Bevel use the settings below - Color White

69. Layers – Duplicate
70. Image - Resize
by 75% - Uncheck - Resize all layers
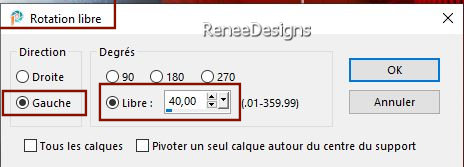
71. Image – Free Rotate-Degrees 40-Left
72. Pick Tool: (K) on your keyboard -Enter these parameters on the toolbar
 - 6/ 435
Press ( M ) to close the tool
73. Open these two tubes-" Shape 1 and 2 " for the small square from the bottom left
Or decorate with your own shapes- and paste as a new layer
on your work (see preview image )
74. Open the Tube ‘’
Renee-TUBES-Formes-Panier’’
- Image Resize to 75%
75. Edit - Copy- Activate your work -Edit - Paste as a new layer -Place the Tube in the upper right corner
76. Open the Tube ‘’Renee-TUBES-Formes-Personnage-2’’ -Edit - Copy- Activate your work -Edit - Paste as a new layer
Place the Tube in the upper left corner
77. Open the Tube " titre "- Edit - Copy- Activate your work -Edit - Paste as a new layer
Or write your own text
78. Paste the author's watermark on your work and your own watermark
79. Image - Add Borders-Symmetric checked: 1 Pixel -Color Black
Image - Add Borders-Symmetric checked: 10 Pixels -Color White
Image - Add Borders-Symmetric checked: 1 Pixel -Color #30478d=3
Image - Add Borders-Symmetric checked: 5 Pixels -Color White
Image - Add Borders-Symmetric checked: 1 Pixel -Color #950200= 4
Image - Add Borders-Symmetric checked: 45 Pixels -Color White
80. Image - Resize - 80% - Resize all layers- Checked
Save as JPG
I hope you enjoyed this lesson
Renée
This lesson was written by Renée 2024
Edited and Update
in 2024
*
*
Any resemblance with an existing lesson is a coincidence
* Do not forget to thank the people who work with us and for us - I have appointed the tubeurs and translators
Thanks
|
 Translations


