|
Let's start the lesson
-
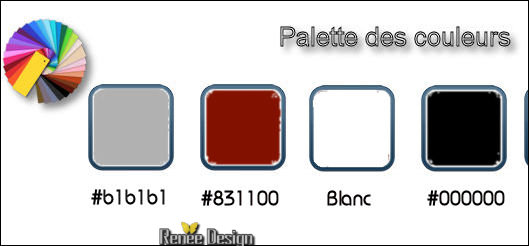
Color Palette- Set your foreground color to
#b1b1b1- Set your background color to #831100
1.
File- Open a new transparent image 1005 x 625 pixels
2.
Activate Flood Fill Tool  and fill the layer with the background color and fill the layer with the background color
3.
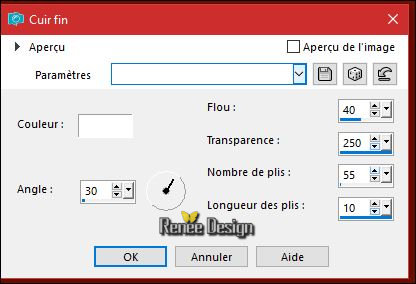
Effects- Texture Effects- Fine Leather use settings below-Color #ffffff
4.
Layers- New Raster Layer
5.
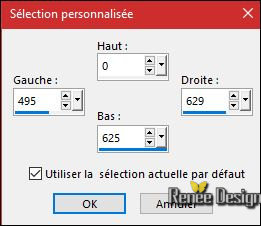
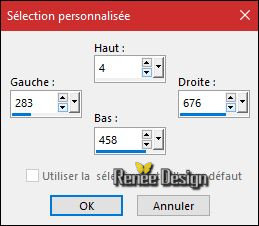
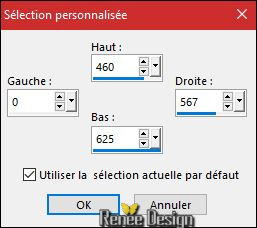
Activate Selection Tool -Custom Selection (S) -Rectangle with these settings
6.
Activate Flood Fill Tool- Opacity of the color at 50 %– Fill the selection with the foreground color
7.
Effects-Plugins –Unlimited - Andrew's Filters 24- Patterns Not/using the default settings
Selections- Deselect All
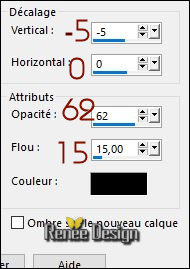
8. Effects- 3 D Effects- Drop Shadow with these settings: 0/0//62/7 black
9. Layers- Duplicate
10. Effects- Image Effects- Offset with these settings:

11.
Effects- Plugins –Unlimited - Alf's Power Grads- Radial Grads..using the default settings 89/0/0/0
12. Effects- 3 D Effects- Drop Shadow with the same settings
13. Layers- Merge- Merge- Down
14.
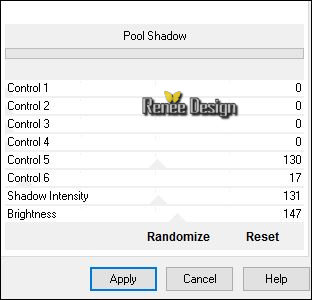
Effects- Plugins – Unlimited - Filter Factory Gallery A -Pool
Shadow
15. Effects- Image Effects- Offset with these settings: H = 160 and V = 0
16. Layers- Duplicate
17. Image -
Mirror (CTRL+B)
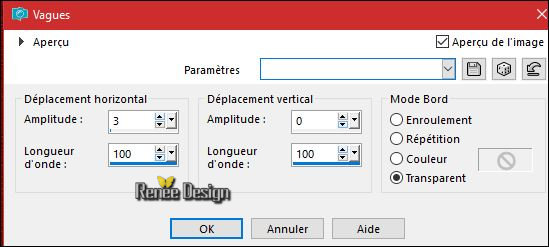
18. Effects- Distortion Effects- Wave use settings below
19. Layers-Properties-Set the Blend Mode to " Overlay " -Set the Opacity of this layer to 71%
20. Effects- 3 D Effects- Drop Shadow with these settings:
21. Layers- New Raster Layer
22.
Activate Selection Tool -Custom Selection (S) -Rectangle with the same settings
23. Activate Flood Fill Tool –Opacity of the color at 50% –Fill the selection with the foreground color
Selections- Deselect All
24. Effects- Plugins
– L & K’s- Djin 55/164 (
Patched)
25. Effects-Edge Effects-Enhance More
26.
Layers-Properties-Set the Blend Mode to " Hard Light "
27. Open the ‘’Renee_guerriere_rouge_image1’’
- Image
Resize to 60%
- Edit - Copy- Activate your work -Edit - Paste as a new layer and move
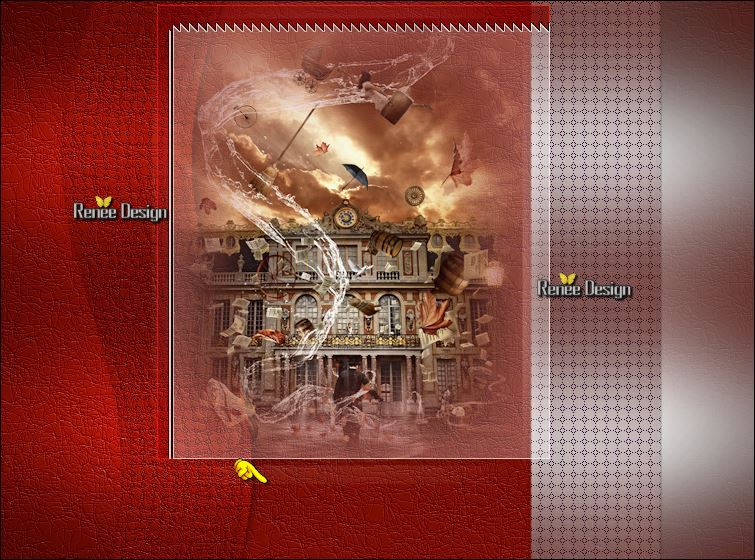
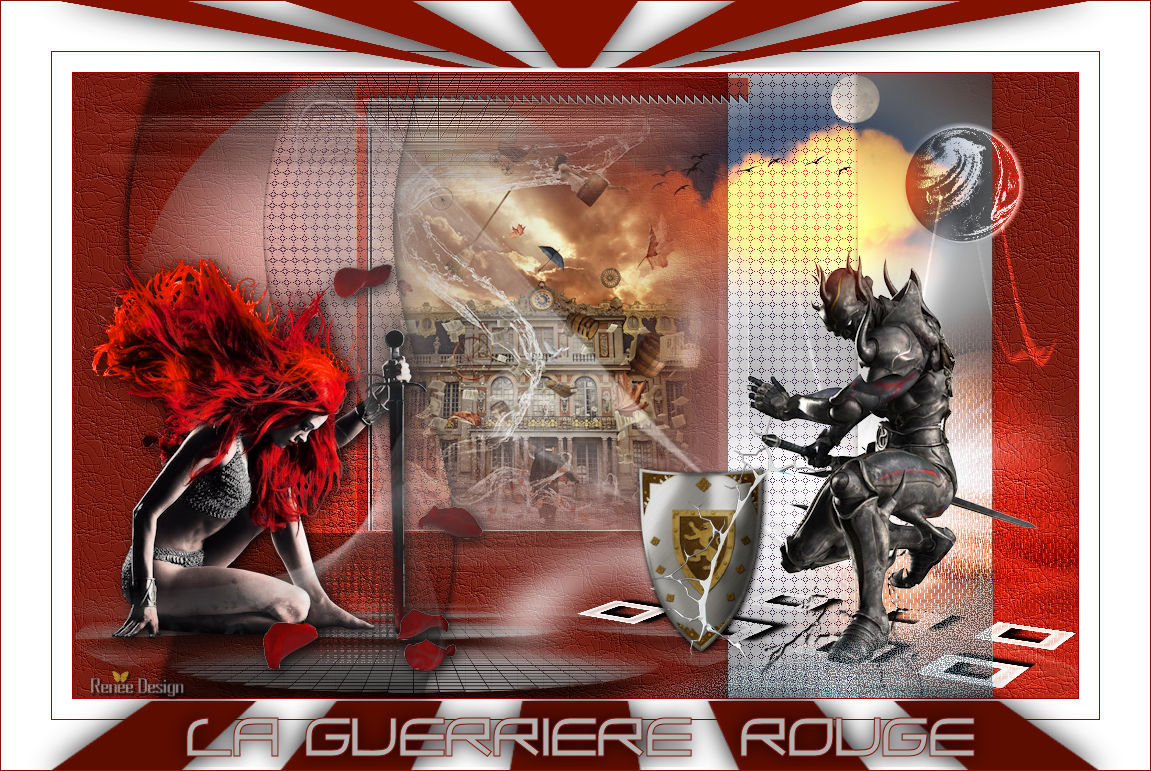
- You should have this result
28. Layers- New Raster Layer
29.Selections –load/save selection –load selection from disc and select my selection:‘’
Guerriere_rouge_1
30. Activate Flood Fill Tool – Opacity of the color at 100% –Fill the selection with the foreground color
Selections- Deselect All
31.
Layers-Properties-Set the Blend Mode to " Exclusion " -Set the Opacity of this layer to 77%
- Layers - Arrange - Move Down (above raster 1)
- To replace the top of the layers palette
32. Layers- New Raster Layer
33.Selections –load/save selection –load selection from disc and select my selection:‘’
Guerriere_rouge_2’’
34. Activate Flood Fill Tool – Opacity of the color at 100% –Fill the selection with the foreground color
Keep Selected
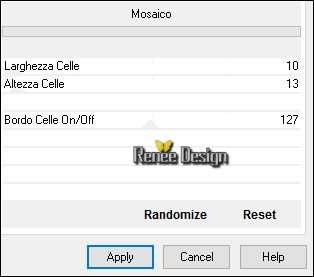
35.
Effects- Plugins– Unlimited - It@lian Editors Effect –
Mosaico
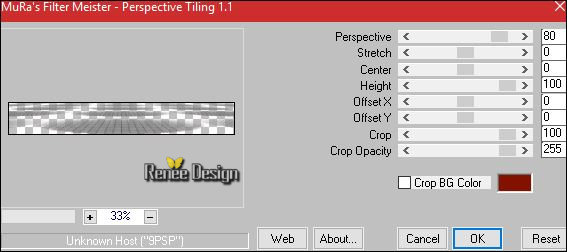
36.
Effects- Plugins – Mura’s Meister – Perspective
Tilling
Selections- Deselect All
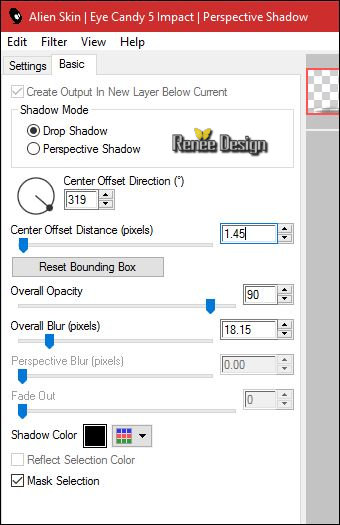
37.
Effects- Plugins – Eyecandy 6– Perspective shadows/
Drop Height 1
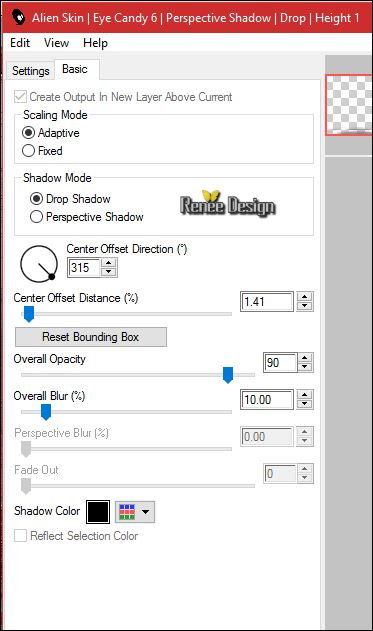 or Eye Candy 5 Impact or Eye Candy 5 Impact
38. Layers- Duplicate
39. Effects-Plugins
– Unlimited – Italian editor effect – Effetto
Fantasma 13/17
40. Image -
Flip (CTRL+I)
41.
Layers-Properties-Set the Blend Mode to "Luminance-Legacy "
- Effects- Edge Effects- Enhance
42. Open the tube ‘’
Renee_tube_guerriere_rouge_TUBE_BY_ARTUS’’
- Image
Resize to 2 x 60%
- Edit - Copy- Activate your work -Edit - Paste as a new layer
- Place it on the bottom left side
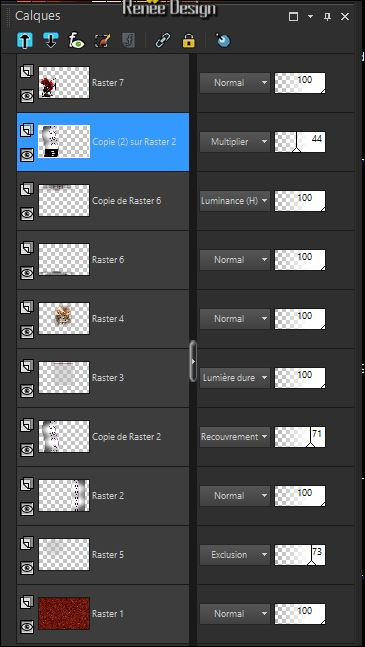
- Your Layer palette look like this now-You should have this result
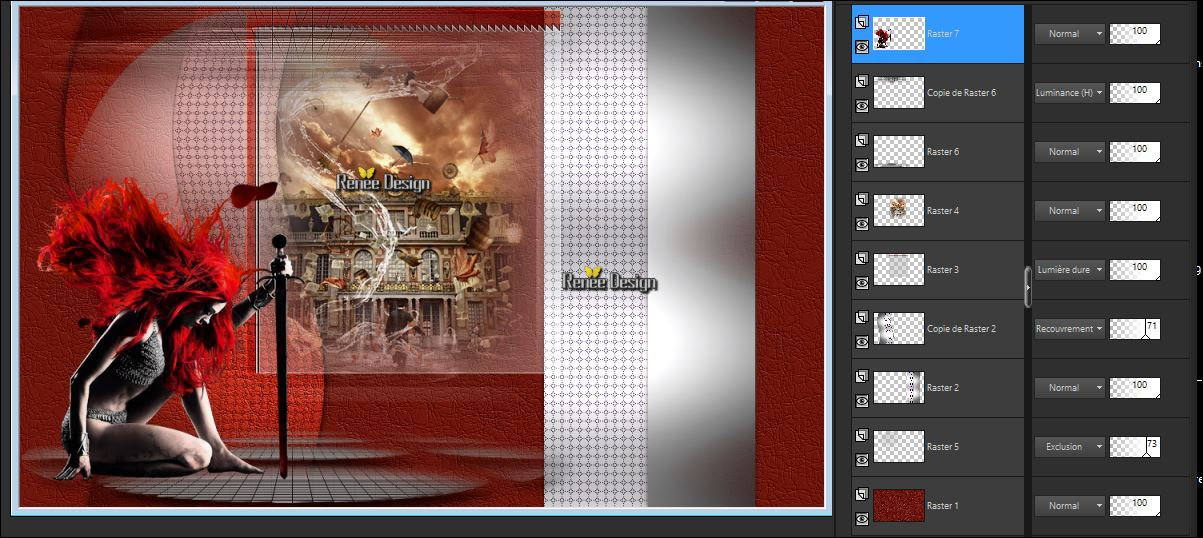
43. In the Layer- Palette- make ‘’ Copy of Raster 2 active
44. Layers- Duplicate
45. Layers- Arrange- Bring to Top
46.
Layers-Properties-Set the Blend Mode to " Hard Light " -Set the Opacity of this layer to
44%
47.
Activate Selection Tool -Custom Selection (S) -Rectangle with these settings
48.
Effects- Plugins – Unlimited - Kang 1- we make
Headlights
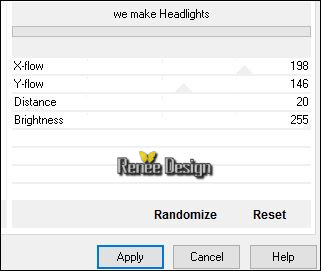
Selections- Deselect All
49. Layers- Arrange- Move Down
- Your Layer palette look like this now
50. Open the tube ‘’petales’’
-
Freehand Selection Tool -Lasso select a few leaves and past as a new layer and move
The leaves and the lady merge visibly into one layer
51.
Effects- Plugins – Eyecandy 5 Impact – Perspective
shadow- Preset ‘’Drop Shadow ,Lowest ‘’
52. Layers- Merge- Merge Visible
- Open the mask ‘’ Narah_mask_Abstract044’’ in your PSP
- Color Palette- Set your foreground color to #ffffff
53. Layers- New Raster Layer
54. Activate Flood Fill Tool and fill the layer with the foreground color #ffffff
55. Layers>New Mask layer>From image
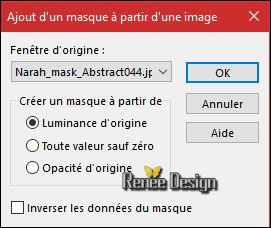
-Layers- Merge- Merge- Group
56.
Layers-Properties-Set the Blend Mode to " Normal " -Set the Opacity of this layer to 48%
57.
Effects- Plugins – Eyecandy 5 Impact – Perspective
shadow- Preset ‘’Drop Shadow ,Lowest’’
58. Layers- New Raster Layer
59.Selections –load/save selection –load selection from disc and select my selection:‘’
Guerriere_rouge_3’’
60. Activate Flood Fill Tool and fill the selection with the foreground color #ffffff
Selections- Deselect All
61. Open the tube ‘’ Renee_guerriere_rouge_image2’’
- Edit - Copy- Activate your work -Edit - Paste as a new layer
62. Effects- Image Effects- Offset with these settings: H= 320 and V = 0
63. Effects- Plugins – Andromeda Perpective- Freeform-
ff14

- Move tool / place your tube on the bottom right side of your image ( see finished image )
64. Layers- New Raster Layer
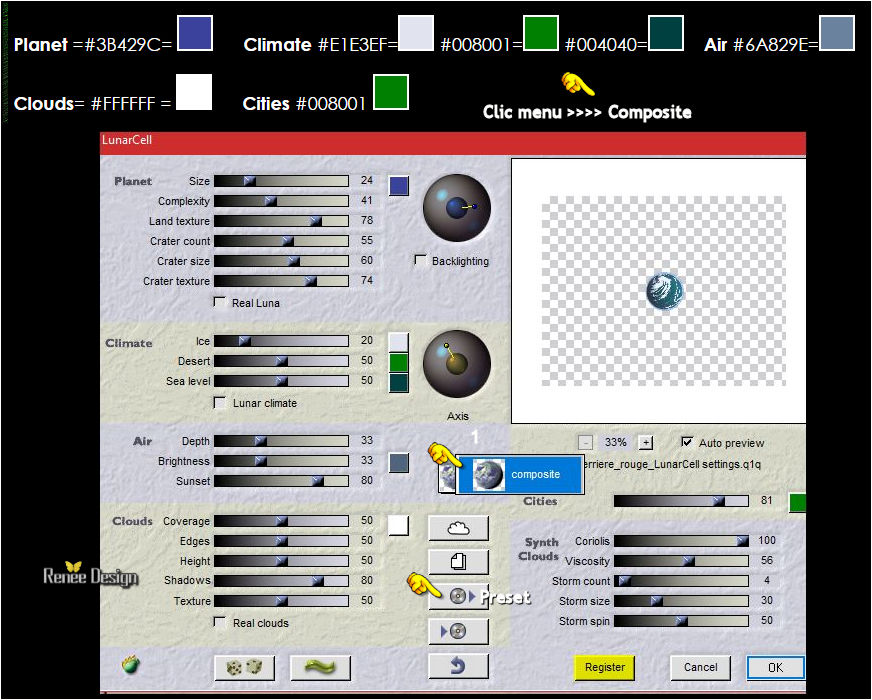
65.
Effects-Plugins – Flaming Pear – Lunar Cell /Preset
“Guerriere_rouge_LunarCell settings”
-
click on the menu=>so you will see
>>>Composite
>>1>>>
- click on the red arrow>> and select my file-preset  “Guerriere_rouge_LunarCell
settings” “Guerriere_rouge_LunarCell
settings”
-
Or manual settings as shown in the example below
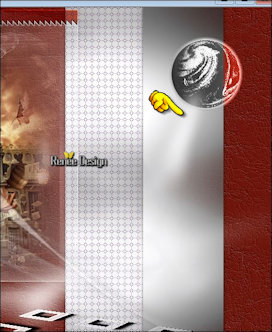
- Place it on the top right corner (see finished image )
66.
Layers-Properties-Set the Blend Mode to "Luminance"
67. Open the tube ‘’ Renee_guerriere_rouge_image4’’
- Edit - Copy- Activate your work -Edit - Paste as a new layer
68. Effects- Image Effects- Offset with these settings: H = 253 and V = 0
- Replace your ‘’lune ‘’ If necessary
69. Open the tube ‘’ Renee_guerriere_rouge_image5.pspimage’’
- Edit - Copy- Activate your work -Edit - Paste as a new layer
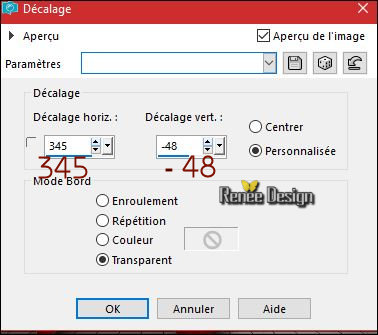
70. Effects- Image Effects- Offset with these settings:
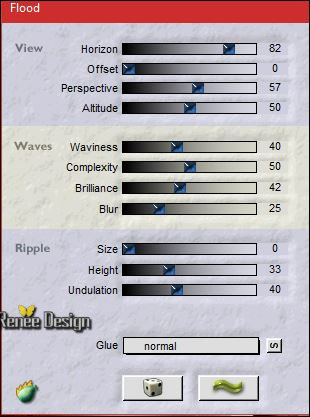
71.Effects- Plugins – Faming Pear – Flood-select my Preset ‘’
Guerriere_rouge_Flood settings.q8r’’ /color #ffffff
72.
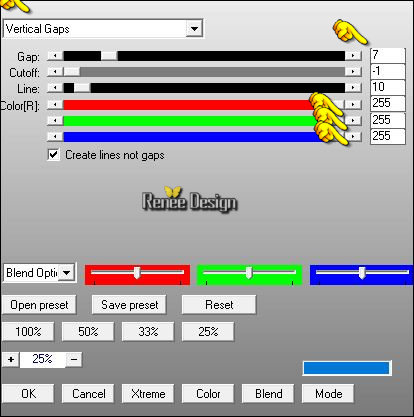
Effects- Plugins – AP[Lines] – Lines
Silverling
73. Open the tube ‘’ Renee_tube_chevalier.pspimage’ (Do not close we need it later for the rest of the work)
- Activate the layer " raster 2" of the tube
- Edit - Copy- Activate your work -Edit - Paste as a new layer
74. Effects- Image Effects- Offset with these settings: H = 152 and V = - 155
75. Layers- New Raster Layer
76.
Selections –load/save selection –load selection from disc and select my selection:‘’
Guerriere_rouge_4’’
77. Activate Flood Fill Tool and fill the selection with the foreground color #ffffff (2 clicks)
Selections- Deselect All
78. Effects- 3 D Effects- Drop Shadow with these settings:2/1/75/1 black
79. Effects- User Defined Filter Emboss 3 – using the default settings
80.
Layers-Properties-Set the Blend Mode to " Hard Light "
81. Back on
tube ‘’ Renee_tube_chevalier.pspimage’’
- Activate the layer " raster 1" of the tube
- Edit - Copy- Activate your work -Edit - Paste as a new layer
- Place it on the bottom right side (see finished image)
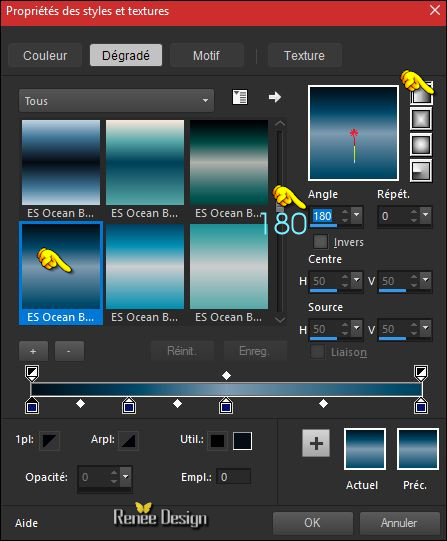
- Color-Palette: Set your Foregroundcolor to gradient and select ‘’ ES Ocean
Breeze 030’’ - Prepare a linear gradient configured like this.
82. Layers- New Raster Layer
83.Selections –load/save selection –load selection from disc and select my selection:‘’
Guerriere_rouge_5’’
84. Activate Flood Fill Tool and fill the selection with the gradient ( 2 clicks)
Selections- Deselect All
85.
Adjust-Add/Remove Noise-Add Noise

86. Effects- Edge Effects- Enhance More
87. Open the tube ‘’ Renee_La_Guerriere_nuage_ orange’’
- Edit - Copy- Activate your work -Edit - Paste as a new layer
- Move to the top right corner
88.
Layers-Properties-Set the Blend Mode to " Hard Light "
89. Image - Add borders-Symmetric checked: 1 pixel #831100
90. Image - Add borders-Symmetric checked: 20 pixel #ffffff
91. Image - Add borders-Symmetric checked: 1 pixel #831100
92. Image - Add borders-Symmetric checked: 50 pixel #ffffff
93. Open the tube ‘’cadre-final ‘’ Edit - Copy- Activate your work -Edit - Paste as a new layer
94. Activate your Text Tool -Font to choice- '' ZeroHour
'' or take my text
95. Image - Add borders-Symmetric checked: 1 pixel #831100
Save as JPG
I hope you enjoyed this lesson
Renée
This lesson was written by Renée 10/12/2016
Edited and Update
2016
*
Any resemblance with an existing lesson is a coincidence
* Do not forget to thank the people who work with us and for us I have appointed the tubeurs and translators
Thanks Renée *
*
| 
 Translations


 If a plugin supplied appears with this icon it must necessarily be imported into Unlimited *

 All rights reserved