|
Let's start the lesson
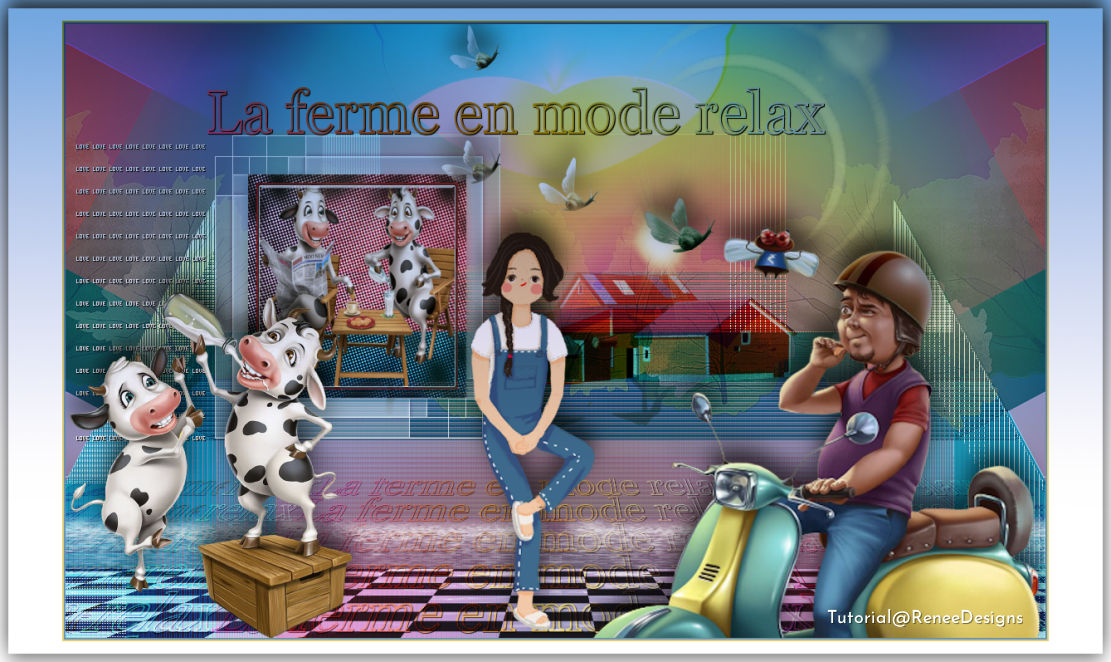
The farm in relaxing mode

- Preparation
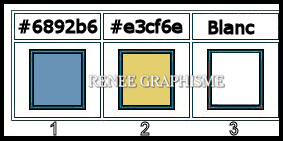
- Material Properties: Set your foreground color to color #6892b6= 1 – Set your background color to color #ffffff=White=3
1. Open the BG-Image (choose the right background image)– Fond- La
ferme en mode relax – Promote Background Layer =Raster 1
2. Effects –Plugins-
Unlimited 2.0 - &<BKg Designer sf10 II> - PSY Streaker:
112/51
3. Effects –Plugins-
Unlimited 2.0 - &<BKg Designer sf10 II> - OLI Rayons de
Soleil using the default settings
4. Adjust-Blur-Gaussian Blur-Radius 65%
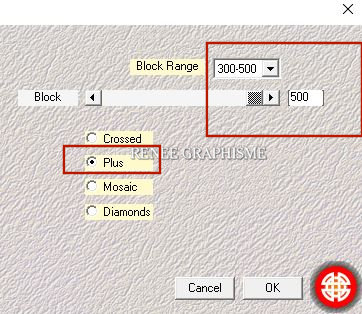
5. Effects -Plugins-
Unlimited 2.0 –Simple - Half Wrap
6. Effects – Edge Effects – Enhance
7. Effects –Plugins- Medhi – Sorting Tile use the settings below
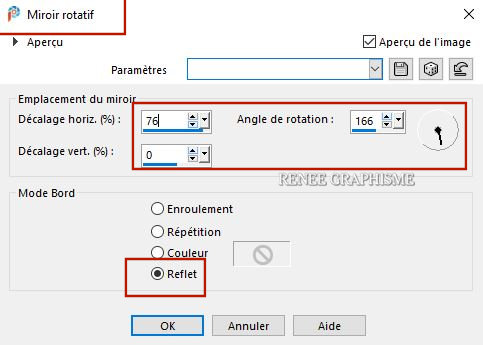
8. Effects – Reflection Effects– Rotating Mirror use the settings below
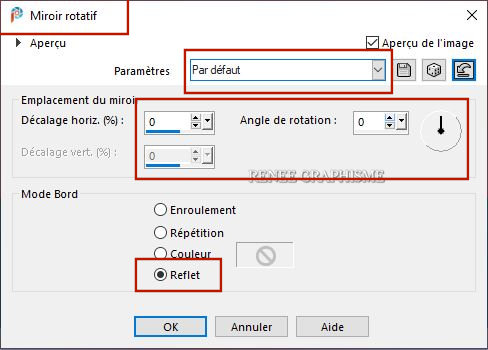
- Repeat! Effects – Reflection Effects– Rotating Mirror using the default settings
9. Layers- Duplicate
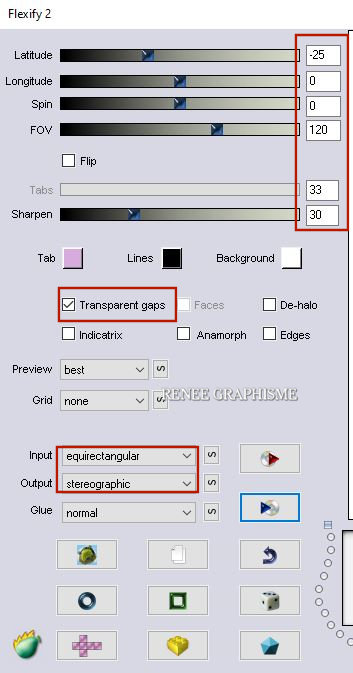
10. Effects – Plugins – Flaming Pear Flexify 2 –click the red arrow and select the file- Preset :
Ferme-Relax-Flexify 2
Or set the settings manually see screen
-
Close eye of this layer for now
- Activate the layer underneath=Raster 1
11. Selections –load/save selection –load selection from disc and select my selection: ‘’Ferme-relax-1’’
12. Edit –Cut
13. Edit - Paste as a new layer
14. Objects – Align
–Bottom
 Selections Deselect All Selections Deselect All
15. Effects –
Plugins-Unlimited 2.0 - FunHouse – Loom 71/2 all the rest has 0
- Return to the bottom layer= Raster 1
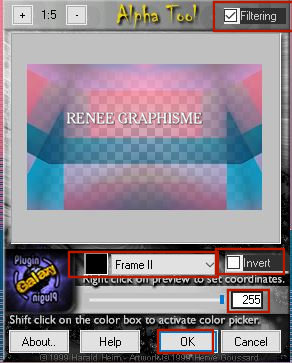
16. Effects – Plugins – Plugin galaxy – Alpha Tools use the settings below
- Open again the top layer of the layers palette (Copy of
Raster 1)
- Stay on this layer
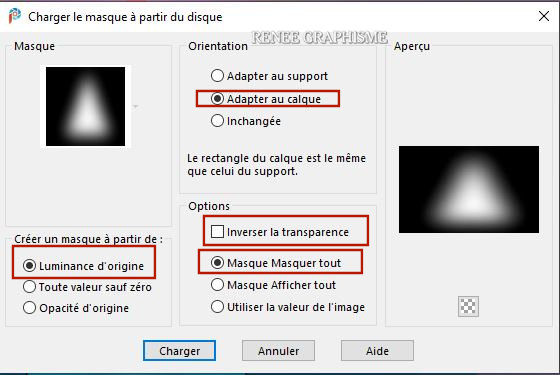
17. Layers-Load/Save Mask-Load Mask From Disc and select ‘’
1217491303_masques’’
- Layers- Duplicate
- Layers- Merge- Merge Group
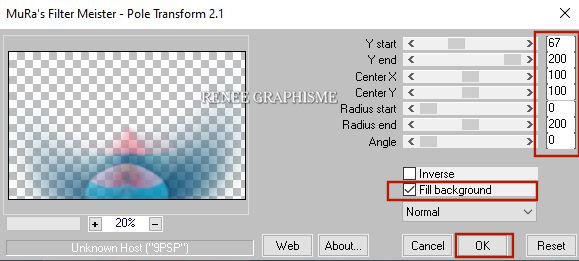
18. Effects - Plugins – Mura’s Meister – Pole Transform use the settings below
19.
Image - Mirror - Mirror vertical ( Image - Flip in older versions of PSP)
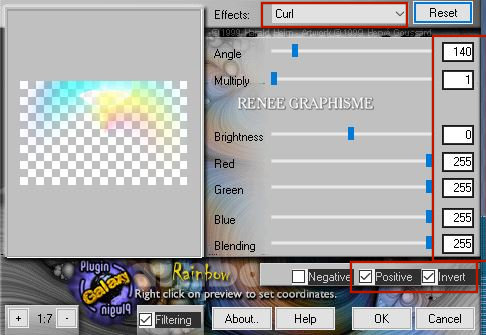
20. Effects – Plugins– Plugin Galaxy- Rainbow use the settings below
21. Layers- New Raster Layer
22. Selections –load/save selection –load selection from disc and select my selection: ‘’Ferme-relax-2’’
23. Activate your Flood Fill Tool
 -
fill the selection with the background-color =3 -
fill the selection with the background-color =3
24. Activate the Magic Wand use the settings below-Tolerance 20-Feather 18

Click in the upper empty area
 3 times
25. Layers- New Raster Layer
26. Selections –load/save selection –load selection from disc and select my selection: ‘’Ferme-relax-3’’
27. Activate your Flood Fill Tool
-
fill the selection with the background-color=3
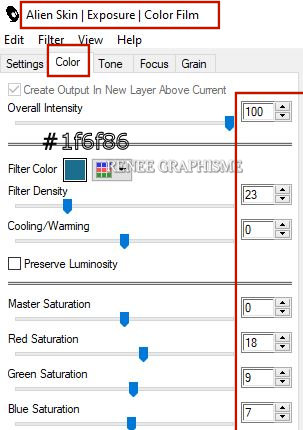
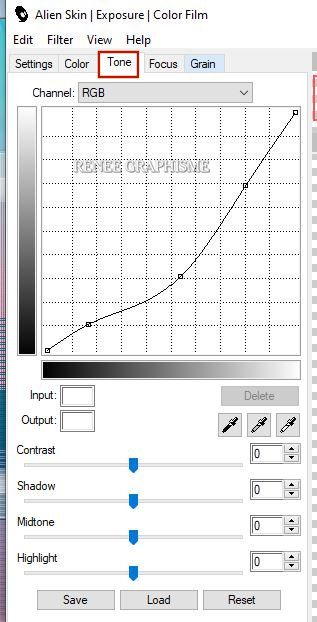
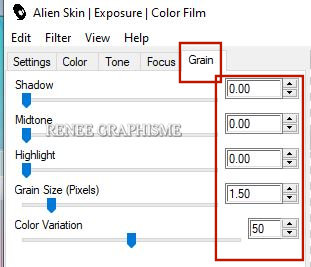
28. Effects – Plugins – Alien Skin Exposure –Color Film -Tab-Settings-User settings and select my file-Preset :
exposure-color-film-ferme-relax
Or set the settings manually see screen
- Activate the bottom of the layer palette =Raster 1
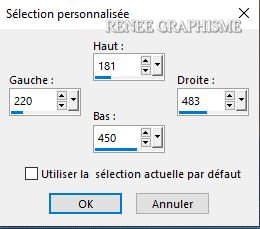
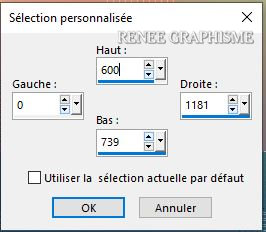
29. Activate Selection Tool -Custom Selection (S) -Rectangle with these settings

30. Selections –
Promote selection to layer
31. Layers- Arrange- Bring to Top
32. Effects –Plugins-
Unlimited 2.0 - Tramages – Print Screen using the default settings
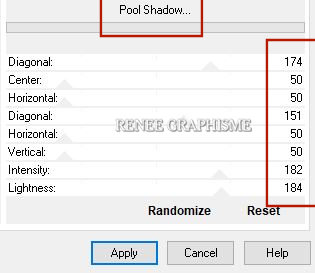
33. Effects –Plugins-
Unlimited 2.0 - Tramages – Pool Shadow use the settings below
34 Selections - Modify - Contract by 10 Pixels
35. Layers- New Raster Layer
36. Open the tube ‘’
Renee-TUBES-Juin-2021- 26.pspimage’’ -Edit - Copy- Activate your work -Edit - Paste into selection
KEEP SELECTION
37. Layers- Merge- Merge Down
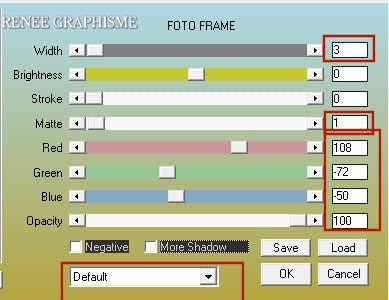
38. Effects –Plugins– AAA Frame – Foto frame use the settings below
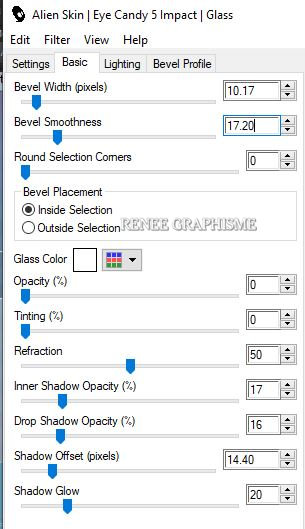
39. Effects – Plugins – Alien Skin EyeCandy 5 Impact – Glass – Preset :
Clear- with this setting!!!!!
40. Layers- New Raster Layer (Raster 5)
41. Selections –
Select All
42. Open the BG-Image ‘’Ferme-relax-image-fond’’-
-Edit - Copy- Activate your work -Edit - Paste into selection
43. Layers- Arrange- Send to Bottom
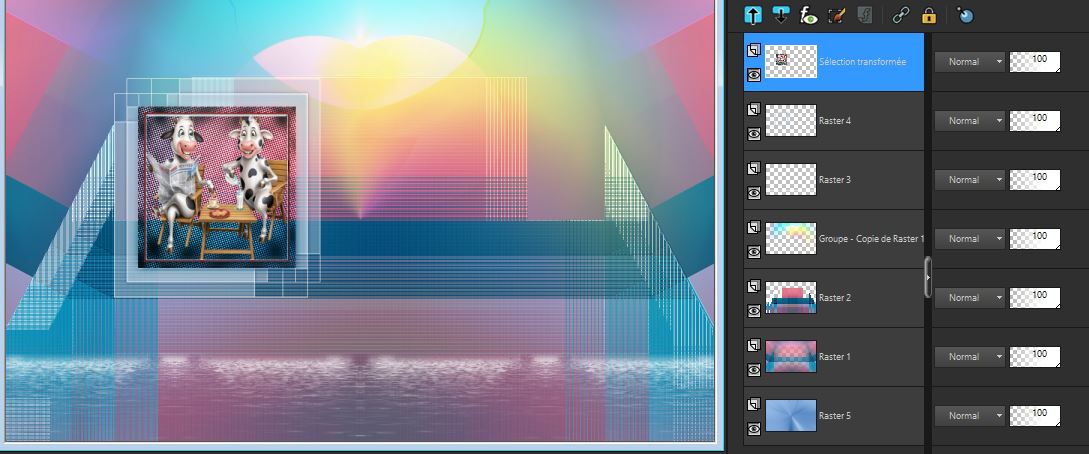
-Your work and Layer Palette look like this now-You should have this result
- Activate the top of the layer palette
44. Open the tube ’’Ferme-Relax-tube
1.’’ -Edit - Copy- Activate your work -Edit - Paste as a new layer
45. Pick Tool: (K) on your keyboard -Enter these parameters on the toolbar
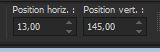 13/
145 13/
145
Press ( M ) to close the Pick Tool
46. Effects – 3D-Effects –Drop Shadow with these settings: 1/1/100/1 Black
47. Layers-New Raster Layer
48. Activate Selection Tool -Custom Selection (S) -Rectangle with these settings
49. Activate your Flood Fill Tool
–
Opacity 50% – Fill the selection with the background-color=3
50. Effects –Plugins-
Unlimited 2.0 – Toadies - 3D Checkers with these settings; 5/11/114
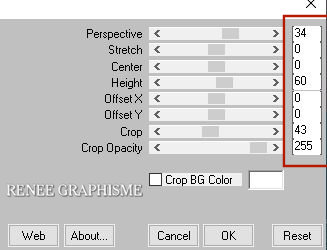
51. Effects – Plugins – Mura’s Meister – Perspective Tiling use the settings below
52. Layers-Properties-Change the Blend Mode to " Overlay "
- In the layer palette-activate raster 2
53. Open the tube ’’Ferme-Relax-tube
2’’-Edit - Copy- Activate your work -Edit - Paste as a new layer
54. Pick Tool: (K) on your keyboard -Enter these parameters on the toolbar
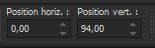 0
/94 0
/94
Press ( M ) to close the Pick Tool
55. Layers-Properties-Set the Blend Mode to" Hard Light "- Lower the Opacity to 71 (it will depend on the choice of your tube, modify if necessary)
56. Open the tube ’’Ferme-Relax-tube
3’’-Edit - Copy- Activate your work -Edit - Paste as a new layer
57. Pick Tool: (K) on your keyboard -Enter these parameters on the toolbar
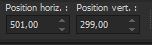 501/
299 501/
299
Press ( M ) to close the Pick Tool
58. Layers-Properties-Change the Blend Mode to " Overlay "
- Activate the top of the layer palette
59. Open the tube
‘’Renee-TUBES-Juin-2021- 31.’’
- Image-
Resize 75 %
- Edit - Copy- Activate your work -Edit - Paste as a new layer
-Place at the bottom right
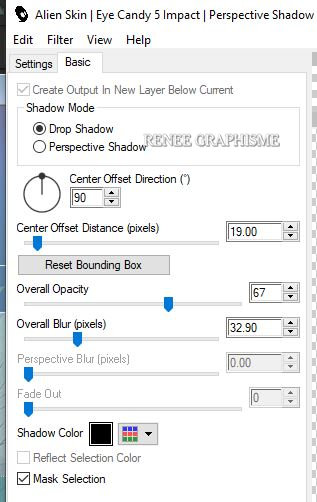
60. Effects – Plugins – Alien Skin Eyecandy 5 Impact – Perspective
Shadow use the settings below
61. Layers- New Raster Layer
62. Selections –load/save selection –load selection from disc and select my selection: ‘’Ferme-relax-4’’
63. Color Palette-set the foreground color to color #e3cf6e=2
Activate your Flood Fill Tool –
Opacity 100%- fill the selection with the foreground color =2
64. Adjust-Blur-gaussian Blur -Radius 8
65. Layers- New Raster Layer
66. Activate your Flood Fill Tool-
fill the selection with the background color=3
67. Adjust-Blur-gaussian Blur -Radius 8
68. Activate the layer underneath (raster 11 ) Layers-Properties-Change the Blend Mode to " Hard Light "
69. We are going to decorate -Renée has 2 spare folders with nice tube
Place the decorative elements individually according to your taste
70. Apply a Drop Shadow - For the Drop Shadows- Renée used the Eye Candy Perspective in memory or to your taste
71. Activate your text tool -Font ‘’Vani’’ (choose a gradient in harmony with your work
)
-Renée chose this gradient ‘’ Liapastel’’ - Change foreground material into gradient and select ‘’ Liapastel’’- and Close the background color
72. Write the title ‘’La ferme en mode relax’’

73. Effects– 3D-Effects - Drop Shadow with these settings: 1/1/100 /1 Black– Place the title in the right place
74. Layers- Duplicate
75. Place this layer above Raster 2 in the layer palette (
you don't see anything yet)
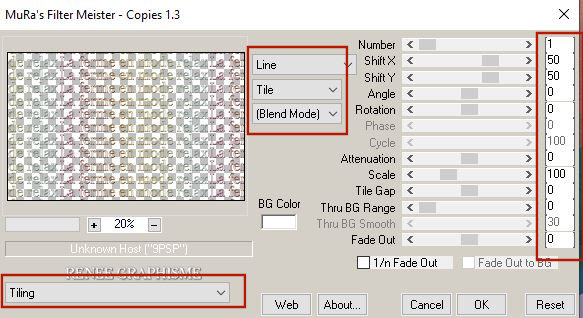
76. Effects – Plugins – Mura’s Meister – Copies use the settings below
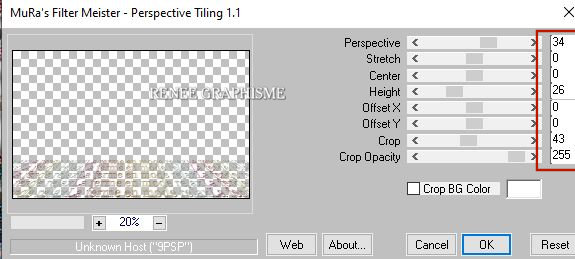
77. Effects – Plugins – Mura’s Meister- Perspective Tiling use the settings below
78. Layers-Properties-Change the Blend Mode to " Overlay " – Lower the Opacity to 71%
79. Image - Add borders-Symmetric checked:2 Pixels Color #6892b6=1
80. Image - Add borders-Symmetric checked:2 Pixels Color #e3cf6e= 2
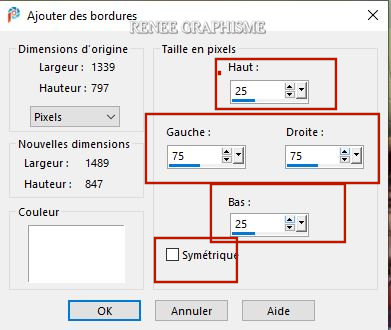
81. Image - Add borders -Asymmetric !!! use the settings below-Color #ffffff
82. Selections -
Select All
83. Selections -
Modify - Contract- 10 Pixels
84. Effects– 3D Effects– Drop Shadow with these settings: 10/0/42/32 Color Black
- Repeat!! -Effects– 3D Effects– Drop Shadow with these settings: -10 /0/42/32
85. Effects - Plugins– Nick Software – Color Effex Pro 3. 0/ Graduat
Filters / Color set : Blue No 4

86. Image - Resize to 83% - All layers checked.
Save as JPG
I hope you enjoyed this lesson
Renée
This lesson was written by Renée 15/05/2021
Edited and Update
2021
*
Any resemblance with an existing lesson is a coincidence
* Do not forget to thank the people who work with us and for us -I have appointed the tubeurs and translators
Thanks
*
|

 Translations