|
Let's begin
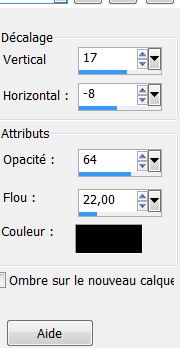
1. Open the background ''guerre_des_etoiles_fond''/
window - duplicate/ close original and work with the
copy
2. Layers - Duplicate
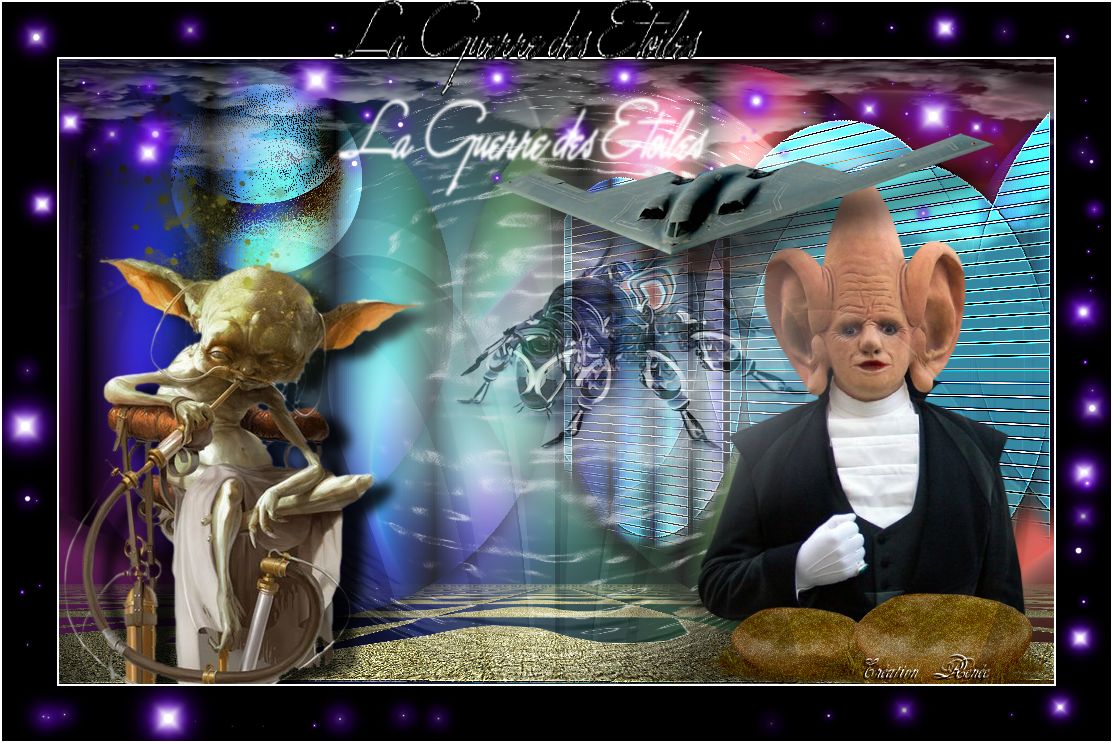
3. Effects -ICNet Filters Unlimited / Special effect 1 /
Pipes (vertical)
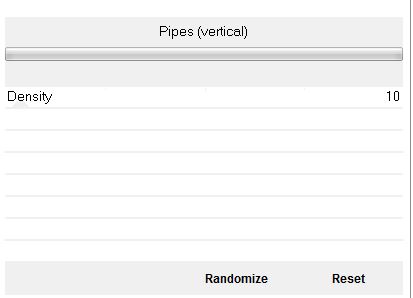
4. Effects - ICNet Filters
Unlimited / Special effect 1 / / Binoculars
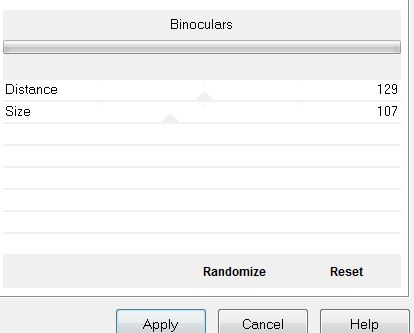
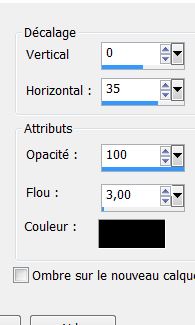
5 Effects - 3D Effect -
Drop Shadow.
6. Effects - Image effects
- Seamless tiling

7. Layers - Duplicate
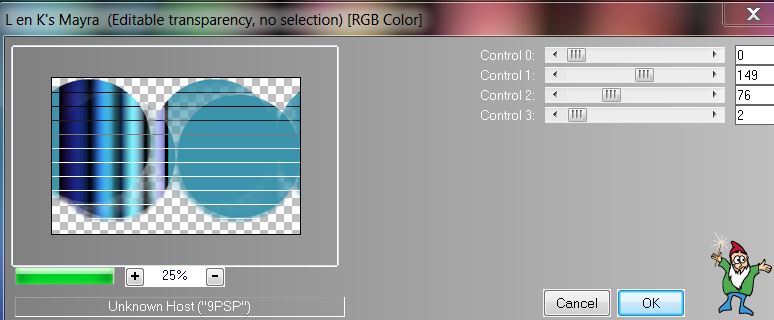
8. Set your foreground color to #ded3ce and background
color to #3c94ac
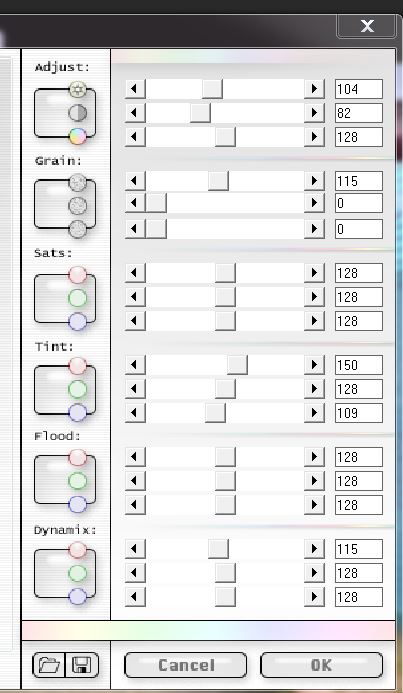
9. Effects - L and K's / Mayra Filter
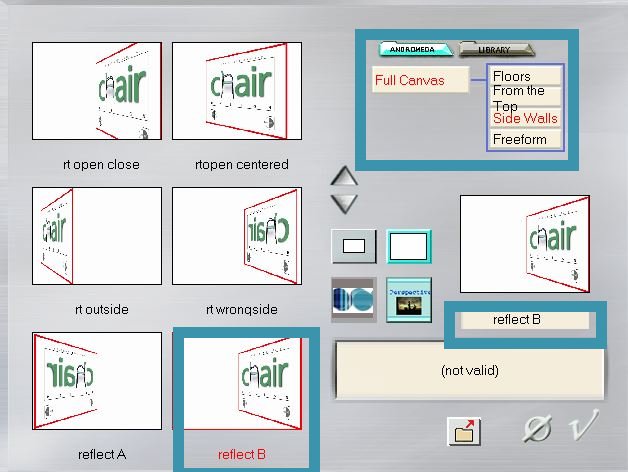
10. Effects - Plugins -
Andromeda - Perspective/ Side walls/ reflect B
11. Effects - Edge effects - Enhance more
12. Effects - Plugins - EyeCandy 5/ Impact - Pespective
shadow / Preset ''guerre-etoile_persp''
13. Layers - add a new layer
14. Effects - Artistic effects - balls and bubbles /
Preset (click default) - then ''Prest_BallsandBubbles_guerre_etoiles''/
OK
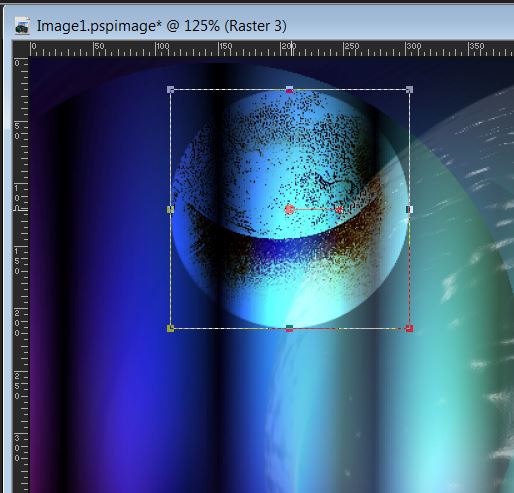
15. Open the tube ''sphere_guerres_etoiles''/ Copy and
paste in place like this
16. Set the blend mode to Overlay
17. Open and paste ''Tube fait par Inter 745'' (this
tube was made just for this tutorial so please do not
change the copyright)
18. Effects - 3D effects - Drop Shadow (same as before)
19. Layers - add a new layer / Change the foreground
color to #41493c
20. Open "pinceau_1" / File - Export> Custom Brush /
open with your brush tool
With the foreground color black and brush tool set like
this / size 358

*Appliquer
comme ceci
21 On this layer / Effects
- Illumination effects - Sunburst / color #eeef5f

22. Open the tube ''nuage_L''/
copy and paste and then move to the top right
23. Set the layer blend mode to Overlay
24. Effects / Illumination effects - Lights / Preset "Preset_Lights_guerre_etoiles"
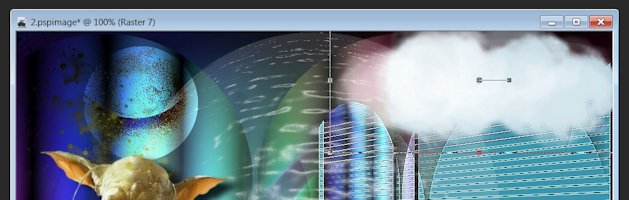
25. Open the tube ''nuage_2'' Copy and paste as a new
layer - move to the top as shown
26. Lower it's opacity to 57
27. Click on the bottom layer of the layer stack
28. Selections - load selection "guerres_etoiles_1"
29. Selections - Promote selection to layer
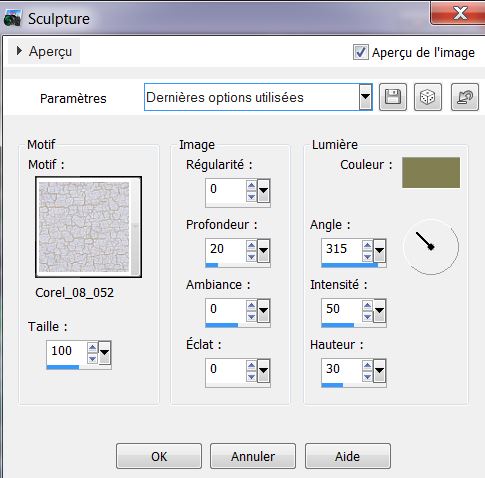
30. Effects - Texture effects - Sculptures color #827f52
and pattern Corel_08_052
31. Adjust Add / Remove Noise/ Add noise as shown

32. Selections - Select none
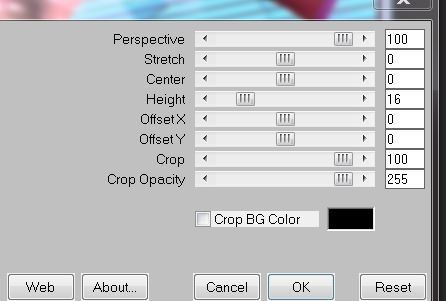
33. Effects - Mura's Meister - Perspective Tiling
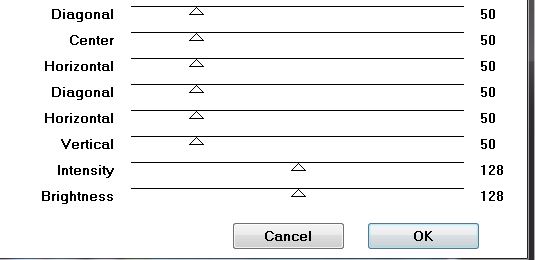
34. Effects - Graphics Plus - Cross Shadow
35. Open the tube ''pierres_herbes'' copy and paste as
new layer on top of the stack/ put it in the lower right
corner
36. Effects - Plugins - Final Impact - Hotshot
37. Layers - add a new layer
38. Effects-Vanderlee Unplugged-X / raster
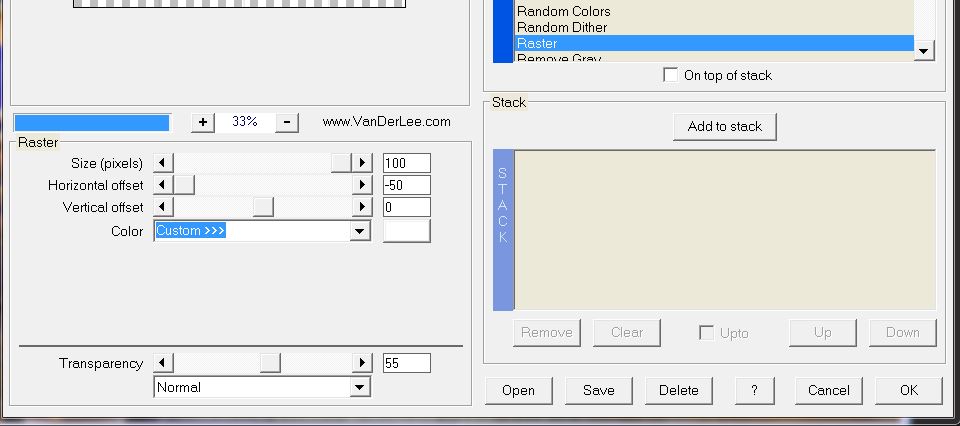
the result
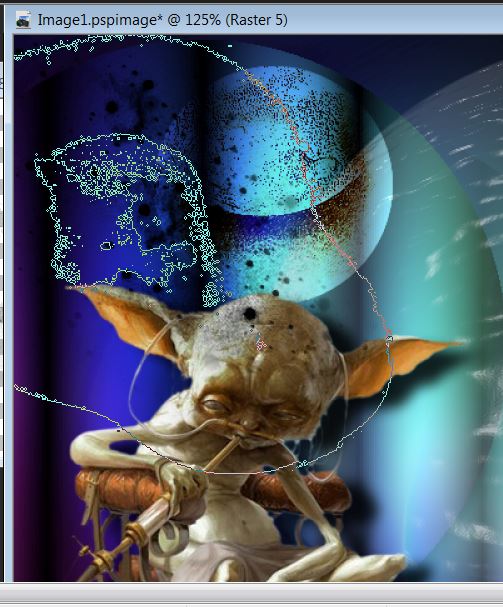
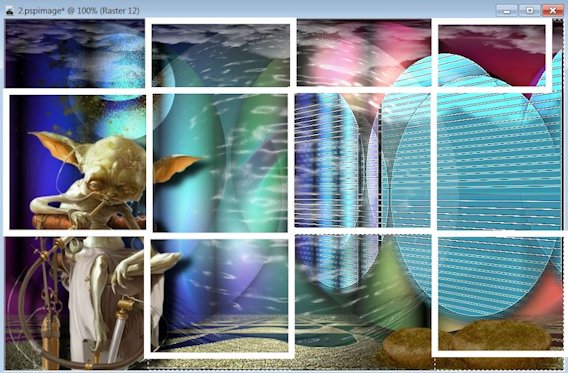
39. With your magic wand
set like this

40. Select these parts
with your magic wand (circled in white)
41. Paint tool - Using the color
white and opacity @20

42. Fill the selections
43 Selections - Deselect
44. Effects - Plugins Toadies - What are you set at
12/20
45. Effects - 3 D effects - Drop Shadow
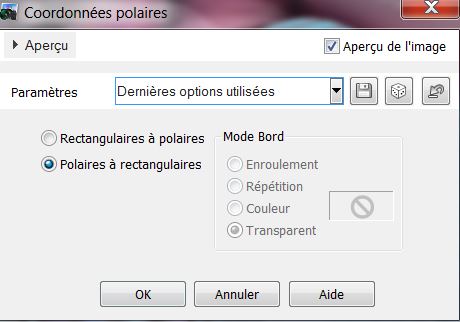
46 Effects -. Distortion Effects -
Polar Coordinates / Apply twice
47.Set the blend mode to Overlay and Set opacity to 59
48. Layers - add a new layer
49. Tube tool - Open your tube ''etoile1'' - apply to
the top of the image as shown

50. Open the tube ''b2_spirit'' and paste as new layer/
move to a good place
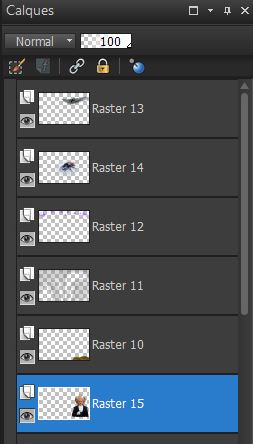
51. Stay on top of the layers palette
52. Open the tube ''insect'' resize image to 62% and
paste as a new layer. Place as shown
53. Arrange layer down - Set opacity to 61
54. Go back to the top of the Layers palette
55. Open the tube ''Alies1FA528-stranger-10062013''
paste as new layer
56. Arrange layer under the layer of stones (raster 10)
57. Image - add borders 2 pixels white
58. Image - add borders 55 pixels black
59. Open tube tool / "etoile1'' - take the pattern and
decorate to your taste
60. Image - add borders 2 pixels white
61. Paste the text tube in place
62. Effects - 3D effects/ Drop Shadow

All Done
Thanks Sally
*

|