|
Let's start the lesson .
1. Open the background image :985 x 655 pixels - Promote Background Layer =Raster 1
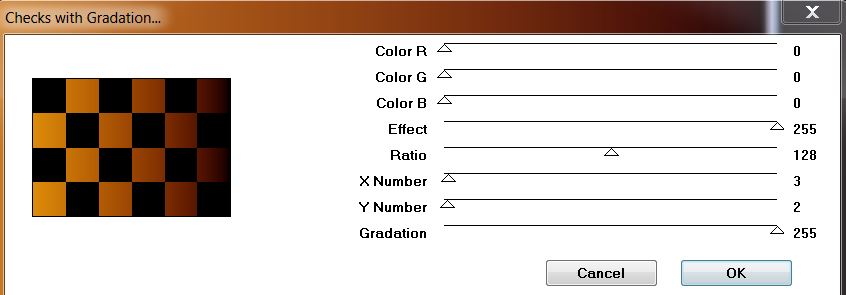
2. Effects- Plugins - Mura's Seamless – Checks with
Gradation
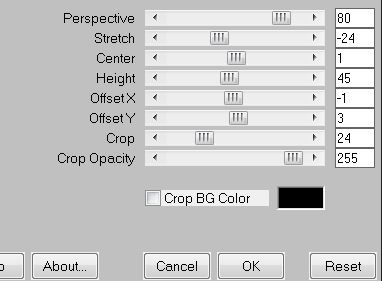
3. Effects- Plugins - Mura's Meister - Perpsective
Tilling
4.Effects- Distortion Effects- Warp withe these settings
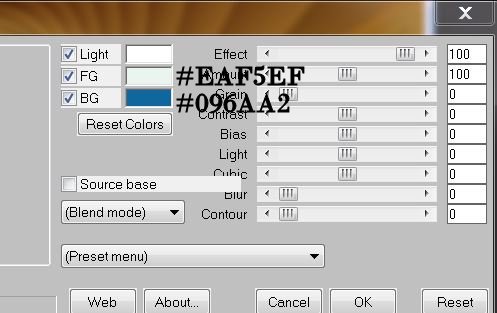
5. Material Properties: Foreground color to this color:#b6d8d7- Background color to this color : #000000
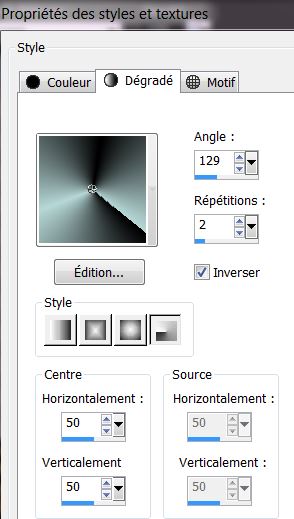
6.Prepare a Radial Gradient as configured like this.
7.Activate the magic wand: Select the transparent part
8. Layers- New Raster layer
9.
Activate Flood fill tool and fill the selection with the gradient
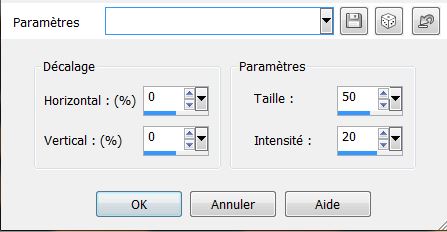
10. Adjust- Blur- Gaussian Blur : Radius: 18%
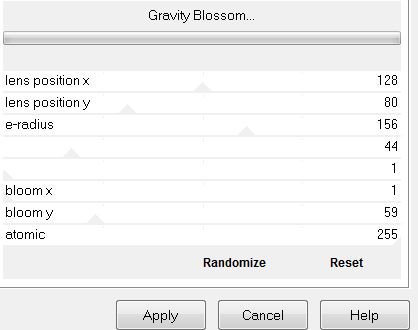
11.Effects- Plugins –Filtre Unlimited - Factory Gallery Q – Gravity
Blossom
12. Effects- Plugins - Adjust Variation : one click-
more red -more yellow /repeat : one click more red-more
yellow
13.Selections-Deselect All
14. Layers- New Raster layer
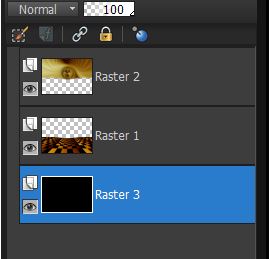
15. Activate Flood Fill Tool and fill the layer with color black
16. Layers- Arrange- Sent to Bottom
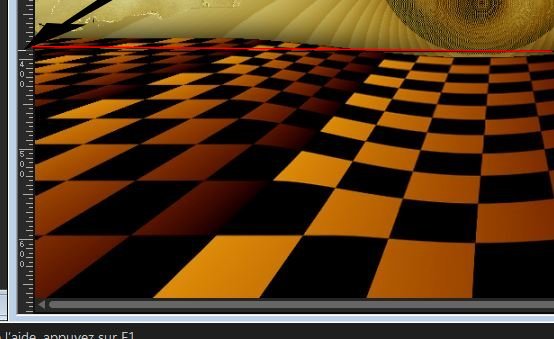
17. Your work look like this now
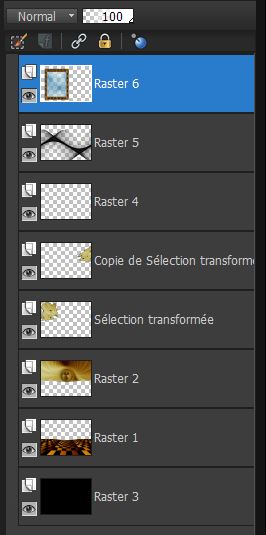
18. Activate the top of the Layer-Palette (Raster 2)
19.Selections - load/save selection- load selection from disk and select my file
''renee_la_porte_des_songes_1''
20. Selections- Promote selection to layer
21.
Effects- Textureffects- Wave with these settings
22. Effects- Edge Effects- Enhance More
23. Effects- Plugins - Unlimited – Distorsion /Smelter 1 =
73
- Selections- Deselect All
24. Layers- Duplicate /Image Mirror
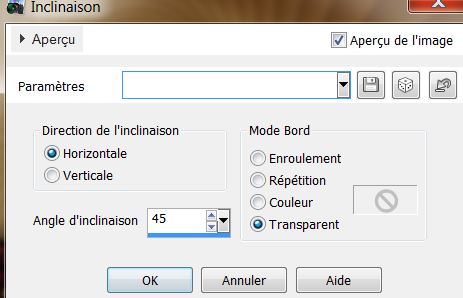
25.Effects- Geometric Effects -Skew with these settings
26. Layer Palette -Double click on this Layer and set the Blend Mode to "Soft Light "
27. Layers- New Raster layer
28. Properties Foreground: Foreground color black
29. Activate Pen Tool with these settings : Line style: current styled line /Size 2

- Draw a black line like this (Example: color red for better view)
30. Convert to Raster Layer
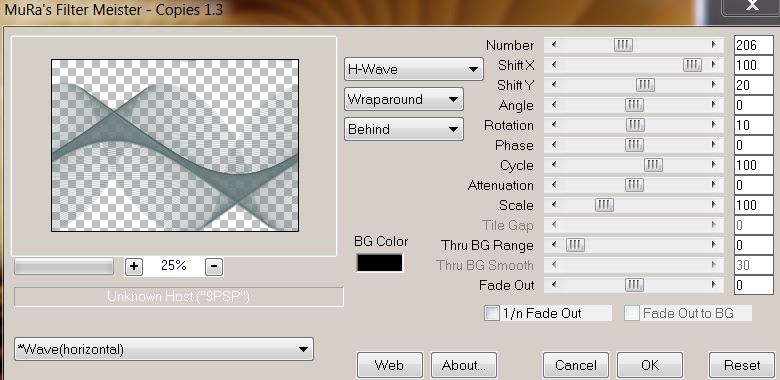
31. Effects- Plugins - Mura's Meister - Copies use settings below
32. Lower the opacity down to 30%
33. Layers- New Raster layer
34. Selection Tool ( S ) Custom selection use settings below
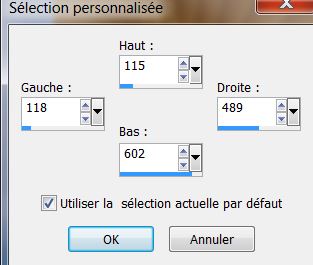
- Keep Selected
35.Effects- Plugins - Mura's Meister - Clouds
36. Lower the opacity down to 69%
37.
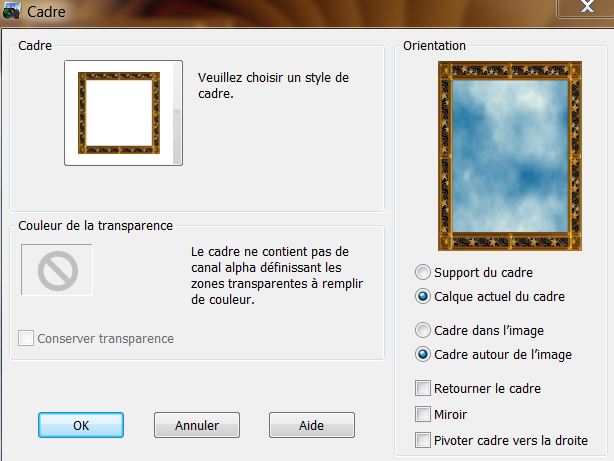
Picture Frame Image and choose frame ''frame gold
starpa'' with these settings .
Picture Frame: extract into
-->> C:\Users\YourName\Documents\Corel PaintShop Pro\12.0\Picture Frames
- Selections- Deselect All
38. Layers- Merge- Merge Down
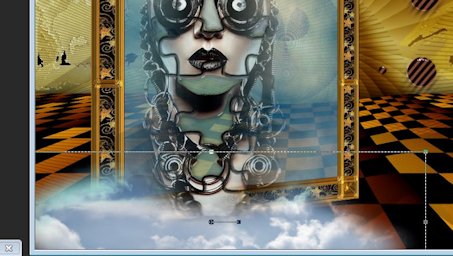
- Your work look like this now
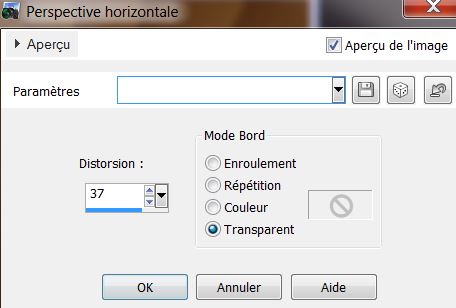
39. Effects- Geometric Effects Perspective Horizontal
40. Open the tube ''moon_miner_by_flexdreams_tubed_by_thafs''
. Edit/copy-Edit paste as a new layer on your working area
41. Image Resize 75% Resize all Layers not checked
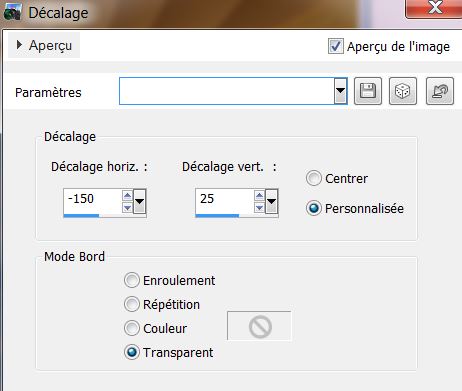
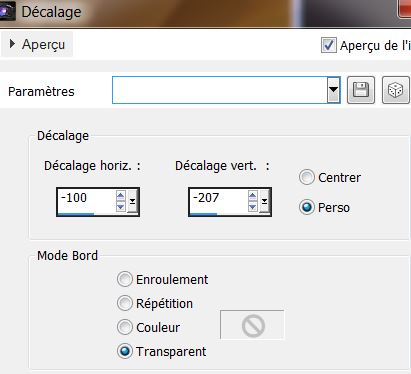
42. Effects - Images Effects - Offset use settings below
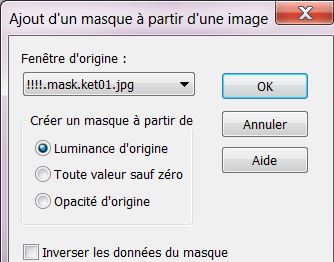
43.Layers-New Mask Layer From Image and choose Mask: maskKet01''
44. Layers- Duplicate
45. Layers- Merge- Merge Group
46. Layers- Duplicate - Layers- Merge- Merge Down
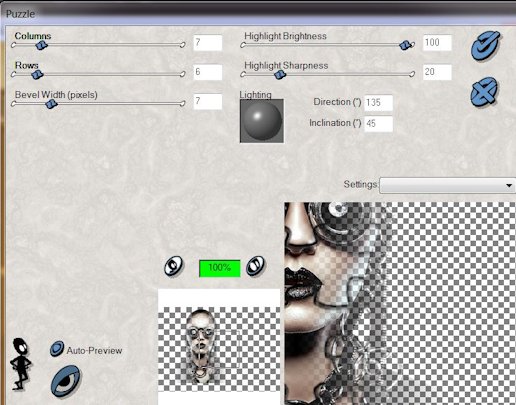
47. Effects- Plugins - Xenofex- Puzzles
48.Selections - load/save selection- load selection from disk and select my file ''renee_la_porte_des_songes_1''
49. Delete
50. Effects- Plugins
- Eyecandy5 - Impact - Glass
tab Settings/User Settings and choose my preset ''renee_porte_songe_glass''
- Selections- Deselect All
51.Open the tube - "pastille" Edit/copy-Edit paste as a new layer on your working area and place
52. Open the tube ''Mist corinne.vicaire-nuages01-2012"Edit/copy-Edit paste as a new layer on your working area
- With your move tool place it in the right place
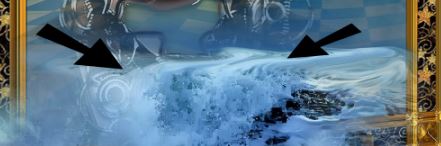
53.Open the tube ''480e_vague /Edit/copy-Edit paste as a new layer on your working area
54. Effects - Images Effects - Offset use settings below
55.Activate Smudge Brush Tool with these settings. Remove the horizontal line again with the Smudge Brush as shown down below

56. Open the tube ''Dodo Imaginism AIW-tubed by
Devil'' Image Resize 75 %. Edit/copy-Edit paste as a new layer on your working area and move
57. Layers- Merge-Merge Visible
View - Toolbars - Script checked !!!!! .Activate toolbar Script, choose my file in the list ''cadre_porte des
songes
58. extract into
-->> Load the script from the materials file into your psp files if you haven't already done so
C:\Users\YourName\Documents\Corel PaintShop Pro\12.0\ Scripts-trusteds''
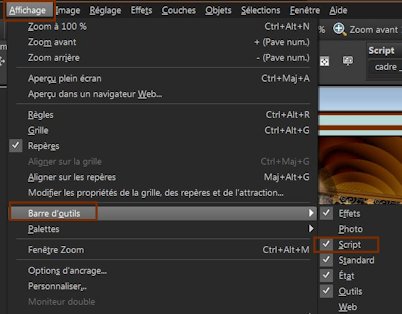

- Activate Toolbar Script, choose my file in the list and click the little blue arrow. Let the script run and when it asks click OK
59. With the magic wand select the blue border
60. Layers- New Raster layer
61. Open image ''93070dda » »Edit/copy-Edit paste into selection
62. Selections-Deselect All
63. Layer Palette -Double click on this Layer and set the Blend Mode to "Dissolve " . Reduce the opacity of this layer to 28%
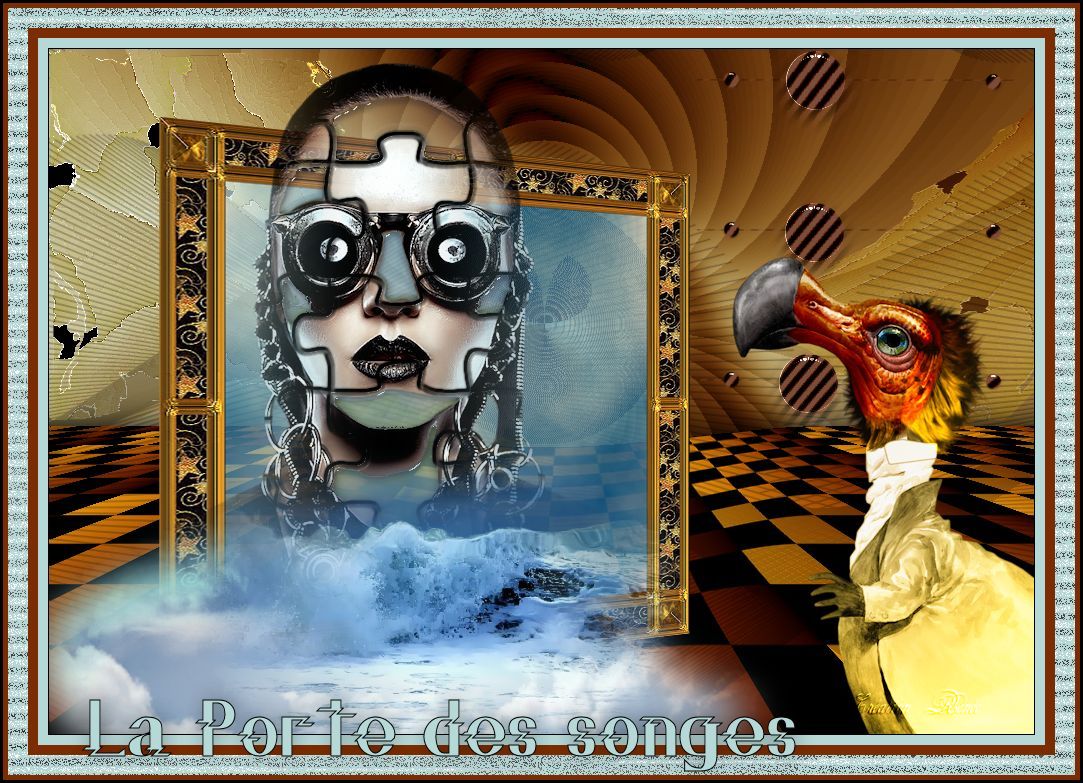
64. Open the tube ''titre ''–Edit/copy-Edit paste as a new layer on your working area and move
Save as JPG.
-I hope you enjoyed this lesson
This lesson was written by Renée 15/04/2013

|


 Translations