|
Let's start the lesson

-Preparation
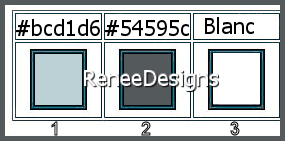
-Material Properties: Set your foreground color to color #bcd1d6 =1- Set your background color to color #54595c= 2
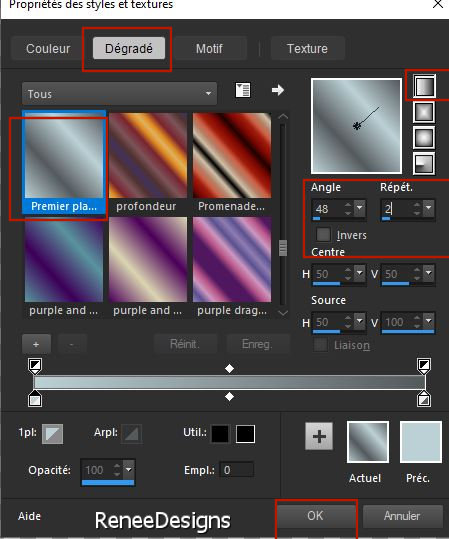
-Set your Foregroundcolor to foreground-background "Linear" gradient configured like this
1. File: Open a transparent image of 1125 x 825 Px
2. Activate Flood Fill Tool –fill the layer with the gradient –fill the layer with the gradient
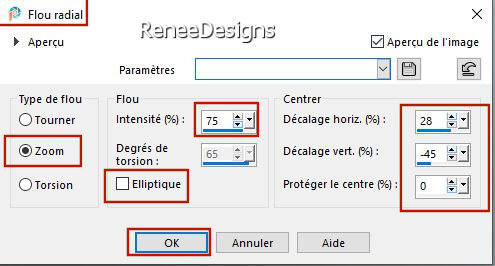
3. Adjust-Blur-Radial Blur use the settings below
4. Effects –Plugins-
Unlimited 2.0 - Kiwis Oelfilter- Setzboard: 185
5. Effects –Plugins-
Unlimited 2.0 – Graphic Plus – Cross Shadow use the settings below

6. Layers- Duplicate
7. Image - Mirror - Mirror Horizontal (Image - Mirror in older versions of PSP)
8. Image - Mirror - Mirror vertical ( Image - Flip in older versions of PSP)
9. Layers-Properties-Lower the Opacity to 58%
10. Layers- Merge- Merge Down
11. Effects- Image Effects-Seamless Tiling using the default settings
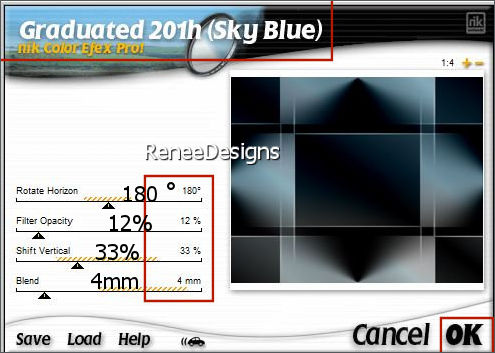
12. Effects – Plugins - Nick Color Efex Pro 1- Graduated 201h use the settings below (Sky
Blue)
13. Layers- Duplicate
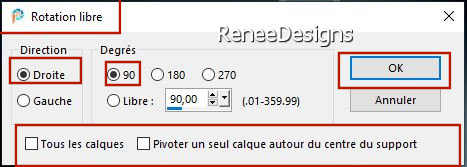
14 Image – Free Rotate - 90° Right
15. Selections –load/save selection –load selection from disc and select my selection: ‘’chercheur -d-âmes 1’’
16. Effects- Image Effects-Seamless Tiling using the default settings

17.Image - Resize 80% - Resize all layers NOT checked
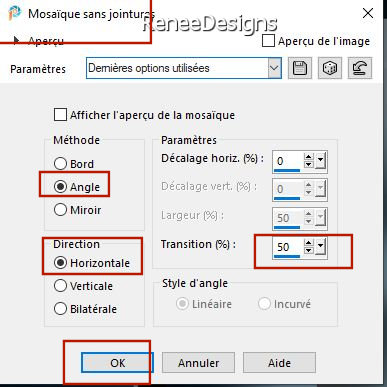
18. Effects- Image Effects-Seamless Tiling use the settings below
- Activate the bottom of the layer palette (Raster 1)
19. Selections –
Select All
20. Activate the layer above
Copy of Raster 1 -Image -Crop to Selection
21. Layers-Properties-Set the Blend Mode to " Dodge "
22. Layers- Duplicate
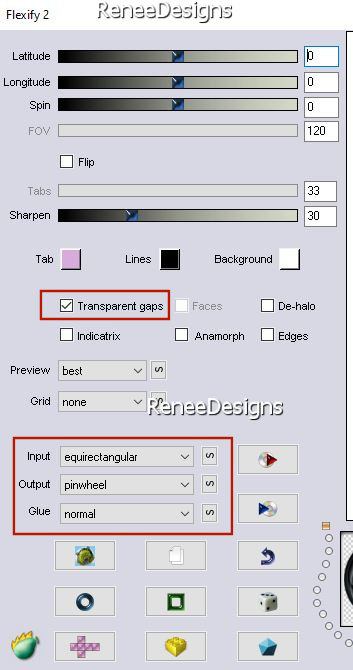
23. Effects – Plugins – Flaming Pear - Flexify 2 use the settings below
24. Effects – Plugins – Alien Skin Eye Candy 5- Impact – Glass –Tab-Settings-User Settings and select my file-
Preset : ‘’Chercheur-ames-Renee- Glass ‘’
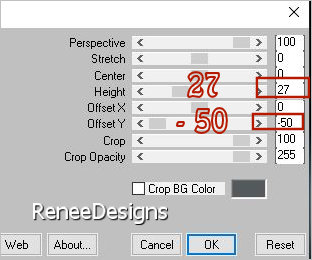
25. Effects – Plugins - Mura’s Meister – Perspective Tiling use the settings below
26. Layers-Properties-Set the Blend Mode to " Normal "-Lower the Opacity to 81%
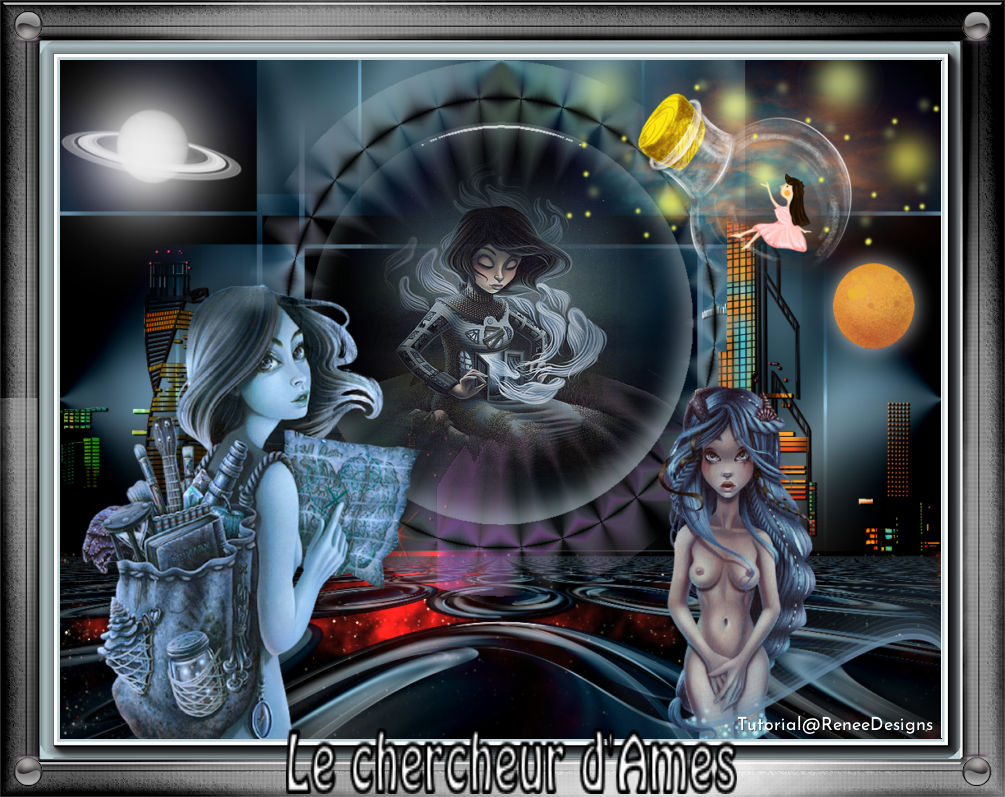
- Your work and Layer Palette look like this now-You should have this result
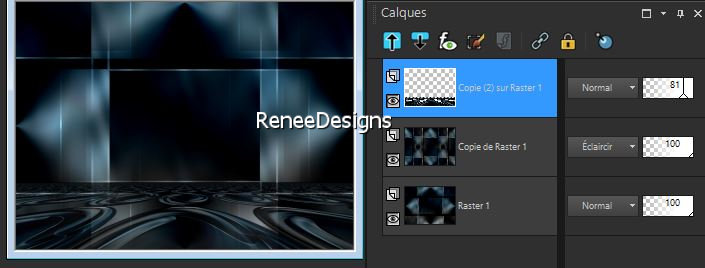
STAY ON THIS LAYER
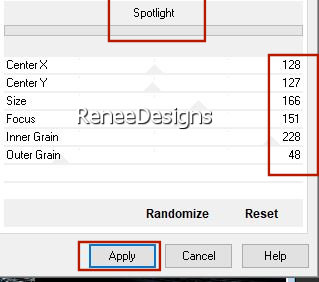
27. Effects –Plugins-
Unlimited 2.0 - Filter Factory Gallery A – Spotlight use the settings below
- Material Properties-Change your Foregroundcolor to foreground-background "Linear" gradient configured like this

- In the layerplatte-activate
Copy of Raster 1
28. Layers- New Raster Layer
29. Activate Flood Fill Tool
–
fill the layer with the gradient
30. Effects –Plugins-
Unimited 2.0 – Graphic Plus- Cross Shadow settings-All settings at 50
31. Effects –Plugins-
Unimited 2.0 - VM Distortion – Channel 5 using the default settings
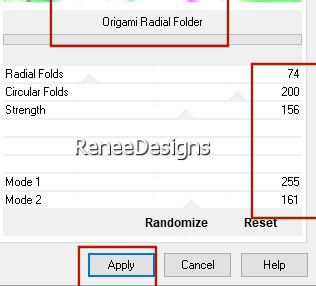
32. Effects –Plugins-
Unimited 2.0 - VM Distortion - Origami Radial Folder use the settings below
33. Effects – Plugins – Transparency - Eliminate White
34. Selections –load/save selection –load selection from disc and select my selection: ‘’chercheur -d-âmes 2’’


35. Objects – Align
– Top
36. Selections –load/save selection –load selection from disc and select my selection: ‘’chercheur -d-âmes 3’’
Do not add a new layer
37. Open the tube Renee-TUBES-Chasseur-ames_1’’ -Edit - Copy- Activate your work -Edit - Paste into selection
38. Adjust –
Sharpen - Sharpness
- Repeat: Adjust – Sharpen - Sharpness
39. Layers- New Raster Layer
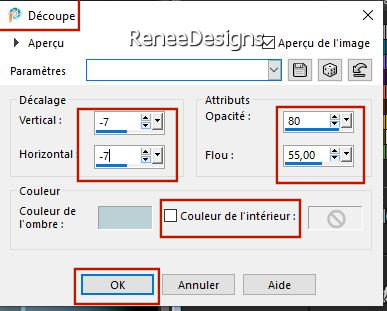
40. Effects –
3D-Effects – Cutout use the settings below – Color #bcd1d6=1
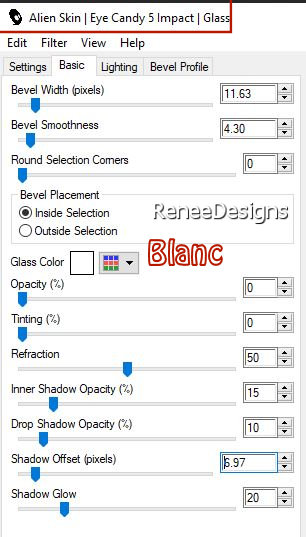
41. Effects - Plugins - Alien Skin EyeCandy 5 - Impact -Glass use the settings below
42. Layers- Merge- Merge Down
43. Layers- Arrange- Bring to Top
-Activate the bottom of the layer palette (Raster 1)
44. Selections –load/save selection –load selection from disc and select my selection: ‘’chercheur -d-âmes 4’’
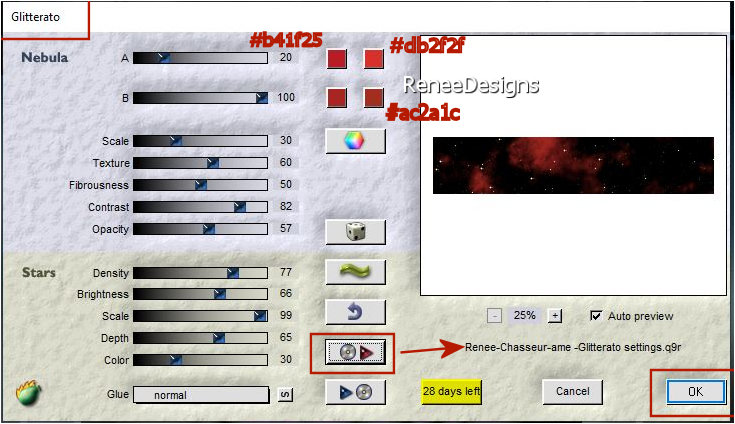
45. Effects –Plugins – Flaming Pear – Glitterato- select my file -Preset ::
Renee-Chasseur-ame -Glitterato settings.q9r
(
the colors I opted for different reds - adapt your colors according to your creation )
click the red arrow
 choose my preset in the map of your choice choose my preset in the map of your choice
DO NOT DESELECT
- In the layerplatte-activate Copy of Raster 1
46. Repeat: Effects –
Plugins – Flaming Pear – Glitterato with the same settings
- To replace the top of the layer-palette
47. Open the tube ‘’Renee-TUBES-Chasseur-ames_2’’ -Edit - Copy- Activate your work -Edit - Paste as a new layer
- Do not move , it is in the right place
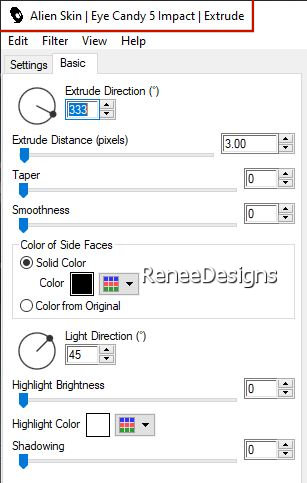
48. Effects - Plugins - Alien Skin Eye Candy 5 – Impact- Extrude use the settings below
49. Open the tube ’’
Renee-TUBES-Chasseur-ames_3.’’ -Edit - Copy- Activate your work -Edit - Paste as a new layer
- Move tool- Move to the top (see finished image)
50. Open the tube ’’
Renee-TUBES-Chasseur-ames_5.’’ -Edit - Copy- Activate your work -Edit - Paste as a new layer
51. Objects- Align
– Top – Objects – Align - Right
52. Open the
tube’’ Renee-TUBES-the-seeker’’ -( select layer ’’ tuto-chasseur-ames’’ of the tube )
-Edit - Copy- Activate your work -Edit - Paste as a new layer and move it in the right place
53. Open the tube ’’
Renee-TUBES-Chasseur-ames_6.’’ -Edit - Copy- Activate your work -Edit - Paste as a new layer
- Place to your liking
54. Open the tube ’’
Renee-TUBES-Chasseur-ames_4.’’ -Edit - Copy- Activate your work -Edit - Paste as a new layer
- Place at the bottom right
55. Layers-Merge- Merge Visible
56. Edit- Copy!!
57. Open the tube
" cadre/frame" in your Psp
58. Activate your Magic Wand with these settings

- select the inside of the frame
59. Edit - Paste into Selection (the image is still in memory)
60. Open the tube
‘’Renee-TUBES-Chasseur-ames_Deco-cadre’’ Edit - Copy- Activate your work -Edit - Paste as a new layer (do not move)
- Open the tube
‘’titre’’ -Edit - Copy- Activate your work -Edit - Paste as a new layer/Or write your own text using the font provided
Layers-Merge- Merge All ( flatten)
Add your name or watermark, save as JPG file and you're done
I hope you enjoyed this lesson
Renée
This lesson was written by Renée
02/10/2021
Edited and Update
in 2021
*
Any resemblance with an existing lesson is a coincidence
* Do not forget to thank the people who work with us and for us -I have appointed the tubeurs and translators
Thanks
*
|
 Translations