|
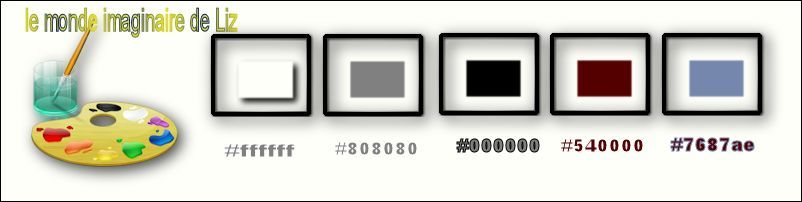
Let's start the lesson. Open the Color-Palette
-
Material Properties: Foreground color white #fffffff
Background color to: #808080
-
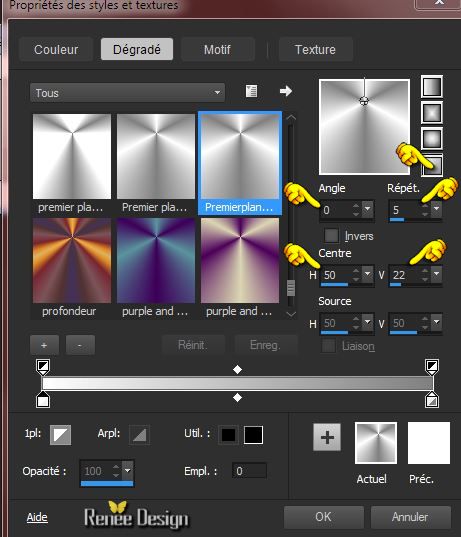
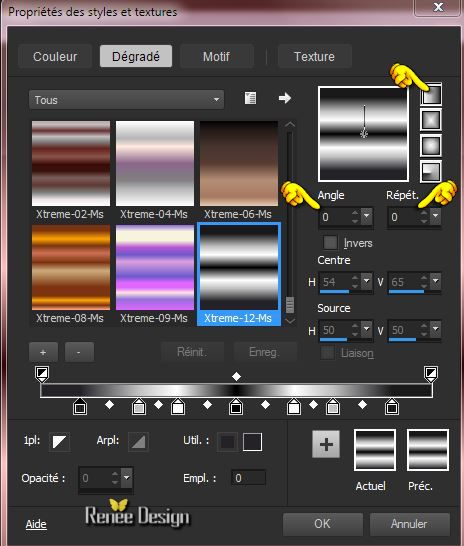
Prepare a radial gradient configured like this.
1.
File - new, Open a new transparent image 995 x 645 pixels
2.
Activate Food Fill Tool :fill the layer with the gradient
3.
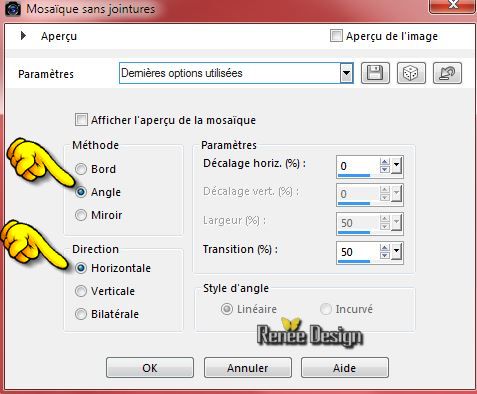
Effects- Image Effects- Seamless Tiling with these settings
4.
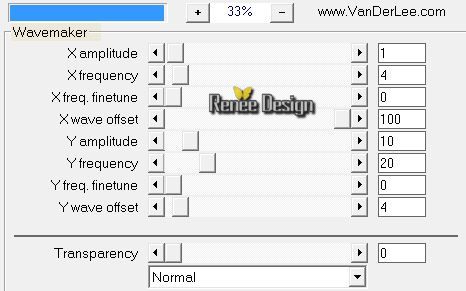
Effects- Plugins - Vanderlee Unplugged
X-Wavemaker
5.
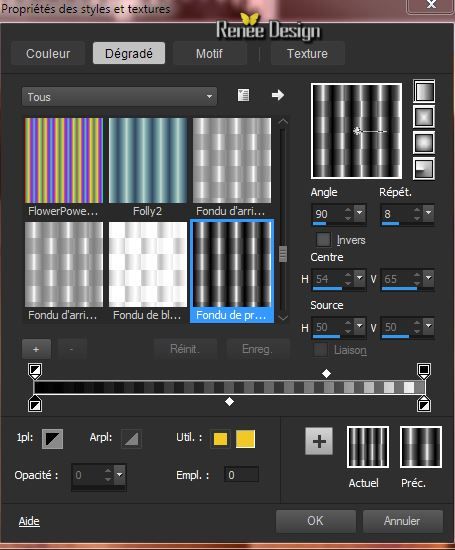
Material of the foreground - change material of the foreground into gradient select ''Xtreme-12-Ms ''- Prepare a linear gradient configured like this.
6. Layers - New raster layer
-
Activate Flood Fill Tool and fill the layer with the gradient
7.
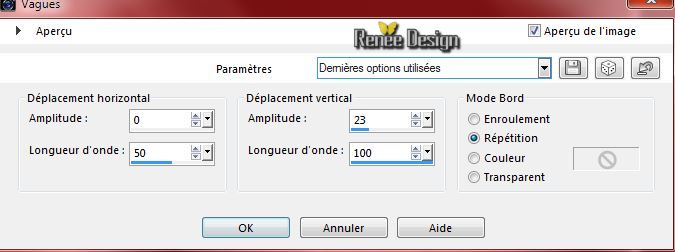
Effects- Distortion Effects- Wave with these settings
8.
Selections - load/save selection - load selection from disk and choose my selection: "LIZ_MI_1"
-
Delete on your keyboard 
-Selections-Deselect All
9.
Effects- Plugins- L&K 's -Palmyre with these settings
255/7
10.
Layers-Duplicate
11.
Image Mirror (Image - mirror/flip is no longer available in PSP 17 versions newer than X3, please use the script )
-
Layer Palette -Double click on this layer and set the Blendmode to Soft Light
-
Material of the foreground: foreground color white
12.
Layers- New raster layer-Activate Food Fill Tool :fill the layer with the foreground color white
13.
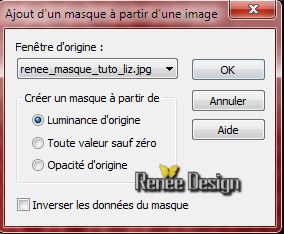
Layers- New mask layer from Image and select mask:''renee_masque_tuto_liz.jpg"
-
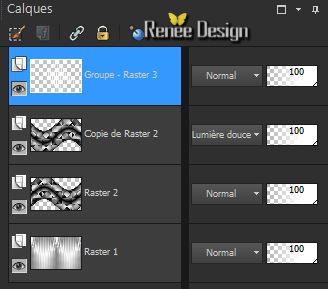
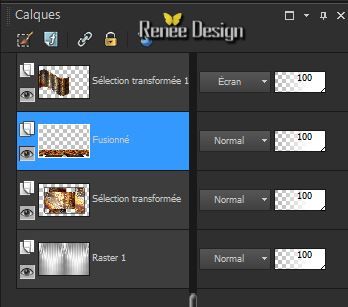
Layers- Merge- Merge Group
-Your Layer Palette look like this now:
14.
Close the bottom layer (Raster 1)
-
Activate an open layer
15. Layers - Merge - Merge Visible
-
Open the bottom layer (Raster 1)
-
Activate the merged layer
16.
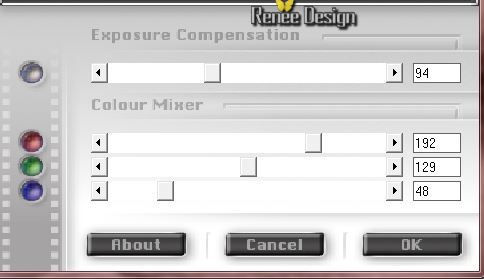
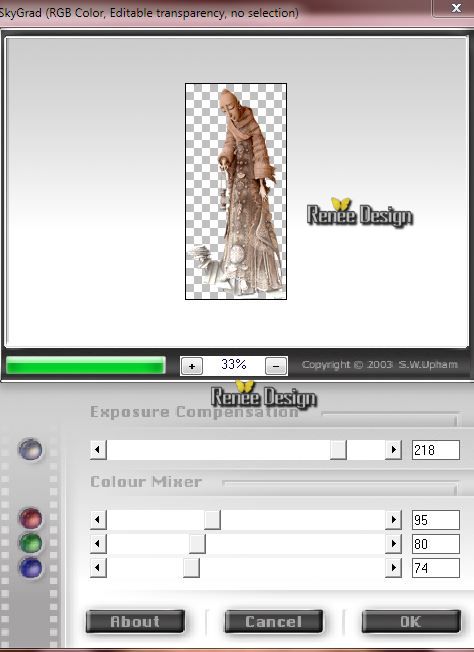
Effects- Plugins - Fotomatic -
Skygrad
(Here you can change the settings based on your choice of colors)
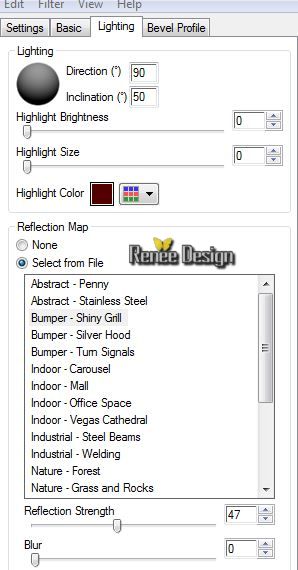
17.
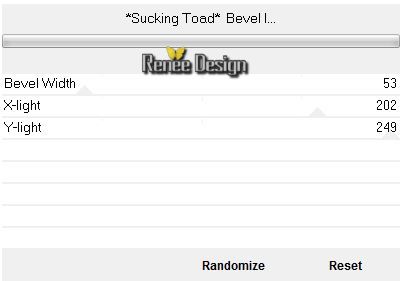
Effects- Plugins - Unlimited 2.0 - Toadies - Sucking Toad*Bevel
!
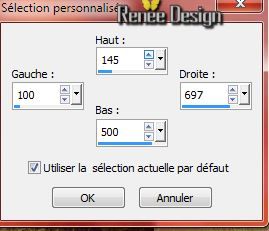
18.
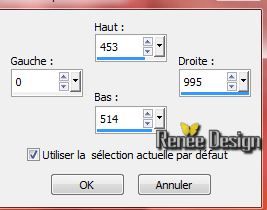
Activate Selection Tool (S) - Custom Selection with these settings
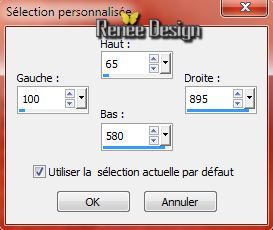
-
Keep Selected
19. Effects- Plugins - Simple - Diamonds
20.
Selections - Promote selection to layer
21.
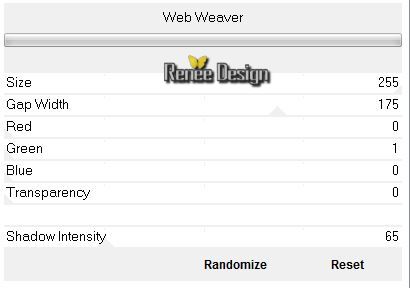
Effects- Plugins - Unlimited 2.0 - VM1 - Web Weaver
22. Effects-3D effects-Drop Shadow with these settings: 10/10/62/14 black
- Repeat: Effects-3D effects-Drop Shadow with these settings:-10/10
-Selections-Deselect All
23
.
Activate Selection Tool (S) - Custom Selection with these settings
24.
Effects- Distortion Effects- Wave with these settings

25.
Selections - Promote selection to layer
26.
Selections- Modify-Contract 10 pixels
27. Layers - New raster layer
- Material of the foreground : foreground color black
28. Prepare a linear "Fading foreground" gradient configured like this.
29. Activate Flood Fill Tool and fill the selection with the gradient
Selections-Deselect All
30.
Decrease the opacity of the layer to 75%
31. Layers- Merge- Merge Down
-Layer Palette -Double click on this layer and set the Blendmode to Screen
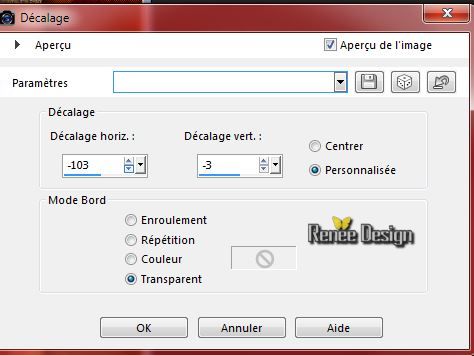
32. Effects- Image Effects Offset with these settings
- Be placed on the second last layer (Merged)
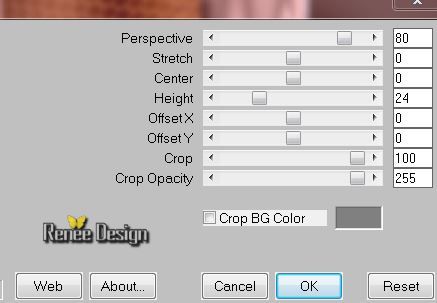
33. Effects- Plugins - Mura's Meister -Perpsective
Tilling
34. Layers- Arrange-Move Up
- Your Layer Palette look like this now:
-Stay on this layer (Merged)
35. Layers - New raster layer
36.
Activate Selection Tool (S) - Custom Selection with these settings
37. Activate the tube ' Le_monde_ imaginaire _ Liz_image1'- Edit/copy-Edit-paste into selection
Selections-Deselect All
-
Activate the top of the layer-Palette
38. Layers - New raster layer
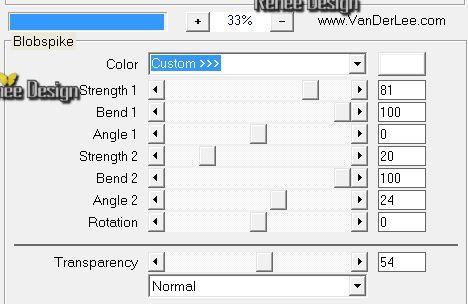
39. Effects- Plugins- Vanderlee Unplugged X-
Blobspike
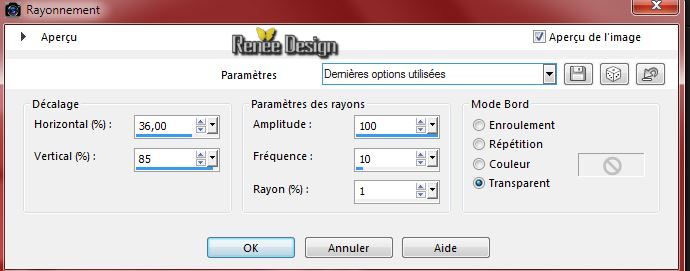
40. Effects- Distortion Effects- Spiky Halo with these settings
41. Layers-
Arrange 3 times down (above selecting transformed)
- Activate the top of the Layer Palette
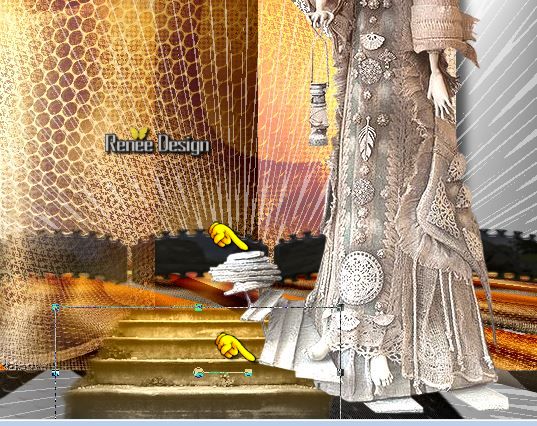
42. Activate the tube ''escaliers_59010-9''- Edit/copy-Edit paste as a new layer on your working area and place at the bottom of your work
43. Activate the tube ''Lize-ADR-44.png''- Edit/copy-Edit paste as a new layer on your working aera
(erase the signature)
44. Effects- Image Effects Offset with these settings H = 300 and V =0
45. Effects- Plugins-Fotomatic-Skygrad with these settings
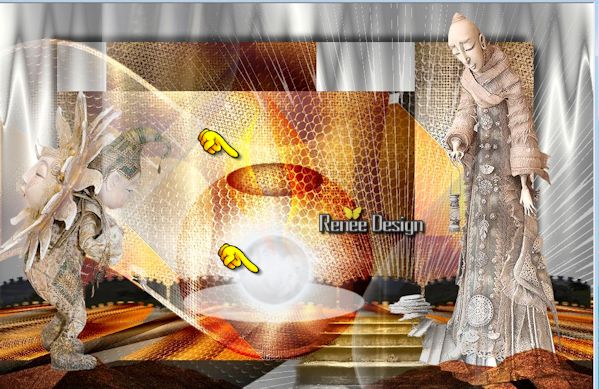
If you use other colors feel free to change the opacity and/or the blend mode from your layers
-You have this result
46. Activate the tube ''monde_liz_image2''- Edit/copy-Edit paste as a new layer on your working aera
-place at the bottom of your work see example
47. Layer Palette -Double click on this layer and set the Blendmode to Hard Light
48. Activate the tube ''Lize-ADR-47.png''
- Image
Mirror
- Image
Resize with 75%
-Edit-Copy-Edit-Paste as a new layer area and move to the left
49. Layers- Merge- Merge- Visible
50. Layers - New raster layer
In earlier versions, merging down layers with different blend mode and/or opacity, can result in a slightly different effect
- Material Properties: Foreground color white : #ffffff -Background color to:#540000
51.
Selections - load/save selection - load selection from disk and choose my selection: ''LIZ_MI_2'
- Activate Flood Fill Tool and fill the selection with the foreground color
52. Layers - New raster layer
- Activate Flood Fill Tool and fill the selection with the background color
53.
Selections- Modify-Contract 55 pixels
54.
Selections- Modify-Feather-Feather amount 55 pixels
DELETE on your keyboard
Selections-Deselect All
55. Layers-Merge- Merge Down
-
Layer Palette -Double click on this layer and set the Blendmode to Overlay
56. Layers - New raster layer
57.
Selections - load/save selection - load selection from disk and choose my selection: ''LIZ_MI_3''
- Activate Flood Fill Tool and fill the selection with the background color
58.
Selections- Modify-Contract 15 pixels
59.
Selections- Modify-Feather-Feather amount 35 pixels
DELETE on your keyboard (click 3 times )
Selections-Deselect All
60. Layers - New raster layer
61.
Selections - load/save selection - load selection from disk and choose my selection: ''LIZ_MI_4''
62. Pot of Paint: Change the opacity of the color to 60%- Activate Flood Fill Tool and fill the selection with the foreground color
Selections-Deselect All
63. Layers - New raster layer
64.
Selections - load/save selection - load selection from disk and choose my selection: ''''LIZ_MI_1''
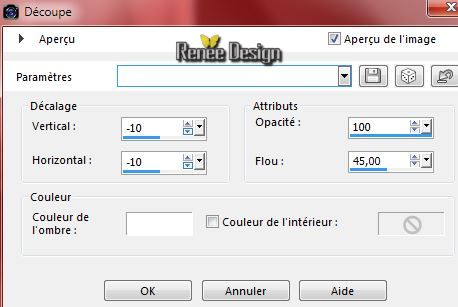
65. Effects- 3D Effects- Cutout with these settings
66.
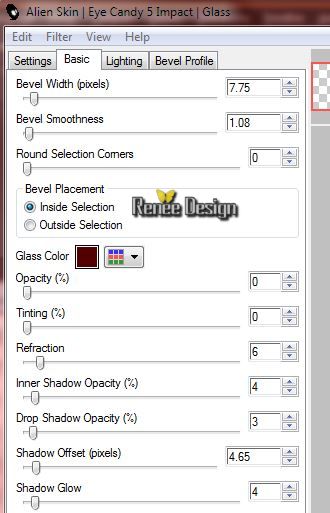
Effects- Plugins-Eyecandy 5-
Glass-tab settings/user settings - choose my preset -''Liz_glass"
Or manual settings below
Selections- Deselect All
67. Image -Free Rotate 90 ° Right
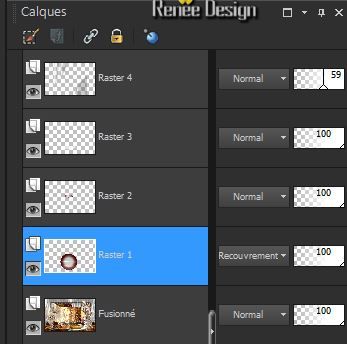
-
Decrease the opacity of the layer to 59%
68. Activate in the layer palette Raster 1
69. Repeat: Effects- Plugins- EyeCandy Glass -with the same settings
- Your Layer Palette look like this now:
-
Activate the top of the Layer Palette
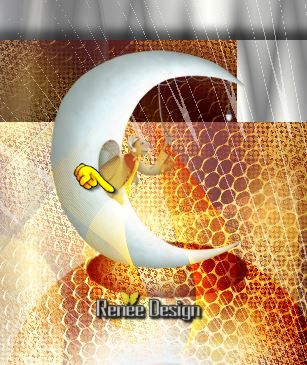
70. Activate the tube '' monde_liz_image3.pspimage'' on this tube
- Activate layer ''terre'' = raster 1 of the tube -Edit/Copy-Edit paste as a new layer on your working aera .With your move tool place it to the middle of your work like this
- Activate layer ''effet ''= raster 2 of the tube . Edit/Copy-Edit paste as a new layer on your working aera and move like this
71. Activate the tube ''Lize-CG-9.pspimage''
-activate the layer ''modifié_travail ''- Edit/copy-Edit paste as a new layer on your working area and move
place like this
72. Layers - New raster layer
73.
Selections - load/save selection - load selection from disk and choose my selection: '' LIZ_MI_5"
74. Pot of Paint: Change the opacity of the color to 100% Activate Flood Fill Tool and fill the selection with color #7687ae
Selections-Deselect All
75.Layers- Merge- Merge Visible
76. Activate the tube " monde_liz_eclair"
- Edit/copy-Edit paste as a new layer on your working area and move
- Layer Palette -Double click on this layer and set the Blendmode to Luminance Legacy
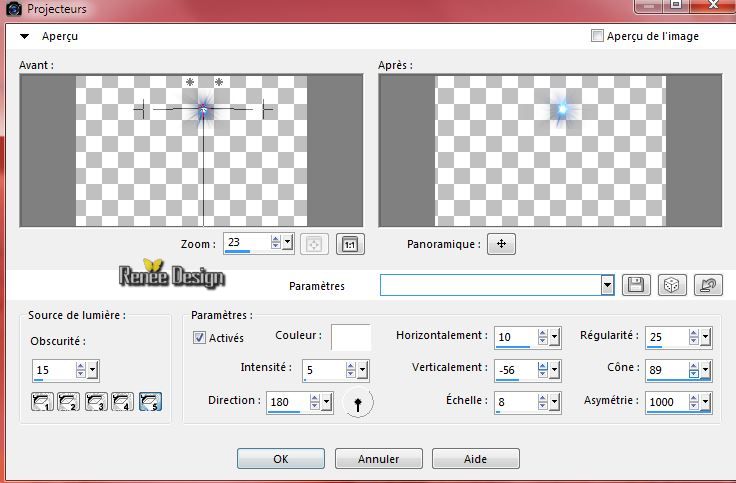
77. Effects- Illimination Effects- Lights with these settings
78. Layers- Merge- Merge All ( flatten)
79. Image - Add borders-Symmetric checked: 1 pixel BG-Color #540000
80. Image - Add borders-Symmetric checked: 2 pixels FG-Color white
81.
Image - Add borders-Symmetric checked: 1 pixel BG-Color#540000
82. Image - Add borders-Symmetric checked: 50 pixels FG-Color white
83. Image - Add borders-Symmetric checked: 1 pixel BG-Color#540000
84. Image - Add borders-Symmetric checked: 2 pixels FG-Color white
85.
Image - Add borders-Symmetric checked: 1 pixel BG-Color#540000
86. Activate Text Tool- Font ''blooods'' Write your own text-Effects- 3 D Effects- Drop Shadow to your own taste
Save as JPG
I hope you enjoyed this lesson
Renée
This lesson was written by Renée10 /12/2014
Placing
01/2015
*
Any resemblance with an existing lesson is merely a coincidence *
* Don't forget to thank the people who work for us and with us. I named the tubeurs - Testers and the translators.
Thanks Renée.
| 
 Translations


 When you see this logo the filter is imported in Unlimited *

 All rights reserved