|
Let's start the lesson
Les larmes de la
montagne/The tears of the mountain
-Preparation
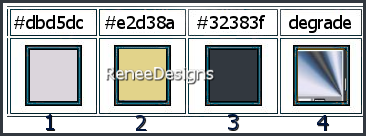
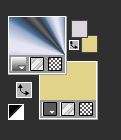
-Material Properties: Set your foreground color to color #dbd5dc= 1- Set your background color to color #e2d38a= 2

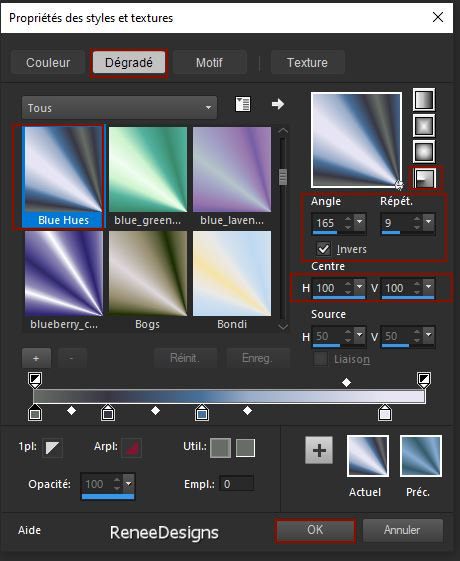
- Color Palette: Foreground color to gradient and select gradient ‘’ Blue Hues ’’ -
Prepare a foreground-radial gradient configured like this
1. Open the Background Image
‘’ Fond-larmes-montagne’’- Promote Background Layer =Raster 1
2. Layers- New Raster Layer
3. Activate Flood Fill Tool
 –Fill the layer with the gradient –Fill the layer with the gradient
4. Effects – Plugins – DSB Flux- Gears with these settings: 8/16
5. Layers- Duplicate
6. Image - Mirror - Mirror Horizontal (Image - Mirror in older versions of PSP)
6a. Image - Mirror - Mirror vertical ( Image - Flip in older versions of PSP)
7. Layers-Properties-Change the Blend Mode to " Multiplikation "
8. Layers- Merge- Merge Down
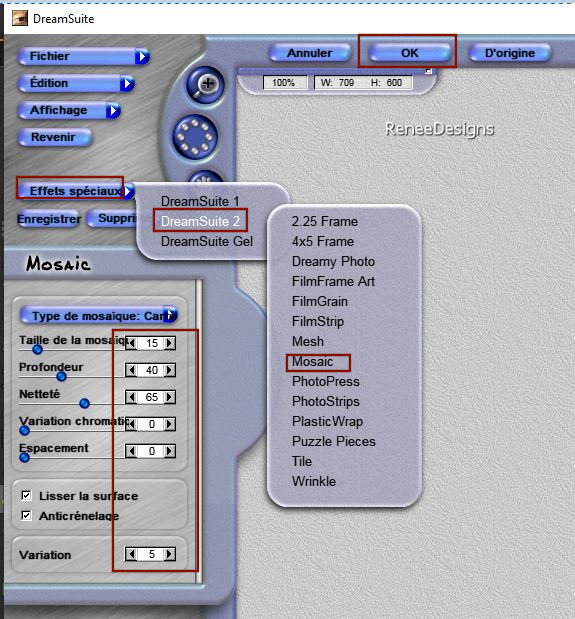
9. Effects – Plugins– Auto –FX-Software - Dreamsuite
- Click: Effets
Speciaux/DreamSuite2/Mosaic- use the settings below
10. Effects –Plugins-
Unlimited 2.0 - Special Effects 1- Binoculars- reset first
 these settings: 103/106
11. Effects –Plugins- Unlimited
2.0 – Visual Manipulation- Transmission with these settings: 10/105/0 (attention set your foreground back to color nr 1 and background color to nr 2) If it turns white, place the filter in the plug-in filters and not in Unlimited)
If you don't have it you can also find it in the VM Extravaganza plugin.
12. Layers-Properties-Change the Blend Mode to " Multiplikation "
13. Layers- New Raster Layer
14. Selections –load/save selection –load selection from disc and select my selection: ‘’Larmes-Montagne 1’’
15. Foreground color back on the radial gradient
Activate Flood Fill Tool
 –
fill the selection with the gradient –
fill the selection with the gradient
16. Adjust-Blur- Gaussian Blur -Radius 45%
17. Layers- New Raster Layer
18. Open the Tube ’’ Renee-Paysage-
larmes-de-la-montagne’’ -Edit - Copy- Activate your work -Edit - Paste into selection
19. Layers-Properties-Change the Blend Mode to " Darken"
20. Selections –load/save selection –load selection from disc and select my selection: ‘’Larmes-Montagne 2’’
21. Selections-Promote selection to layer
22. Layers-Properties-Change the Blend Mode to " Hard Light "

23. Effects- 3D-Effects - Drop Shadow with these settings: 0/0/64/55 Color #e2d38a= 2
- Material Properties: Set your foreground color to color #dbd5dc= 1- Set your background color to color #e2d38a=2
24. Layers- New Raster Layer
25. Selections –load/save selection –load selection from disc and select my selection: ‘’Larmes-Montagne 3’’
26. Activate Flood Fill Tool - Fill the selection with the background color =2
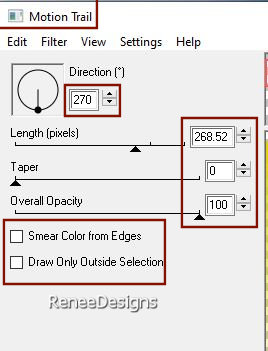
27. Effects – Plugins – EyeCandy 4000- Motion Trail use the settings belowl

28. Image- Rotate Right
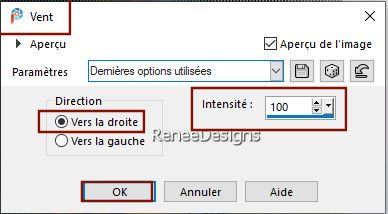
29. Effects – Distortion Effects– Wind/From Right/100
30. Image -Rotate Left
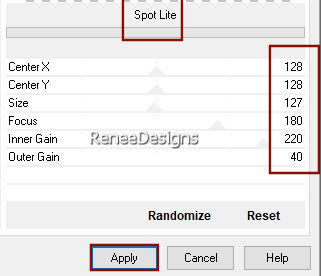
31. Effects –Plugins-
Unlimited 2.0- Graphics Plus - Spot Lite use the settings below
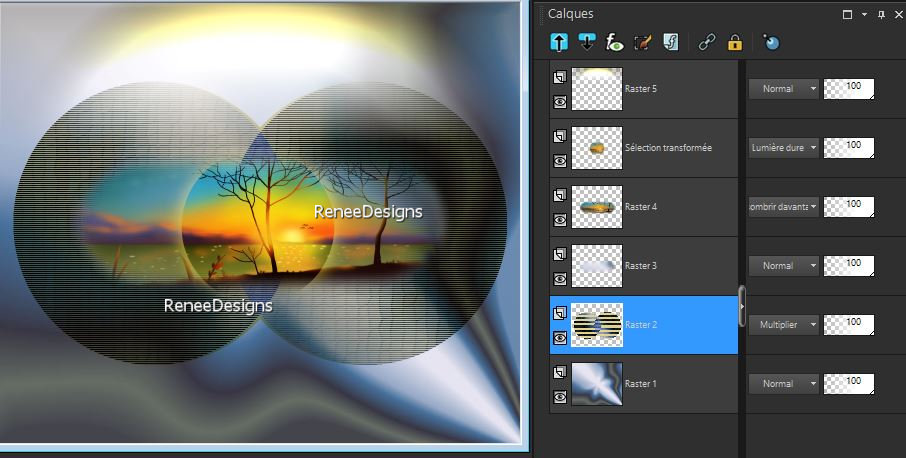
- In the layers palette-activate Raster 2
Your work and Layer Palette look like this now-You should have this result
- Color Palette-set the foreground color to colr #32383f= 3
32. Layers- New Raster Layer
33. Selections –load/save selection –load selection from disc and select my selection: ‘’Larmes-Montagne 4’’
34. Activate Flood Fill Tool
 –
Fill the selection with the foreground color = 3 –
Fill the selection with the foreground color = 3
35. Effects –Plugins-
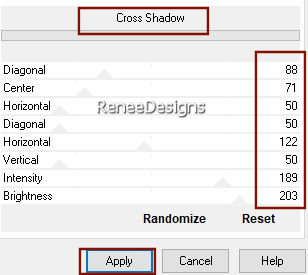
Unlimited 2.0 – Graphic Plus – Cross Shadow use the settings below
36. Effects- 3D-Effects - Drop Shadow with these settings: 5/5/65/25 Color Black

37. Activate the Magic Wand with these settings - Click in the top empty area

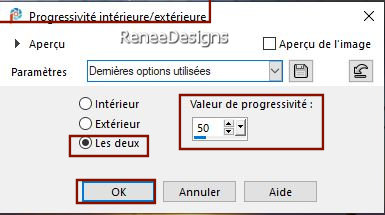
38. Selections –
Modify - Inside/Outside Feather (Both 50 ) Click 10 times on the delete key of your keyboard

39. Open the Tube ‘’Larmes-montagne-image 1’’ -Edit - Copy- Activate your work -Edit - Paste as a new layer
- Do not move, it is in the right side
40. Layers-Properties-Change the Blend Mode to " Normal" - Lower the Opacity to 55%
- In the layer palette-activate
Raster 6
- Color palette-Put the foreground color back on the radial gradient
41. Layers- New Raster Layer
42. Activate Flood Fill Tool
 –
Fill the layer with the gradient –
Fill the layer with the gradient
43. Adjust-Blur-Gaussian Blur-Radius 58%
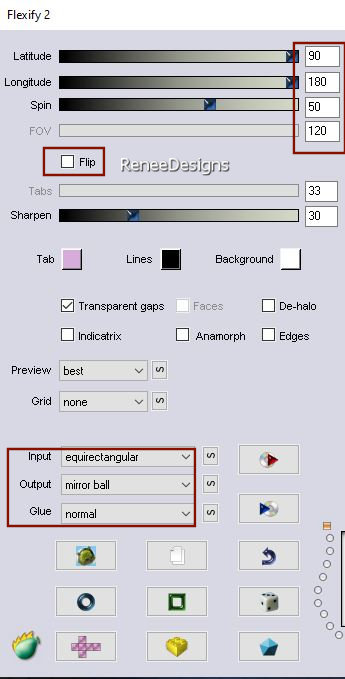
44. Effects – Plugins – Flaming pear – Flexify 2 use the settings below
45. Effects- Distortion Effects– Wave use the settings below
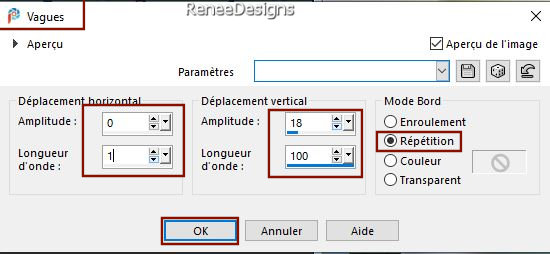
46. Effects- Distortion Effects– Wind ( from Right/100 )

47. Layers-Properties-Change the Blend Mode to " Overlay "
- Activate the top of the layer palette
48. Open the Tube ‘’
Larmes-montagne-image 2’’ -Edit - Copy- Activate your work -Edit - Paste as a new layer
49. Pick Tool: (K) on your keyboard -Enter these parameters on the toolbar
 191/772 191/772
Press ( M ) to close the Pick Tool
50. Open the Tube ‘’Renee_tube_ciel_pourpre.pspimage’’ -Edit - Copy- Activate your work -Edit - Paste as a new layer
- Place at the top right
51. Open the Tube ’’ Renee-TUBES-Larmes-Montagne-Image
3’’ -Edit - Copy- Activate your work -Edit - Paste as a new layer
52. Pick Tool: (K) on your keyboard -Enter these parameters on the toolbar
 563/
61 563/
61
Press ( M ) to close the Pick Tool
53. Effects – Plugins – FM Tile Tools – Blend Emboss using the default settings
54. Effects- 3D-Effects - Drop Shadow with these settings: 5/5/65/25 Color Black
55. Open the Tube
‘’Renee-TUBES-Larmes-Montagne-Image 4’’ -Edit - Copy- Activate your work -Edit - Paste as a new layer
56. Image - Resize to 78% - Uncheck - Resize all layers
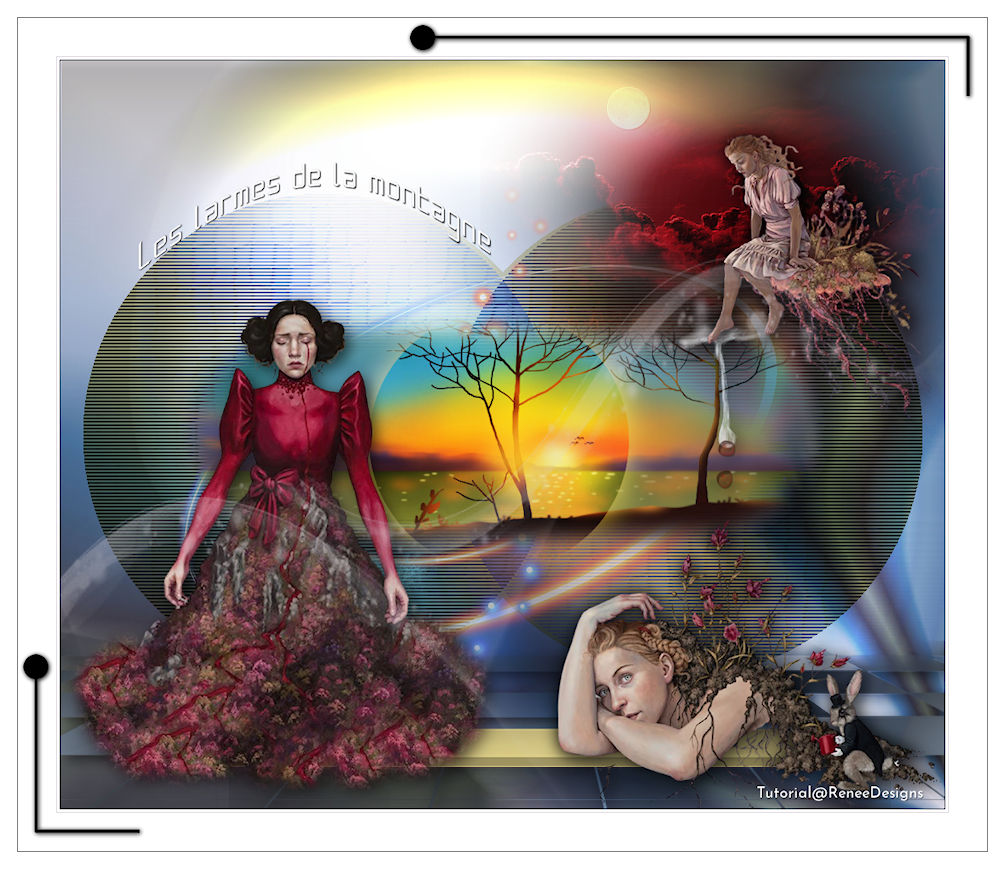
- Move it in the right place ( see finished image)
57. Effects- 3D-Effects - Drop Shadow with these settings: 5/5/65/25 Color Black
58. Open the Tube " titre "-Edit - Copy- Activate your work -Edit - Paste as a new layer- Or write your own title
59. Layers- New Raster Layer
60. Activate Flood Fill Tool
 –Opacity at 50% – Fill the layer with the foreground color= 1 –Opacity at 50% – Fill the layer with the foreground color= 1
61. Layers- New Mask Layer-From Image and select Mask: ‘’
VSP240’’
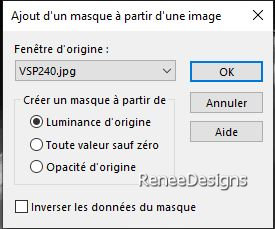
62. Layers- Duplicate
63. Layers- Merge- Merge Group
64. Image - Add borders-Symmetric checked:1 Pixel /Color # 32383f=3
Image - Add borders-Symmetric checked: 3 Pixels /Color White
Image - Add borders-Symmetric checked: 1 Pixel /Color # dbd5dc=1
Image - Add borders-Symmetric checked: 45 Pixels /Color White
Image - Add borders-Symmetric checked: 1 Pixel /Color # 32383f=3
Image - Add borders-Symmetric checked: 20 Pixels /Color White
65. Open the Tube ‘’tube DECO’’ -Edit - Copy- Activate your work -Edit - Paste as a new layer (do not move)
66.Image - Resize to 85%- Resize all Layers checked.
- Paste the author's watermark on your work and your own watermark
-Layers- Merge- Merge All (flatten)
Save as JPG
That's it - Thank you / I hope you enjoyed this lesson
Renée
This lesson was written by Renée 30/01/ 2022
Edited and Update
2022
*
Any resemblance with an existing lesson is a coincidence
* Do not forget to thank the people who work with us and for us -I have appointed the tubeurs and translators
Thanks
*
|
 Translations


