|
Let's start the lesson.
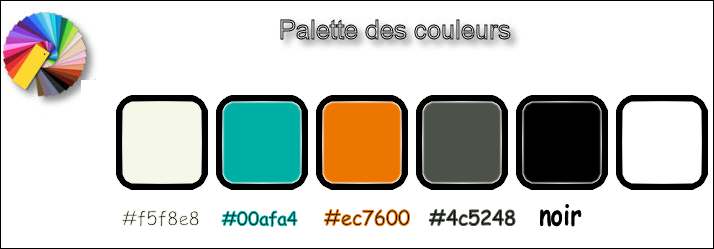
Used Colors

- Preparation - Color Palette: Set your Foreground color to #f5f8e8 -Set your Background color to #000000
-
Prepare a linear gradient configured like this

1. File: Open a new transparent image 1005 x 675 Pixels
2. Activate the Flood Fill Tool and fill the layer with the gradient
3. Effects –Plugins – Neology – A Different Sin use the settings below

-
Color-Palette-Change your background color into
#4c5248
4. Layers- New Raster Layer
5.
Selections –load/save selection –load selection from disc and select my selection:‘’ Les doux yeux du
monstre_1’’
6. Activate the Flood Fill Tool and fill the selection with the background color
Selections- Deselect All
7.
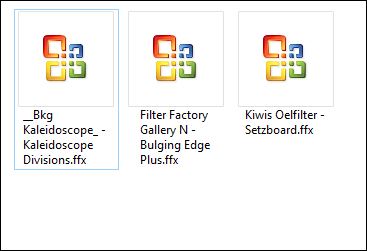
Effects –Plugins - Unlimited - Filter Factory Gallery N- Bulging Edge
Plus...

8.
Effects –Plugins -Unlimited - Kiwis Oelfilter – Setzboard
37
9.
Activate Selection Tool -Custom Selection (S) -Rectangle with these settings

DELETE

Keep selected !
10. Effects – 3D Effects –Drop Shadow with these settings

- Repeat- Drop Shadow with these settings 15 /15
11. Layers- New Raster Layer
12. Activate Flood Fill Tool - Change the opacity of the color at 50% and fill the selection with the foreground color #f5f8e8
13.
Selections – Modify - Contract 7 pixels
DELETE

14. Open your tube ‘’ Renee_tube_Les doux yeux du
monstre-paysage’’
- Edit - Copy- Activate your work -Edit - Paste as a new layer
15. Image
-Resize to 50% (All layers not checked)
16.
Selection - Invert
DELETE

Selections- Deselect All
17. Layers- Merge- Merge Down
18.
Effects –Plugins – Nick Color Effex 3.0 /Bi color
-Filters
Color
set2/ Cool warm 2

19. Layers- New Raster Layer
20.
Selections –load/save selection –load selection from disc and select my selection:‘’ Les doux yeux du
monstre_2’'
21. Activate Flood Fill Tool - Change the opacity of the color at 100% and fill the selection with the foreground color (3 clicks)
22. Effects
Plugins -AAA Frame – Foto Frame

Selections- Deselect All
23. Effects
– Plugins – MV Plugins – PanoWarp

24. Layers- Duplicate
25. Layers- Merge- Merge Down
- Color-Palette-Change your background color into #ffffff
26. Layers- New Raster Layer
27.
Selections –load/save selection –load selection from disc and select my selection:‘’ Les doux yeux du
monstre_3’’
28. Activate Flood Fill Tool and fill the selection with the background color #ffffff
Selections- Deselect All
29. Effects
– Distortion Effects -Wind: 40° wind direction from right
- Repeat:Wind
40° wind direction from left
30. Open your tube ‘’ Renee_tube_Les doux yeux du
monstre-effet1’’
- Edit - Copy- Activate your work -Edit - Paste as a new layer
31. Effects
–Geometric Effects -Circle -transparent
-
Layers-Properties-Set the Blend Mode to " Screen " -Set the Opacity of this layer to 42%
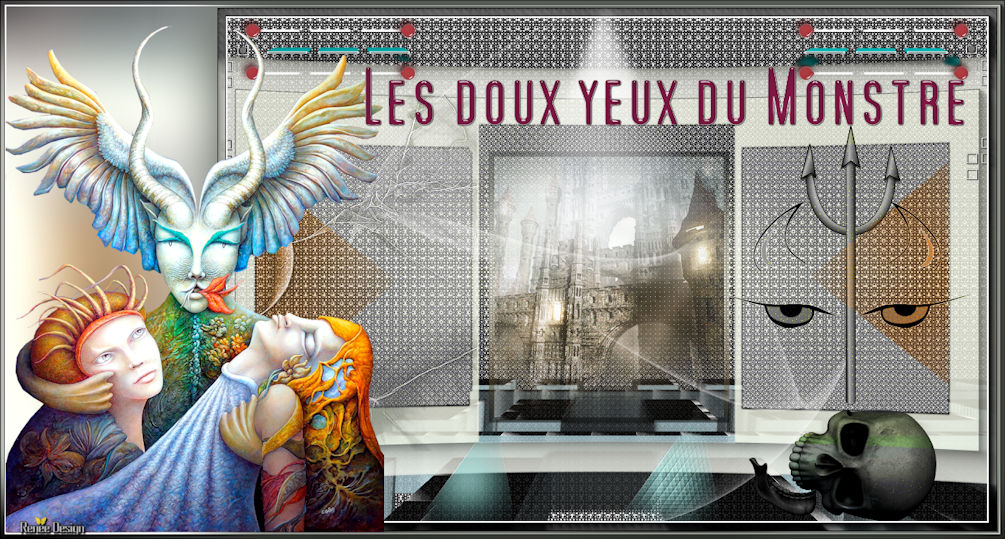
Your work and Layer Palette look like this now-You should have this result

- Activate in the layer palette Raster 2
32. Effects
– Plugins – Mura’s Meister Perspective Tilling

33. Effects–Image Effects- Offset with these settings H = 0 and V = - 107
34. Effects
– Plugins – EyeCandy 5 Impact – Extrude use the settings below / Color #c7eaf3

35.
Set the Opacity of this layer to 85%
36.
Selections –load/save selection –load selection from disc and select my selection:‘’ Les doux yeux du
monstre_4’’
DELETE
Keep Selected !
37. Color Palette: Set your Foreground color to #ec7600- Set your Background color to #ffffff
- To replace the top of the layer-palette
38. Layers- New Raster Layer
39. Activate Flood Fill Tool - Change the opacity of the color at 60%
and fill the selection with the foreground color
40. Effects
–Plugins - Unlimited - &<Bkg Kaleidoscope>- Kaleidoscope
Divisions 10/155
41.
Set the Opacity of this layer to 51%
Selections- Deselect All
42. Open the tube ‘’ Renee_tube_Les doux yeux du
monstre-yeux.’’
- Edit - Copy- Activate your work -Edit - Paste as a new layer
43. Effects – Image Effects- Offset with these settings : H = 310 and V = - 71
44.
Layers-Properties-Set the Blend Mode to " Luminance:"
45. Open the tube ‘’ Renee_tube_Les doux yeux du
monstre-effet2.pspimage
- Edit - Copy- Activate your work -Edit - Paste as a new layer
46. Effects – Image Effects- Offset with these settings : H = - 340 and V = - 5
47.
Layers-Properties-Set the Blend Mode to " Luminance " -Set the Opacity of this layer to
67%
48. Open the tube ‘’ Renee_tube_Les doux yeux du
monstre-effet3.pspimage’’
- Edit - Copy- Activate your work -Edit - Paste as a new layer
- Activate Move Tool (M) place against the top edge of your image
49. Layers- Merge- Merge Visible
50.
Selections –load/save selection –load selection from disc and select my selection:‘’ Les doux yeux du
monstre_5’’
51.
Selections-Promote selection to Layer
52. Adjust- Blur- Radial Blur use the settings below

Selections- Deselect All
53.
Layers-Properties-Set the Blend Mode to " Screen " -Set the Opacity of this layer to 57%
54.
Effects –Plugins – AP[Lines Silverling] – Dotty Grid

55. Layers- Merge- Merge Visible
56. Edit - Copy !!!
57.
Selections- Select All
58. Image - Add borders-No Symmetric / Color
#4c5248

59.
Selection - Invert
60. Layers- New Raster Layer
61. Paste into selection (Image is still in your PSP memory)
62. Adjust- Blur- Gaussian Blur: Radius: 42%
63. Effects
–Plugins – Topaz Clarity( (If your filter does not give the same result.Or you don't have this filter /The effect is included with the material / and paste into selection.
)

64. Effects
- Plugins – AAA Frame Foto Frame

65.
Selection - Invert
66. In the Layer- Palette: activate the layer underneath
67. Effects
- Plugins – AAA Frame - Foto Frame

Selections- Deselect All
68. Open the tube ‘’ Renee_tube_Les doux yeux du monstre’’
69. Image
Resize to 60%
- Edit - Copy- Activate your work -Edit - Paste as a new layer
-With the move tool, move it in the bottom left corner
- Color Palette: Set your Foreground color to #00afa4 -Set your Background color to #ffffff
70. Layers- New Raster Layer
71.
Selections –load/save selection –load selection from disc and select my selection:‘’ Les doux yeux du
monstre_6’’
72. Activate Flood Fill Tool:
fill the selection with the foreground color (1 click) and
with the background color (1 click)
Selections- Deselect All
73. Effects- Edge Effects- Enhance
74. Write the title with the attached font/ Or of your choice
75. Layers- Merge- Merge (Flatten)
76. Image
Resize to 1005 Pixels width.
Save as JPG
I hope you enjoyed this lesson
Renée
This lesson was written by Renée 25/07/2017
Edited and Update
2017
*
Any resemblance with an existing lesson is a coincidence
* Do not forget to thank the people who work with us and for us I have appointed the tubeurs and translators
Thanks Renée
*
| 


 Translations


 If a plugin supplied appears with this icon it must necessarily be imported into Unlimited *


 All rights reserved
