|
Let's start the lesson.
-
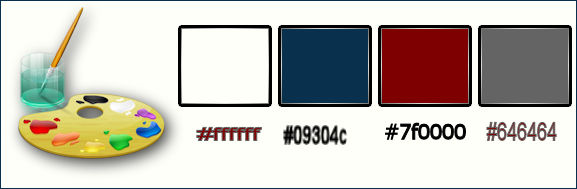
Color-palette:Set your foreground color to #ffffff
-Set your background color to #09304c
1.
Open the background image ‘’fond_munhir’’- Window - Duplicate (or shift+D) - Close the original and proceed on the copy -Promote Background Layer =Raster 1
2.
Open the tube ‘’ Renee_tube_game in
street”
- Edit/copy- Edit/ paste as new layer (do not move it is in the right place)
3. Effects –Plugins-
Unlimited – Pixelate
- Sector Mosaic using the default settings 25/25
4.
In the Layer- Palette- Double click and set the Blend Mode to "Dodge"
5.
Effects- Plugins - VM Experimental - Every
Picture Tells A Story a 176
6. Effects- Edge Effects- Enhance
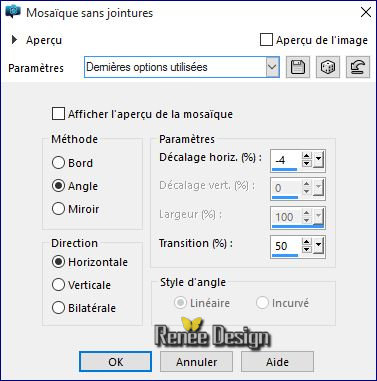
7. Effects-Image Effects-Seamless Tiling use settings below
8.
Effects- Plugins- Transparency – Eliminate
Black
9.
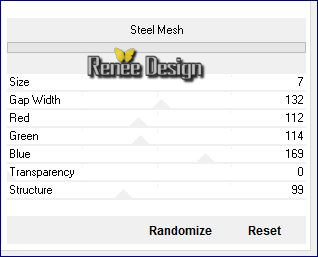
Effects –Plugins - Unlimited – VM Texture- Steel Mesh use the settings below
10.
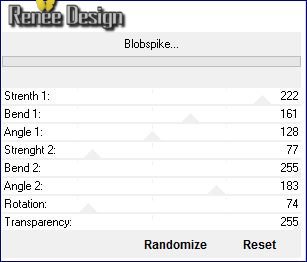
Effects –Plugins- Unlimited - UnPlugged
Shapes-Blobspike..use the settings below .
11. Activate the Magic Wand with these settings

– and click in the white part of the top
Hit the Delete Key of your Keyboard

Selections- Deselect All
12.Effects- Distortion Effects- Twirl -Degrees: -720
13.
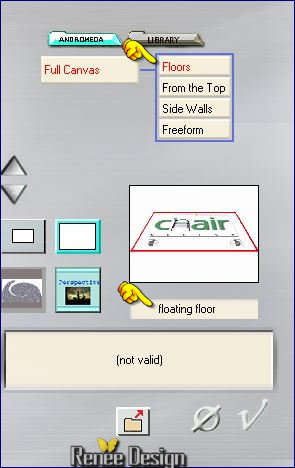
Effects- Plugins– Andromeda – Perpsective- Floors –
floating floor
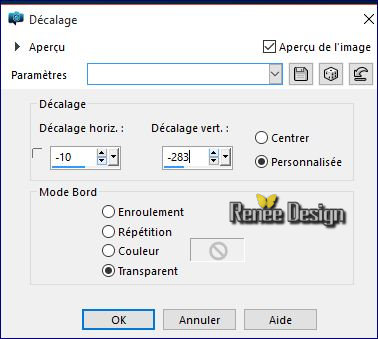
14.Effects- Image Effects- Offset use settings below
15. Layers- New Raster Layer
16. Activate Flood Fill Tool and fill the layer with the foregroundcolor #ffffff
17. Layers- New Mask layer from Image and choose Mask: ‘’
Renee_Masque_Munhir.jpg’’

- Layers- Merge- Merge- Group
18.In the Layer- Palette- Double click and set the Blend Mode to "Hard Light "
- Activate the bottom of the layers palette= Raster 1
19.
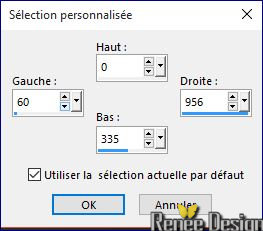
Selection Tool ( S ) Custom selection use settings below
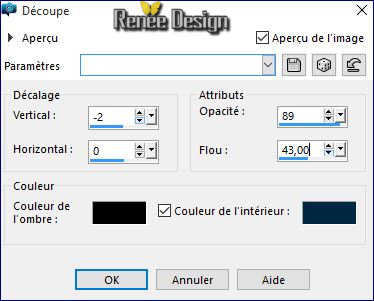
20. Effects- 3D Effects- Cutout use settings below- Shadow color to black-Fill interior with your background color
21.
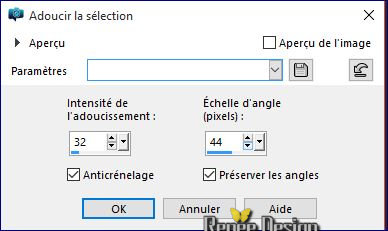
Selctions- Modify-Smooth with these settings
Selections- Deselect All
To replace the top of the layers palette (Group –Raster 3)
22.
Selection Tool ( S ) Custom selection use settings below

23. Edit/ Copy-Edit - Paste as new layer on your working image
Selections- Deselect All
24. Effects-Image Effects-Seamless Tiling -Side by side
25. Activate the Pick Tool- (K) select my preset ‘’ Munhir’’
Click on the preset and effect will apply
26.
Layers- Duplicate
27.
Effects- Plugins– Toadies What are you using the default settings 20/20
28. Effects- Edge Effects- Enhance More
29. Layers- Merge- Merge- Down
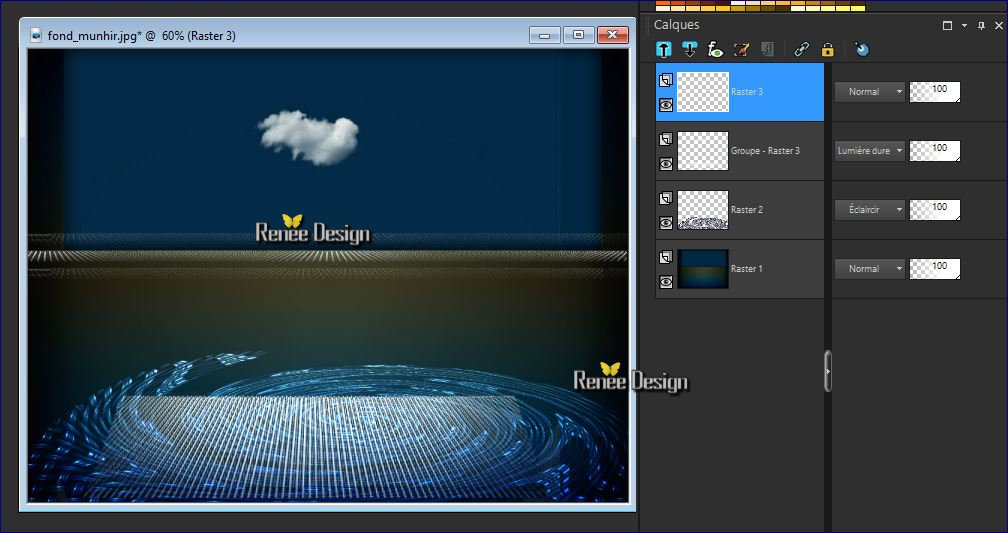
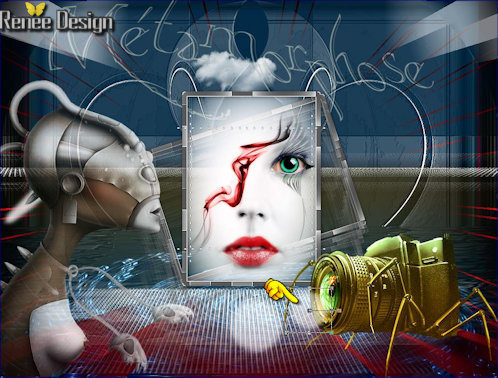
Your work and Layer Palette look like this now
30. Open the tube " Munhir_image1"
- Edit/ Copy-Edit - Paste as new layer on your working image
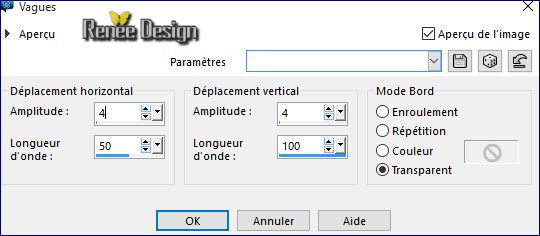
31.Effects- Distortion Effects- Weave with these settings
32.Effects- Image Effects- Offset with these settings H = 0 and V = 255
-
Set the layer opacity of this layer to 57%
- Color-palette:Set your background color to #7f0000
33. Layers- New Raster Layer
34.
Selections –load/save selection –load selection from disc and select my selection:‘’ munhir_metam_1’’
35. Activate Flood Fill Tool and fill the selection with the background color #7f0000
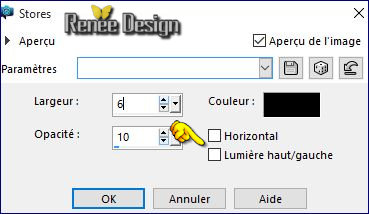
36. Effects- Texture Effects- Blinds use settings below
37. Effects- Edge Effects- Enhance
Selections- Deselect All
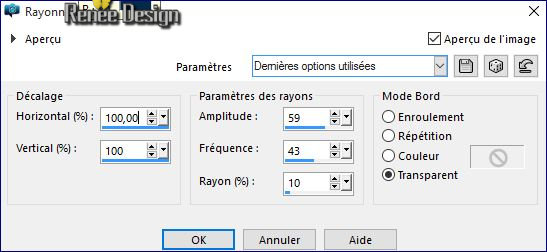
38. Effects- Distortion Effects- Spiky Halo use settings below
39.
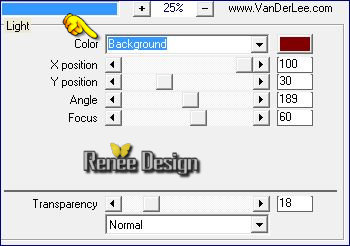
Effects- Plugins– Vanderlee Unplugged x – Light-use settings below -Color #
7f0000
40. Adjust- Sharpness- Sharpen
41.
Effects- Plugins - VM Toolbox (or VM stylize )–
Zoom blur using the default settings 39/60
42. Layers- Duplicate -Image - Mirror - Mirror Horizontal ( Image - Mirror in previous PSP Versions) CTRL B
43. Layers- Merge- Merge- Down
44.
Open the tube’’ Munhir_image2’’
- Edit/ Copy-Edit - Paste as new layer on your working image
45. Effects- Image Effects- Offset with these settings: H= 0 and V = - 250
46. Effects
–Plugins - VM –Toolbox – Zoom blur a 46/83
47.
Set the layer opacity of this layer to 71%
49. Layers- Duplicate -Image - Mirror - Mirror Vertical ( Image - Flip in previous PSP Versions) CTRL I
50.
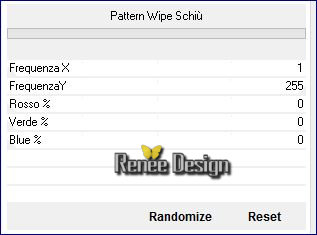
Effects –Plugins- Unlimited - Italian Editors Generatore- Pattern Wipe
Schiù use settings below
51. Double click on this Layer and set the Blend Mode to "Screen " -Set the layer opacity of this layer to 51%
52. Open the tube ‘’ Munhir_image3.png’’
- Edit/ Copy-Edit - Paste as new layer on your working image
53.
Effects –Plugins- Unlimited - &<Background Designers
IV>-@Frame Gradient Switcher/ click on the menu
> Select 56
 with these settings with these settings  Click
Apply Click
Apply
54.
Effects- Edge Effects- Enhance
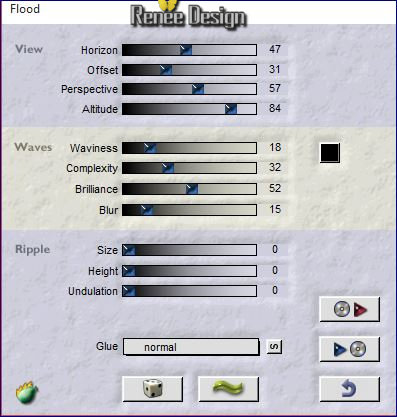
55.
Effects- Plugins– Flaming Pear
Flood use settings below
56.Effects- User Defined Filter – Emboss 3-using the default settings
57. Open the tube ‘’ Renee_tube_silenced.pspimage’’
- the selected part
- Edit/ Copy-Edit - Paste as new layer on your working image
-
Image Resize to 45 % resize all layers not checked
(do not move it is in the right place )
58. Layers- New Raster Layer
59.
Selections –load/save selection –load selection from disc and select my selection:‘’munhir_metam_2’’
Color-palette:Set your foreground color to #646464 -Set your background color to #ffffff
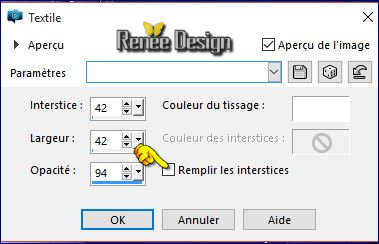
60. Activate Flood Fill Tool and fill the selection with the foreground color #646464
61. Effects- Texture Effects- Weave with these settings
62. Effects- Edge Effects- Enhance More
63. Effects - 3D Effects - Drop Shadow with these settings 1/1/40/12 color black
Selections- Deselect All
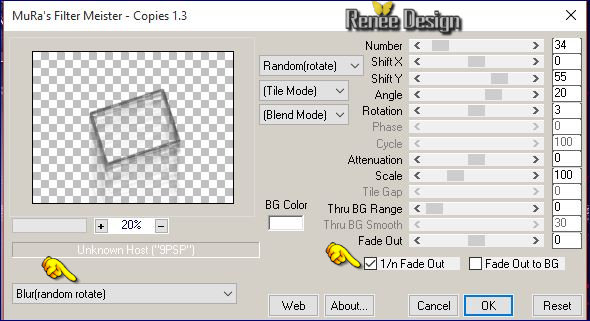
64. Layers- Duplicate
65. Effects- Plugins– Mura’s Meister – Copies use settings below
66. Layers-Arrange - Move 2 times down
- To replace the top of the layers palette
67. Layers Merge - Merge 2 times down
68. Open the tube ‘’ Renee_tube_photo_arraigné.pspimage’’
- Image Resize to 65% ‘’
- Edit/ Copy-Edit - Paste as new layer on your working image
-
With your Move Tool (M) move to the bottom right
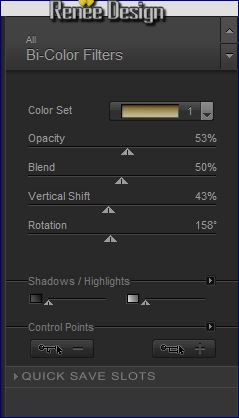
69.
Effects- Plugins – Nick color effex – Bi Color
Filters/set =Brown=1
70. Open the tube ‘’Munhir_image4.png’’
- Edit/ Copy-Edit - Paste as new layer on your working image
- Do not move it is in the right place
71. Open the tube ‘’ Renee_tube cat-vuzel’’
- Image Resize to 65%
- Edit/ Copy-Edit - Paste as new layer on your working image
- With your Move Tool (M) move to the bottom left
72. Layers- Merge- Merge- Visible
73. Layers- New Raster Layer
74.
Selections –load/save selection –load selection from disc and choose my selection:’’ munhir_metam_3’’
75. Pot of Paint: Change the opacity of the color at 50%
Activate Flood Fill Tool and fill the selection with the background color #ffffff
Selections- Deselect All
76. Layers- Duplicate- Image Resize 70 % resize all layers not checked
77. Activate the Pick Tool/Deformation tool (K) Mode Scale and place as shown in the example below
Color-palette:Set your foreground color to #7f0000 -Set your background color to
#09304c
78. Image - Add borders-Symmetric checked: 1 pixel –background color
79. Image - Add borders-Symmetric checked: 3 pixels -foreground color
80.
Image - Add borders-Symmetric checked: 1 pixel –background color
81. Image - Add borders-Symmetric checked: 35 pixels –#ffffff
82. Image - Add borders-Symmetric checked: 10 pixels - #bcc2c6
83. Image - Add borders-Symmetric checked: 1 pixel -foreground color
84. Image - Add borders-Symmetric checked: 1 pixel –background color
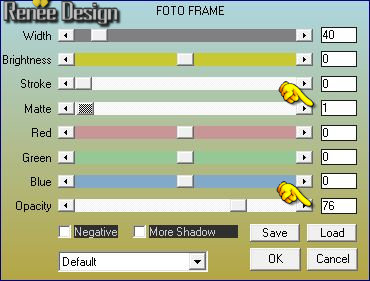
85. Effects- Plugins - AAA Frame - Foto
Frame use settings below
86. Open the tube "titre" -Edit/ Copy-Edit - Paste as new layer on your working image and move -Ore write your own text
87. Layers - Merge - Merge All
88 Image Resize to 999 pixels width
Save as JPEG
I hope you enjoyed this lesson
Renée
This lesson was written by Renée 10/02/2016
Edited and Update
2016
*
Any resemblance with an existing lesson is a coincidence
* Do not forget to thank the people who work with us and for us I have appointed the tubeurs and translators
Thanks Renée
| 

 Translations


 When you see this logo the filter is imported in Unlimited

 All rights reserved
