|
Let's begin
1. Open the tube "fond" Window - duplicate/ close the
original as we will work with the copy
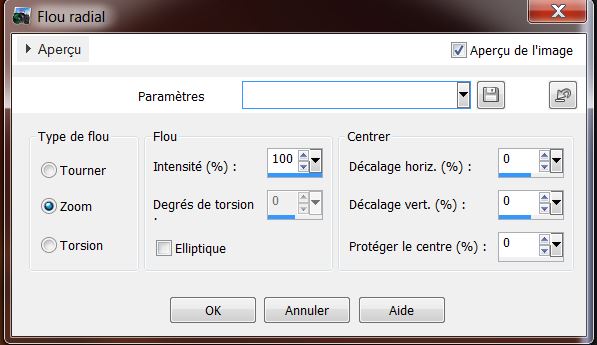
2. Adjust - blur - radial blur
3. Layers - duplicate
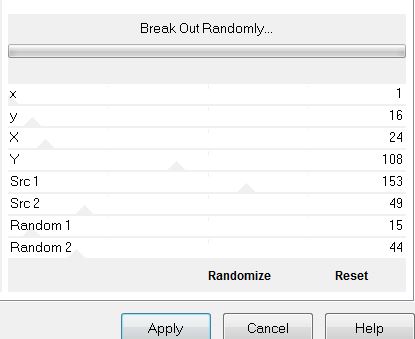
4. Effects - Filters Unlimited2.0 - Plugins AB07 - break
out randomly
5. Effects - Filters Unlimited2.0 - <& Bkg Kaleidoscope
/ Flip SidesRsf
6. Select Tool -(K) decrease to 400 pixels
7. Effects - 3D effects - Drop shadow - color white
8. Change your foreground color to #771300 and
background to black
9. Layers - add a new layer
10. Selections - Load Selection "Magic_toys_1''
11. With artistic brush tool - Corel 01_032
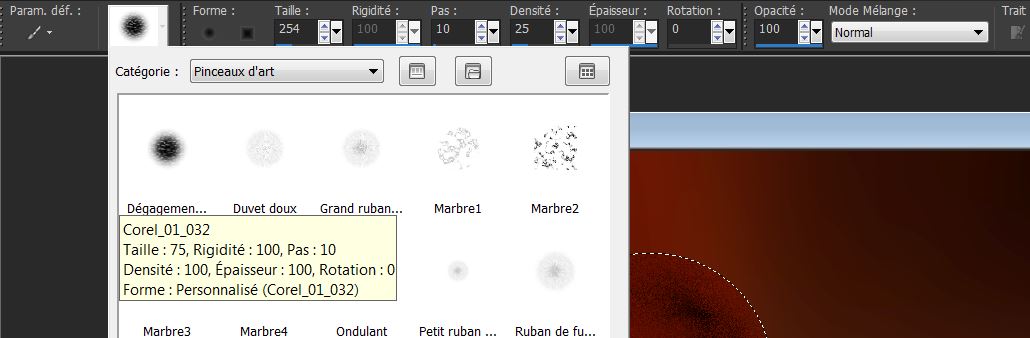
12. Apply as follows
13. When the selection is filled to your liking /
Selection - deselect
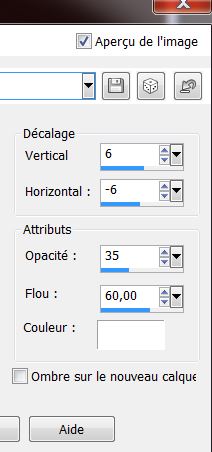
14. Effects - 3D effects - Drop shadow
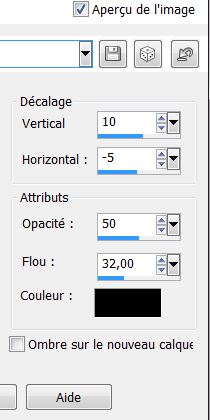
15. Effects - Image effects - Offset
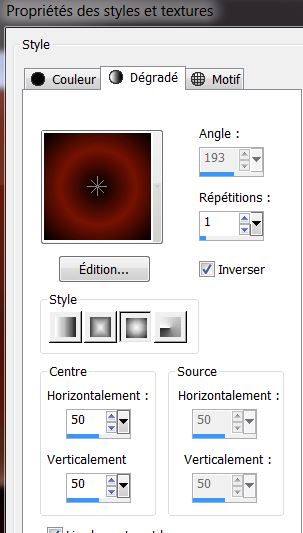
16. With your color palette - Prepare a sunburst
gradient configured like this
17. Layers - add a new layer
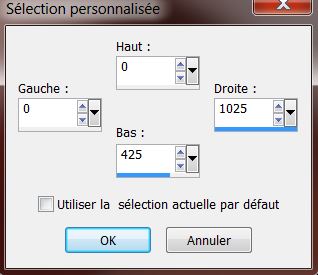
18. Selection Tool - Custom selection
19. Fill the selection with the new gradient
20. Adjust - Blur - Gaussian Blur/ 32
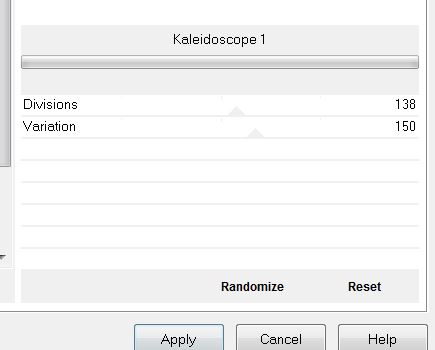
21. Effects - Filters Unlimited 2.0 - <&Bkg Kaleidoscope
/ Kaleidoscope 1
22. Selections - Select None
23. Layers - move down twice / set the blend mode to
Luminance Legacy and the opacity to 57
you're there
24. Open the tube "Alies1DI454 coloured lamps". Image
resize to 80% and paste as a new layer
25. Open the tube "2013_bea_753653526_ @ rosapc" Click
and activate raster 1 / resize to 80% and copy and paste
it in place
26. Return to the same tube / click on the eye to open
layers "oeuf1" and "oeuf2". Close other layers - Edit
copy special/ copy merged and paste as new layer
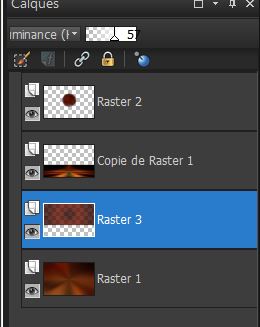
27. Layers palette - Stand on the raster layer ''3''
28. Selections - load selection from disk
''magic_toys_2''
29. Selections - promote selection to layer
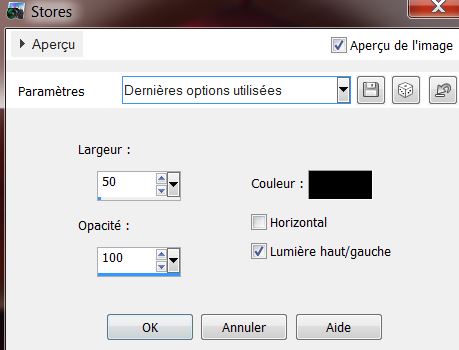
30. Effects - texture effects / blinds
31. Selections - select none
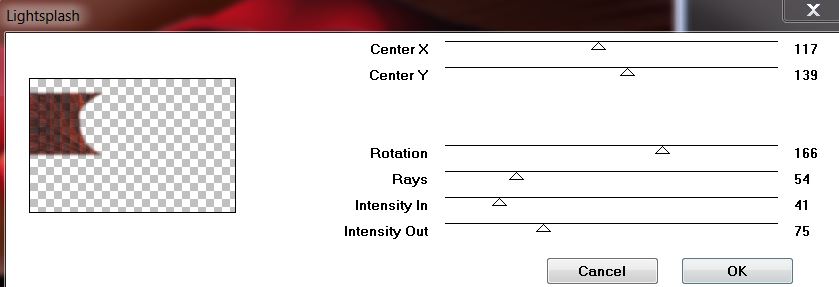
32. Effects - VM Natural - lightsplash
33. Open the tube "MSB_eclairage" Paste as new layer/
move into place - Change mode to luminance legacy and
opacity to 95
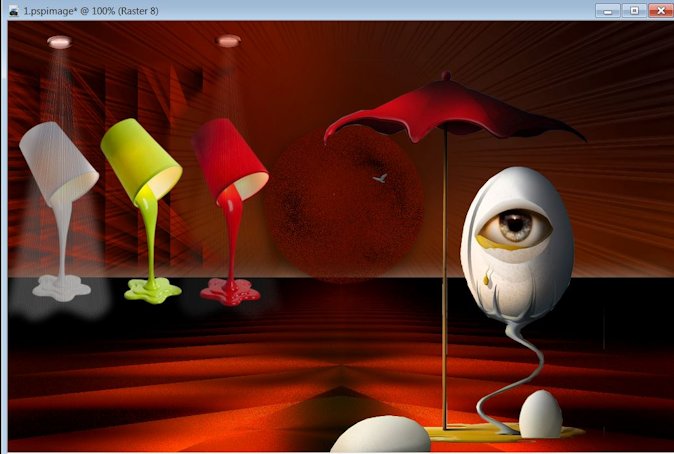
34. Color palette - Change the foreground color to
#c9bfb1
35. Layers - new raster layer
36. Selections - load selection from disk "magic_toys_3"
- fill with color
Leave selection
37. Effects - Toadies - what are you on 20/20
38. Selections - select none
39. Effects - toadies - what are you on 20/20
40. Open the tube "image_goutte" Paste as new layer and
make sure it is well placed
41. Layers - duplicate (see finished image)
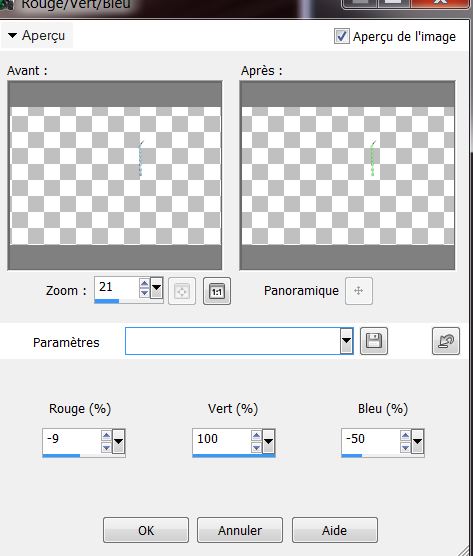
42. Adjust - color - red / green / blue (Shift + U)
43. Layers - add a new layer
44. Selections - load selection ''magic_toys_4'' and
fill with the foreground color #c9bfb1
45. Effects - Vanderlee - Halftone V.2 (NB "scale
resolution will qualify at 72" if working with the old
version of filter)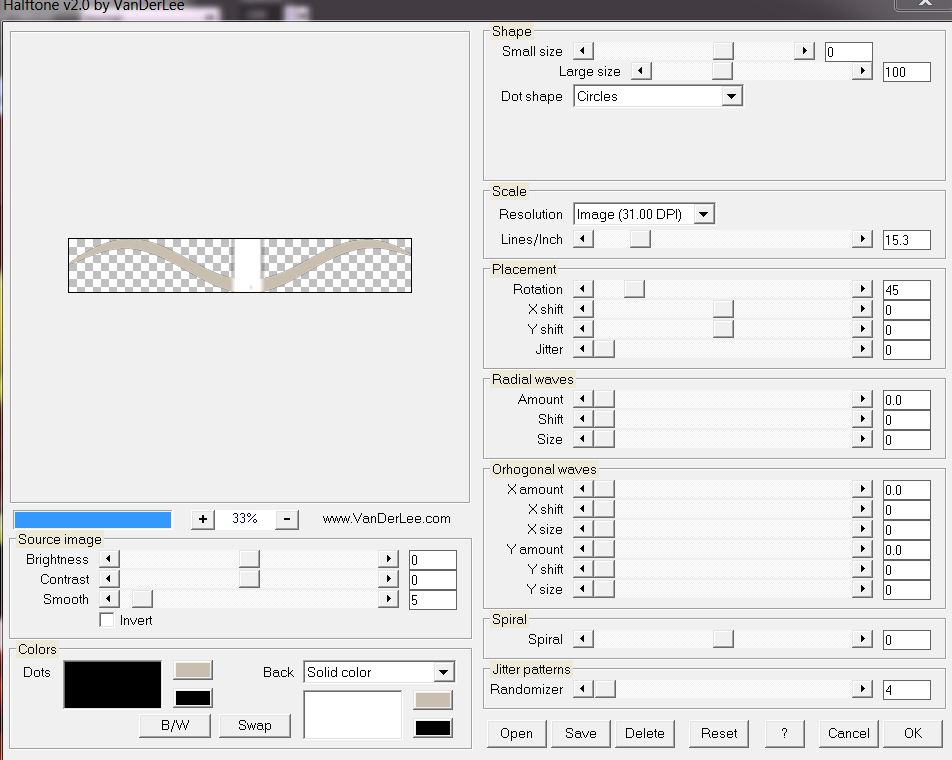
46. Selections - select none
47. Effects - toadies - what are you on 20/20
48. Adjust - Sharpness - Sharpen - Lower the opacity to
79
49. Open the tube "SVB (495) beauty" image - resize 60%/
all layers unchecked - paste as a new layer and move
into place
50. Open tube "nicole_etrange12" click on and activate
raster1 - image/ resize 50% all layers unchecked - Edit
- copy and paste as a new layer
Change the mode to hard light and opacity to 87
51. Layers - merge visible layers
52. Edit - copy
The framework will be made using the script
(I did it myself with an older version of PSP. Disregard
the warning - click the blue arrow each time the script
is finished)
53. Find the script "cadre_magic" (Load it from the
materials file)

54. With your magic wand select the widest margin of 45
pixels
55. Edit - paste into the selection the copied image
still in memory
56. Adjust - Blur - Gaussian Blur/ 22
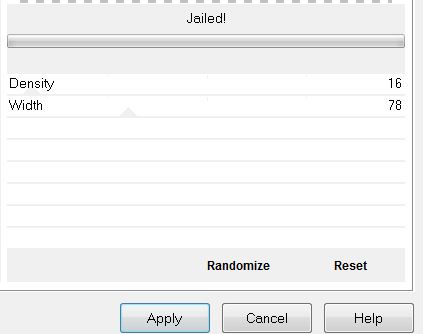
57. Effects - ICNET filters unlimited - special effects
1 - jailed!
58. Selections - select none
59. Adjust - One Step Photo Fix
60. Open tube "texte" Copy and Paste as a new layer
61. Image - resize to 995 pixels wide
*
All
finished
Thanks Sally

|