|
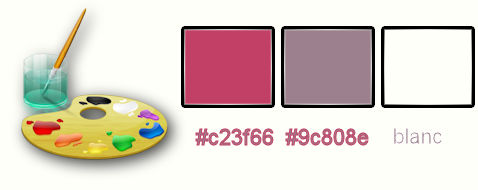
Let's start the lesson. Open the Color-Palette
-
Material Properties:Set your foreground color to#c23f66
- Set your background color to #9c808e
1.
Open the image ‘’Fond_marion’’ – - Window - Duplicate (or shift+D) - Close the original and proceed on the copy -Promote Background Layer =Raster 1
2.
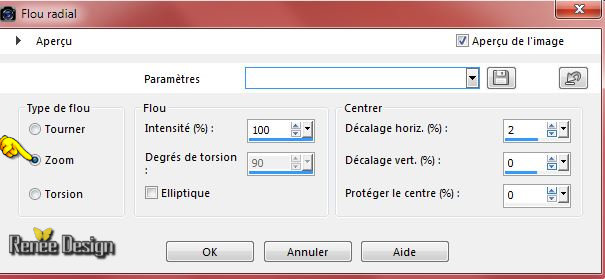
Adjust-Blur-Radial Blur with these settings
3.
Effects –Plugins- Unlimited - Kiwis Oelfilter - 3,5 Promille using the default settings 128/128/0/0/128
4.
Effects –Plugins- Unlimited - RCS Filter Pak 1.0 - RCS
TripleExposure a 255
5. Effects –
Edge Effects- Enhance More
6. Effects –
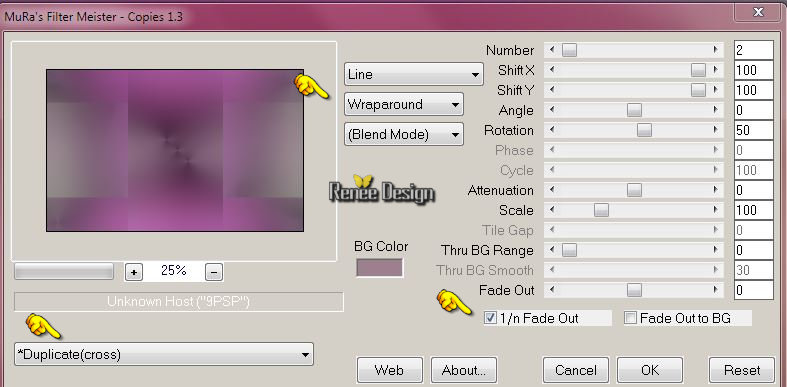
Plugins – Mura’s Meister- Copies with these settings
7.
Selections –load/save selection –load selection from disc and choose: ‘’ marion_1 »
8.
Selections -Promote selection to layer
9.
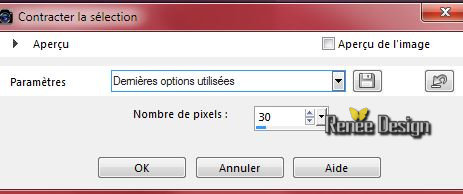
Selections-Modify-Contract with these settings
Hit the Delete Key of your Keyboard

10.
Selections-Modify-Select Selection Borders with these settings-Outside
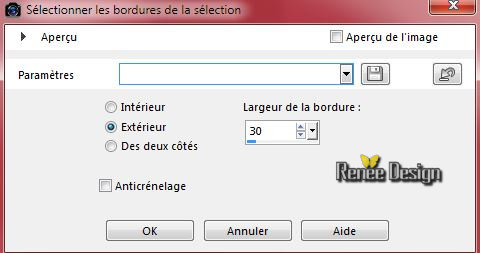
11. Layers-New raster layer
12. Material palette:Set your foreground color to:#ffffff -Activate Flood Fill Tool and fill the selection with the foreground color #ffffff
13. Layers- Merge-Merge Down
14. Effects
– Plugins - Topaz – Topaz Simplify 2 -
Cartoon with these settings
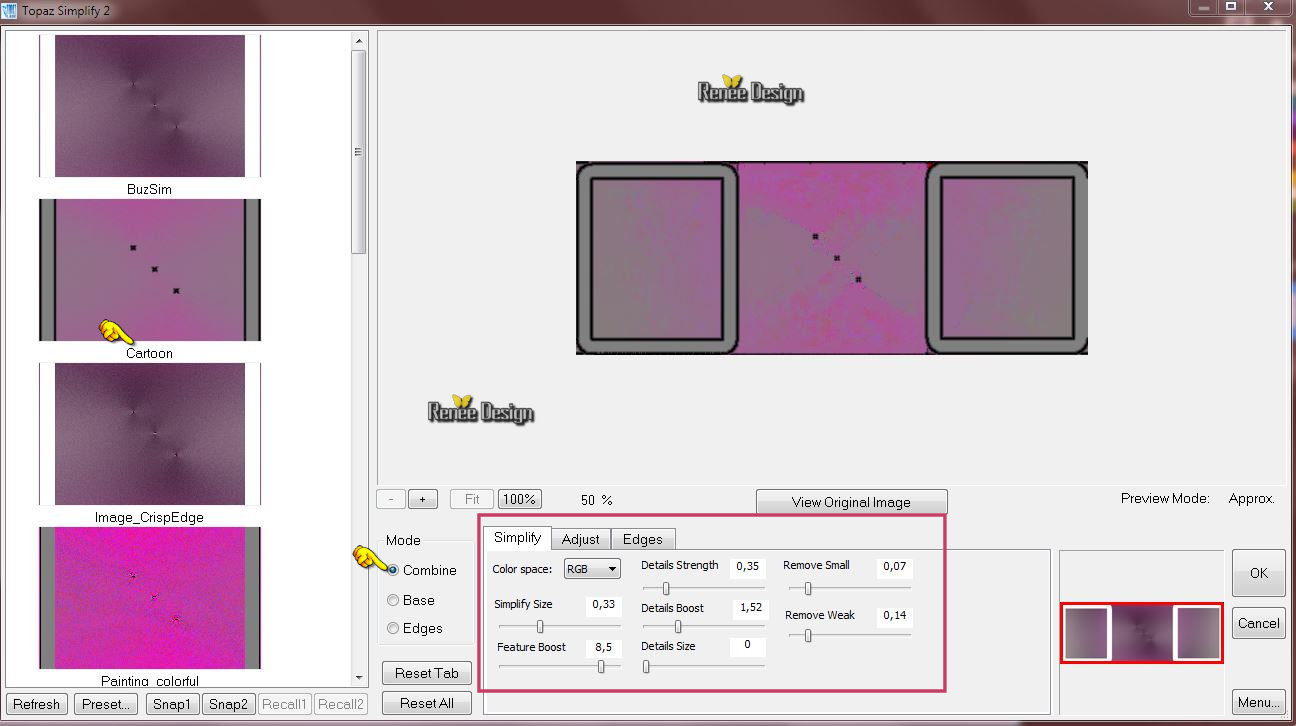
15. Effects - 3D-effect/ Drop shadow with these settings
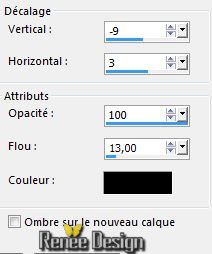
Selections-Deselect All
16. Effects-Plugins - Simple – Pizza slice mirror
17. Repeat :Effects-Plugins - Simple – Pizza slice mirror
18.
Selection Tool ( S ) Custom selection use settings below
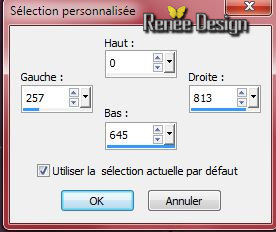
19. Edit-Cut!!-Edit-Paste as a new layer
20. Effects-Plugins – Mura’s Meister – Perspective Tilling using the default settings
Selections-Deselect All
21. Layers- New raster layer
22.
Selections –load/save selection –load selection from disc and choose: ‘’marion_2’’
23. Activate Flood Fill Tool and fill the selection with the background color
24. Effects-Plugins – L and K’s – Adonis with these settings
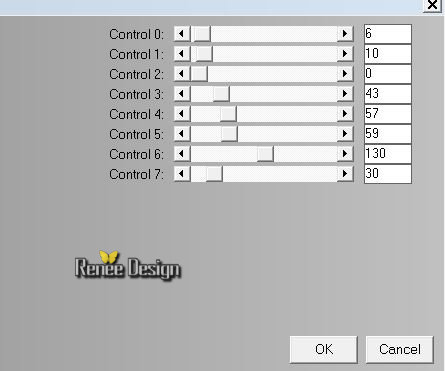
Selections-Deselect All
25. Effects - 3D-Effects -Drop shadow with these settings 1/9/45/2 black
26. Layers-Duplicate
27. Image
Mirror
28. Layers- Merge-Merge Down
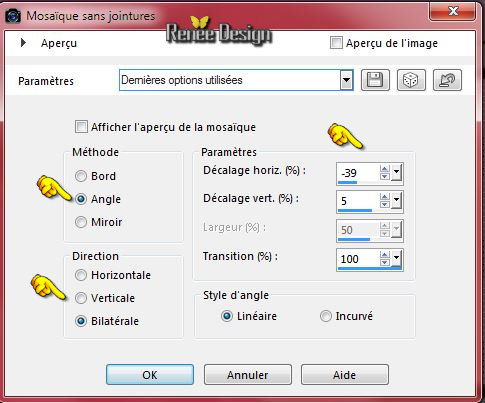
29. Effects-Image Effects-Seamless Tiling with these settings
30. Effects-Geometric Effects-Circle-Transparent
-Material palette:Set your foreground color to #c23f66
31. Layers-New raster layer
32.
Selections –load/save selection –load selection from disc and choose: ‘’marion_3’’
33. Activate Flood Fill Tool and fill the selection with the foreground color #c23f66
Selections-Deselect All
34. Effects
– Plugins– Photoshop Fun II – Kylie
93/0
35. Double click on this Layer and set the Blend Mode to "Multiply "Set the layer opacity of this layer to 89%
36. Layers-Duplicate – Image Mirror
37. Layers- Merge-Merge Down
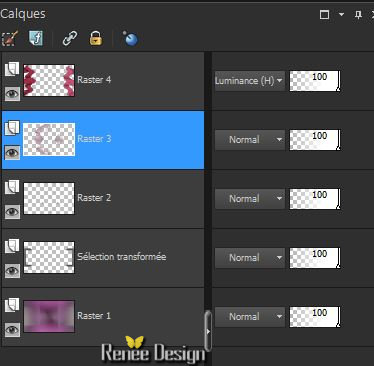
38. Double click on this Layer and set the Blend Mode to "Luminance -Legacy " – Opacity 100%
39. Effects-Distortion Effects-Wave with these settings
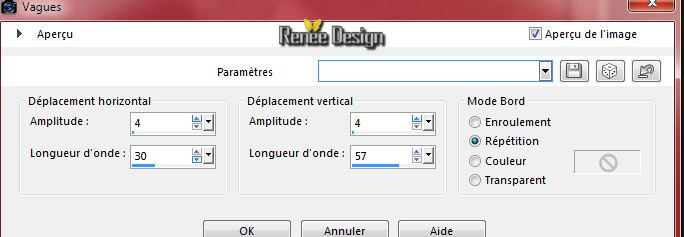
you should have this result:
40. Activate the tube ‘’ Alies 1-2FA240-dreaming-21032015.pspimage’’
-Edit/copy- Edit/ paste as new layer on your working image (do not move it is in the right place)
41.
Effects –Plugins – Flaming Pear –
Flood with these settings
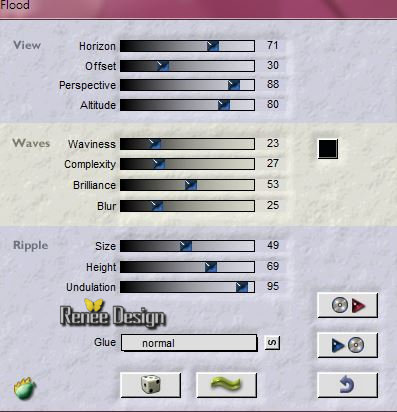
42. Layers-New raster layer
43.
Selections –load/save selection –load selection from disc and choose: « marion_4 »
- Material palette:Set your foreground color to white (#ffffff)-Set your background color to #9c808e
44. Effects
– Plugins – Medhi – Wavy Lab with these settings (the 3rd color =#CEBFC6)
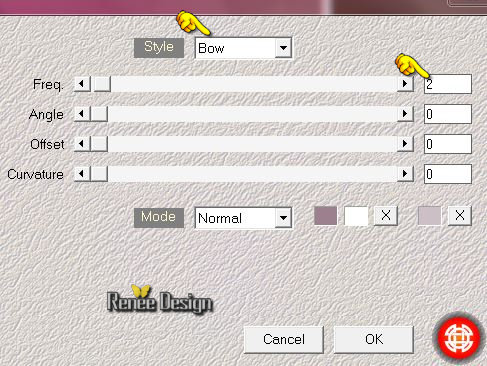
45. Effects
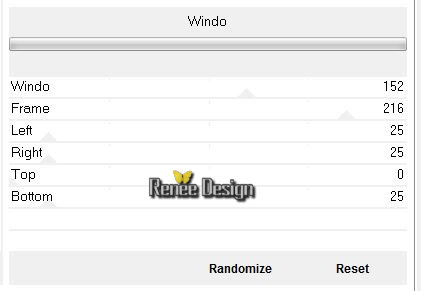
–Plugins- Unlimited – Mock – Windo with these settings
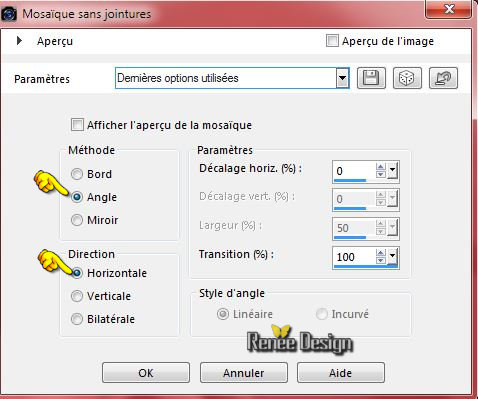
46.Effects-Image Effects-Seamless Tiling with these settings
Selections-Deselect All
47. Layers- New raster layer
48.
Selections –load/save selection –load selection from disc and choose: ‘’ marion_5 »
49. Activate Flood Fill Tool and fill the selection with the foreground color #ffffff
50.
Set the layer opacity of this layer to 77%
Selections-Deselect All
51. Layers-New raster layer
52.
Selections –load/save selection –load selection from disc and choose: ‘’ marion_6’’
53. Activate Flood Fill Tool and fill the selection with the foreground color #ffffff
Selections-Deselect All
54. Effects-Plugins – Mura’s Meister – Copies with these settings
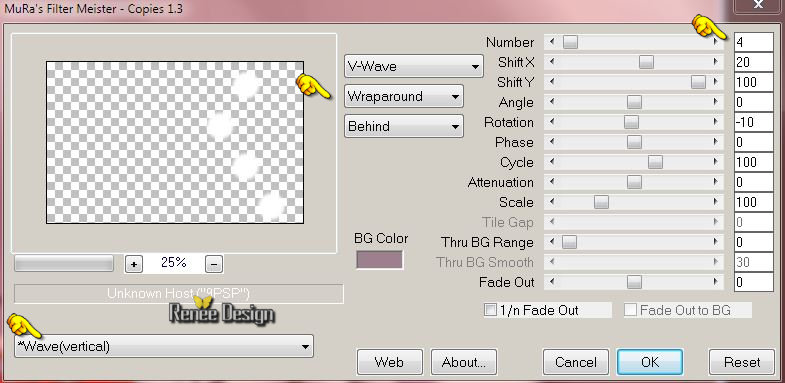
55. Double click on this Layer and set the Blend Mode to "Soft Light "
56. Layers-New raster layer
57.
Selections –load/save selection –load selection from disc and choose: »
marion_7 »
58. Activate Flood Fill Tool and fill the selection with the foreground color #ffffff
Selections-Deselect All
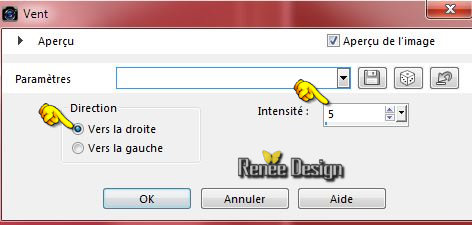
59. Effects - Distortion Effects - Wind - From Right checked - Wind Strength:5
60. Layers-New raster layer
61.
Selections –load/save selection –load selection from disc and choose: ‘’marion_8 ‘’
62. Activate Flood Fill Tool and fill the selection with the foreground color #ffffff (zoom in )
Selections-Deselect All
- Layer palette – Make raster 4 active
63. Layers-New raster layer
64.
Pot of Paint: Change the opacity of the color at
50% -Activate Flood Fill Tool and fill the layer with the foreground color #ffffff
65. Layers- New Mask layer from Image and choose Mask:
‘’Narah_mask_0483.jpg’’
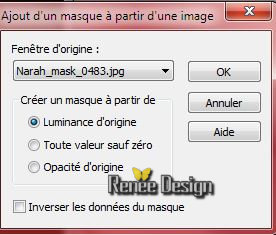
- Layers-Merge-Merge Group
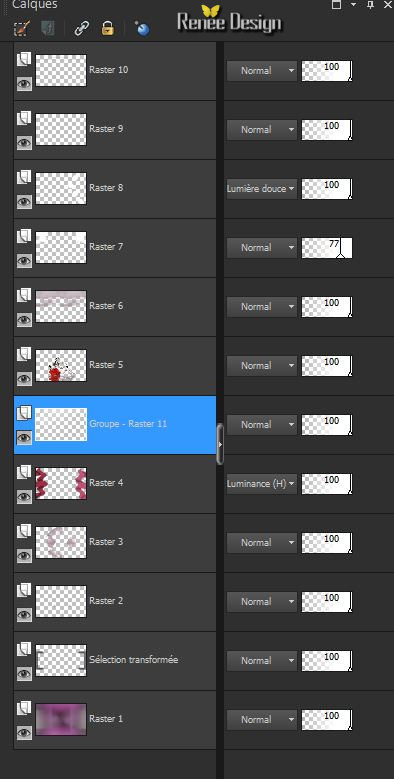
The result
66.
Layers-Merge-Merge Visible
67. Activate the tube ‘’ Alies 1FP562-Dandelion-26062013.pspimage’’
- Edit/copy- Edit/ paste as new layer on your working image
68.
-Activate your Pick Tool (K) place it in the right place as shown in the example below
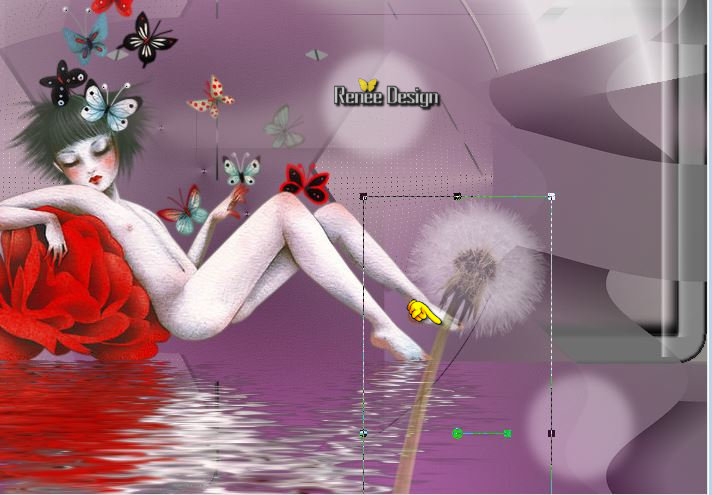
69.
I have lowered the opacity of that layer to 38%
70. Activate the tube ‘’ marion_image1’’
Edit/copy- Edit/ paste as new layer on your working image and move
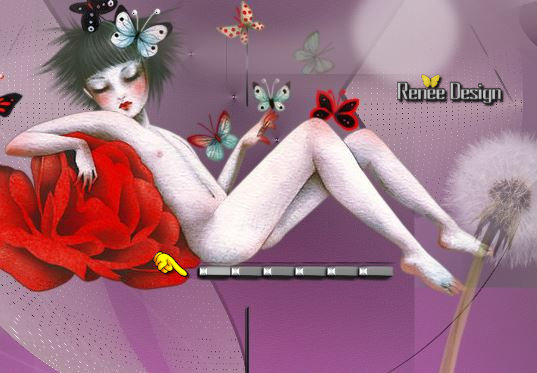
71. Effects-Plugins – Flaming Pear Flood with the same settings as in step 41 (
(The filter settings depends where the tube is placed)
72. Image - Add borders-Symmetric checked: 1 pixel #9c808e
73. Image - Add borders-Symmetric checked: 20 pixels #ffffff
74. Image - Add borders-Symmetric checked: 1 pixel en #c23f66
75.
Image - Add borders-Symmetric checked: 25 pixels #ffffff
76. Activate Text Tool-Write your text ‘’Marion ‘’font your choice
77. Activate the tube '' Alies -1-2AN186-birds-15122014.pspimage''
- Edit/copy- Edit/ paste as new layer on your working image
- Move Tool-Move to the left side
78.Double click on this Layer and set the Blend Mode to "Luminance-Legacy".
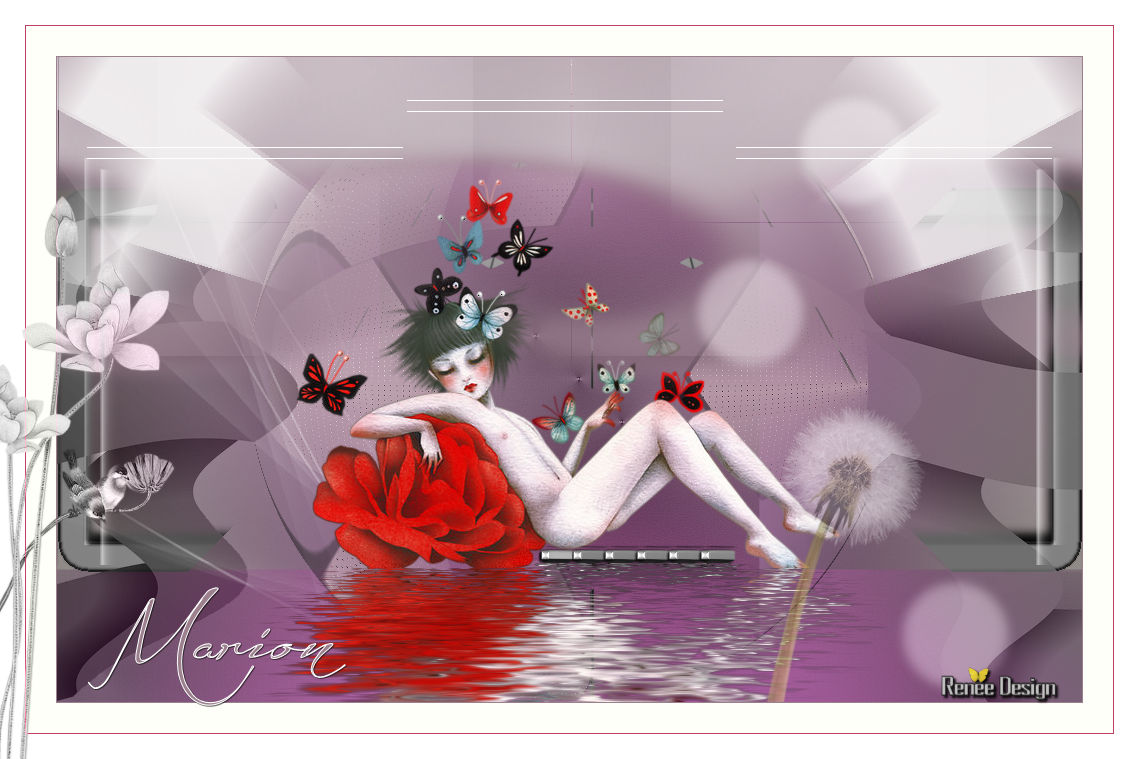
Layers-Merge-Merge All.
Save as JPG
I hope you enjoyed this tutorial .
Renée
This lesson was written by Renée 20/07/2015
edited and update
2015
*
Any resemblance with an existing lesson is merely a coincidence *
* Don't forget to thank the people who work for us and with us. I named the tubeurs - Testers and the translators.
Thanks Renée.
*
| 
 Translations


 When you see this logo the filter is imported in Unlimited


 All rights reserved