|
Let's start the lesson.
Mode comestible – Edible
fashion
- Preparation
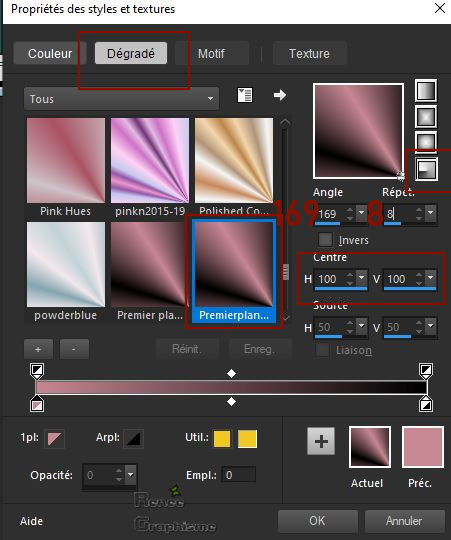
- Material Properties: Set your foreground color to color # c78793= 1 – Set your background color to color #000000= 2

- Set your Foregroundcolor to foreground-background radial gradient configured like this

1. File:Open a new transparent Image 940 x 780 Pixels
2. Flood Fill Tool –
Fill the layer with the gradient –
Fill the layer with the gradient
3. Effects-Plugins – DSB Flux- Gears 11/10
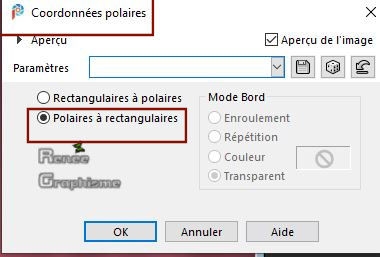
4. Effects – Distortion Effects– Polar Coordinates- Polar to Rectangular
5. Effects -Plugins–
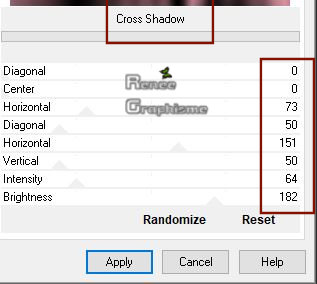
Unlimited 2.0 – Graphic plus- Cross shadow use the settings below
6. Layers- New Raster Layer
7. Selections- Select All
8. Open the tube ‘’ Renee_TUBES_Robes-souliers-Fleurs
6.pspimage’’ -Edit - Copy- Activate your work -Edit - Paste Into Selection
Selections- Deselect All
9. Adjust- Blur-Gaussian Blur- Radius 50
10. Layers-Properties-Change the Blend Mode to " Screen"
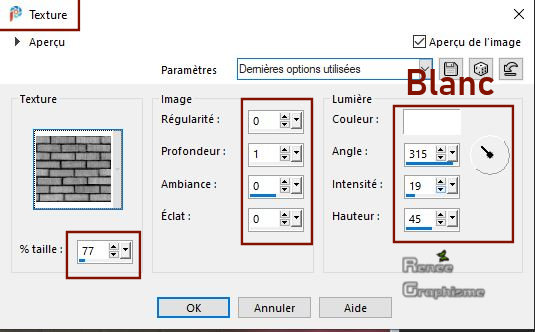
11. Effects – Texture Effects –Texture and select ‘’Corel 15_033’’ with these settings (Brick wall )
12. Adjust- Sharpness- Sharpen More
13. Layers- New Raster Layer
- Set your foreground color to color # d7472f=3
14. Selections –load/save selection –load selection from disc and select my selection: ‘’ Mode_Comestible-1’’
15. Flood Fill Tool –
Fill the selection with the foreground color =3 (2 clicks) –
Fill the selection with the foreground color =3 (2 clicks)
Selections- Deselect All
16. Open the tube ‘’M_C_Image 1’’ -Edit - Copy- Activate your work -Edit - Paste as a new layer –Do not move !!
17. Open the tube ‘’M_C_Image 2’’ -Edit - Copy- Activate your work -Edit - Paste as a new layer
18. Objects – Align -
Top
19. Layers- Merge- Merge Down 2 times
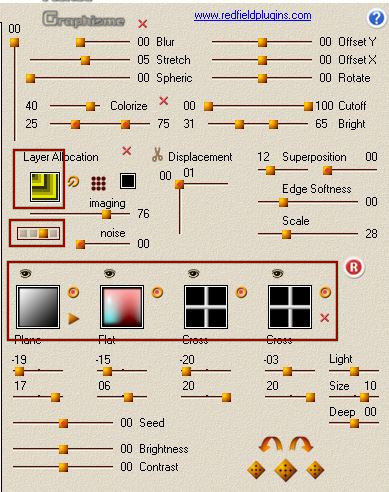
20. Effects – Plugins – Redfield – Umatrix use the settings below
Do you have problems with this- PNG image is into the zipfile and paste as a new layer on your working area
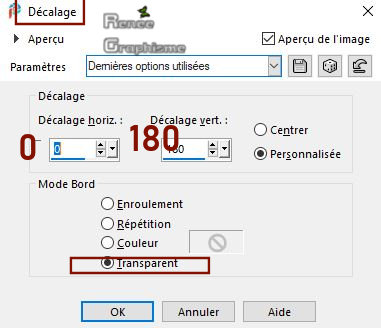
21. Effects – Image Effects– Offset with these settings ( Or : Object-Align-Top )
22. Layers- New Raster Layer
23. Selections –load/save selection –load selection from disc and select my selection: ‘’ Mode_Comestible-2’’
24. Set your Foreground color to color #f2ef05=4
Flood Fill Tool –
Fill the selection with the foreground color =4 –
Fill the selection with the foreground color =4
25. Layers-Properties-Change the Blend Mode to " Overlay "
26. Layers- New Raster Layer
27. Selections –load/save selection –load selection from disc and select my selection: ‘’ Mode_Comestible-3’’
28. Open the tube ‘’ M_C_Image 3’’ -Edit - Copy- Activate your work -Edit - Paste Into Selection
(if you want to change fill the selection with a gradient
)
Selections- Deselect All
29. Activate Selection Tool -Custom Selection (S) -Rectangle with these settings

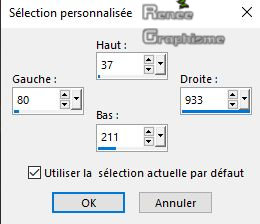
DELETE
Selections- Deselect All
30. Objects -Align -
Top
31. Open the tube ‘’ M_C_Image 4’’ -Edit - Copy- Activate your work -Edit - Paste as a new layer
Attention - Do not change this layer - Blend Mode "Overlay" - Opacity 61%
32. Layers- Duplicate
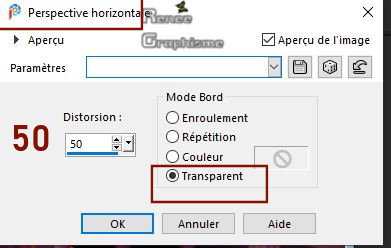
33. Effects –Geometric Effects - Perspective Horizontal use the settings below
’
34. Effects –Geometric Effects – Spherize with these settings
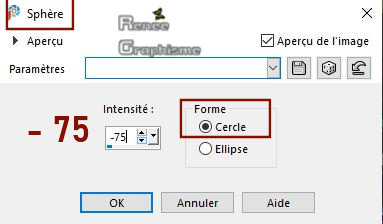
- Repeat : Effects – Geometric Effects – Spherize with these settings = - 90
35. Pick Tool: (K) on your keyboard -Enter these parameters for the X: 0,00 and Y: 154,00 positions on the Toolbar
 0
/ 154 0
/ 154
-Press ( M ) to close the Pick Tool
36. Effects – 3D Effects –Drop Shadow with these settings: 22/15/25/10 Color White
- In the Layer-Palette- Activate Raster 6 or Raster 7
it depends on whether you have used the filter or the image
redfield
Layers Arrange- Move Down above Raster 2 as shown in the example below
- Your work and Layer Palette look like this now-You should have this result (Arrange the layers correctly)
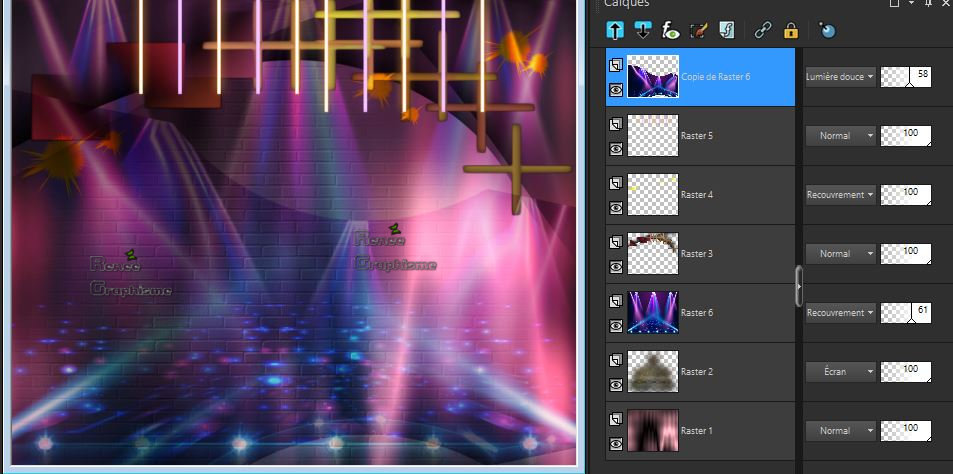
- To replace the top of the Layer-Palette
37. Layers- New Raster Layer
38. Selections –load/save selection –load selection from disc and select my selection: ‘’ Mode_Comestible-4’’
39. Set your Foreground color to color #ffffff-5
Flood Fill Tool –
Fill the selection with #ffffff=5 (zoom in if necessary) –
Fill the selection with #ffffff=5 (zoom in if necessary)
Selections- Deselect All
40. Activate the Magic Wand with these settings

– Click in center of frame
41. Selections-
Modify – Contract by 8 Pixels
Do not add a new layer !!!!!!
42. Flood Fill Tool –
Fill the selection with the background color =2 –
Fill the selection with the background color =2
43. Effects –Plugins-
Unlimited 2.0 - Photo Aging Kit - Photo Frame 04
Selections- Deselect All
44. Activate Selection Tool -Custom Selection (S) -Rectangle with these settings
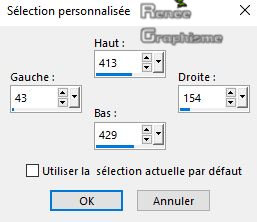
45. Layers- New Raster Layer
46. Set your Foreground color to color # d7472f =3
Flood Fill Tool fill the selection with the foreground color = 3 fill the selection with the foreground color = 3
47. Effects –Plugins-
Unlimited 2.0 - Photo Aging Kit - Centerspot /
Vignetting: 255
- Repeat this filter Photo Aging Kit with the same settings
Selections- Deselect All
48. Effects – Plugins – Alien skin EyeCandy 5 Impact – Extrude –tab- Settings- User/Settings and select my file -Preset :
MC-Renee-Extrude
-Or manual settings as shown in the example below
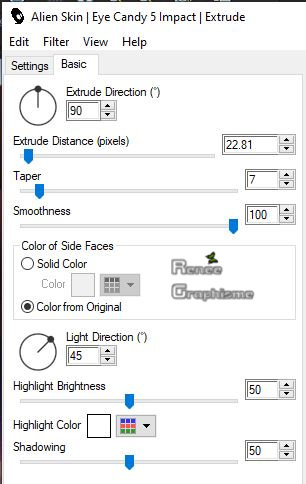
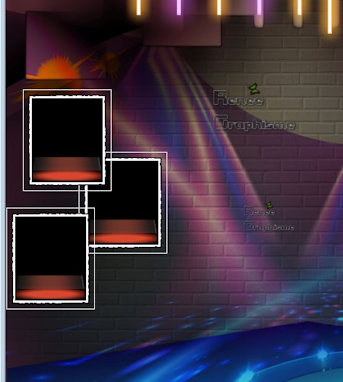
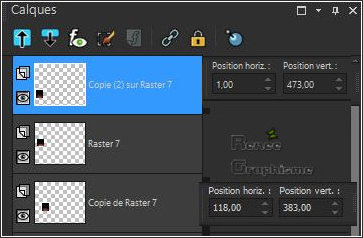
49. Layers- Merge- Merge Down
50. Layers- Duplicate 2 times
Activate your Move Tool (M) place it in the right place as shown in the example below
51. Open the tube
‘’Tubes-ReneeGraphisme-Souliers- fleurs’’
Choose three flower shoes – Image - Mirror - Mirror Horizontal - Resize according to your choice and place ( see finished image )
52. Layers- New Raster Layer
53. Selections –load/save selection –load selection from disc and select my selection: ‘’ Mode_Comestible-5’’
54. Set your Foreground color to color #ffffff=5
Flood Fill Tool –
Fill the selection with the foreground color =5 –
Fill the selection with the foreground color =5
Selections- Deselect All
55. Effects – 3D Effects –Drop Shadow with these settings: 3/3/48/8 Color Black
56. Open the tube ‘’M_C_Image -
rideau " -Edit - Copy- Activate your work -Edit - Paste as a new layer
57. Pick Tool: (K) on your keyboard -Enter these parameters for the X: 492,00 and Y: 312,00 positions on the Toolbar
 492/312 492/312
-Press ( M ) to close the Pick Tool
- Open the tube ‘’Tubes-Robes-soulier-Fleurs-légumes’’
58. Take a tube from the folder and resize if necessary
- Edit - Copy- Activate your work -Edit - Paste as a new layer
Activate your Move Tool (M) place it to the right side(see finished image )
59. Open the tube ‘’Renee_TUBES_MC-
femme micro’’ -Edit - Copy- Activate your work -Edit - Paste as a new layer
-Activate your Move Tool (M) place it in the right place (see finished image )
60. Image - Add borders-Symmetric checked: 30 Pixels Color White
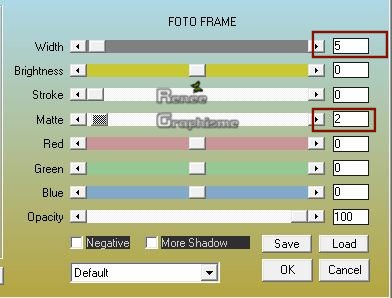
61. Effects – Plugins– AAA Frame – Foto frame use the settings below
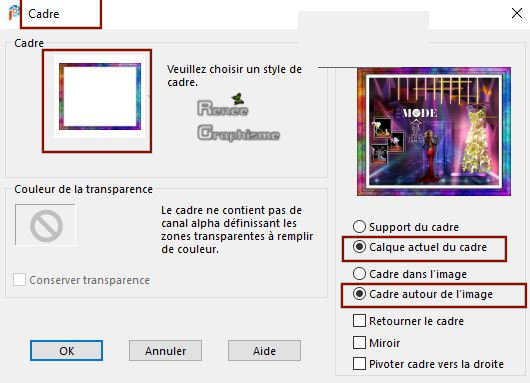
62. Image – Picture Frame/Cadre
Open the Picture Frame "Cadre" in your Psp
File- Export -Picture Frame and give it a name "Cadre"
Image - Picture Frame and choose my file "Cadre" with these settings :
63. Layers- Merge- Merge All(flatten)
64. Image -
Resize- Width 940 Pixels
Save as JPG
I hope you enjoyed this lesson
Renée
This lesson was written by Renée 03-03/2020
Edited and Update
in 2020
*
Any resemblance with an existing lesson is a coincidence *
Do not forget to thank the people who work with us and for us
I have appointed the tubeurs and translators
Thanks
*
|


 Translations


