|
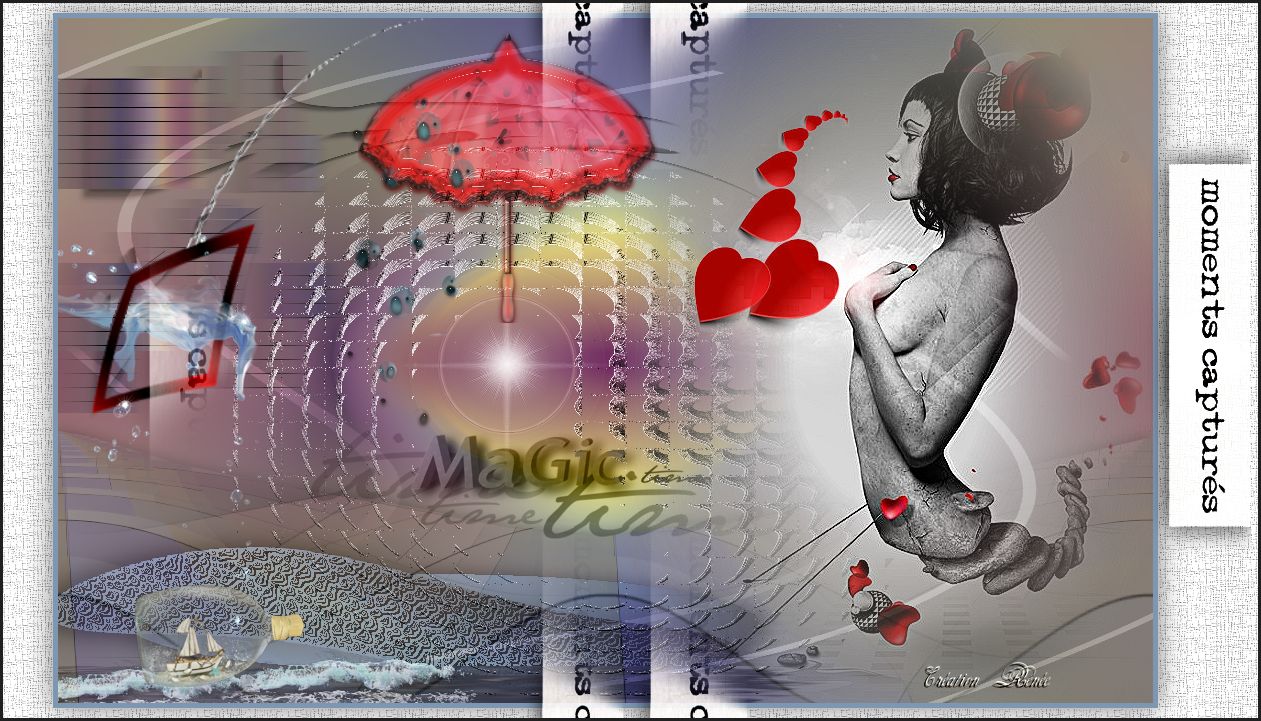
Let's begin
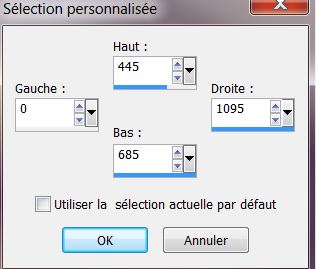
1. Open transparent image of 1095 x 685 pixels
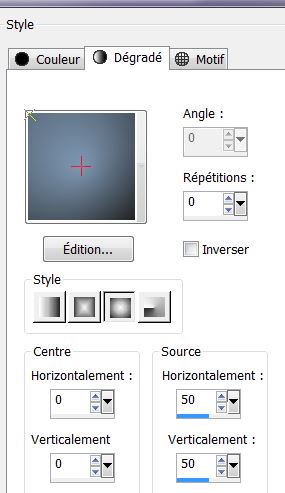
2. Color palette - Make a radial gradient using the
gradient ''Mqc Triple'' configured as follows
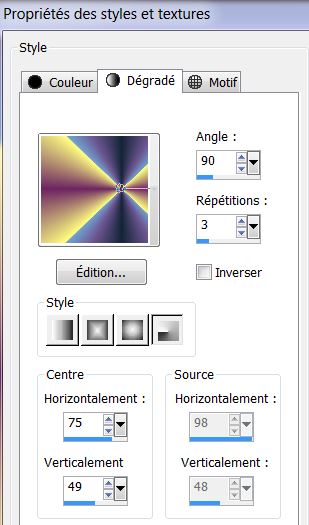
3. Fill the layer with the gradient
4. Effects - Simple/ 4 Way Average
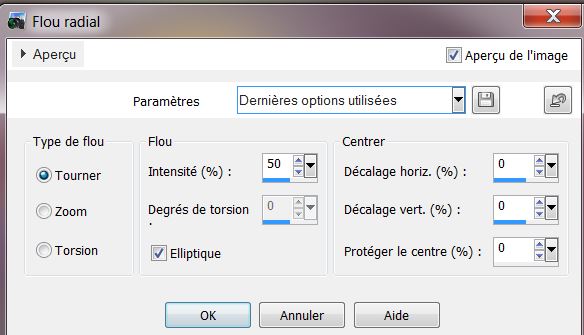
5. Adjust/ Blur - Radial Blur
6. Selection tool - load a
custom selection
7. Selections - Promote selection to layer
KEEP SELECTION ACTIVE
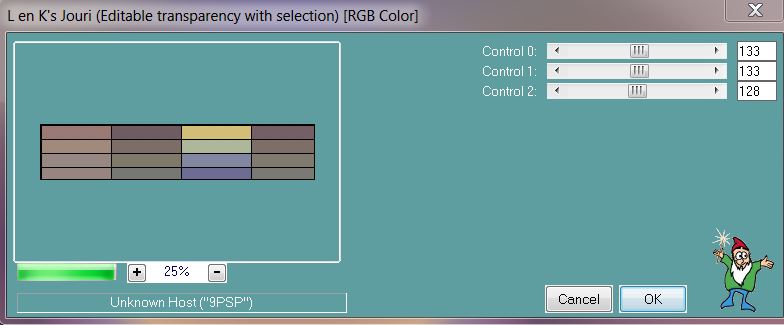
8. Effects - L and K's/ Jouri
9. Selections - deselect
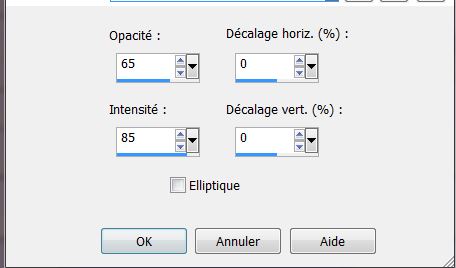
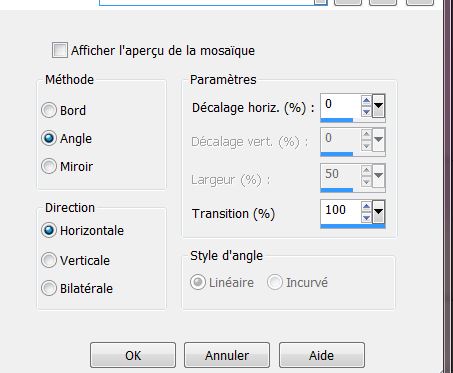
10. Effects - Reflection effect - Feedback
11. Lower the opacity of the layer down to 57
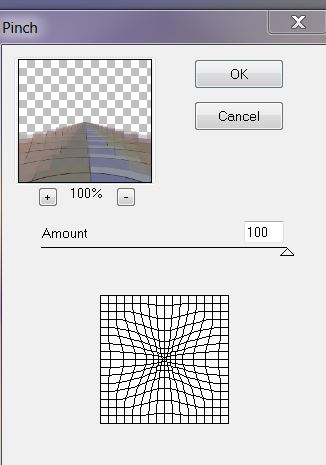
12. Effects - Distort - Pinch / repeat the effect
13. Effects - Image
effects/ Seamless tiling
14. Selections - load selection from disk
"moments_captures_1"
15. Delete or Cancel
16. Selections - Select none
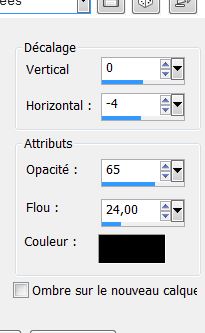
17. Effects - 3D effects - Drop Shadow
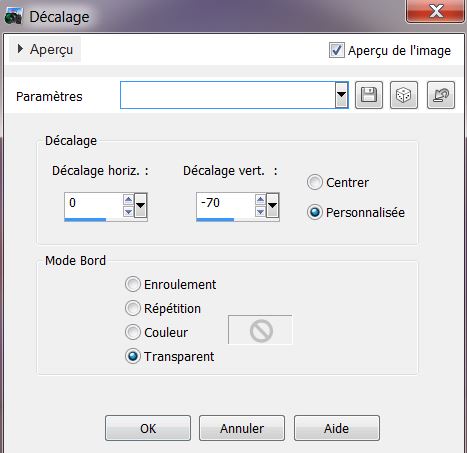
18. Effects - Image effect
- Offset
19. Layers - new raster layer
20. Selections - load selection "moments_captures_2"
21. Change the foreground gradient to a Sunburst
gradient and the background to color #6f545d

22. Fill the selection with the gradient
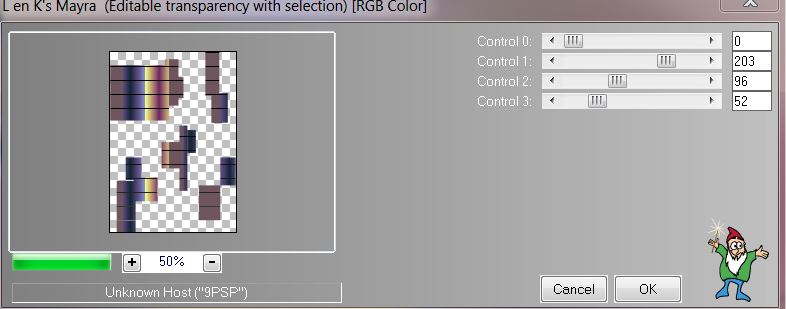
23. Effects - L and K's / Mayra
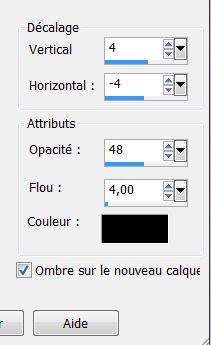
24. Effects - 3D effects -
Drop Shadow / Warning: tick the box "shadow on new
layer"
25. Selections - Select none
* You have this in your layers palette
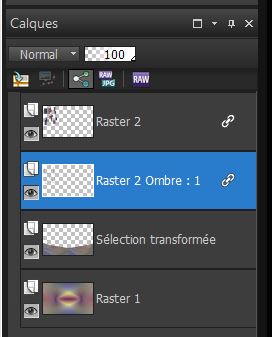
26. Stay on "Raster 2 Shadow: 1"
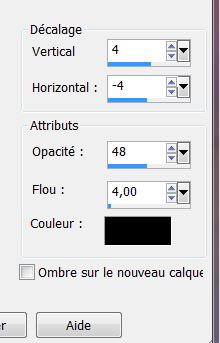
27. Effects - 3D effects - Drop shadow
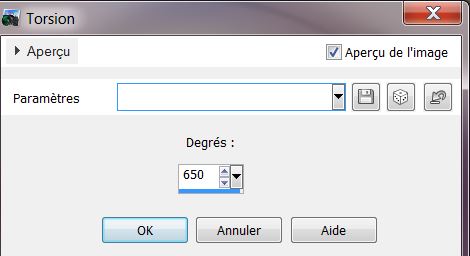
28. Effects - Distortion
effects - Twirl
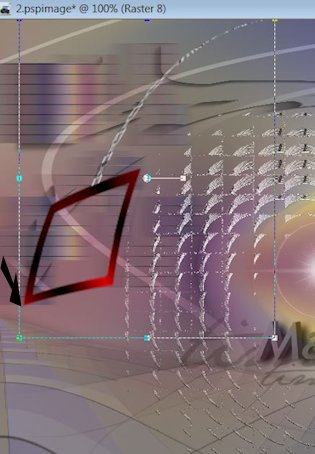
29. Go back on the top layer (Raster 2)
30. Effects - Distortion effects - Wind

31. Open the tube "image_1" and paste as a new layer
32. Effects - Image effects - Offset/ H = 0 and V = -
50/ transparent
33. Open the tube "time_magic683_L" and paste as a new
layer
34. Move it as shown and change the blend mode to
Luminance (Legacy)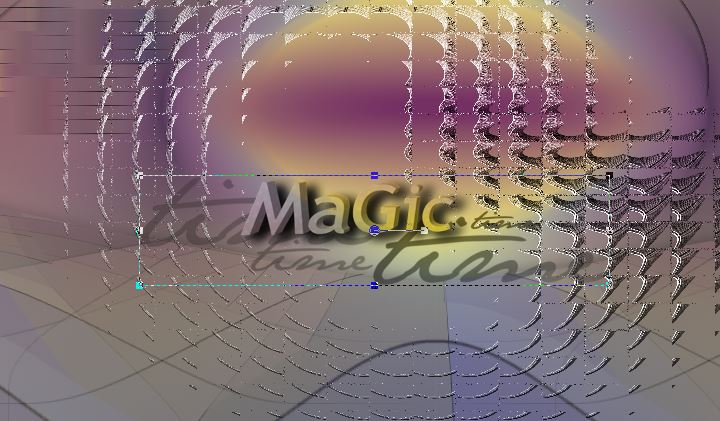
35. Open the tube "image_2" and paste as new layer -
place as shown in the example
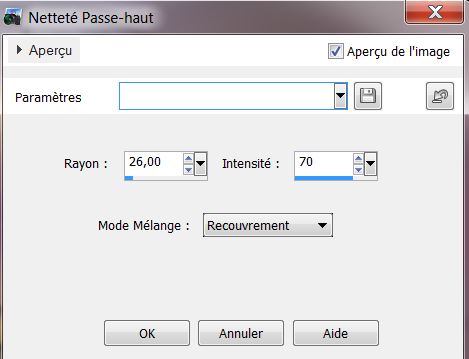
36. Adjust Sharpness - Highpass Sharpen
38. Layers - new raster layer
39. Color Palette - Set the foreground color to #fefefe
40. Selections - load the selection "moments_captures_3"
/ fill with the foreground color / deselect
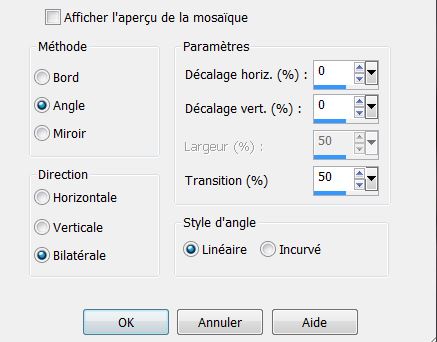
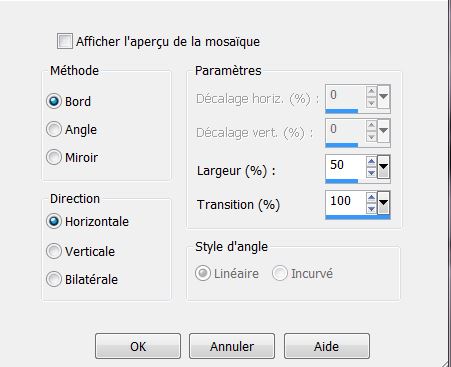
41. Effects - Image effect - Seamless tiling
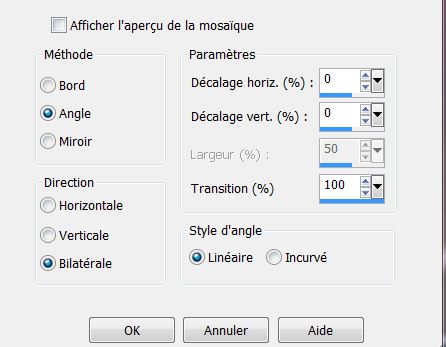
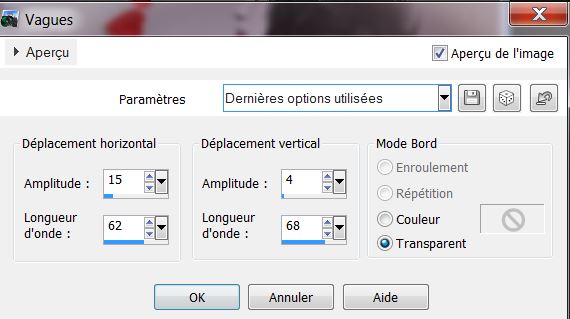
42. Effects - Distortion
effects - Wave
43. Set the blend mode to Overlay and opacity to 36
44. Open the tube "renee_femme_moments_captures" and paste it
in place as a new layer
45. Open the tube "image_3" - Paste in place as a new
layer and place like this. Lower opacity to 83
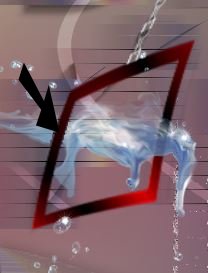
46. Paste the tube
"image_4" as a new layer and with the eraser tool/ erase
the left part that covers the frame like this
47. Open the tube "image_5_parapluie" and paste as a new
layer - Place well
48. Stay on the top of the Layers palette
49. Layers - add a new layer
50. Selections - load selection/ "moments_captures_4"
51. Open the tube "image_6_bulle" / Edit - edit copy/
paste into selection
52. Effects - EyeCandy 5 Impact/ Glass - Preset-clear
53. Selections - Select none
54. In the color palette set the foreground color to
#7d97b2 and background to #202020
55. Prepare a Sunburst gradient configured like this
56. Layers - add a new layer
57. Selections - load selection "moments_captures_5"
58. Fill the selection with the sunburst gradient
KEEP SELECTION ACTIVED
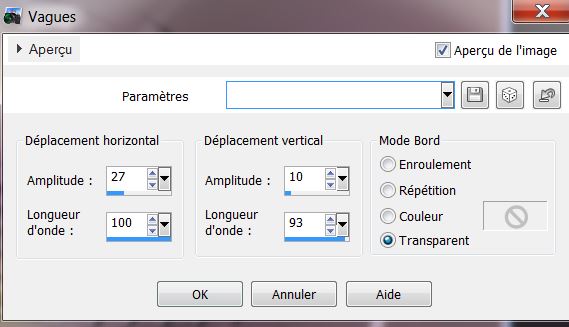
59. Effects - Distortion effects - Wave
60. Effects - Eyecandy5 Impact - Perpective shadow -
Preset "moments_captures_1perps"
61. Effects - Flaming Pear - India Ink

62. Selections - Select none
63- Set the blend mode to soft light
64. Effects - EyeCandy 5 Impact - Perspective Shadow /
Preset - "moments_magiques_2Persp"
65. Open the tube ''image7_vagues'' - Paste as a new
layer then place in the lower left corner
66. Open the tube "manuedesign_image1"/ Image resize to
80% and paste in place
67. Layers - Merge Visible
68. Image add borders 5 pixels #7d97b2
69. Image add borders asymmetrical white like this:
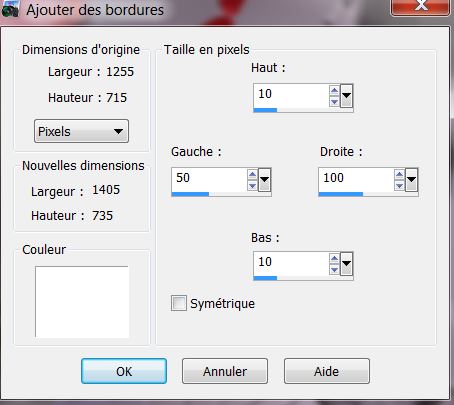
70. Select the border with the magic wand
71. Effect - ICNet Filters Unlimited/ Paper Textures /
Papyrus 66/96
72. Effects - Edge effects - Enhance
73. selection none
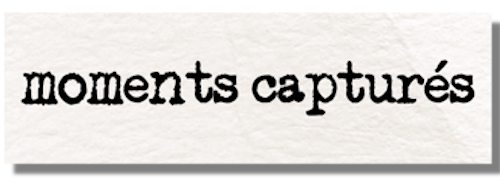
74. Open the tube "moments_capturés_titre" Paste up to
the right/ and put in hard light mode
75. Layers - duplicate
76. Effects - Image effects - Seamless Tiling
77. Layers - duplicate
78. Effects - Image effects - Seamless Tiling
79. Image add borders 3
pixels black
All Done
Thanks Sally
 |