|
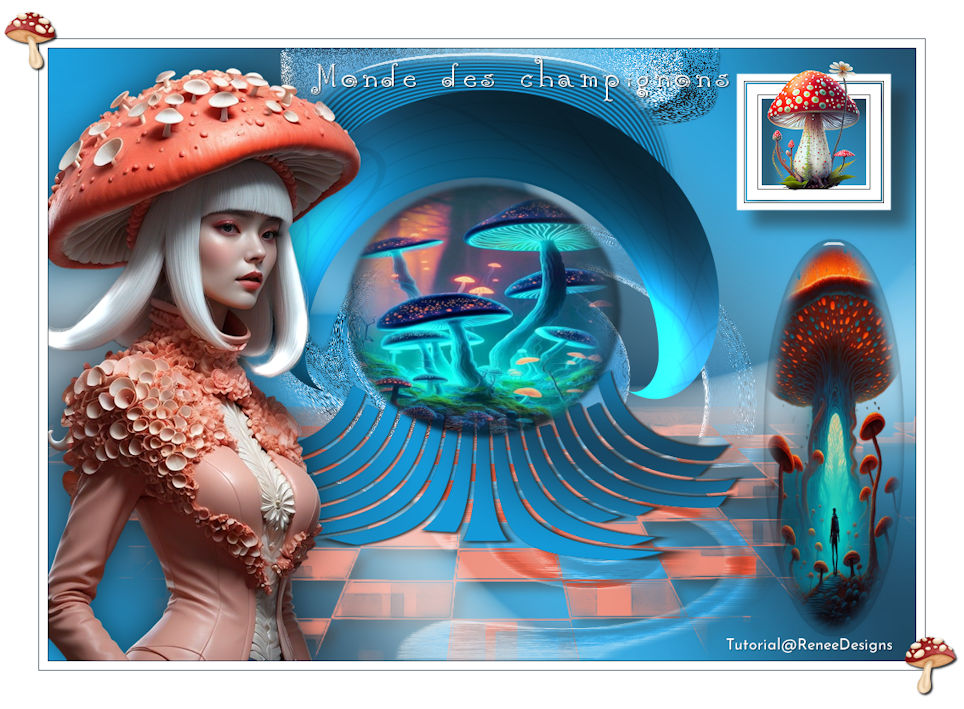
Let's start the lesson
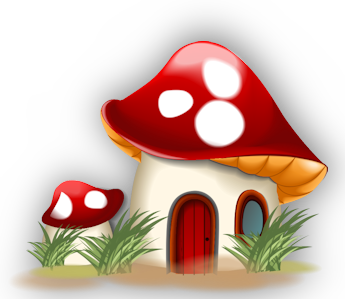
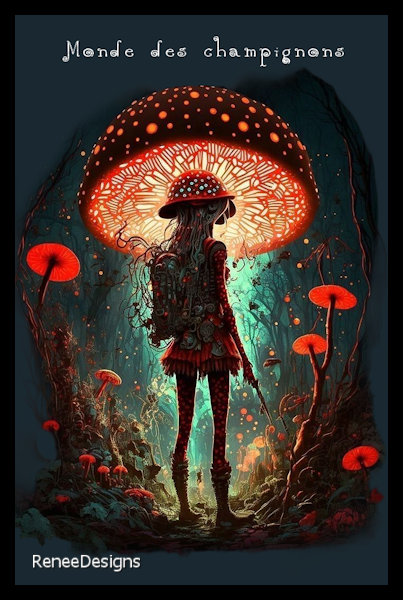
Mushroom World - Monde des
champignons
- Preparation
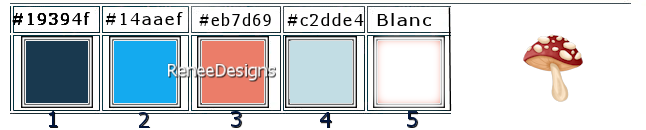
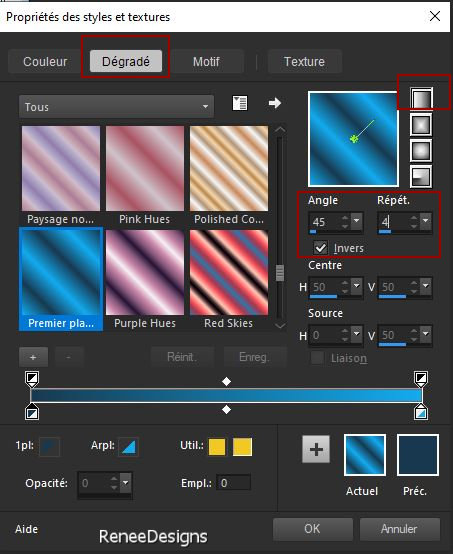
-Material Properties: Set your Foreground color to color
1– Set your Background color to color 2
-
Replace
your foreground color with a foreground/background
linear gradient configured as follows
1. File-Open a new
transparent image of this size:1020 x 720 Pixels-Raster
1
2. Flood Fill Tool
 –
Fill the layer with the gradient –
Fill the layer with the gradient
3. Adjust- Blur-Gaussian
Blur-Radius 50%
4. Layers- Duplicate
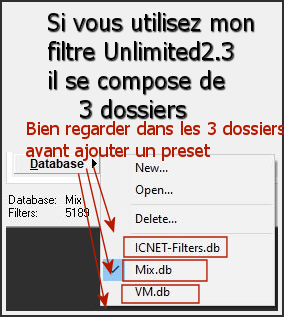
5. Effects - Plugins- Filters
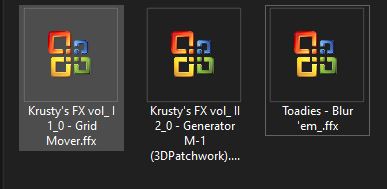
in Unlimited 2.0 -Krusty's FX vol. I
1.0 - Grid Mover use the default settings
6.
Layers- Duplicate
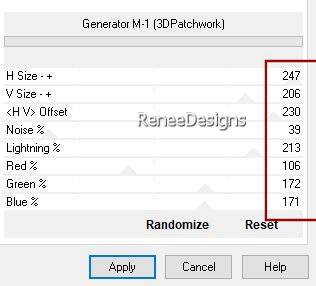
7.
Effects - Plugins- Filters in
Unlimited 2.0 - Krusty's FX vol. II 2.0 -
Generator M-1 (3DPatchwork)with the following settings
8.
Image - Free Rotate 90° Left
9.
Image - Resize 73 %- Resize all layers-not
checked
10.
Layers-Properties-Set the Blend Mode to " Luminance"
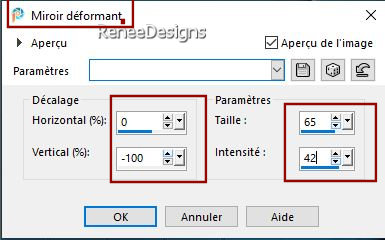
11.
Effects –Distortion Effects- Warp with the following
settings
12.
Effects –Distortion Effects – Twirl – Degrees = 54
13.
Selections –load/save selection –load selection from
disc and select my selection: ‘’Champignons-Renee-1’’


15.
Effects - Plugins- Filters in Unlimited 2.0 –
Toadies - Blast 'em!... : 14 /165
16.
Tool - Lighten/Darken Brush (L)- with the following
settings-To make it brighter
Hold
down the left mouse button and move along the edge along
the entire length of the shape

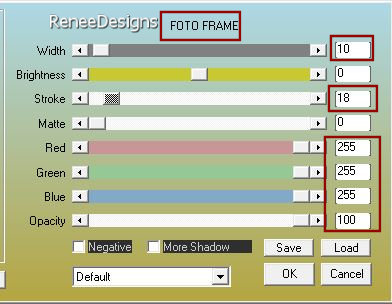
17. Selections
–load/save selection –load selection from disc and
select my selection:‘’Champignons-Renee-0’’
Layers
palette - Activate Copy of Raster 1
18.
Selections –load/save selection –load selection from
disc and select my selection: ‘’Champignons-Renee-2’’
-
Layers- New Raster Layer
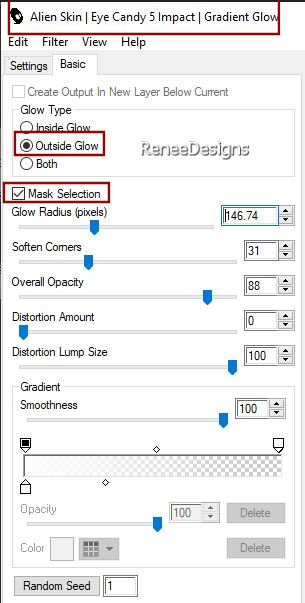
19.
Effects - Plugins- Alien Skin EyeCandy 5 –
Impact – Gradient Glow with the following settings
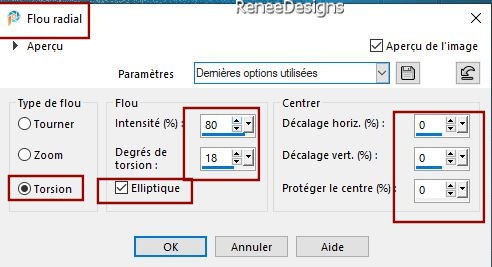
20.
Adjust- Blur- Radial Blur with the following settings
-Activate
the bottom of the layer palette= Raster 1
21.
Selections –load/save selection –load selection from
disc and select my selection: ‘’Champignons-Renee-3’’
22.
Selections-Promote Selection to Layer
23.
Layers- Arrange- Bring to Top
24.
Effects - Plugins - VM Extravaganza – shoutin’ !
use the settings below
25.
Effects- 3D-Effects- Drop Shadow with these settings: 3/ 3/ 85 / 5
Color black
26.
Effects- Plugins – Flaming Pear – Flexify 2 with
the following settings

-
Layers palette- activate Copy of Raster 1
27.
Layers- Arrange- Bring to Top
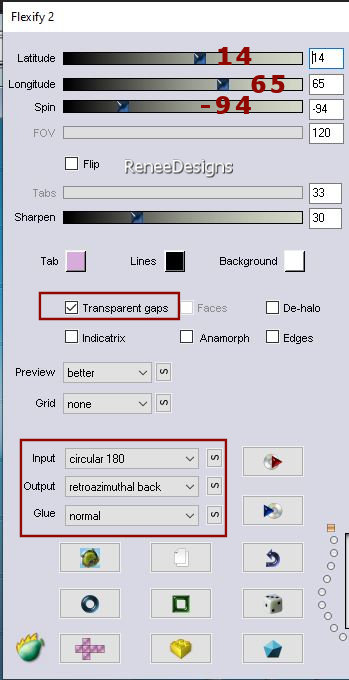
28.
Effects- Plugins – Flaming Pear – Flexify 2 use
the settings below
29.
Layers- New Raster Layer
30.
Selections –load/save selection –load selection from
disc and select my selection: ‘’Champignons-Renee-4’’
31. Flood Fill Tool
–Fill
the selection with the background color =color number 2
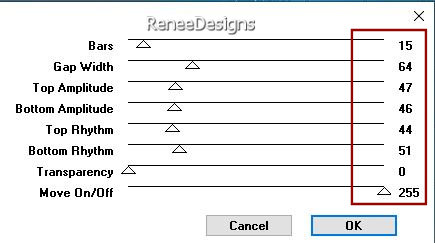
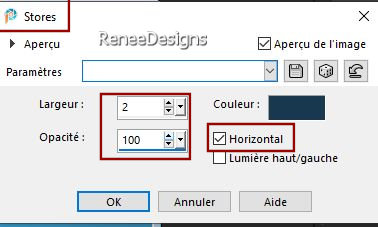
32.
Effects – Texture Effects– Blinds use the settings below
– Color number 1
33.
Effects- 3D- Effects- Drop Shadow with the same settings
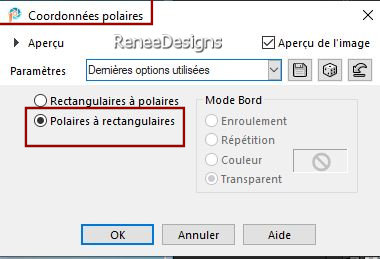
33.
Effects- Distortion Effects- Polar coordinates -Polar to
Rectangular
34.
Objects – Align - Top
35.
Layers- Arrange- Move Down
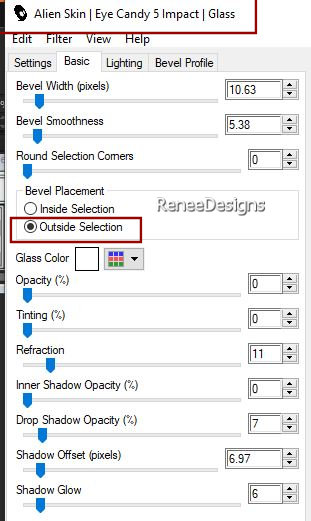
36.
Effects - Plugins - Alien Skin EyeCandy 5 –
Impact – Glass with the following settings
-
Activate the layer above (Copy of Raster 1)
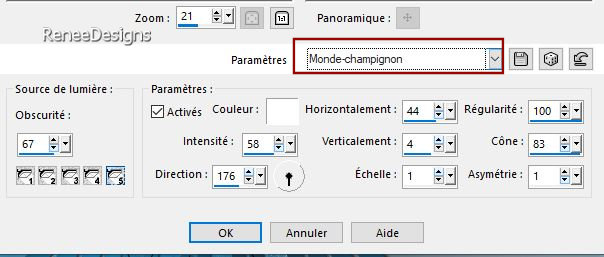
37.
Effects – Illumination Effects– Lights– select my file- Preset :’’Monde-champignon’’
or
adopt the settings below
38.
Layers- New Raster Layer
39.
Selections –load/save selection –load selection from
disc and select my selection: ‘’Champignons-Renee-5’’
40.
Open the tube : ‘’Renee-Tubes-Monde-des-champignons-Image1’’
-Edit - Copy -
Activate your work - Edit - Paste into selection
41.
Layers- New Raster Layer
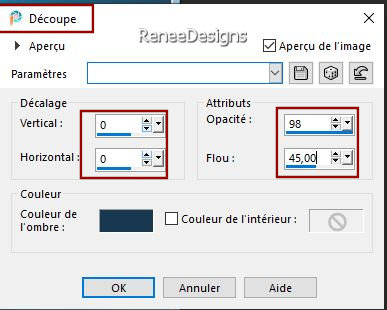
42.
Effects – 3D-Effects – Cutout use the settings below –
Color number 1
-
Activate the bottom of the layer palette =Raster 1
43.
Layers- New Raster Layer
-
Foreground Properties - Set your foreground color
to color number 3
44. Flood Fill Tool
-
Fill the selection with color number 3
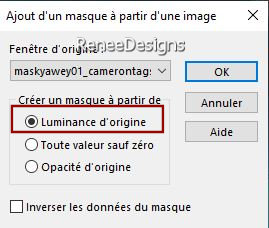
45.
Layers- New Mask Layer- From Image and select Mask
‘’maskyawey01_camerontags’’
-
Layers- Merge- Merge Group
46.
Effects- 3D- Effects- Drop Shadow with these settings: 10/10/60/15
Color black
- Your
work and layer palette now look like this: You should
have the following result (Arrange the layers
correctly)
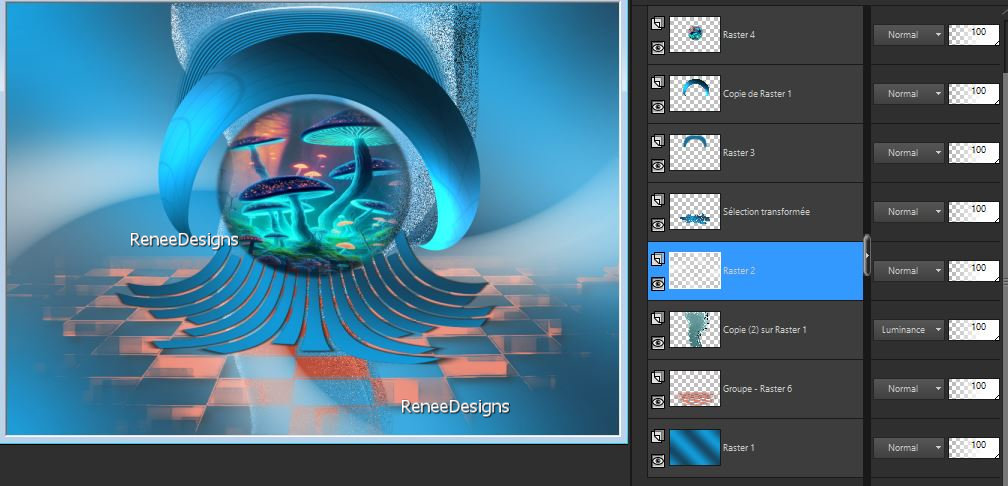
-Layers
palette- activate Copy 2 of Raster 1
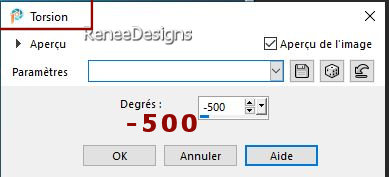
47.
Effects –Distortion Effects– Twirl with the following
settings
-
On the same layer
48.
Selections –load/save selection –load selection from
disc and select my selection: ‘’Champignons-Renee-6’’
49.
Effects –Distortion Effects– Twirl with the same
settings
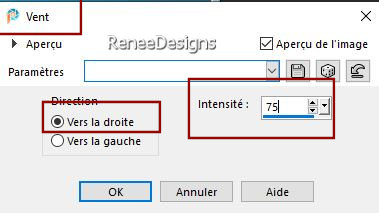
50.
Effects –Distortion Effects- Wind-Wind direction from
right- Wind strength 75%
- Activate the top of the
layer palette
51.
Layers- New Raster Layer
52.
Selections –load/save selection –load selection from
disc and select my selection: ‘’Champignons-Renee-7’’
53. Flood Fill Tool
–
Fill the selection with color number 5 (white)
54.
Effects- Plugins – AAA Frame – Foto Frame with the
following settings
55.
Activate your Magic Wand – Tolerance at 0 and Feather at
0 – Click inside the frame
56.
Flood Fill Tool- Fill the selection with color number 4
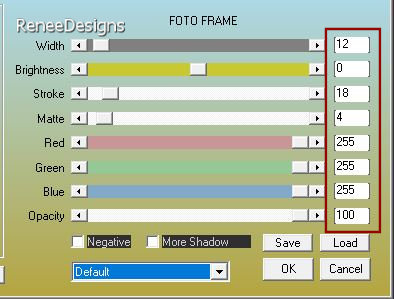
57.
Effects- Plugins – AAA Frame – Foto Frame use the
settings below
57.
Activate your Magic Wand – Tolerance at 0 and Feather at
0 –Click inside on the square part in light blue
58.
Effects- 3D-Effects- Drop Shadow with these settings: 19/19/60/22
Color black
59.
Open the tube : ‘’Renee-Tubes-Monde-des-champignons-Image2’’
-Edit - Copy- Activate your work -Edit - Paste as new
layer
-
Réglage traitement rapide des photos (facultatif)
60.
Open the tube
‘’Renee-TUBES-Champignon-Femme 1’’
(or one of your choice) -Edit - Copy- Activate your work -Edit - Paste as
new layer
-
Resize if necessary (Renée at 70%) - Move to left
(see finished image )
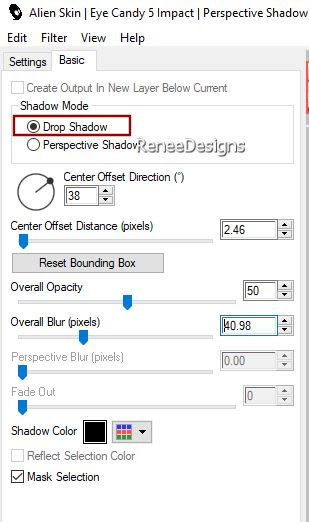
61.
Effects - Plugins - Alien Skin EyeCandy 5 –
Impact – Perspective Shadow with the following settings
62.
Layers- New Raster Layer
63.
Selections –load/save selection –load selection from
disc and select my selection: ‘’Champignons-Renee-8’’
64.
Open the tube :
‘’Renee-Tubes-Monde-des-champignons-Image3’’ -Edit - Copy
- Activate your work - Edit - Paste into selection
65.
Layers- New Raster Layer
66.
Selections – Modify – Expand 10 Pixels
67.
Effects - Plugins - Alien Skin EyeCandy 5 –
Impact – Glass- Preset : Clear, No Drop Shadow
68. Text Tool -With font attached ‘’Rebecca’’-
Size 36 – foreground and background color on white
- Write the title-
Monde des champignons
‘’ and move
69. Effects- 3D- Effects-
Drop Shadow with these settings: 1/1/100/2 Color black
70. Image – Ajouter des
bordures de 1 Pixel -Color number 1
- Image – Ajouter des
bordures de 10 Pixels -Color number 5 ( white)
- Image – Ajouter des
bordures de 1 Pixel -Color number 1
- Image – Ajouter des
bordures de 45 Pixels -Color number 5 ( white)
71.Open the tube ''deco
cadre'' -Paste as new layer ( do not move)
- Add the author's
watermark to your work and your own watermark
72. Layers- Merge-Merge All
( flatten)
73. Image – Resize 85%
-Resize all layers checked
Save as JPG
I hope you enjoyed this
lesson
Renée
This lesson was written by
Renée 17/05/2024
Edited and Update
in 2024
*
Any resemblance with an
existing lesson is a coincidence
* Do not forget to thank the people who work with us and
for us - I have appointed the tubeurs and translators
Thanks
|
 Translations