|
Let's start the lesson.
-
Material Properties: Foreground color to color white=#fffffff
Background color to color black =#000000
-
File - New - New Transparent Image:995 x 625 pixels
1.
Effects- Plugins – Medhi- Wavy Lab1.1 with these settings
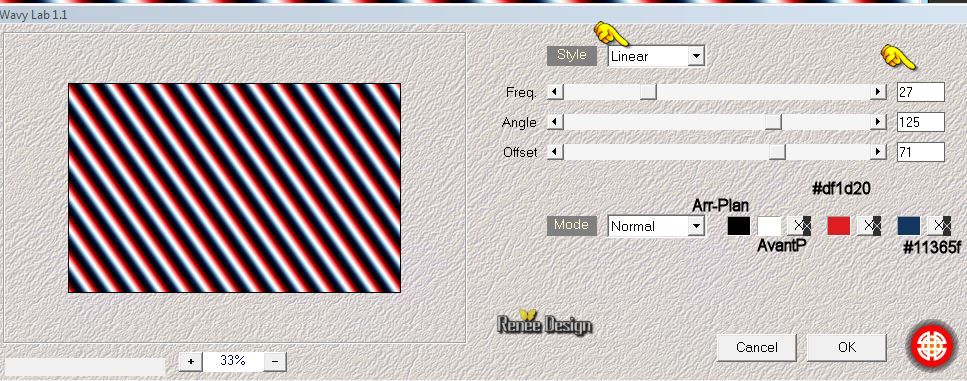
2.
Adjust- Blur- Gaussian Blur Radius: 32%
3.
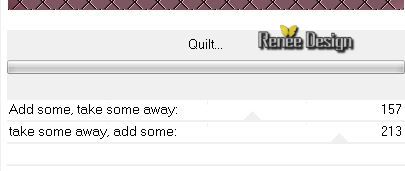
Effects- Plugins -Unlimited 2.0 -&<Bkg Designer
sf10II> Quilt
4.
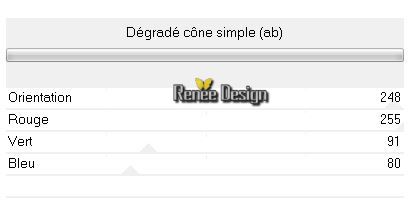
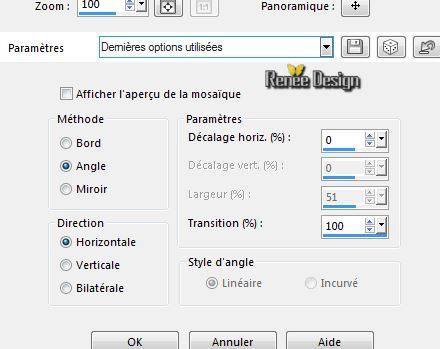
Effects- Plugins -Unlimited 2.0 -Degrades - degrade cone simple
(ab)
5. Layers- New raster layer
- Activate Flood Fill Tool and fill the layer with color white
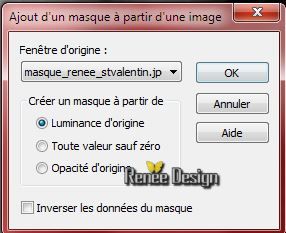
6. Layers- New Mask layer from Image and select Mask :Renee st valentin
-
Layers- Merge- Merge Group
7. Effects- Edge Effects- Enhance
8. Effects-Image Effects-Seamless Tiling use the settings below
- Double click on this layer and set the Blendmode to Screen
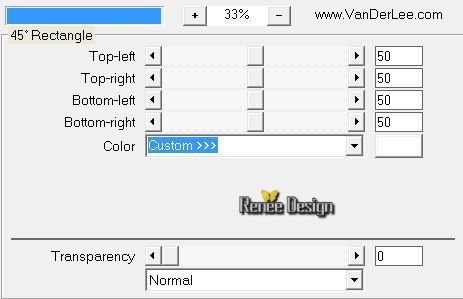
9. Effects- Plugins -Vanderlee Unplugged X -45°Rectangle
10.
Effects- Plugins -Toadies -What are you 60 and
20
11. Effects- Plugins -Simple -4 Way average
12. Double click on this layer and set the Blendmode to Difference
13. Layers- Merge- Merge Visible
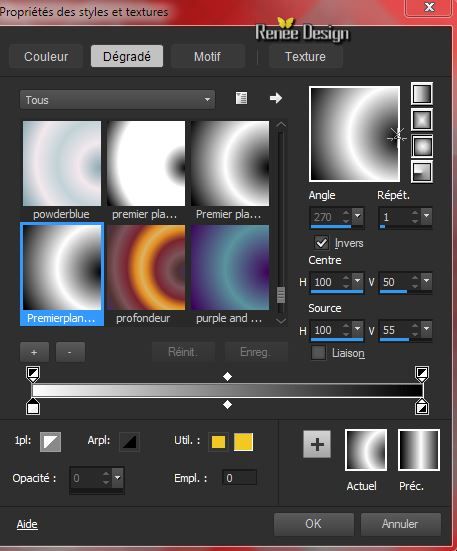
Color palette -Prepare a sunburst gradient configured like this.
14. Layers- New raster layer
15.
Selections - load/save selection - load selection from disk and choose my selection: ''Nous2_SV_1''
-Activate Flood Fill Tool and fill the selection with the gradient
16. Adjust- Blur- Gaussian Blur Radius: 95%
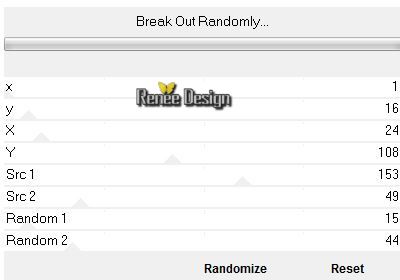
17.
Effects- Plugins - Unlimited 2.0 - Plugins AB07/Break out
Randomly
18.
Selections-Invert-Press the delete button on your key board (2 x)
Selections- Deselect All
19. Double click on this layer and set the Blendmode to Hard Light
20. Layers- Duplicate
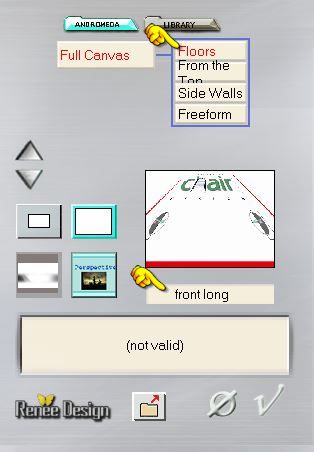
21. Effects- Plugins - Andromeda Perspective- Floors – Front
long
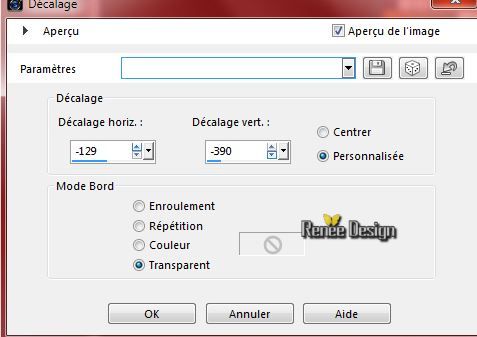
22. Effects- Image Effects- Offset with these settings
23. Layers- Duplicate -Image Mirror
24. Layers- Merge- Merge Down
25. Effects- Edge Effects- Enhance More
-Double click on this layer and set the Blendmode to Normal
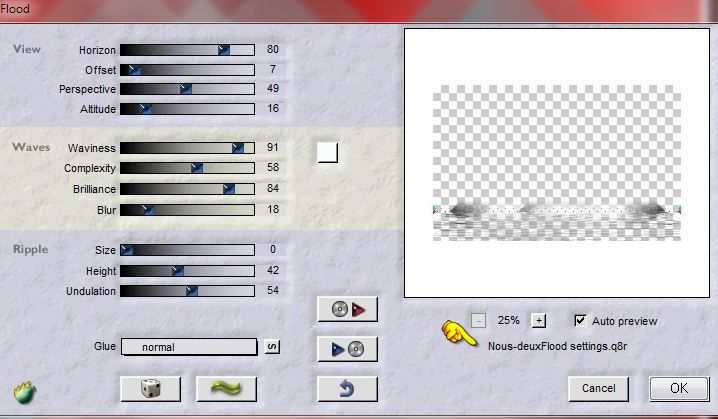
26.
Effects- Plugins -Flaming Pear Flood-click on the red arrow>can be used in any folder of your choice by clicking it and select - Preset
''Nous-deuxFlood settings'' Open it will be ok in your filter
27. Activate the tube ''Renee_tube_valentine_day.pspimage''-Edit - Copy -Edit - Paste as new layer on your working area and move a little down
28. Activate the tube ''
''TW-FL-Love.pspimage''-Love.pspimage''
with different parts (Coeur-reverbere-tasse_love and pré_fleurs )Edit - Copy -Edit - Paste as new layer on your working area and move .
-on the tube layer of "pré fleur"
29. Activate Soften Brush with these settings

Then click with the right mousebutton on to the tube as shown on the print screen below

30. Activate the tube ''nuage'' -Edit/copy-Edit paste as a new layer. With your move tool place it in the top left corner
31. Activate the tube ''TW-FL-wordart1''
Edit/copy-Edit paste as a new layer on your working area and move
32. Layers- Duplicate
- Double click on this layer and set the Blendmode to Screen
33. Layers- Merge- Merge Visible
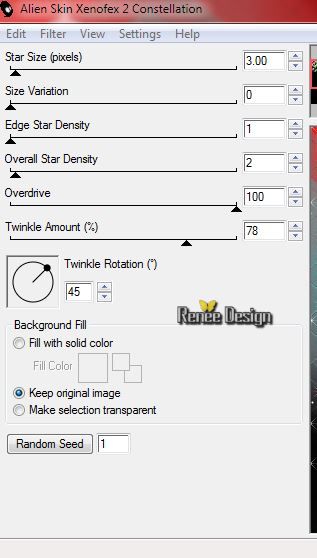
34. Effects- Plugins -Alien skin Xenofex2 with these settings
35. Image - Add borders-Symmetric checked: 2 pixels BG-Color
36. Image - Add borders-Symmetric checked: 30 pixels FG-Color
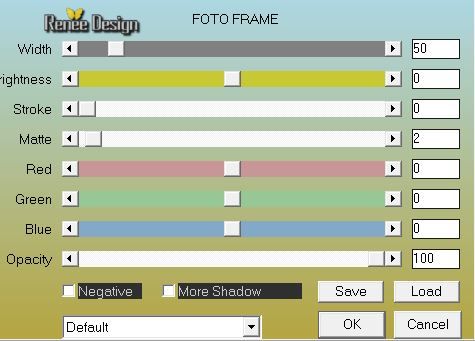
37. Effects- Plugins - AAA Frame - Foto frame with these settings
38.
Selections-Select All
39.
Selections- Modify-Contact with 22 pixels
40.
Selections- Invert
41.
Effects- 3D Effects- Inner Bevel with these settings- Color #c11813

Selections- Deselect All
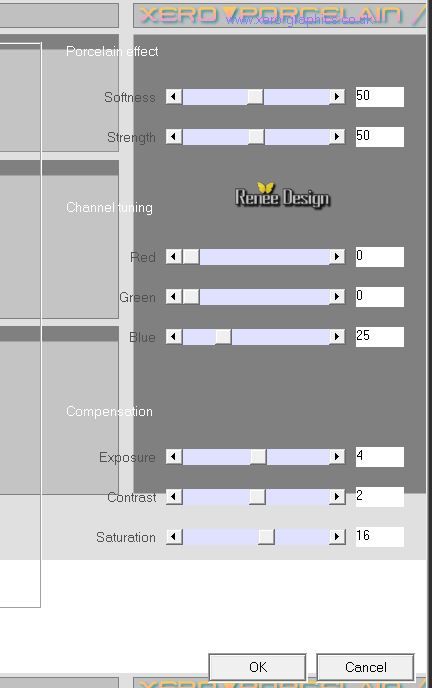
42. Effects- Plugins -Xero XL -Porcelaine with these settings
- Open the text/ Edit/copy-Edit paste as a new layer on your working area .Ore write your own text( Font ''BEMY '')
Save as JPG
I hope you enjoyed this lesson
Renée
This lesson was written by Renée 9/01/2015
Placed at
14/02/2015
*
Any resemblance with an existing lesson is merely a coincidence *
* Don't forget to thank the people who work for us and with us. I named the tubeurs - Testers and the translators.
Thanks Renée.
*
| 
 Translations


 When you see this logo the filter is imported in Unlimited *

 All rights reserved