|
Let's start the lesson
Nyctophile
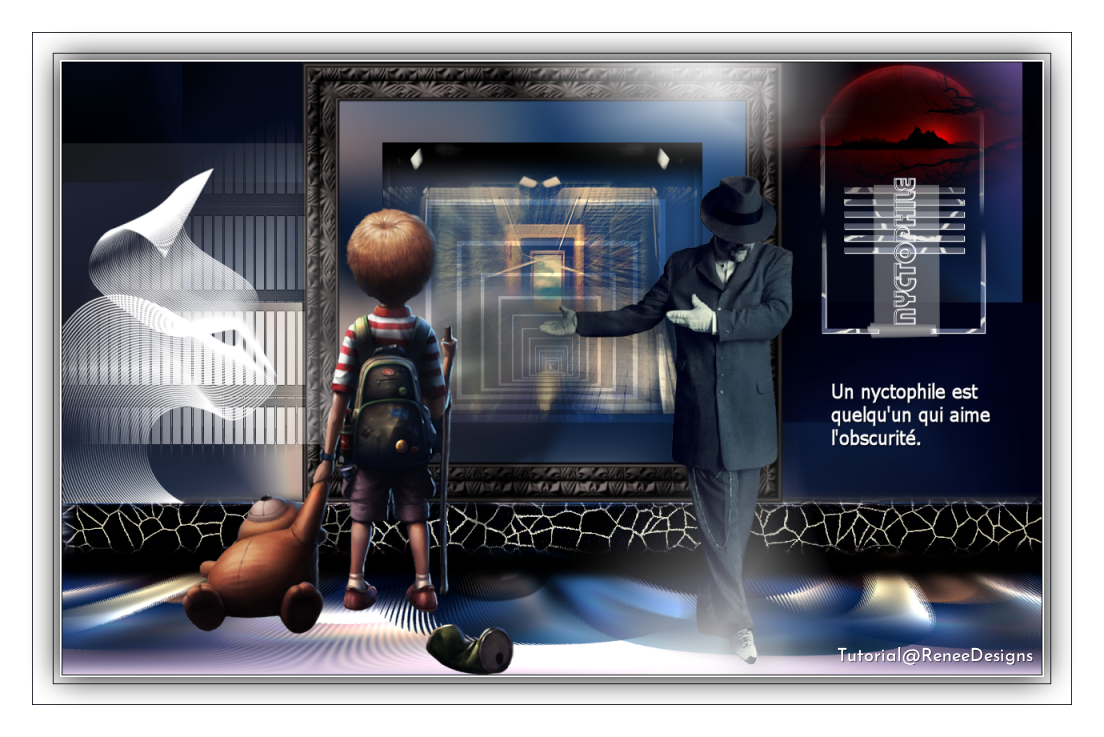
Garçon seul dans
obscurité / Boy alone in darkness
- Preparation
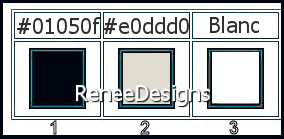
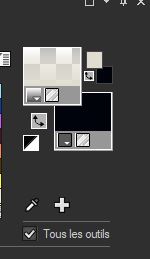
-Material Properties: Set your foreground color to color #01050f = 1 Set your background color to color #e0ddd0 =2

1. Open the Background image
‘’Fond-Nyctophile- Promote Background Layer =Raster 1
2. Effects- Plugins – Medhi- Sorting Tiles use the settings below
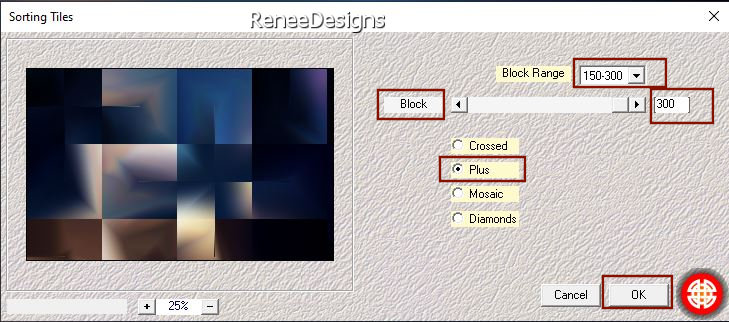
3. Layers- Duplicate
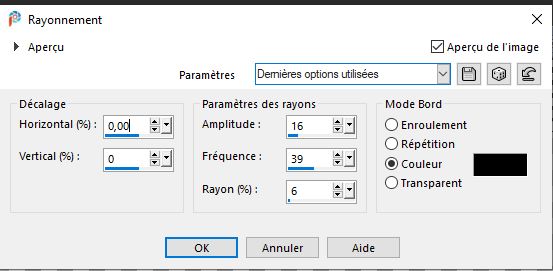
4. Effects- Distortion Effects – Spiky Halo with these settings
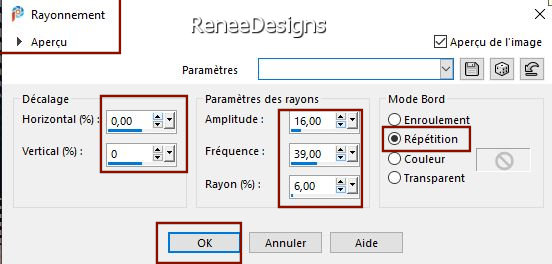
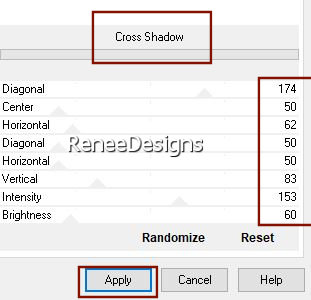
5. Effects –Plugins- Unimited
2.0 – Graphic Plus – Cross Shadow use the settings below
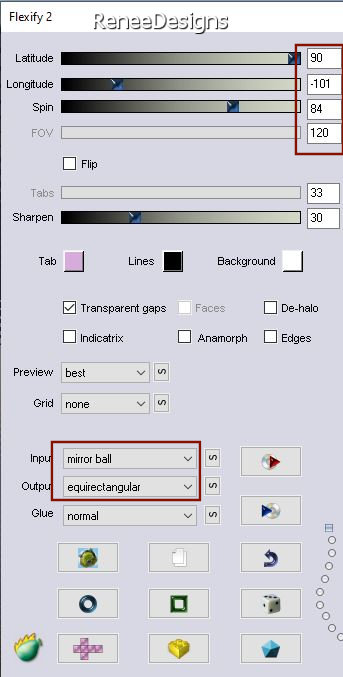
6. Effects – Plugins – Flaming Pear – Flexify2 use the settings below
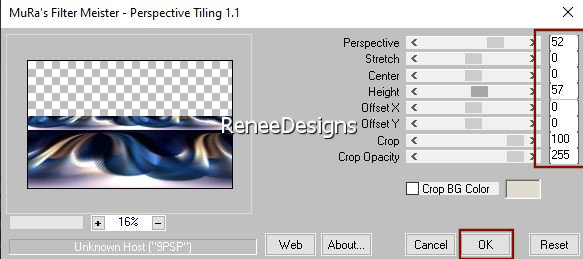
7. Effects – Plugins - Mura’s Meister - Perspective Tiling use the settings below
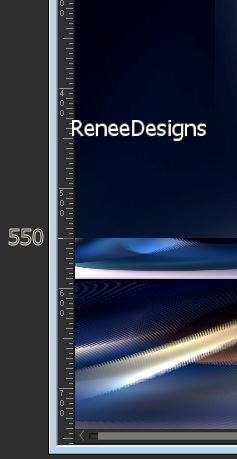
8. Pick Tool: on your keyboard (K) - Mode Scale
Place the mouse pointer over the top center cursor
Pull down to 550 pixels
9. Selections –load/save selection –load selection from disc and select my selection: ‘’Nyctophile- 1’’
10. Effects – Plugins- Mura’s Meister- Perspective Tiling using the default settings
KEEP SELECTION and STAY ON THIS LAYER
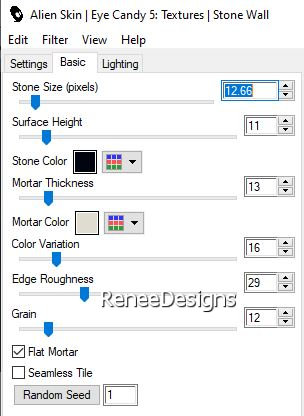
11. Effects – Plugins – Alien Skin EyeCandy 5 – Textures – Stone Wall-–Tab-Settings-User Settings and select my file- Preset : Nyctophile-Stone Wall1
12. Selections- Promote Selection to Layer
13. Layers-Properties-Change the Blend Mode to " Hard Light "
- Activate the layer underneath
14. Effects-Distortion Effects – Spiky Halo with the same settings (Edge Mode-Color -Black )
15. Effects –Plugins-
Unlimited 2.0 –Toadies -*Sucking Toad* Bevel II.2..with these settings: 88/62/43
16. On the layer above (Promoted selection )
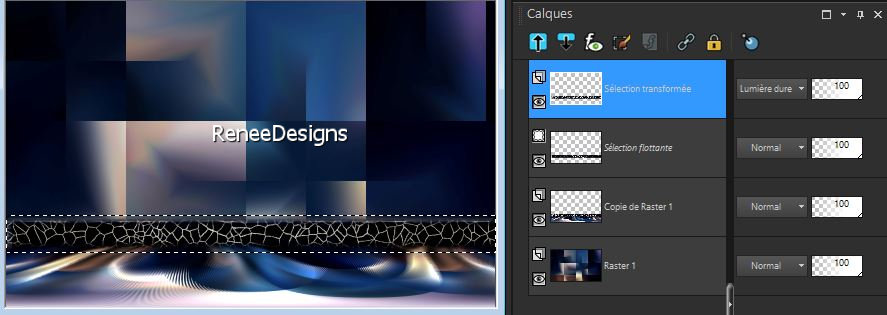
Your work and Layer Palette look like this now-You should have this result
17. Effects- 3D-Effects - Drop Shadow with these settings: 27/0 /100 /0 Black

- Activate the bottom of the layer palette =Raster 1
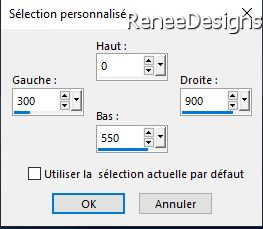
18. Activate Selection Tool -Custom Selection (S) -Rectangle with these settings

19. Selections- Promote selection to Layer
20. Layers- Arrange- Bring to Top
21. Adjust-Blur-Gaussian Blur -Radius 25
22. Layers- New Raster Layer
23. Activate the tube
‘’ Boy-alone-darkness- cadre’’
- Edit - Copy- Activate your work -Edit - Paste into selection
24. Selections - Modify - Contract by 100 pixels
25. Layers- New Raster Layer
26. Effects
3D- Effects – Cutout - use the settings below-Color Black
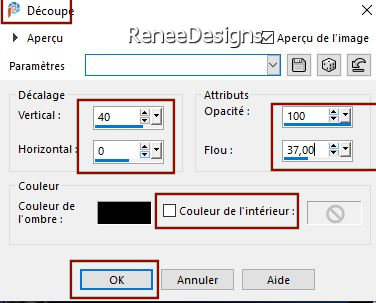
27. Selections- Modify-Select Selection Borders with these settings
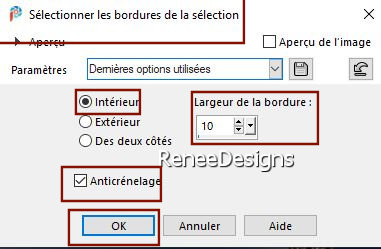
28. Layers- New Raster Layer
29. Activer le Flood Fill Tool

–Fill the selection with the background color #e0ddd0 (No 2)
(use a light color if you use your own colors)

30. Effects -Reflection Effects –Feedback use the settings below
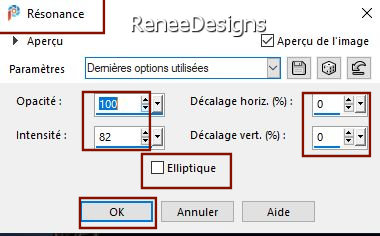
31. Layers-Properties-Set the Blend Mode to " Dodge "-Lower the Opacity to 32%
32. Open the tube ‘’ Boy-alone-darkness-
porte’’-Edit - Copy- Activate your work -Edit - Paste as a new layer
33. Effects – Image Effects -Offset with these settings
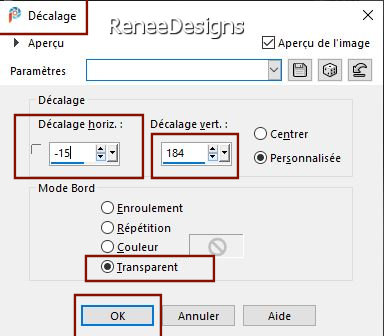
34. Layers- Arrange- Move Down (Renée-Blend Mode
-Exclusion)
35. Effects – Plugins –FM Tile Tools – Saturation Emboss using the default settings
- To replace the top of the layer-palette
- Color Palette-
Invert the colors of the layers palette
Foreground color #e0ddd0 =2 -Background color #01050f=1
- Color Palette
- Set your Foregroundcolor to gradient –Fading foreground-Style Linear (Corel 06_026)
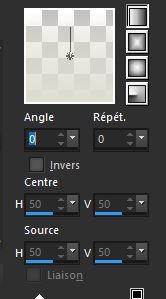
36. Layers- New Raster Layer
37. Selections –load/save selection –load selection from disc and select my selection: ‘’Nyctophile- 2’’
38. Activate Flood Fill Tool
 –
fill the selection with the gradient –
fill the selection with the gradient

39. Layers-Properties-Change the Blend Mode to " Screen "
40. Layers- Duplicate
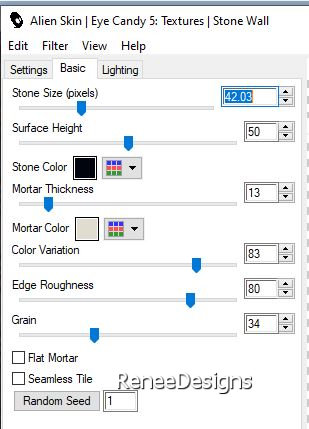
41. Effects – Plugins- Alien Skin EyeCandy 5 –Textures –Stone wall-Tab-Settings-User Settings and select my file- Preset : Nyctophile-Stone Wall
2
42. Layers- Merge -Merge Down
43. Effects- 3D-Effects - Drop Shadow with these settings: 1/1/100/1 White
44. Open the tube‘’ Boy-alone-darkness-
soleil-rouge’’ -Edit - Copy- Activate your work -Edit - Paste as a new layer
- Place at the top right
45. Layers- New Raster Layer
46. Selections –load/save selection –load selection from disc and select my selection: ‘’Nyctophile- 3’’
-Foreground still on "Fading foreground "gradient
47. Flood Fill Tool
 –
Fill the selection with the gradient –
Fill the selection with the gradient
48. Effects –Plugins-
Unlimited 2.0- &<Bkg Designer sf10 I>- Cruncher :
120/255
49. Effects – Edge Effects- Enhance

50. Effects -
Distortion Effects – Wind – Wind Strength 75
Wind Direction: once to the right / once to the left
51. Effects – Plugins– AV.Bros Page Curl pro 2.2
Click on the arrow : Main
Click on Load setting (relative)
Choose my preset in the map of your choice
Click on Open
Click on APPLY (the effect will run)
- Activate Pick Tool(K) On the directional arrows on the Keyboard-click 1 or 2 times on the arrow to the right until the effect it is in the middle 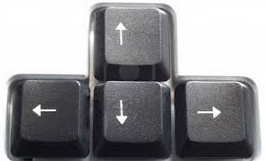
52. Layers-Properties-Change the Blend Mode of this layer to " Screen"
53. Text Tool- -Renée chose the font "a_BighausTitul3D "–(or a font of your choice) FG-Color White -BG-Color Black

Write :Nyctophile
-Convert to Raster Layer
54. Image- Free Rotate 90° Left – Move the text to the right place (see finished image )
55. Open the tube ‘’
Boy-alone-darkness- texte’’ -Edit - Copy- Activate your work -Edit - Paste as a new layer
56.
Open the tube ‘’Boy-alone-darkness-
homme’’ -Edit - Copy- Activate your work -Edit - Paste as a new layer
57. Pick Tool: (K) on your keyboard -Enter these parameters on the toolbar
 595/
141 595/
141
Press ( M ) to close the Pick Tool
58. Shadow of your choice- For Renée-Effects – Plugins- Alien Skin EyeCandy 5 Impact -Perspective Shadow use the settings below
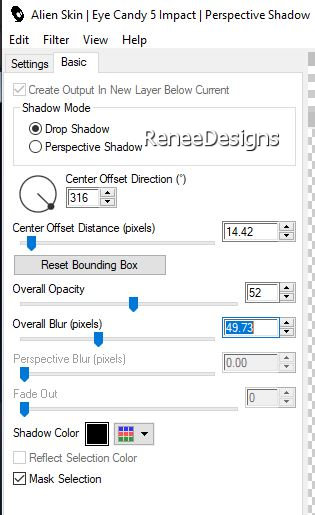
- Color-Palette-Set the Foreground color to color #ffffff=3
- Create a foreground gradient "fading white" (linear) with these settings
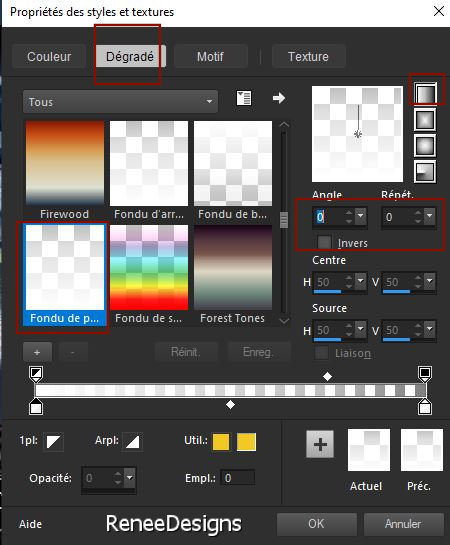
59. Layers- New Raster Layer
60. Selections –load/save selection –load selection from disc and select my selection: ‘’Nyctophile- 4’’
61. Flood Fill Tool
 -
fill the selection with the gradient -
fill the selection with the gradient

62. Effects- 3D-Effects - Drop Shadow with these settings: 7/ - 13/ 45 / 29 Black
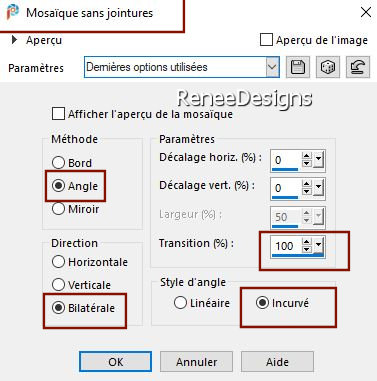
63. Effects –Image Effects - Seamless Tiling use the settings below
64. Selections –load/save selection –load selection from disc and select my selection: ‘’Nyctophile- 5’’
65. Adjust-Blur-Gaussian Blur -Radius 25

66. Effects – Distortion Effects– Vent – Wind Strength 100
Wind Direction: once to the right / once to the left
-
Stay on this layer
67. Selections –load/save selection –load selection from disc and select my selection: ‘’Nyctophile- 6’’
68. Effects –Plugins-
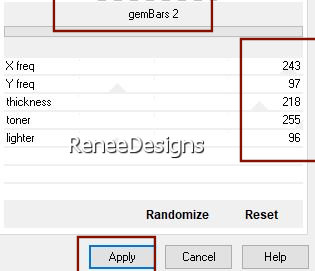
Unlimited 2.0 – Kang4 - gemBars 2 use the settings below
69. Effects – Edge Effects – Enhance

Keep color white in the foreground
70. Layers- New Raster Layer
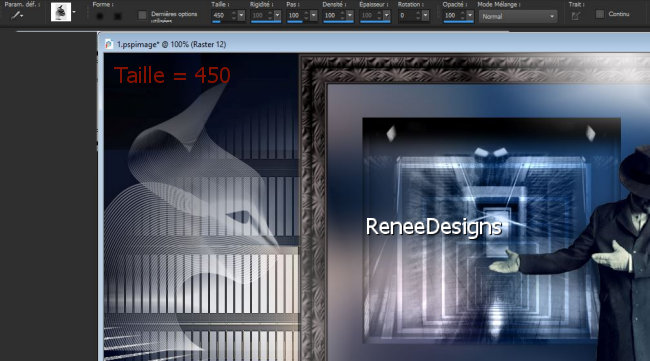
71. Activate the Brush Tool- and choose the brush ‘’Renee-Chat’’
Size 450 -Stamp with the WHITE foreground color on your image (see example)
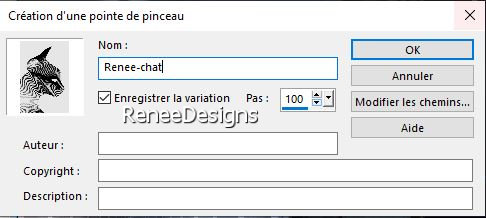
If it doesn't work : File- Export -Custom Brush (Give it a name)
72. Open the tube ’’
Renee_TUBES_Boy alone in darkness’’ -Edit - Copy- Activate your work -Edit - Paste as a new layer
- Move it in the right place( see finished image)
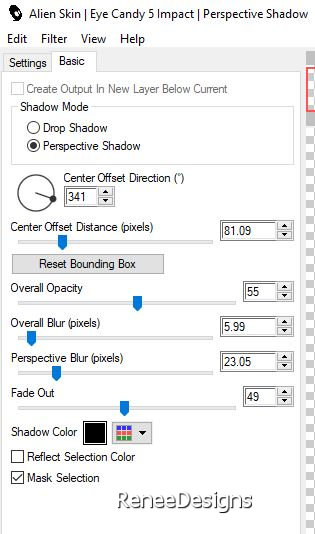
73. Effects – Plugins- Alien Skin EyeCandy 5- Impact – Perspective
Shadow use the settings below
74. Image - Add borders-Symmetric checked: 1 Pixel - Black
Image - Add borders-Symmetric checked: 10 Pixels- White
Image - Add borders-Symmetric checked: 1 Pixel -Black
Image - Add borders-Symmetric checked: 25 Pixels - White
Image - Add borders-Symmetric checked: 1 Pixel – Black
Image - Add borders-Symmetric checked: 40 Pixels – White
Image Resize with 80%
75. Selections -
Select All
76. Selections -
Modify – Contract 60 Pixels
77. Effects- 3D-Effects - Drop Shadow with these settings: 0/0/100/45 Black
Selections-Deselect All.
Save as JPG
That's it - Thank you / I hope you enjoyed this lesson
Renée
This lesson was written by Renée 24/07/2021
Edited and Update
2021
*
Any resemblance with an existing lesson is a coincidence
* Do not forget to thank the people who work with us and for us -I have appointed the tubeurs and translators
Thanks
*
|
 Translations


