| Let's start the lesson
1. File: Open Image. ''fond_on
the road'' - Promote to Raster Layer = Raster 1
2.
Layers- New raster layer . Flood Fill Tool: fill the layer with color black.
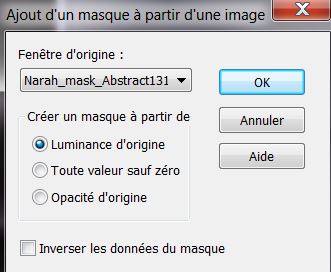
3. Layers-New Mask Layer From Image and choose Mask:Narah_mask_Abstract 131
4. Effects-Edge Effects-Enhance
5.
Layers- Merge- Merge Group
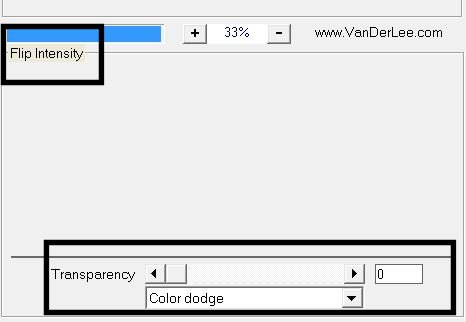
6. Effects-Plugins Vanderlee - Unplugged X -
Flip Intensity - Color Dodge
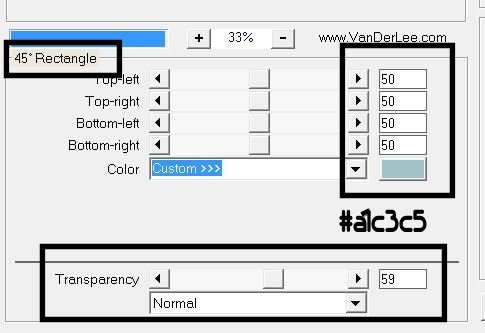
7. Effects-Plugins Vanderlee Unplugged X -45
rectangle
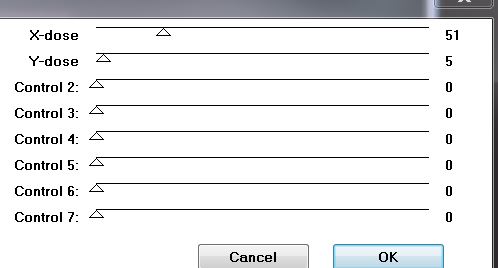
8. Effects-Plugins Toadies - What are you
9. Effects-Edge Effects-Enhance More
10.
Selections - load/save selection- load selection from disk and select my file: ''on_the_road1'''
11.
Promote selection to Layer
Selections-Deselect All
12. Effects-Plugins Unlimited 2.0 - &<Bkj
Designer SF10 I> - Crosstich
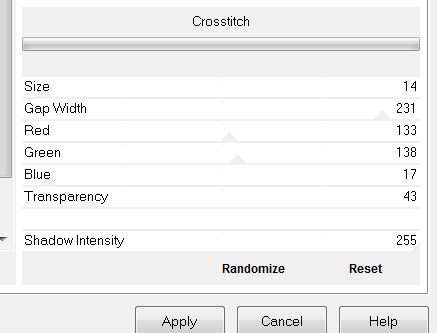
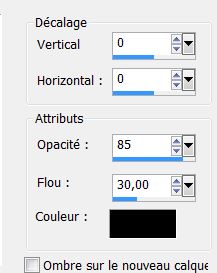
13.
Effects - 3D Effects - Drop shadow/black
use settings below:
14.
Layers-Duplicate - Image Mirror
15.
Layers-Merge-Merge Down
16.
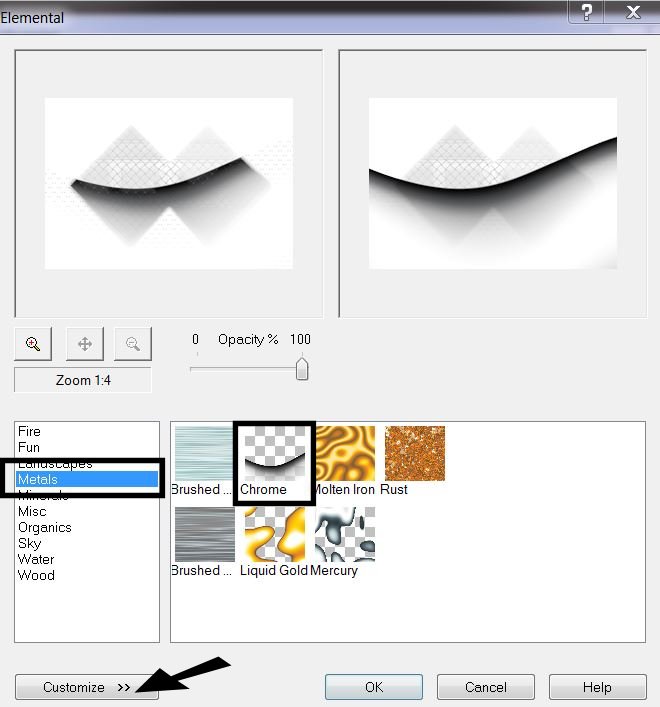
Effects-Plugins Xe Xtra - Elementaluse settings below
Open-Metal Chrome / Click on Customize and then opens a new window Click for red arrow until the image appears there what they see above. Then OK
 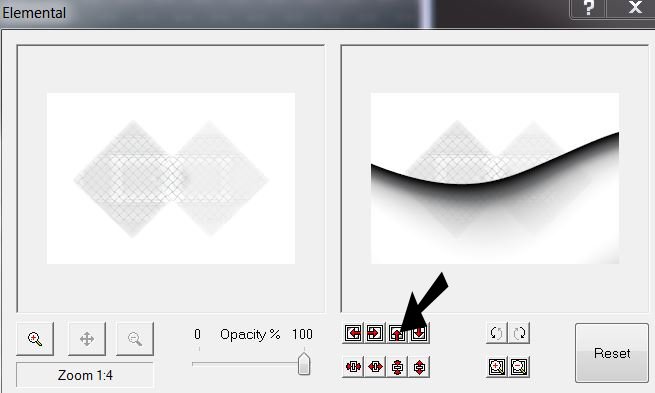
17.Repeat again the filter and immediately click ok / is still in the memory of PSP
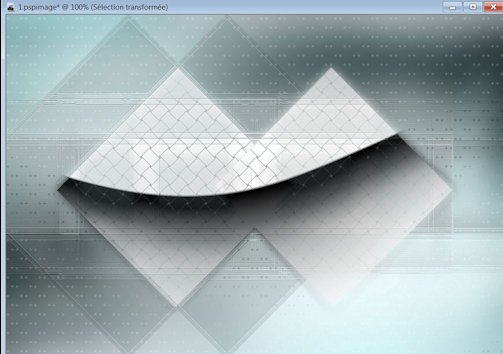
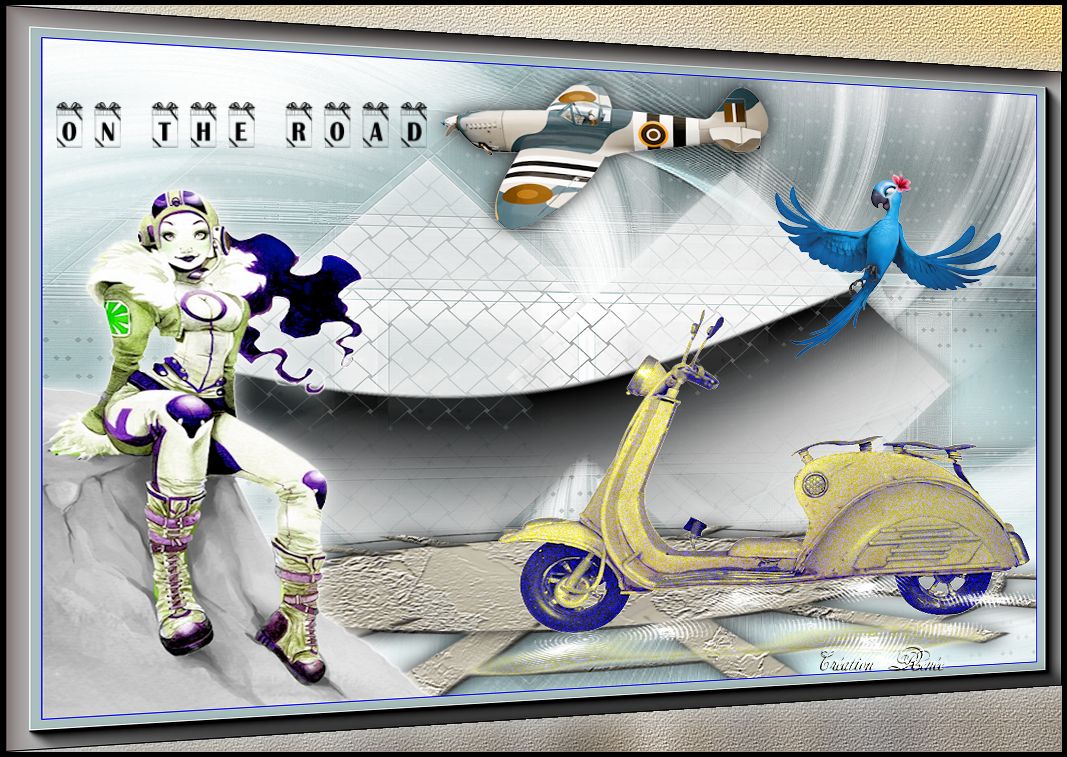
* Your work look like this now*
18. Activate the bottom of the layer-Palette (raster 1)
19. Layers- New raster layer /Flood fill tool:fill the layer with color white
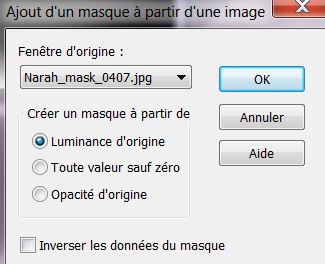
20. Layers-New Mask Layer From Image and choose Mask:
''Narah_mask_0407.jpg''
21.
Effects-Edge Effects-Enhance More / Layers- Merge- Merge Group
22.
Effects - 3D Effects - Drop shadow: with the same settings
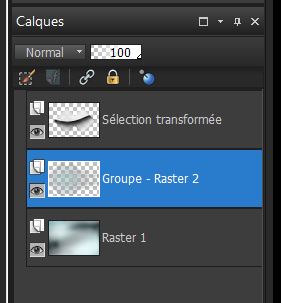
23. Activate the top of the layer-Palette
24. Layers- New raster layer
25.
Selections - load/save selection- load selection from disk and select my file:''on_the_road 2''
26.
Open the "Pattern Texture" Foreground color to pattern with these settings
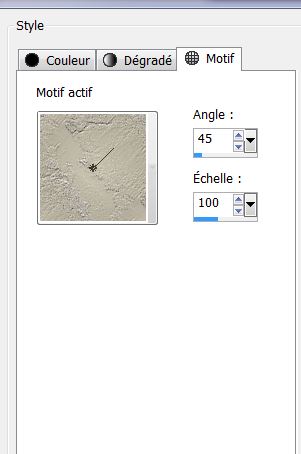
Flood Fill Tool: fill the selection with your Pattern
Keep Selected!!!!
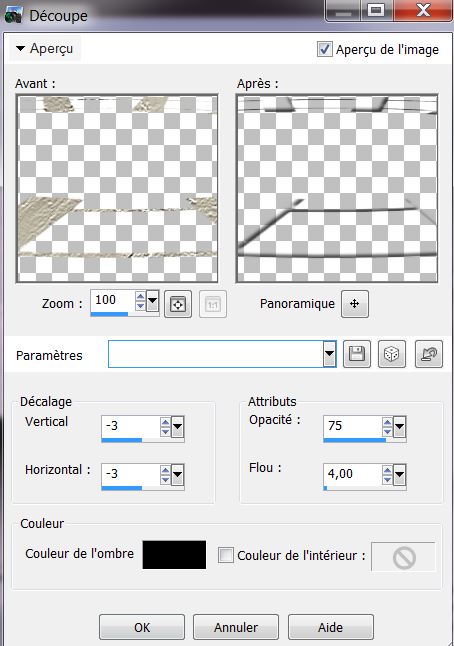
27. Effects -3D Effects-Cutout use settings below
28.Layers- New raster layer / Flood Fill Tool: fill the selection with your Pattern
29.
Selections-Deselect All
30.
Layers-Arrange-Move Down
Your work look like this now

31.
Effects - 3D Effects - Drop shadow: with the same settings
32. Activate the top of the layer-Palette
33.Layers- New raster layer
34.
Selections - load/save selection- load selection from disk and select my file: ''on_the_road3'' /
Flood Fill Tool: fill the selection with your Pattern
35.Selections-Deselect All
36.
Effects - 3D Effects - Drop shadow-with the same settings:
37.
Layers-Arrange-Move Down ( move in the right place )
38.
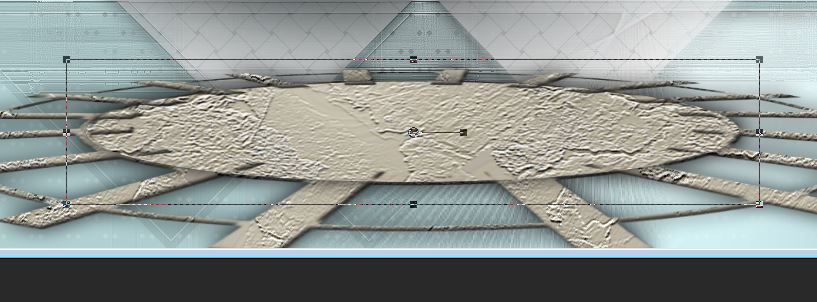
Open the tube ''a bicyclette de Odette'' erase the signature
39.
Edit - Copy -Edit - Paste as new layer on your working area and move
40. Effecten-Image Effects Seamless Tiling/Default
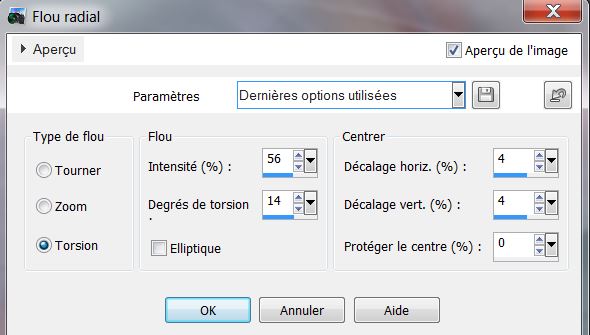
41.
Adjust-Blur-Blur Radial with these settings
42.
Effet - Edge Effects - Find All
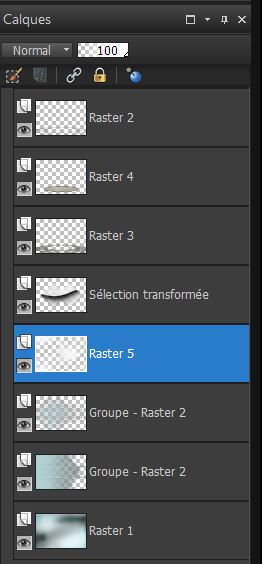
43.
Layers- Arrange 4 x Move Down (Promoted Selection)
44.
Layer Palette: change your Blend Mode to "Hard Light"
45.
Open the tube ''Eenasreation_image14'' Edit - Copy -Edit - Paste as new layer on your working area and move
46. Effects- Plugins - Red Prince
Flips'n Rolls - Bit Reverse Blue
47. Effects-Plugins Eyecandy 5 Impact -Perspective
shadow- Preset - Floating Loaw / Basic Color
#e8e0b3
48.
Open the tube ''aviatrice de charme _by_ Gali_miau""
Image-Resize 80% /Image Mirror
Edit - Copy -Edit - Paste as new layer on your working area and move (remove the signature)
49.With your Free Hand Selection (Lasso Tool,) Point to Point / select this part
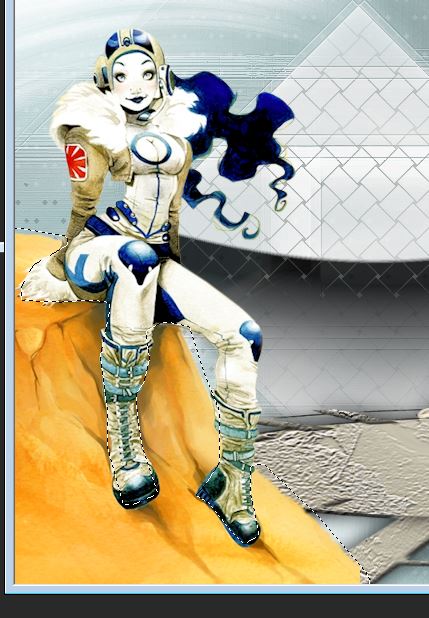
50.
Adjust- Hue and Saturation-Hue Map/Greyscale
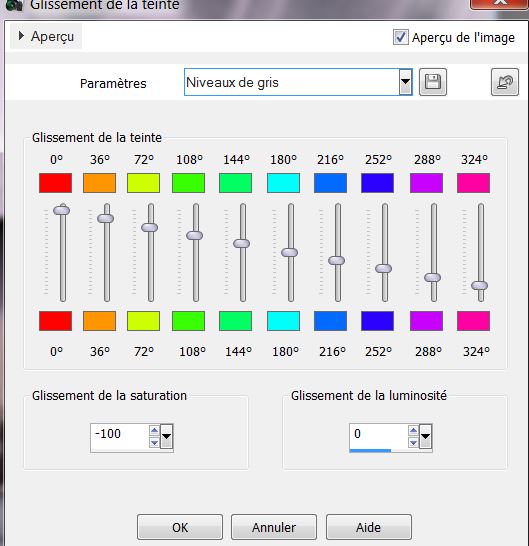
Before you deselected, you can choose the colors-selection made reverse and replace Hue map default and then play
Selections-Deselect All
51.
Effects - 3D Effects - Drop shadow: with the same settings
but color White!!!!!
52.
Open the tube ''eneas_creation_avion '' Edit - Copy -Edit - Paste as new layer on your working area and move
53.
Effects - 3D Effects - Drop shadow: 0/085/30 black
54.
Edit - Copy -Edit - Paste as new layer on your working area and move
55.
Selections - load/save selection- load selection from disk and select my file: ''on_the_road_4'' /Flood Fill Tool: fill the selection with color White
56.
Selections-Deselect All
Open the tube " vespa" Edit - Copy -Edit - Paste as new layer on your working area and move
57.
Layers-Merge-Merge Visible
58.
Image - Add Borders - Symmetric: 1 pixel color #0000ff
59.
Image - Add Borders - Symmetric: 30 pixels color #abbfbf
60.
Layers-Duplicate
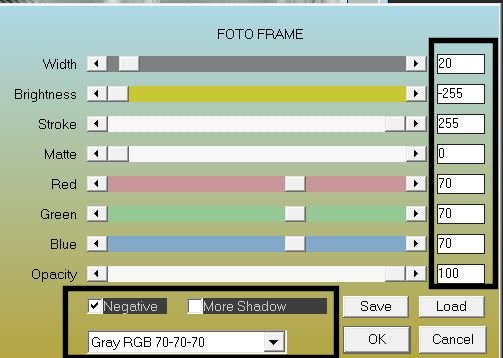
61.
Effects-Plugins AAA Frame - Foto Frame use settings below
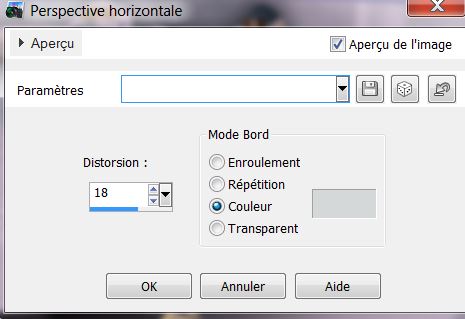
62.
Effects- Geometric Effects - Perspective Horizontal/ Color/ #d4d8d8
63. With the magic wand select the two edges blue triangle
64. Layers- New raster layer
Open the
Texture_2.png Edit-Copy-Edit-Paste into selection
Keep Selected
65.Adjust-Blur-Gaussian Blur: Radius:20
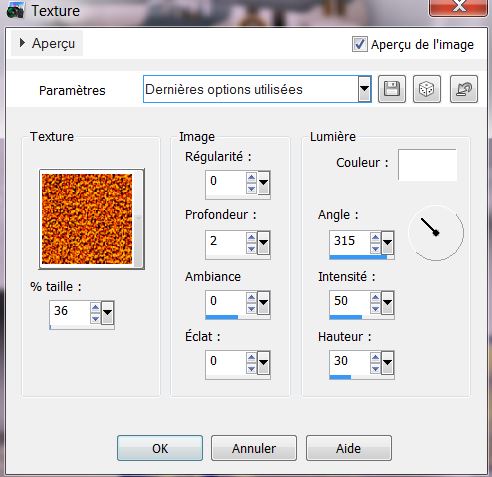
66.
Effects- Texture effects -Texture ''granuleux'' use settings below
67.
Effects - 3D Effects - Drop shadow: use settings below
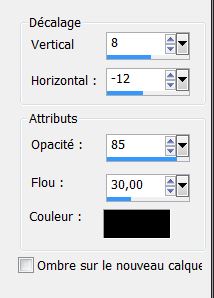
Effects - 3D Effects - Drop shadow: -8 and 12
68.
Selections-Deselect All
69.
Open the tube "perroquet" Edit - Copy -Edit - Paste as new layer on your working area and move
70.
Open the tube titre and paste as a new layer .Or write your own text
71.
Image - Add Borders - Symmetric: 5 pixels black
I hope you enjoyed this lesson
Renée
This lesson was written by Renée the 13/08/2013
|
 Translations