|
Let's start the lesson
Papier
coupé – Paper Cut

- Preparation
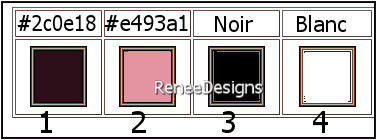
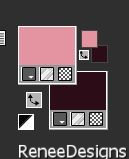
-Material Properties: Set your foreground color to color #2c0e18=color 1 – Set your background color to color #e493a1=color 2

- Properties Foreground- Prepare a foreground/background linear gradient configured like this
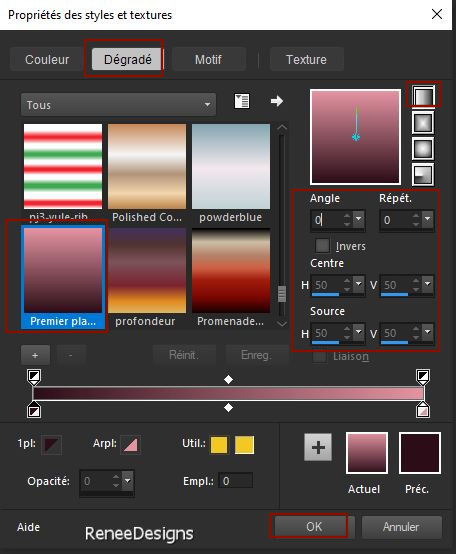
1. File: Open a transparent image in this size: 1050 x 700 Pixels
2. Flood Fill Tool
 –
Fill the layer with the gradient –
Fill the layer with the gradient
3. Layers-New Raster Layer
4. Selections –load/save selection –load selection from disc and select my selection: ‘’Papier-Coupe-1’’
5. Open the Tube ‘’ Renee-Tubes-Papier-Coupe-Image1.’’-Edit - Copy- Activate your work -Edit - Paste into selection
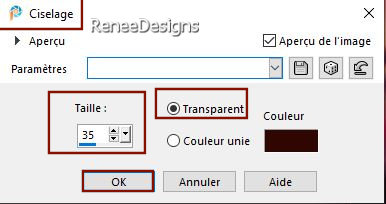
6. Effects- 3D-Effects –
Chisel use the settings below -Color #2c0e18 = 1
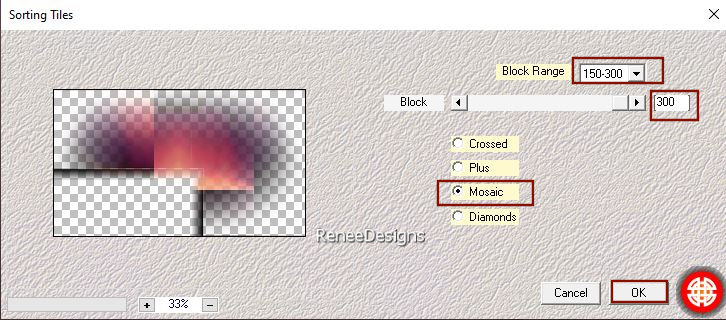
7. Effects – Plugins – Medhi- Sorting Tiles with these settings
8. Effects – Edge Effects
– Enhance

9. Effects – Image Effects
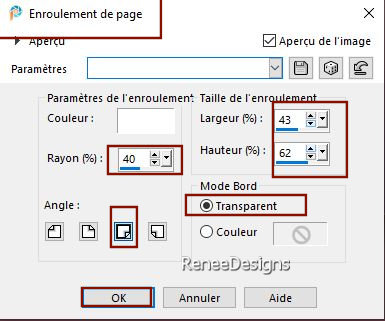
–Page Curl with these settings
10. Layers- Duplicate
11. Image - Mirror - Mirror vertical ( Image - Flip in older versions of PSP)
12. Layers- Merge- Merge Down
13. Layers-Properties-Set the Blend Mode to "Overlay " - Reduce the Opacity of this layer to 71%
- Activate the bottom of the layer palette= Raster 1
14. Selections –load/save selection –load selection from disc and select my selection: ‘’Papier-Coupe-2’’
15. Selections –
Promote selection to layer
16. Effects - Plugins - Filters in Unlimited 2.0 - VM Distortion –
Flipper using the default settings: 55/39/172

17. Effects - Plugins– Toadies – What are you with these settings: 3/20
Material Properties - Swap the colors of the layers palette
18. Effects - Plugins- Carolaine & Sensibility – CS-Halloween 2 with these settings:
158/0/95/65
18. Effects – 3D-Effects – Drop Shadow with these settings: 1/8/85/38 Color Black
19. Layers-New Raster Layer
20. Selections –load/save selection –load selection from disc and select my selection: ‘’Papier-Coupe-3’’
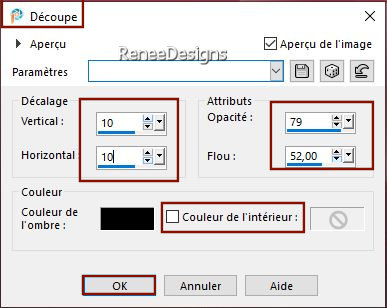
21. Effects – 3D-Effects -
Cutout use the settings below-Color Black

22. Layers – Duplicate
23. Effects – Distortion Effects– Wind- Wind direction from left-Wind strength 62%
- Repeat- Effects – Distortion Effects– Wind- Wind direction from right-Wind strength 62%
24 Layers- Merge- Merge Down ( twice)
- The result
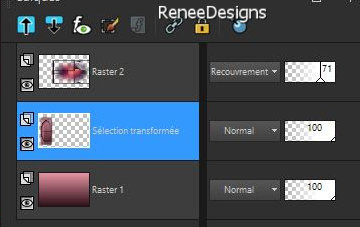
25. Effects - Plugins - Alien Skin EyeCandy 5 - Impact - Backlight -– Tab- Settings-User Settings -choose my file -Preset- ‘’Papier-coupe-BlLight’’
26. Effects – Edge Effects- Enhance
-Activate the top of the layer palette
27. Open the Tube ‘’Papier- decoupe
-4.’’ activate raster 2 of the tube-Edit - Copy- Activate your work -Edit - Paste as a new layer
28. Pick Tool: (K) on your keyboard -Enter these parameters on the toolbar
 -
22/ 251 -
22/ 251
Press ( M ) to close the Pick Tool
- Activate the bottom of the layer palette= Raster 1
29. Effects – Illumination Effects – Lights - and select my file -Preset :Paper-Cut-Renee ( The preset goes into the preset folder of your PSP).
-Activate the top of the layer palette
30. Layers-New Raster Layer
31. Selections –load/save selection –load selection from disc and select my selection: ‘’Papier-Coupe-4’’
32. Properties Foreground- Set your foreground color to color black=3
Flood Fill Tool  – Fill the selection with the foreground color black ( Click 2 to 3 times in the selection) – Fill the selection with the foreground color black ( Click 2 to 3 times in the selection)

33. Layers-New Raster Layer
34. Selections –load/save selection –load selection from disc and select my selection: ‘’Papier-Coupe-5’’
35. Properties Foreground- Set your foreground color to color #ffffff= 4
Flood Fill Tool
 –
Fill the selection with the foreground color=4 –
Fill the selection with the foreground color=4
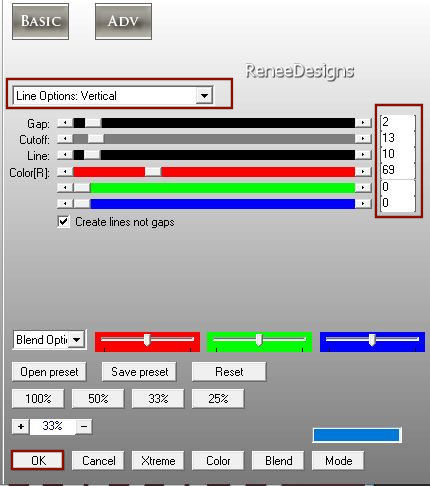
36. Effects -Plugins - AP[Lines] Lines – Silverlining use the settings below
37. Effects – 3D-Effects – Drop Shadow with these settings: 10/10/65/15 Color Black

38. Layers-Properties-Set the Blend Mode to " Overlay " – Reduce the Opacity of this layer to 75%
39. Layers-New Raster Layer
40. Selections –load/save selection –load selection from disc and select my selection: ‘’Papier-Coupe-6’’
41.Flood Fill Tool  – Fill the selection with the foreground color=4 – Fill the selection with the foreground color=4
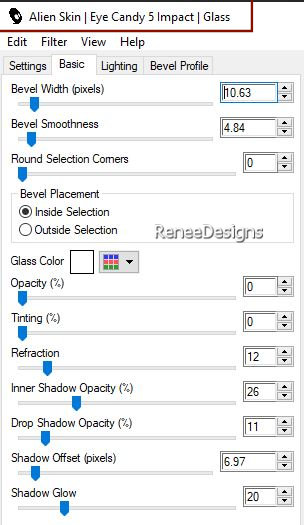
42. Effects - Plugins - Alien Skin EyeCandy 5 - Impact – Glass use the settings below

43.Effects – 3D-Effects – Drop Shadow with these settings: 10/10/65/15 Color Black
44. Open the Tube ‘‘’Renee Papier-Coupe-Image2’’
- Activate Freehand Selection Tool-Point to Point-Take your lasso and remove 1 of those 2 newspapers
- Edit - Copy- Activate your work -Edit - Paste as a new layer
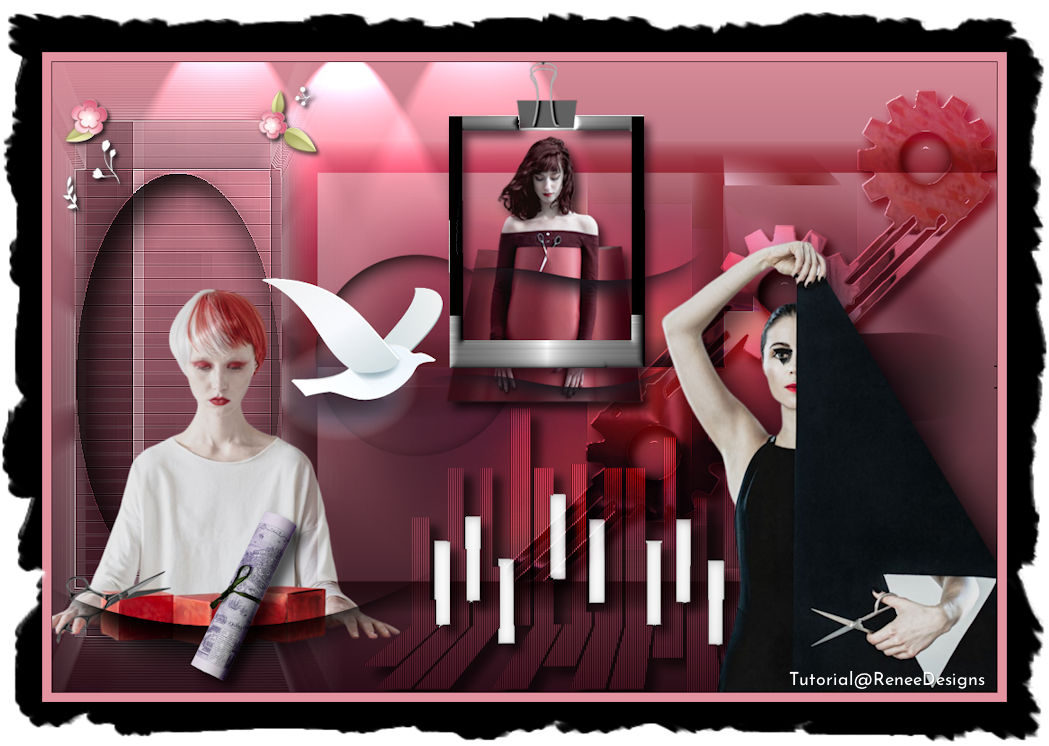
-Move the tube in the right place (see finished image)
45. Effects – 3D-Effects – Drop Shadow with these settings: 10/10/65/15 Color Black
46. Open the Tube ‘’Renee
Papier-Coupe-Image3’’ -Edit - Copy- Activate your work -Edit - Paste as a new layer
47. Pick Tool: (K) on your keyboard -Enter these parameters on the toolbar
 292
/ 213 292
/ 213
Press ( M ) to close the Pick Tool
48. Open the Tube
Renee-Tubes-Papier-Coupe-Image4’’ -Edit - Copy- Activate your work -Edit - Paste as a new layer
Move the tube in the right place (see finished image)
49. Layers-New Raster Layer
50. Selections –load/save selection –load selection from disc and select my selection: ‘’Papier-Coupe-7’’
51. Flood Fill Tool
 -
Opacity 50% -
Fill the selection with the foreground color #ffffff =4 -
Opacity 50% -
Fill the selection with the foreground color #ffffff =4
52. Effets - Modules
externes - Alien Skin EyeCandy 5 - Impact - Chrome –– Tab- Settings-User Settings -choose my
file-Preset : ‘’Papier-coupe-Chrome’’
53. Layers-Properties-Set the Blend Mode to " Overlay "

54. Effects – 3D-Effects – Drop Shadow with these settings: 8/6/75/15 Color #2c0e18=1
55. Selections –load/save selection –load selection from disc and select my selection: ‘’Papier-Coupe-8’’
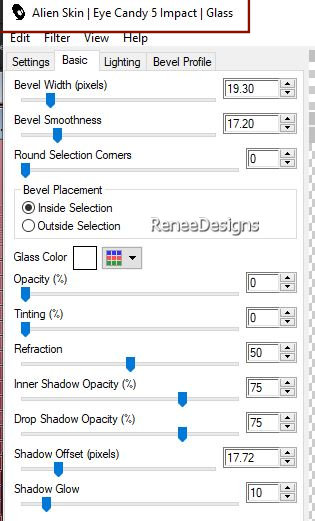
56. Effects - Plugins - Alien Skin EyeCandy 5 - Impact - Glass use the settings below

57. Open the Tube "Renee-Tubes-Papier-Coupe-Image5’’- Edit - Copy- Activate your work -Edit - Paste as a new layer
58. Pick Tool: (K) on your keyboard -Enter these parameters on the toolbar
 441/
- 58 441/
- 58
Press ( M ) to close the Pick Tool
59. Activate your Magic Wand Tool with these settings-select the white frame

60. Effects - Plugins - Alien Skin EyeCandy 5 - Impact – Brushed
Metal use the settings below
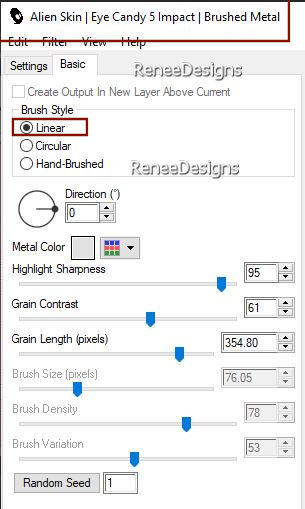
61. Effects – Plugins – Carolaine & Sensibility – Cs Halloween 1
- all settings to 255
62. Effects – 3D-Effects –Inner Bevel use the settings below-Color White
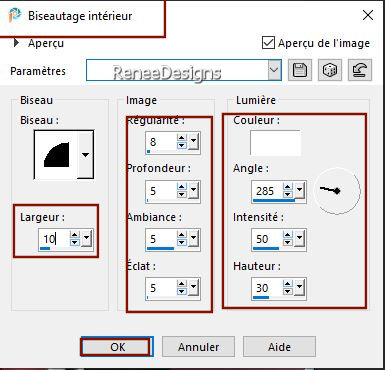
63. Effects – 3D-Effects – Drop Shadow with these settings:
8/6/75/15 Color Black

64. Activate a tube of your choice –reduce them if necessary- The tube chosen by Renée had this size 241 x 319
Pixels
- Drop shadow of your choice
Edit - Copy- Activate your work -Edit - Paste as a new layer
- ATTENTION !!! The tube sticks out of the frame with the hands down !!! (see capture below line 66)
65. Layers- Arrange- Move Down( tube is now behind the frame)
-Activate the top of the layer palette
66. Open the Tube ‘’Decoupe-pour-tube-cadre’’ -Edit - Copy- Activate your work -Edit - Paste as a new layer
Place your tube just so to have these 2 cutting effects
( If needed, I've added a folder with cutting effects if you want to change your tube choice.)
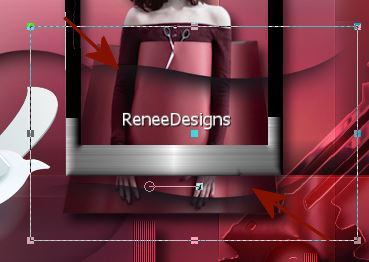
67. Choose another tube and paste as a new layer on your creation and place in the lower right corner against the edge
- Drop shadow of your choice
68. Open the Tube ‘’ Renee-Tubes-Papier-Coupe-Image6.’’ -Edit - Copy- Activate your work -Edit - Paste as a new layer
-Move it in the right place (see finished image)
-
Image - Add borders-Symmetric checked: 1 Pixel Color #2c0e18=1
- Image - Add borders-Symmetric checked: 10 Pixels Color #e493a1=2
- Image - Add borders-Symmetric checked: 45 Pixels Clor Black
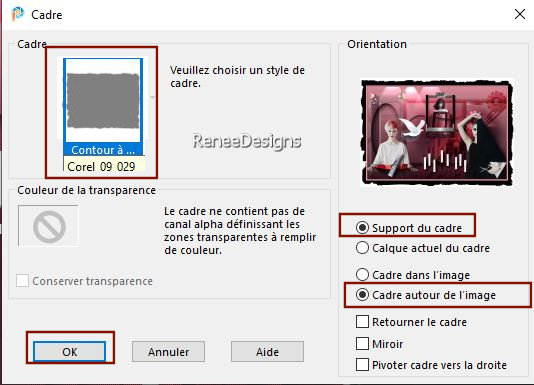
69. Image - Picture Frame – and select Corel
09 029 use the settings below (Included in the material)
70. Image- Resize to 90 %
- Paste the author's watermark on your work and your own watermark.
- Layers- Merge- Merge All (flatten)
Save as JPG
I hope you enjoyed this lesson
Renée
This lesson was written by Renée
27/11/2022
Edited and Update
in 2022
*
Any resemblance with an existing lesson is a coincidence * Do not forget to thank the people who work with us and for us
-I have appointed the tubeurs and translators
Thanks
*
|
 Translations


