|
Let's start the lesson
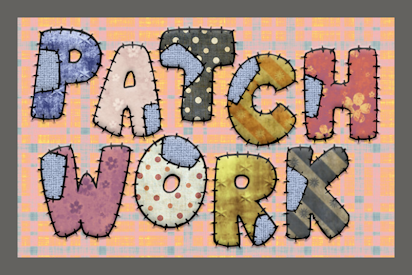
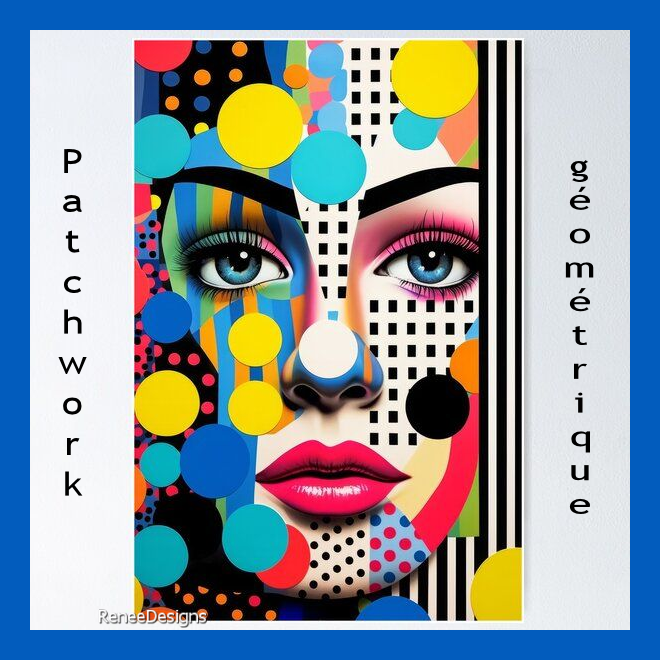
Patchwork géométrique
Geometric patchwork
-
Material Properties: Set the foreground color to color number 1(white) -Set the background color to color number 2

1. File - Open a new transparent image in this size : 1100 x 800 Pixels
2. Activate your Flood Fill Tool
 –
Flood fill the layer with the foreground color white (1) –
Flood fill the layer with the foreground color white (1)
3. Layers - New Raster Layer
4. Selections - Select All
5. Activate tube ‘’ Patchwork-Geometrique-Image 1’’ - Edit - Copy - Activate your work - Edit - Paste into selection

6. Effects - Image Effects - Seamless Tiling use the settings below

- Layers - Merge - Merge Down
Save your work, this filter may close your PSP
7. Effects - Plugins - L
& K's – Raisa with these settings: 165 / 0
8. Effects - Plugins –
Transparency – Eliminate White
9. Layers - Merge - Merge All (flatten)
10. Layers - Duplicate
11.
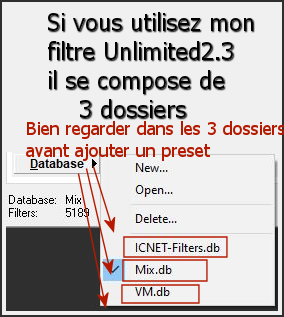
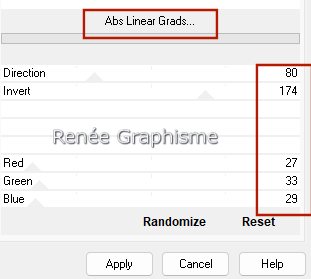
Effects - Plugins - Filters in Unlimited 2.0 -
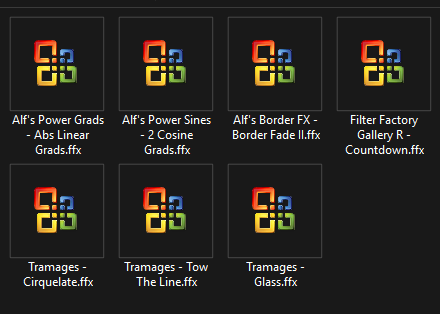
Alf's Power Grads
- Abs Linear Grads...
using the default settings
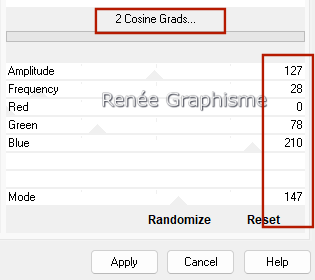
12.
Effects - Plugins - Filters in Unlimited 2.0
-
Alf's Power Sines - 2 Cosine Grads..use the settings below
13. Layers - New Raster Layer
14. Selections –load/save selection –load selection from disc and select my selection: – ‘’ Patchwork-geometrique-1’’
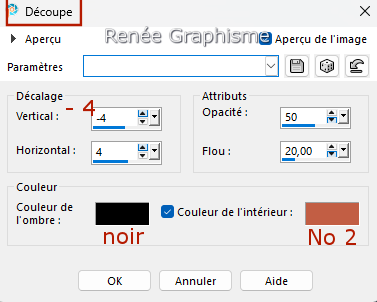
15. Effects - 3D Effects - Cutout - Black and Color number 2
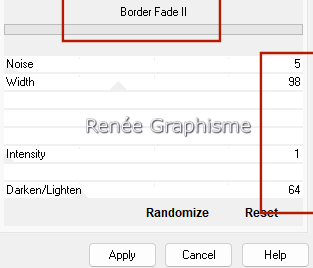
16. Effects - Plugins -
Filters in Unlimited 2.0 - Alf's Border FX – Border Fade II
17. Effects - 3D Effects - Drop Shadow with these settings: 8/48/25/25 Color Black
18. Layers - Properties - Change the blend mode of this layer to Overlay
19. Layers - Duplicate
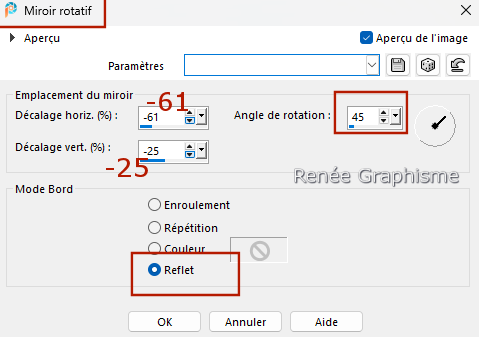
20. Effects - Reflection Effects - Rotating Mirror use the settings below
21.
Effects - 3D Effects - Drop Shadow with these settings:
-52 /-
25 / 25 / 25 White
22. Layers - New Raster Layer
23. Selections –load/save selection –load selection from disc and select my selection: – ‘’ Patchwork-geometrique-2’’
24. Activate Flood Fill Tool
–Opacity at 50% – Flood fill the selection with color White
25. Effects - Plugins -
Alien Skin EyeCandy 5 – Impact – Chrome –Tab /Settings/ User Settings and select my file - Preset :
‘’Patchwork-chrome’’
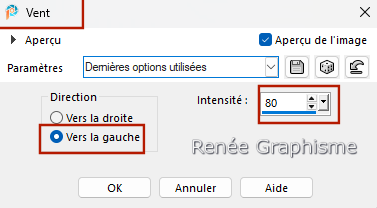
26. Effects – Distortion Effects– Wind - Wind direction from left - Wind strength 80
27. Effects - Edge Effects - Enhance More
- Material Properties: Set the foreground color to color number 3 and the background color to color number 6
28. Layers - New Raster Layer
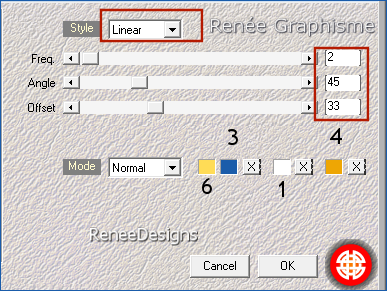
29. Effects - Plugins –
Medhi - Wavy Lab 1.1 use the settings below
30. Adjust - Blur - Gaussian Blur - Radius 80%
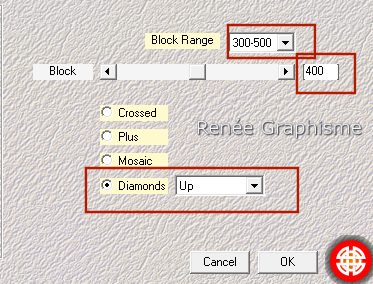
31. Effects - Plugins –
Medhi – Sorting Tiles use the settings below
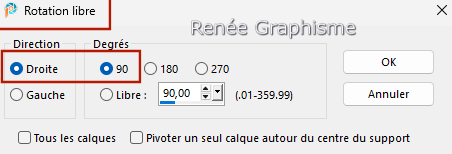
32. Image - Free Rotate -Direction Right - Degrees 90
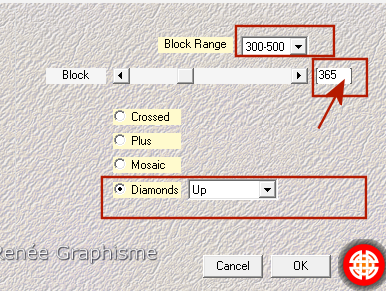
33. Effects - Plugins –
Medhi – Sorting Tiles use the settings below
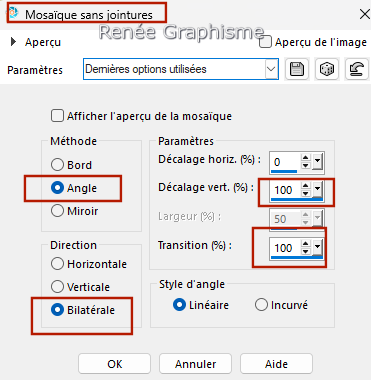
34. Effects- Image Effects- Seamless Tiling use the settings below
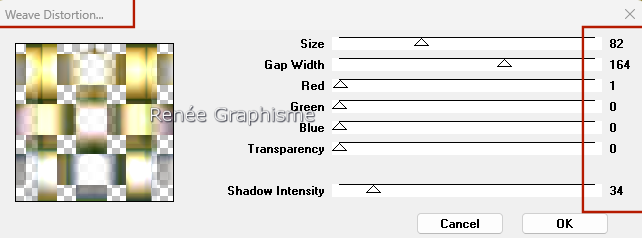
35. Effects - Plugins –
VM Natural – Weave Distorsion use the settings below
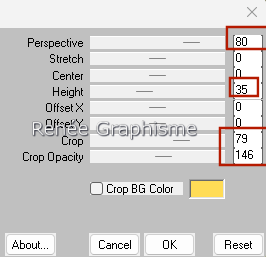
36. Effects - Plugins –
Mura’s Meister – Perspective Tiling use the settings below
37. Layers - Properties-Set the Blend Mode to Difference
38. Layers - Arrange - Move down - above the Background (second layer from the bottom)
39.
Selections –load/save selection –load selection from disc and select my selection: – ‘’
Patchwork-geometrique-3’
 3 Times 3 Times
- Activate the bottom of layer palette (Background)
40.
Selections –load/save selection –load selection from disc and select my selection: – ‘’
Patchwork-geometrique-7’
3 Times
- Activate the top of the layer palette
41. Layers - New Raster Layer
42. Selections –load/save selection –load selection from disc and select my selection: – ‘’ Patchwork-geometrique-4’’
Please note: save your work, because if something goes wrong with the following steps, the PSP will close.
If you have problems with this effect, take the image “effets-bulles-si probleme” from the folder and paste it into the selection.
(do not apply selection 5 if you paste effect into selection 4)
43.
Effects – Artistic Effects -Balls and Bubbles – select my file - Preset :
‘’Patchwork-bulles ‘’ (
Place in the default settings folder.
)
44. Selections –load/save selection –load selection from disc and select my selection: – ‘’ Patchwork-geometrique-5’’
45. Layers - Arrange – Move above Raster 3 (ground (point 36 )
- Activate the top of the layer palette
46. Layers - New Raster Layer
47. Selections –load/save selection –load selection from disc and select my selection: – ‘’ Patchwork- geometrique-6’’
48. Activate Flood Fill Tool
-
Opacity at 100% – Flood fill the selection with color White
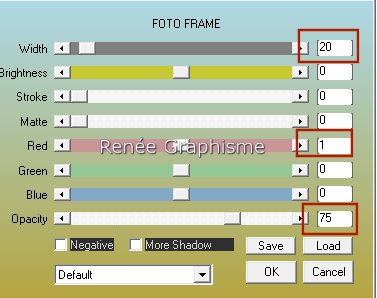
49. Effects - Plugins –
AAA Frame – Foto Frame use the settings below
50. Select - Modify - Contract by 22 Pixels
51. Effects - Plugins -
Filters in Unlimited 2.0 - Filter Factory Gallery R -
Countdown...with these settings :120/ 160
52. Effects - Plugins –
Transparency – Eliminate White
53. Layers - Properties - Change the blend mode of this layer to Overlay – Reduce the opacity of this layer to 53%
54. Activate tube ‘’ renee-texte-Patchwork’’ - Edit - Copy- Activate your work -Edit - Paste as new layer
- Place at top right (see finished image)
55. Effects - 3D Effects - Drop Shadow with these settings: 1/1/100/0 Color Black
- Material Properties: Set the foreground color to color White - Set the background color to color Black
- Activate the bottom layer of the layer palette (Background)
- View - Rulers
56. Selections - Select All
57. Selection - Edit Selection (it turns red)
58. Activate - Airbrush tool configured as follows

- Move the mouse pointer to the 400 mark on the left edge, then right - click and drag it to the right edge.
59. Selections - Edit - Selection ( returns to normal)
60. Selections - Invert
61. Layers - New Raster Layer
62. Activate Flood Fill Tool
–
Opacity at 50% – Flood fill the selection with color White
63. Effects - Plugins -
Filters in Unlimited 2.0 Tramages - Cirquelate... 166
- Activate the top of the layer palette
64. Edit - Copy Special - Copy Merged
65. Edit - Paste as new layer
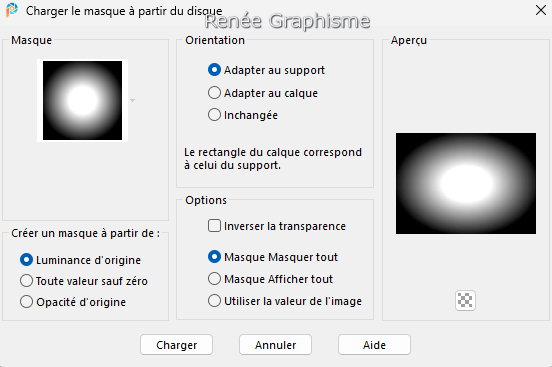
66. Layers - Load/save a mask - Load the mask from disk-select mask
‘’20/20’’
- Layers – Duplicate
- Layers - Merge - Merge Group
67. Effects - Plugins –
Flaming Pear – Flexify 2 use the settings below

68.
Image- Resize by 60% - Resize all layers not checked
69. Pick Tool: (K) on your keyboard -Enter these parameters on the toolbar
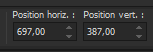 697/
387 697/
387
- Press the ( M ) button to close the tool.
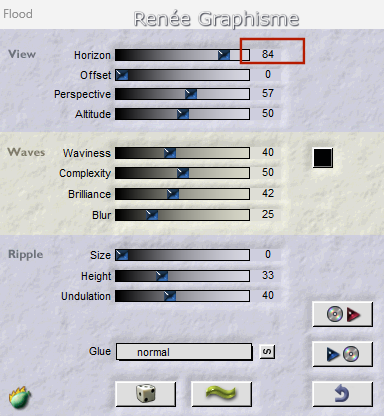
70. Effects - Plugins –
Flaming Pear – Flood use the settings below
71. Layers - Properties - Set the Blend Mode to Difference (your choice of colors)
- Activate the bottom of the layer palette (Background)
72. Layers - Duplicate
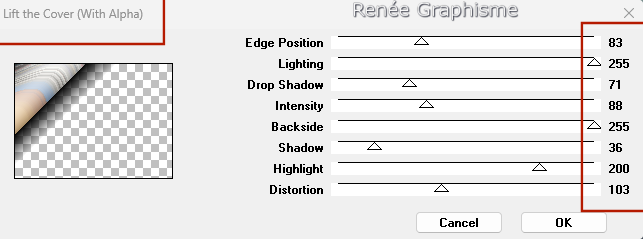
73. Effects - Plugins (Filters in Unlimited )– VM Toolbox - Lift the Cover (With Alpha) !!! use the settings below
74. Effects - Plugins -
Filters in Unlimited 2.0 -Tramages – Tow The Line...using the default settings
75. Effects - Plugins -
Filters in Unlimited 2.0 -Tramages - Glass.. with these settings : 11/73/0
76. Effects - Edge Effects - Enhance More
77. Image - Add Borders-Symmetric checked : 1 Pixel - Color number 3
78. Image - Add Borders-Symmetric checked : 45 Pixels – Color White
- Image - Add Borders-Symmetric checked : 1 Pixel - Color number 3
- Image - Add Borders-Symmetric checked : 10 Pixels – Color White
79. For decoration, choose 2 tubes and paste them as a new layer on your work.
80. Apply a Drop Shadow of your choice
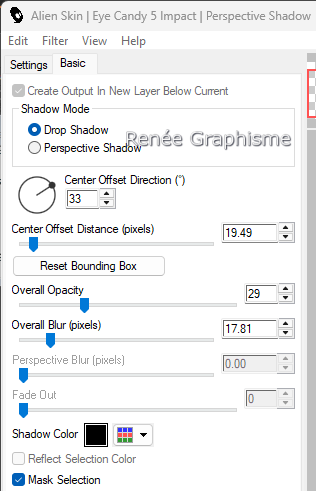
To shadow these tubes, Renée chose to use the following:
- Effects - Plugins -
Alien Skin EyeCandy 5 – Impact - Perspective Shadow with these settings
81. Add the author's watermark and your own watermark
82. Layers - Merge - Merge All (flatten)
83.
Image - Resize to 1000 pixels Width - Resize all layers checked !
Save as JPG
I hope you enjoyed this lesson
Renée
This lesson was written by Renée 04/05/
2025
Edited and Update
in 2025
***
Any resemblance with an existing lesson is a coincidence
* Do not forget to thank the people who work with us and for us -I have appointed the tubeurs and translators
Thanks
*
|

 Translations