|


Translated by Sally
*
Translator Here
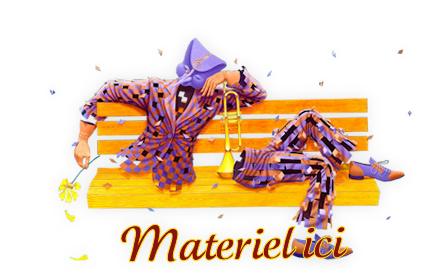
Pensive
Materials here
for download here
*
|
TUBES
Sassy -Alies
These
tubes were received from tubeurs sharing groups
Or found
by me searching on the net
I am
grateful to have been given permission these beautiful
tubes so
please
use any copyright information as needed
If one of
these tubes is yours,
Contact
me
so I can
make a link to your site
or remove
it
Thank you
Renee
|
|
Before you start
*
Open hardware
Open / tubes duplicate and close originals
Minimize mask in your PSP
Put filters in their proper folders
Brushes and other tools in their respective PSP folders
To import presets / Double-click the file it will
automatically move
|
Let's begin
1. Open a new transparent image of 1000 X 650 pixels
2. Colors Palette - Foreground #dfdbd1 and Background #13152E
3. Fill with the background color
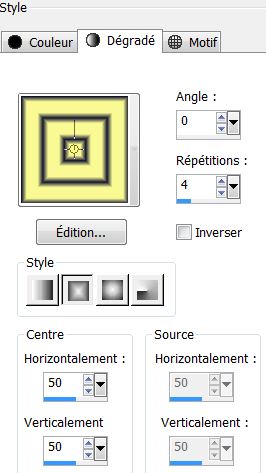
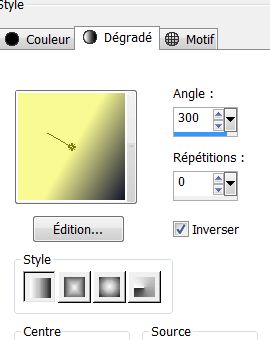
4. Prepare a radial gradient configured like this
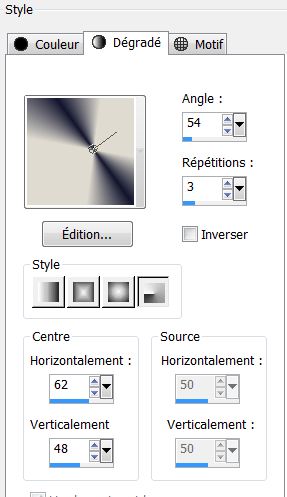
5. Layers - add a new layer
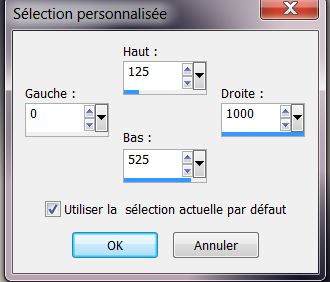
6. Selection tool - Custom selection
7. Fill the selection with the prepared gradient
8. Adjust - Blur - Gaussian blur at 25
9. Selections - Select none
10. Effects - Filters Unlimited2.0 - Mura's Seamless / Tile Rotate
2/2/180
11. Effects - Edge effects - Enhance
12. Effects - Image effects - Seamless tiling / default
13. Effects - Simple - Offset by 3
14. Effects - Simple - Center Tiles
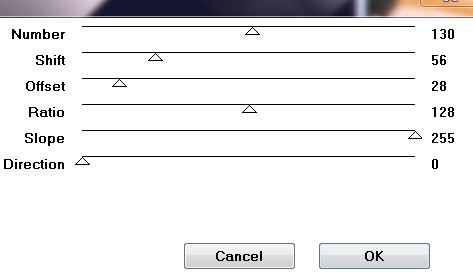
15. Effects - Simple - Diamonds
16. Image - Mirror
17. Stay on raster layer 2
18. Repeat the custom selection
19. Selections - Promote selection to layer
20. Change the blend mode of the layer to hard light
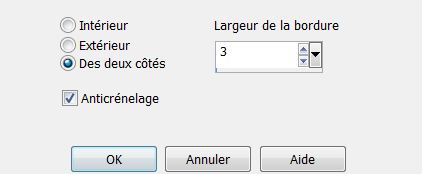
21. Selections - Modify - Select selection borders / Both sides
22. Layers - Add a new raster layer
23. Fill with the gradient
24. Selections - deselect
25. Layers - merge down
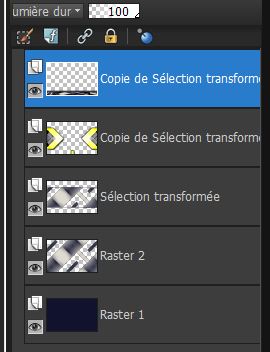
26. Layers - duplicate / change to normal mode
- You have this right now
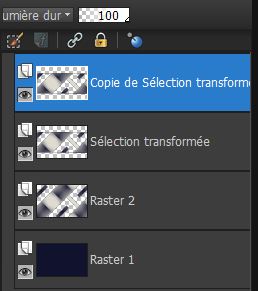
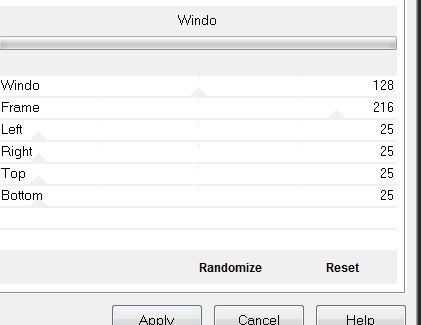
27. On the Layer "Copy of Promoted Selection" / Effects - Mock -
Windo
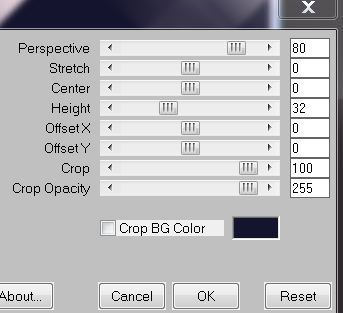
28. Effects - Mura's Meister / Perspective tiling
29. Effects - Distortion Effect - Punch/ Strength at 100%
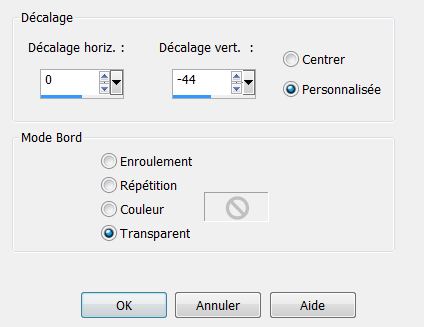
30. Effects - Image effects - Offset
31. Effects - EyeCandy 5/
Impact - Glass / preset "renee_pensive"
32. Activate the "Promoted Selection" layer
33. Layers - duplicate
34. Effects - Filters Unlimited 2.0 - Unplugged Shapes/ Warning
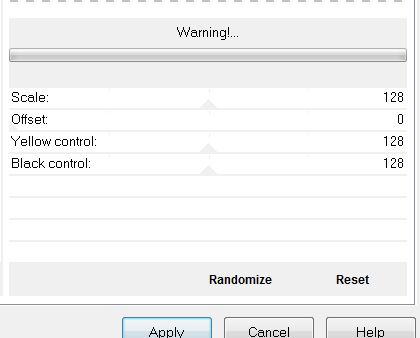
35. Effects - Simple - Pizza Slice Mirror / Apply again on the same
layer
36. Stay on this layer - Selections - Load selection from disk
"renee_pensive_1"/ Delete
37. Selections - deselect
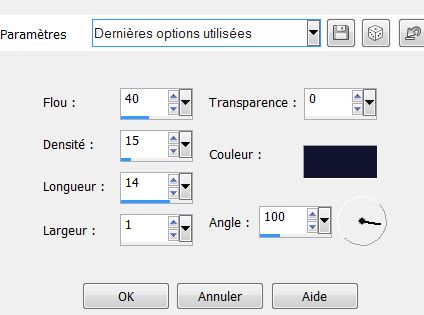
38. Effects - 3-D effect - Drop shadow
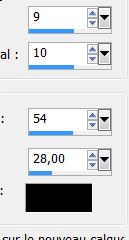
39. Repeat the drop shadow with H-9/ V-10
40. Change the layer blend mode to screen
41. Open the tube "effet_glass_fleche" and paste as new layer
42. Layers - merge down
43. This layer should have it's blend mode as screen
- You have this right now
44. Change the foreground color to #fafa94
45. Prepare a rectangular gradient configured as follows:
46. Go to the top of the Layers palette
47. Layers - add a new layer
48. Selections - load the selection "renee_pensive_2"
49. Fill with the gradient
50. Selections - Select none
51. Effects - Toadies/ What are you - 20/20
52. Effects - Edge effects - Enhance more
53. Effects - Eyecandy5/ Impact - Perspective shadow/ Preset - "renee_pensive_shadow"
54. Layers - add a new layer
55. Selections - load selection "renee_pensive_3" / fill with
#fafa94
56. Selections - modify/ contract by 15 pixels / fill color #13152e
57. Selections - deselect
58. Effects - Eye Candy5 - Impact - Glass/ preset "renee_pensive_glass"
59. Effect - Muras Seamless/ Shift at zig zag
60. Open tube "sound of love - claudiosauzapinto - sassydeb"
Paste as new layer. Do not move
61. With your colors #fafa94 and #13152e make a linear gradient
62. Layers - new raster layer
63. Load selection from disk/ "renee_pensive_4"
64. Fill with your gradient
65. Selections - select none
66. Filters unlimited 2.0 - Toadies - cyborg
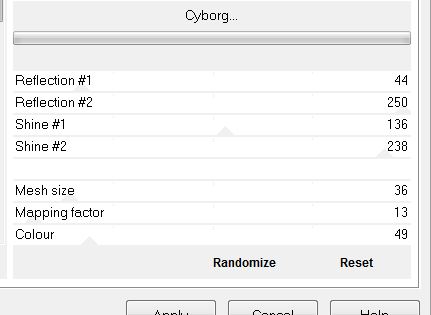
67. Effects - Eye Candy 5 - Impact/ Extrude - preset "renee_pensive_extrude"
68. Effects - Mura's Seamless - Shift at random
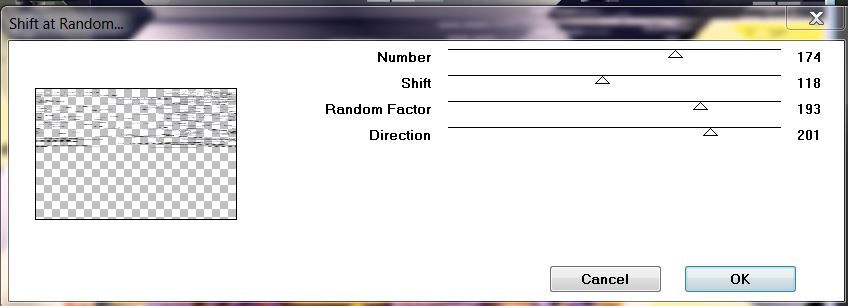
69. Change this layer mode to Overlay and opacity to 79
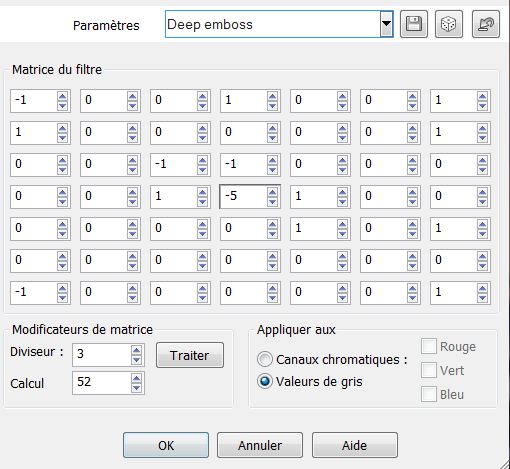
70. Effects - User defined filter - Deep Emboss
71. Open the tube "image_pensive_boules"/ Paste as new layer
72. Layers - Merge Visible
73. Image - add borders 2 pixels black
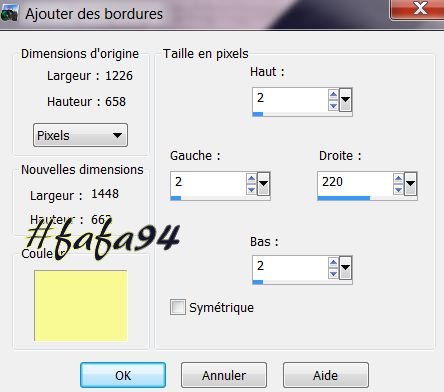
74. Image - add asymmetrical borders as shown
75. Select this border with your magic wand
76. Selections - Promote selection to layer
77. Effects - Texture effects - Straw wall/ with color background
78. Selections - deselect
79. Open the tube "Alies12V93-woman-11022013"/ resize to 80% and
paste as a new layer - move into place
80. Open tube "titre"/ Paste as new layer
81. Image - add borders 2 pixels black
82. Image - Resize to 985 pixels wide
*
It's Done, Thank you
Sally
I am part of Tutorial Writers
Inc.
My tutorials are regularly recorded


|
Your creations here
 |
|