|
Let's start the lesson


1. Open the background
image – Fond-Printemps-2024 – Promote Background
Layer Raster 1
2. Layers- Duplicate
3. Selections- Select All
4. Open the Tube
‘’Renee-TUBES-Femme-Printemps-2024-1’’ -Edit - Copy-
Activate your work -Edit - Paste into Selection

5. Effects- Image Effects-
Seamless Tiling use the settings below

6. Adjust- Blur-Gaussian
Blur-Radius 20%
7. Effects-Plugins – Simple – Pizza Slice Mirror
8. Effects- Image Effects-
Seamless Tiling using the default settings
9. Layers-Properties-Set
the Blend Mode to " Overlay "
10. Selections –load/save
selection –load selection from disc and select my
selection:- ’’Printemps-2024-1’’
11. Selections- Promote
selection to Layer
12. Effects - Plugins – L & K’s – Elvida
: 35
13. Selections – Modify –
Contract- 29 Pixels
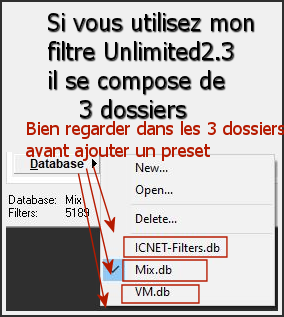
14. Effects- Plugins - Filters
in Unlimited 2.0 – Penta Com – Color Dot use the
settings below

15. Effects- Edge Effects-
Enhance More
16. Effects- 3D- Effects-
Drop Shadow with these settings: 0/0/75/25 Color Black

17. Effects- Image Effects-
Seamless Tiling use the settings below

18. Effects – Image Effects
– Offset use the settings below

- Material Properties: Set
your Foreground color to color #d4bbe7= 1 – Set your
Background color to color #abc7b6= 2
19. Layers- New Raster
Layer
20.
Selections –load/save selection –load selection from
disc and select my selection:- ’’Printemps-2024-2’’
21. Flood Fill Tool
 –
Fill the selection with the Background color #abc7b6= 2 (2
to 3 clicks)
depending on the color used –
Fill the selection with the Background color #abc7b6= 2 (2
to 3 clicks)
depending on the color used

22. Effects – Edge Effects –Enhance
23. Layers- New Raster
Layer
24. Selections –load/save
selection –load selection from disc and select my
selection:- ’’Printemps-2024-3’’
25. Flood Fill Tool
 –
Fill the selection with the Foreground color #d4bbe7=1 –
Fill the selection with the Foreground color #d4bbe7=1
26. Effects- Plugins - Filters
in Unlimited 2.0 - VM Extravaganza -
Heightline...using the default settings
27. Layers-Properties-Set
the Blend Mode to " Overlay " -Reduce the opacity of
this layer to 67%
28. Layers- New Raster
Layer
29. Selections –load/save
selection –load selection from disc and select my
selection:- ’’Printemps-2024-4’’
(it will
cancel the previous one)
-
Material Properties:
Set your Foreground color to color #ffffff=4
30.
Flood Fill Tool
 –Fill the selection with the Foreground color #ffffff=4

31. Activate the Tube ‘’ Renee-TUBES-Printemps-2024- Divers-Tubes’’
- Select 3 tubes - Resize
if necessary-Edit - Copy- Activate your work -Edit -
Paste as new layer
-
I
applied this shadow on the 2 tubes of the characters

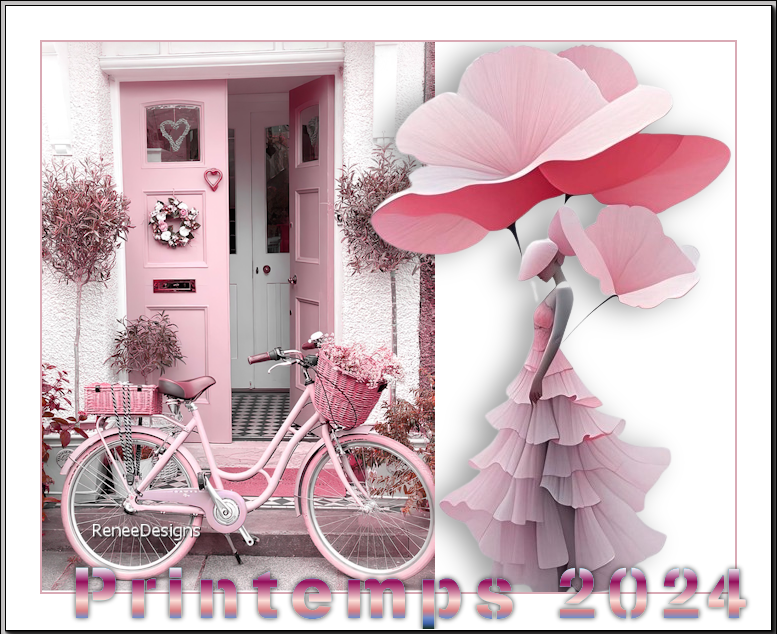
32. Activate your Text
Tool-Renée chose the font/or choose your own font ‘’ Stencilum-‘’
Size 72 - Write the title
‘’Printemps – 2024’’
- Colorize to your taste
-
Or take Renée's text
- Move (see finished image)
- Activate the bottom of
the layer palette=Raster 1
33. Layers- Duplicate
34. Layers- Arrange- Bring
to Top
35. Effects-Plugins – Lotis Filters – Mosaic Toolkit Plus…use
the settings below

36. Effects – Edge Effects –Enhance
37. Effects-Plugins – Pspforum – nicole’s glastegels
with these settings: 130 / 41 /
180
38. Effects- Plugins - Alien Skin EyeCandy 5 – Impact – Glass –
Preset : Clear using the default settings
39. Effects- Geometric
Effects- – Perspective Vertical use the settings below

- View - Rulers (it
must be checked)
40.
Pick Tool: (K) on your keyboard - Mode Scale
- Press the upper middle
node down until 600 Px
- Press ( M ) to close the
Tool
41. Effects- 3D- Effects-
Drop Shadow with these settings: 7 / 0/ 55 /28
Color Black
42. Effects- Plugins - Filters
in Unlimited 2.0 - Toadies - *Sucking
Toad* Bevel I...with thes settings :46 /140 / 101
43. Open the Tube ''Renee-TUBES-Printemps-2024-Plusieurs-Femmes''
-
Select 2 tubes to suit your taste - Resize if
necessary Edit - Copy-Edit Paste as new
layer
44. On
these 2 tubes I applied this drop shadow

45.
Open the Tube ‘’Renee-TUBES-Printemps-2024—vase’’
- Edit - Copy- Activate your work -Edit - Paste as new
layer
- Move (see finished image)
46.
Open the Tube
Renee-TUBES-Printemps-2024—Billes’’ "-Edit - Copy-
Activate your work -Edit - Paste as new layer
- Move (see finished image)
- Shadow in memory (item
44)
47. Image - Add
Borders-Symmetric checked: 1 Pixel –Color #abc7b6=2
Image - Add
Borders-Symmetric checked: 10 Pixels –
Color #ffffff=4
Image - Add
Borders-Symmetric checked: 2 Pixels
-Color
#d4bbe7=1
Image - Add
Borders-Symmetric checked: 40 Pixels –Color
#ffffff=4
48. Effects-Plugins – AAA Frame – Texture Frame
using
the default settings
49. Effects-Plugins – AAA Frame – Foto Frame
use the settings below

50.
Image -
Resize - to 85% - Resize all layers- Checked
Paste the author's watermark on your work and your own
watermark
51.
Calques - Fusionner tous les calques
Save as JPG
I hope you enjoyed this
lesson
Renée
This lesson was written by
Renée 2024
Edited and Update
15/03/2024
*
*
Any resemblance with an
existing lesson is a coincidence
* Do not forget to thank the people who work with us and
for us - I have appointed the tubeurs and translators
Thanks
|


 Translations


