|
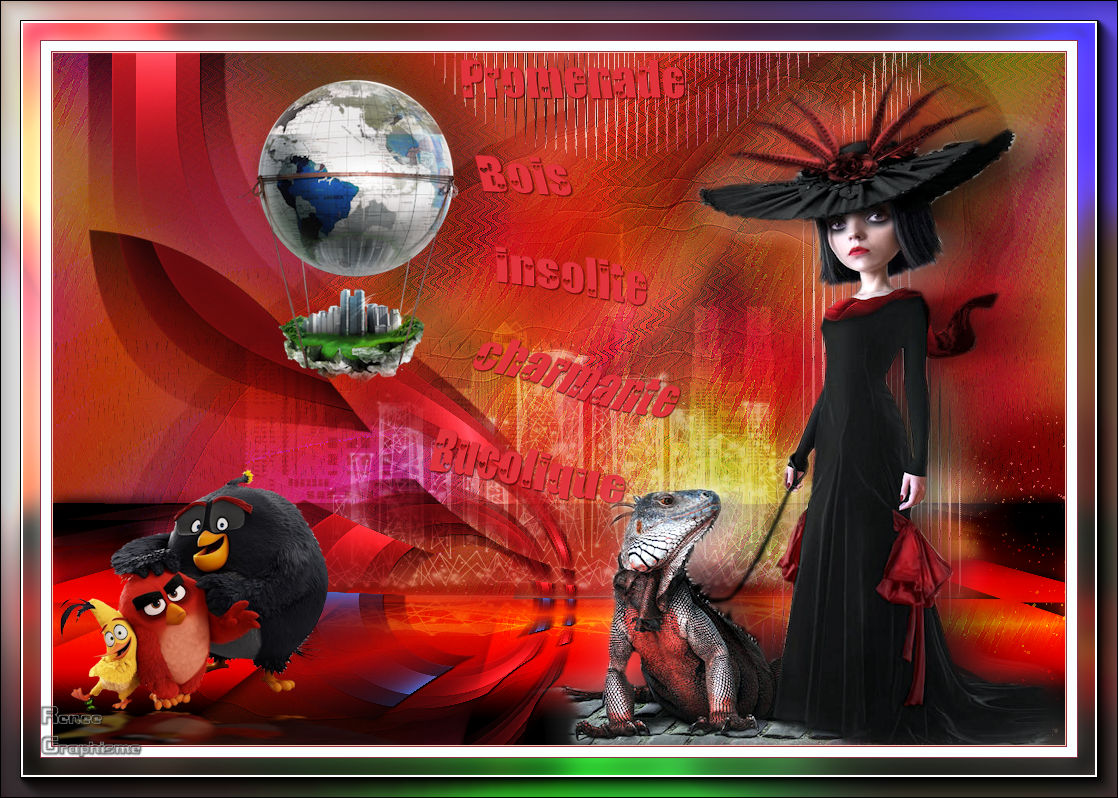
La promenade
insolite/The unusual walk
- Preparation
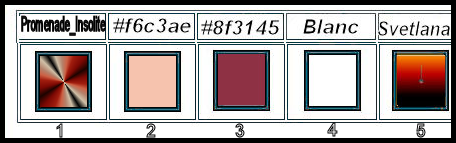
- Color Palette: Set your Foreground color to color #f6c3ae= 2 – Set your Background color to color #8f3145=
3
-
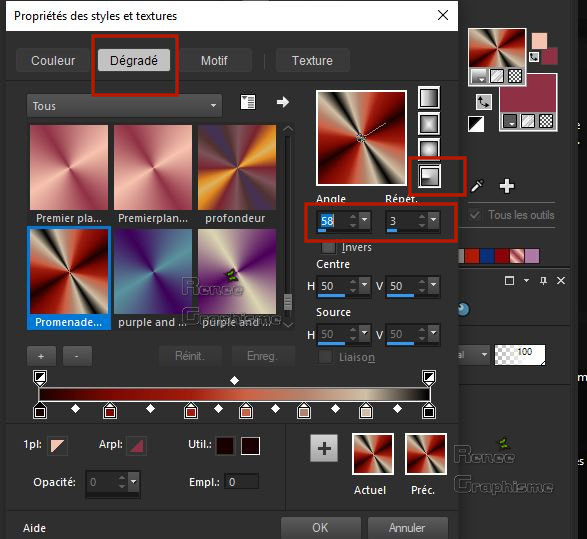
Color Palette: Set your Foregroundcolor to gradient and select : ‘’Promenade_insolite’’- Prepare a radial gradient configured like this.
1. File- Open a new transparent Image of 1012 x 692 Pixels
2. Activate Flood Fill Tool
 – Flood fill the layer with the gradient
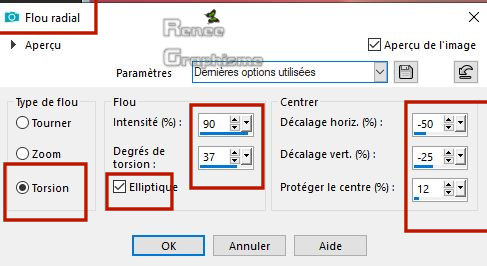
3. Adjust- Blur- Radial Blur use the settings below
4. Layers- Duplicate
5. Layers-Properties-Set the Blend Mode to " Overlay "
6. Layers- Merge- Merge Visible
7. Layers-Duplicate
8. Image - Mirror - Mirror Horizontal ( Image - Mirror in previous PSP Versions)
9. Layers-Properties-Lower the Opacity to 48%
10. Layers- Merge- Merge Visible
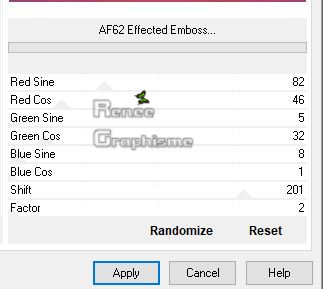
11. Effects –Plugins-
Unlimited 2.0 - &<Bkg Designer sf10 I> -AF62 Effected
Emboss..with these settings.
12. Effects- Edge Effects-Enhance
13. Adjust- Sharpness-Sharpen More
14. Effects – Plugins ( For Renée in unlimited ) VM Toolbox –MirrororriM with these settings:
118/0/255/0
15. Layers-Duplicate
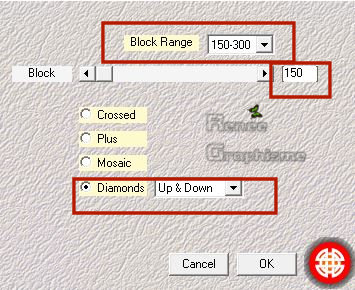
16. Effects- Plugins – Medhi – Sorting Tiles
17. Effects – Geometric Effects- Circle- Transparent
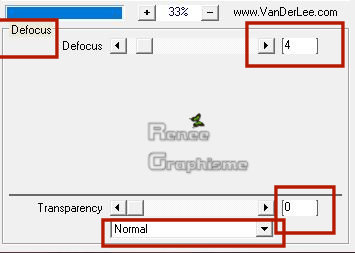
18. Effects –
Plugins – Vanderlee – Unplugged-X - Defocus
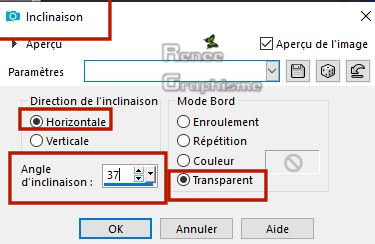
19. Effects – Geometric Effects- Skew with these settings
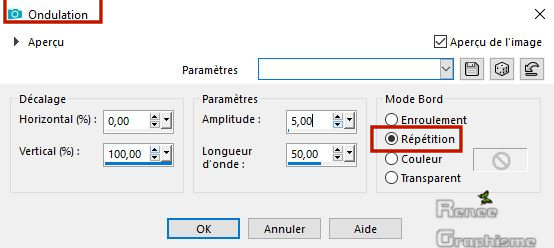
20. Effects – Distortion Effects - Ripple use the settings below
21. Effects- Edge Effects-Enhance
22. Layers-Properties-Set the Blend Mode to " Overlay " and lower the Opacity to 61%
-
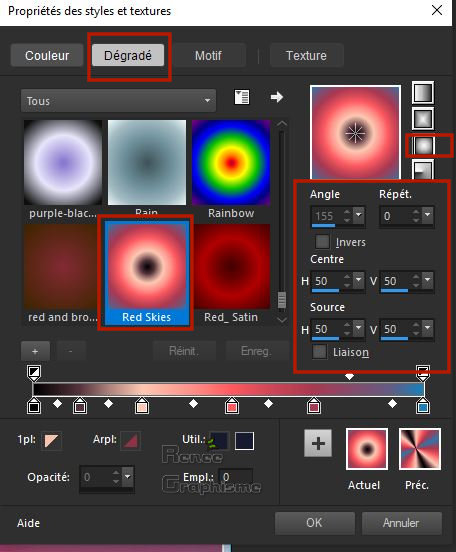
Color Palette: Set your Foregroundcolor to gradient and select : ‘’Red skies’’-Prepare a sunburst gradient configured like this.
23. Layers- New Raster Layer
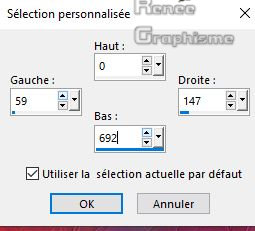
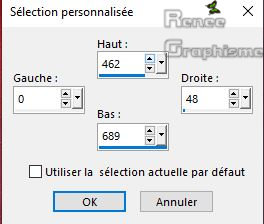
24. Activate Selection Tool -Custom Selection (S) -Rectangle with these settings
25. Activate Flood Fill Tool
– Flood fill the selection with the gradient
Selections- Select None
26. Effects – Plugins – Vanderlee – Unplugged-X – Defocus with the same settings
27. Effects –Plugins-
Unlimited 2.0 – Toadies – Weaver : 200/65/185
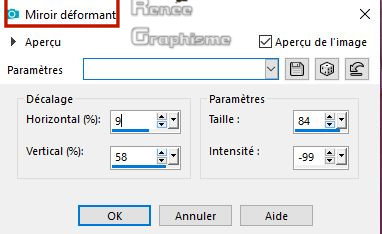
28. Effects – Distortion Effects–Warp use the settings below
29. Effects –3 D Effects –Drop Shadow with these settings: 1/1/89/2 Color Black
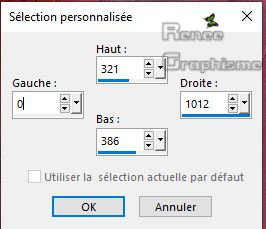
30. Activate Selection Tool -Custom Selection (S) -Rectangle with these settings
DELETE
Selections- Select None
31. Layers- Duplicate
32. Layers-Properties-Set the Blend Mode to " Hard Light "
- In the Layer-Palette: activate the Layer underneath (Raster 1)
33. Effects – Plugins– Final impact – Vivida
(If you use other materials, adjust your colors)
-To replace the top of the Layer-Palette
34. Activate Text Tool-Font ‘’Love Letters’’– Write your words or your text
(It is best if you take a new sheet and write the text among each other
Open a new image ,
Write your text-
Copy and paste as a new layer to your original work
Continue with point 35 )
- Or take my tube with the "text "
- Activate your Move Tool (M) place it in the right place (see finished image)
35. Effects –3 D Effects –Drop Shadow with the same settings
36. Effects – Plugins – Final impact – Vivida use the settings below
37. Effects – Distortion Effects– Twirl with these setting 32
- In the Layer-Palette: Activate the second layer from the bottom ( Copy of Merged )
37a. Layers- New Raster Layer
38. Activate Selection Tool -Custom Selection (S) -Rectangle with these settings
39. Activate Flood Fill Tool
-
Opacity 50%- Flood fill the selection with the sunburst gradient (Do not forget to reset the settings of your paint pot to 100)
Selections- Select None
40. Effects- 3 D Effects- Drop Shadow with these settings: 1/ -2/ 65/ 18,48 Color Black
41. Layers- Duplicate
42. Effects – Image Effects – Offset with these settings:H = 0 and V = 20
43. Layers- Duplicate
44. Effects – Image Effects – Offset with these settings: H = 0 and V = 20
45. Layers- Merge- Merge Down and repeat once more
46. Image -Free Rotate 90° to the Right
47. Effects – Distortion Effects–Warp use the settings below

STAY ON THIS LAYER
48. Activate Selection Tool -Custom Selection (S) -Rectangle with these settings
49. Effects –3 D Effects –Drop Shadow with the same settings
Selections- Select None
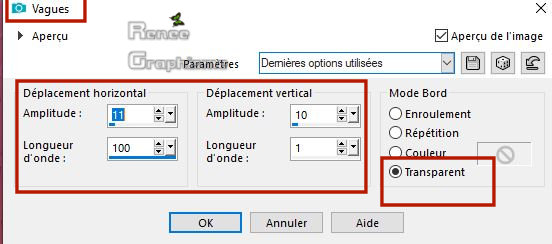
50. Effects – Distortion Effects- Wave with these settings
51.Effects- Edge Effects- Enhance
52. Layers-Properties-Set the Blend Mode to " Normal " and lower the Opacity to 77%
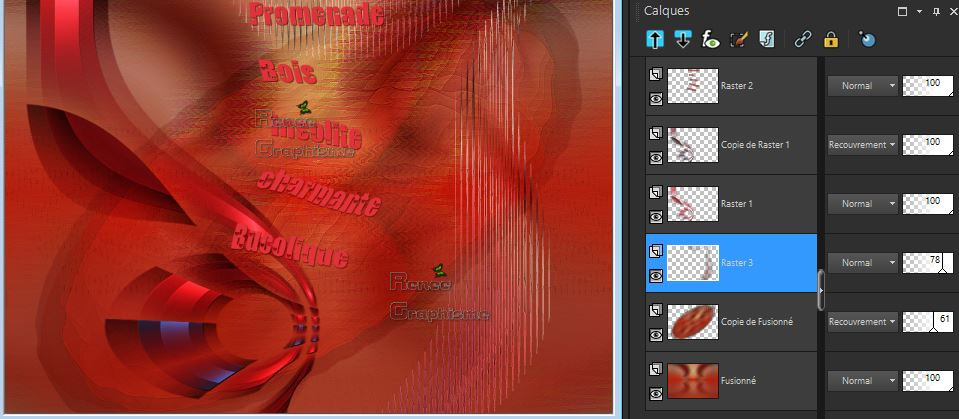
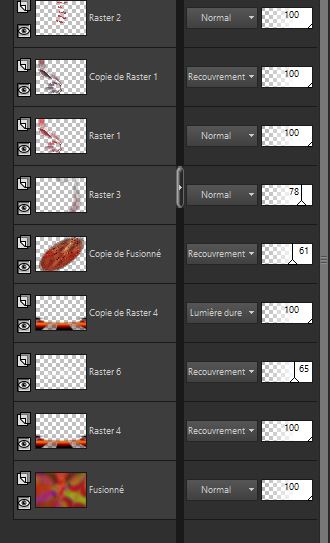
- Your work and Layer Palette look like this now-You should have this result
- Activate the bottom of the layer-palette (Merged)
-
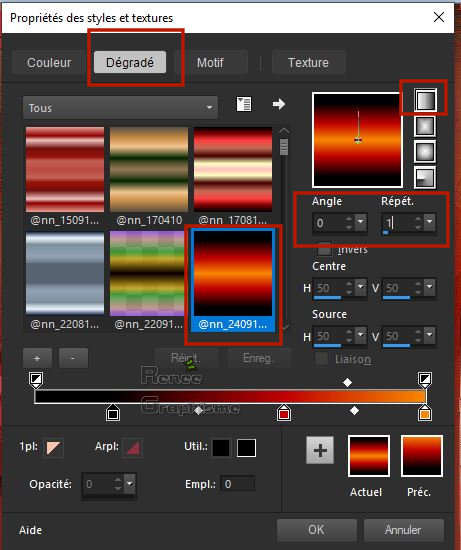
Color Palette: Set your Foregroundcolor to gradient and select :‘’
@nn_240911_GR_Svetlana_tdstudio’’– Prepare a linear gradient configured like this.
53. Layers- New Raster Layer
54. Selections –load/save selection –load selection from disc and select my selection: ‘’ Renee-Lapromenade1’’
55. Activate Flood Fill Tool
-
Opacity 100 %– Flood fill the selection with the gradient
Selections- Select None
56. Selections –load/save selection –load selection from disc and select my selection: ‘’ Renee-Lapromenade2’’
DELETE (4 or 5 times)
Selections- Select None
57. Effects- 3 D Effects- Drop Shadow with these settings: 1/2/65/22 Color Black
58. Layers-Properties-Set the Blend Mode to " Overlay"
59. Layers- Duplicate
60. Layers-Properties-Set the Blend Mode to " Hard Light "
- Activate the bottom of the layer-palette (Merged)
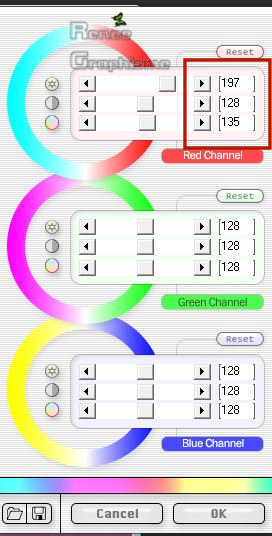
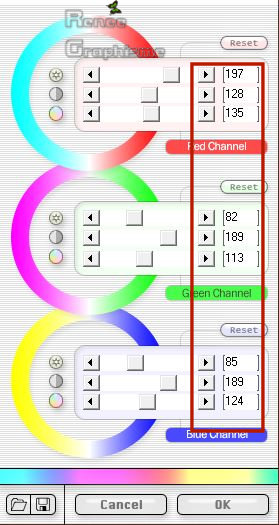
61. Effects –Plugins-
Unlimited 2.0 - Color Effects - Channel Rotation : 177
-To replace the top of the Layer-Palette
62. Layers- New Raster Layer
63. Selections –load/save selection –load selection from disc and select my selection: ‘’ Renee-Lapromenade3’’
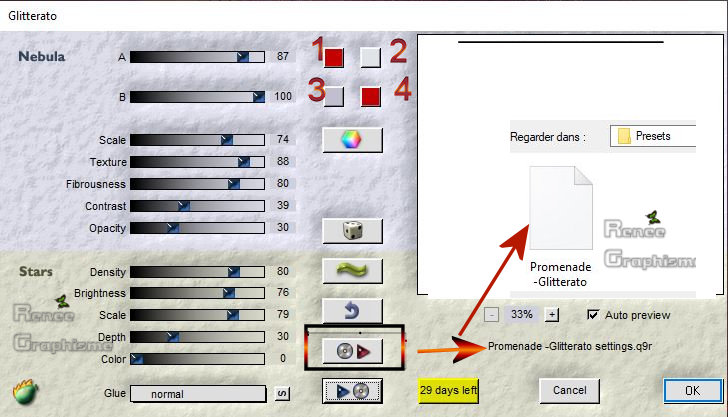
64. Effects- Plugins – Flaming pear - Glitterato
Colors
No1= #c40000 No2
= #dfe4e9
No3 = #c2bed0 No4
= #c40000
Click on the red arrow>>select my file preset ‘’Promenade -Glitterato
settings’’ can be used in any folder of your choice by clicking it. -3 Open it will be OK in your filter
Or manual settings as shown in the example below
65. Layers-Properties-Set the Blend Mode to " Soft Light "
Selections- Select None
66. Effects- Edge Effects-Enhance (two times)
Check the placement of your layers
-In the Layer-Palette: Activate the second layer from the bottom = Raster 4
67. Layers- New Raster Layer
68. Selections –load/save selection –load selection from disc and select my selection: ‘’ Renee-Lapromenade4’’
- Color-Palette: Set your Foreground color to color # ffffff
69. Activate Flood Fill Tool
–
Opacity 100% – Flood fill the selection with the Foreground color #ffffff
Selections- Select None
70. Layers-Properties-Set the Blend Mode to " Overlay" - Lower the Opacity at your choise ( For Renée opacity to 65)
71. Layers- New Raster Layer
72. Selections –load/save selection –load selection from disc and select my selection: ‘’ Renee-Lapromenade5’’
73. Activate Flood Fill Tool
Opacity 100 %– Flood fill the selection with the Foreground color #ffffff
Selections- Select None
74. Layers-Properties-Lower the Opacity to 59%
-To replace the top of the Layer-Palette
75. Activate the tube
‘’ Renee_TUBES_La –promenade’’ (do not close)
on this tube
- Activate the layer
‘’la promeneuse ‘of the tube
- Edit - Copy- Activate your work -Edit - Paste as a new layer
- Move Tool / place your tube to the bottom right side of your image (see finished image)
76. Layers- Duplicate
77. Layers- Arrange- Move Down
78. Adjust-Blur-Gaussian Blur: Radius 15
79. Effects - Distortion Effects - Wind direction- From Right checked - Wind Strength: 20
-To replace the top of the Layer-Palette
80. Back on tube - activate the layer ‘’ ville suspendue’ of the tube
- Edit - Copy- Activate your work -Edit - Paste as a new layer
81. Effects – Image Effects – Offset with these settings: H = - 200 and V = 162
82. Back on tube -activate the layer ’’oiseaux’’ of the tube
- Edit - Copy- Activate your work -Edit - Paste as a new layer
-Move Tool / place your tube to the bottom left side of your image (see finished image)
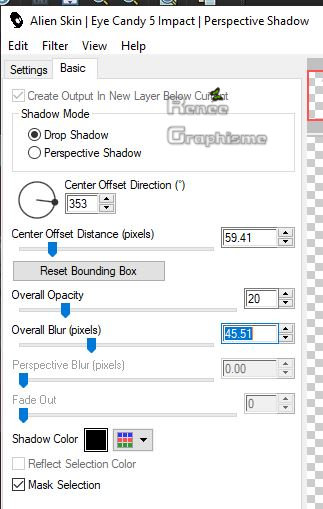
83. Effects – Plugins - Eyecandy 5 impact – Perpective shadow-tab-Settings-User settings and select :Preset
‘’promenade-shadow’’
84. Image - Add borders-Symmetric checked:1 Pixel Color #f6c3ae =2
85. Image - Add borders-Symmetric checked:1 Pixel Color #8f3145 = 3
86. Image - Add borders-Symmetric checked:10 Pixels Color #ffffff
87. Image - Add borders-Symmetric checked:1 Pixel Color #8f3145 = 3
88. Edit-Copy
89. Selections- Select All
90. Image - Add borders-Symmetric checked:40 pixels Color #ffffff
91. Selections -
Invert
92. Edit-Paste Into Selection
93. Adjust-Blur-Gaussian Blur: Radius 12
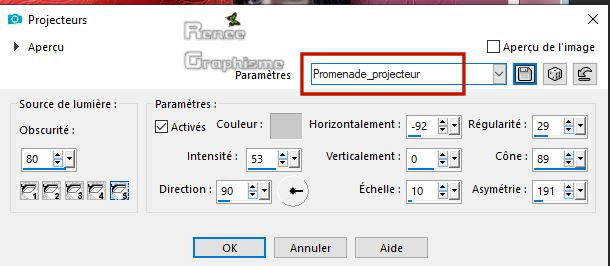
94. Effects – Illumination Effects – Lights –and select my file- Preset ‘’
Promenade-projecteur (First click on Settings / Reset = Default)
Selections- Select None
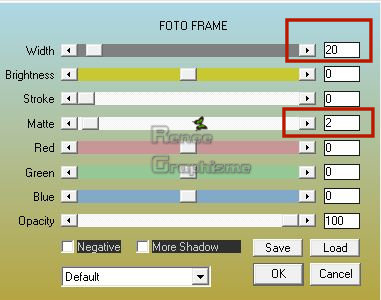
95. Effects -
Plugins – AAA Frame – Foto frame use the settings below
Save as JPG file and you're done!
I hope you enjoyed this lesson
Renée
This lesson was written by Renée 11 May 2019
Edited and Update
May 2019
*
Any resemblance with an existing lesson is a coincidence
* Do not forget to thank the people who work with us and for us I have appointed the tubeurs and translators
Thanks
*
|

 Translations


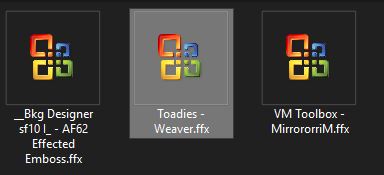


 If a plugin supplied appears with this icon it must necessarily be imported into Unlimited *