|
Let's start the lesson.
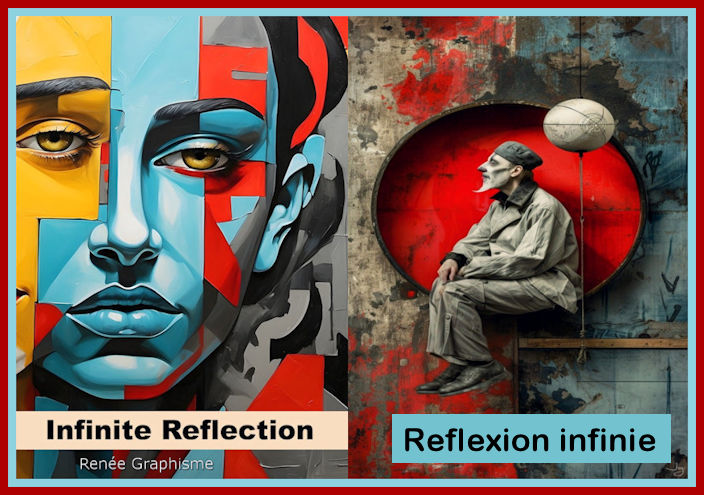
Réflexion infinie - Infinite reflection
-
Material Properties: Set Foreground Color to Color 1 -
Set Background Color to Color 2

-
Replace your foreground with a foreground/background
linear gradient configured like this.
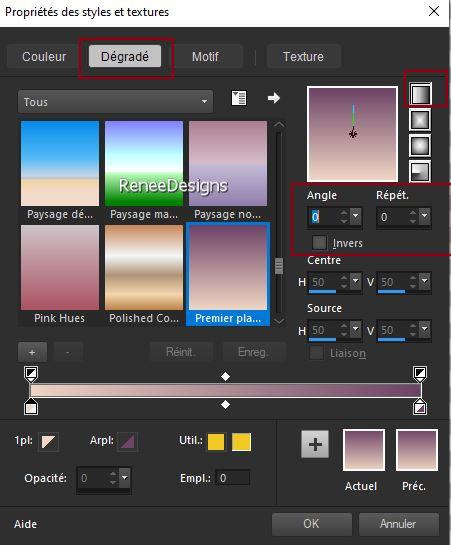
1.
File-Open a new transparent image of this size: 1100 x 750 Pixels
2.
Flood Fill Tool
 –
Flood fill the layer with the gradient –
Flood fill the layer with the gradient
3.
Effects – Plugins – Medhi – Sorting Tiles use the
settings below
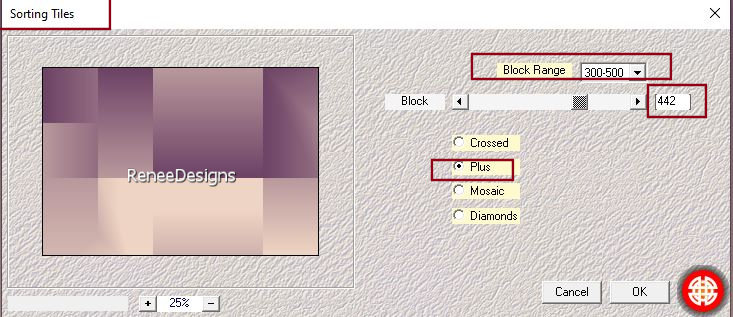
4.
Effects – Edge Effects-Enhance
5.
Layers-Duplicate
6.
Effects - Plugins - Filters in Unlimited 2.0 - VM
1 – Web Weaver use the settings below
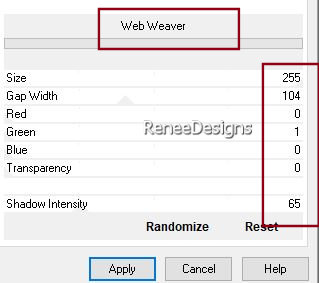
7.
Effects – Plugins - L & K's – Mayra all sliders to 0
8.
Layers-Properties-Set the Blend Mode to "Hard Light"
9.
Effects - Plugins - Filters in Unlimited 2.0 –
Toadies - Bitches Crystal...with these settings : 43/24
10.
Layers-New Mask Layer-From Image- select
‘’Masque- Infinite reflection
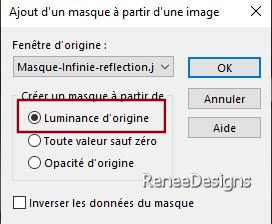
-
Layers- Merge- Merge Group
11.
Effects – 3D-Effects-Drop Shadow with these settings : 0/0/50/50
Color black
-
Repeat: Drop Shadow same settings
-
Material Properties: Set Foreground Color to Color 3 -
Set Background Color to Color 4
-
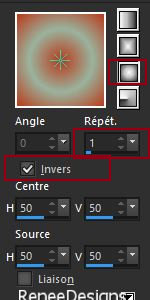
Replace your foreground with a foreground/background
sunburst gradient configured like this.
12.
Layers- New Raster Layer
13.
Flood Fill Tool
 –
Flood fill the layer with the gradient –
Flood fill the layer with the gradient
14.
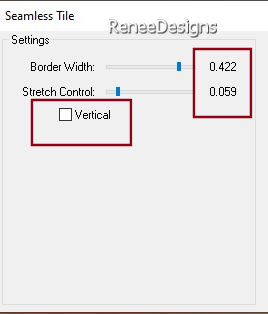
Effects – Plugins – FM Tile Tools – Seamless
Tile use the settings below
15.
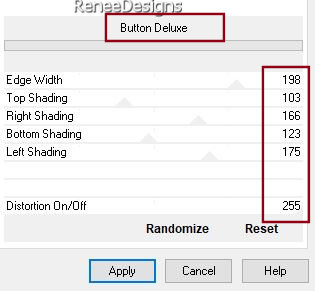
Effects - Plugins - Filters in Unlimited 2.0 -
Filter Factory Gallery B – Button DeLuxe use the
settings below
16.
Image - Resize by 55% - Resize all layers not checked
17.
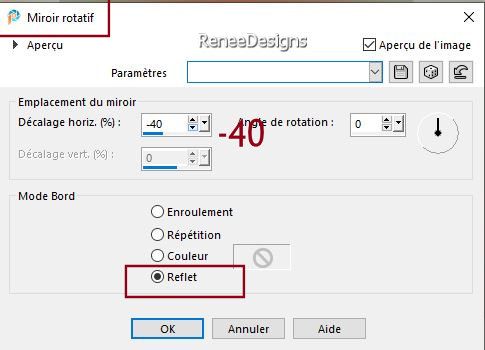
Effects –Reflection Effects – Rotating Mirror use the
settings below
18.
Effects –Reflection Effects – Rotating Mirror use the
settings below
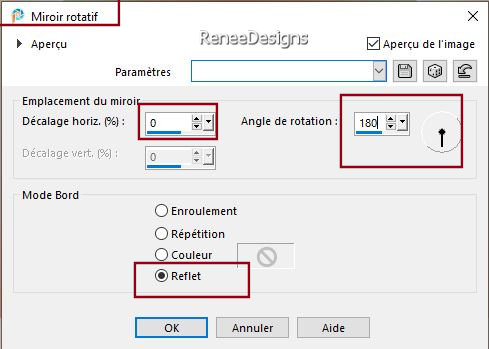
19.
Layers-Properties-Set the Blend Mode to " Difference" –
Reduce the opacity of this layer to 44 %
20.
Effects – Plugins – Innovations 1.5 – Wavy City with
these settings
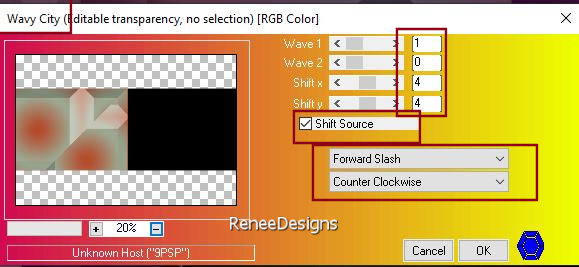
-
Material Properties: Set Foreground Color to Color 5 -
Set Background Color to Color 2
21.
Layers- New Raster Layer
22.
Effects – Plugins – Medhi – WavyLab 1.1 use the settings
below
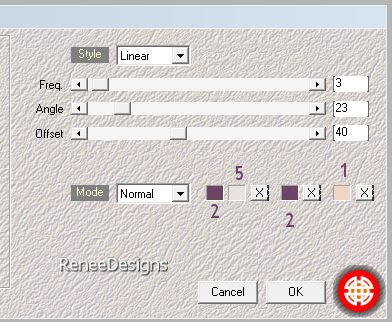
23.
Effects - Plugins -Filters in Unlimited 2.0 – VM
Natural - Weave Distortion...use the settings below
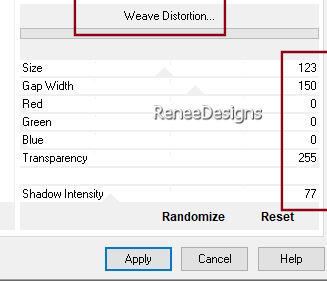
24.
Effects –Plugins -L & K's – Palmyre using the
default settings
25.
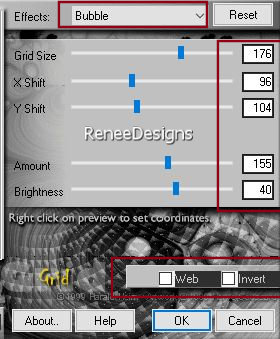
Effects –Plugins -PluginsGalaxy – Grid-
A window opens-select
Bubble use the settings below
26.
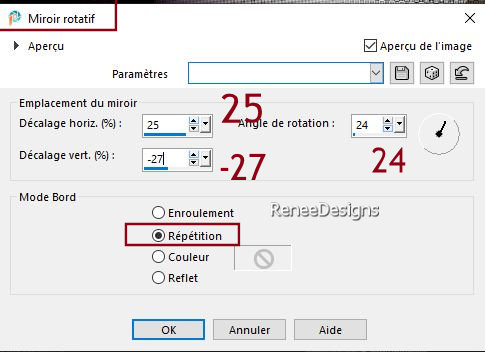
Effects – Reflection Effects – Rotating Mirror use the
settings below
27.
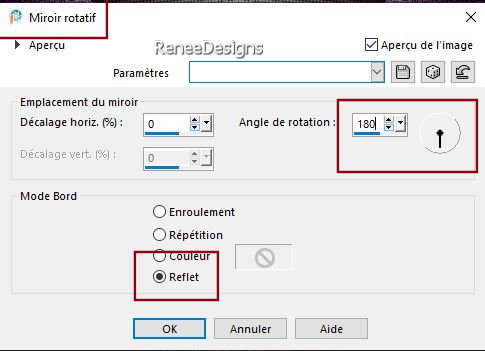
Effects – Reflection Effects – Rotating Mirror use the
settings below
28.
Effects – Plugins – Transparency – Eliminate
Black
29.
Effects – Edge Effects-Enhance
30.
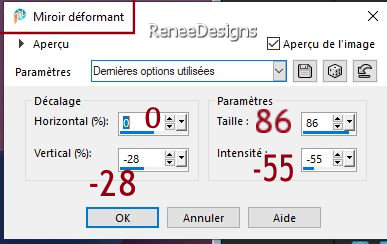
Effects –Distortion Effects –Warp use the settings below
31.
Effects – 3D-Effects-Drop Shadow with these settings : 1/1/65/1
Color White
-
Activate Raster 1 in the layer palette
Foreground properties-
Set the foreground color to color 6
32.
Layers- New Raster Layer
33.
Selections –load/save selection –load selection from
disc and select my selection: ‘’Infinite- reflection
2’’
34.
Flood Fill Tool – Flood fill selections with the
foreground color 6
35.
Layers- New Raster Layer
36.
Activate Mask "Narah_Mask _0878
- Edit
- Copy - Activate your work - Edit - Paste into
selection
37.Effects –
Plugins – Mura’s Meister – Perspective
Tiling using the default settings
38.Layers-Properties-Set
the Blend Mode to " Difference" – Reduce the opacity of
this layer to 55%

-
Activate Raster 4 in the layer palette
39.
Activate your Magic Wand – Tolerance at 0 and Feather at 45
Click
in the empty area 3 to 4 times


- Your
work and layer palette should now look like this - you
should have the following result (layers arranged
correctly)
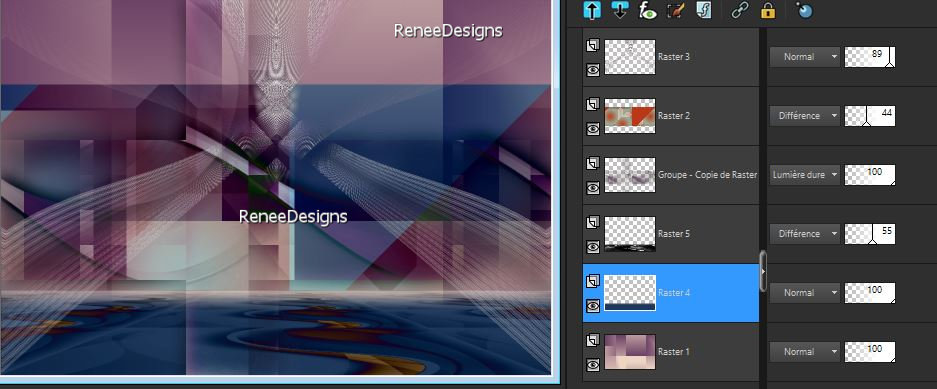
-
Activate the top of the layer palette
40.
Activate the tube ‘’Renee-Tubes-Infinie-reflexion-Cadres’’
-Edit - Copy- Activate your work -Edit - Paste as new
layer
41.
Pick Tool: (K) on your keyboard - Enter the following
parameters on the toolbar
 27 /32
Press
the ( M ) button to close the tool
42.
Layers- New Raster Layer
43.
Selections –load/save selection –load selection from
disc and select my selection: ‘’Infinite- reflection
3’’
44.
Activate ‘’Texture- Infinite reflection''
- Edit
- Copy - Activate your work - Edit - Paste into
selection
45.
Effects - Plugins - Alien Skin EyeCandy 5 –
Impact – Glass use the settings below
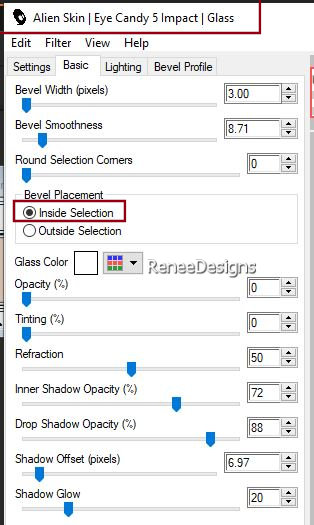

46.
Layers-Arrange-Move Down
-
Activate the layer above
47.
Layers- Merge-Merge Down
48.
Layers-Properties-Set the Blend Mode to " Overlay " -Reduce
the opacity of this layer to 79%
49.
Open and activate the tube ’’ Renee-Tubes- Infinite reflection -3personnages ‘’
-Edit - Copy-
Activate your work -Edit - Paste as new layer
Pick
Tool: (K) on your keyboard - Enter the following
parameters on the toolbar
 21
/0 21
/0
50.
Effects – 3D-Effects-Drop Shadow with these settings : 2/2/50/25
Color Black
51.
Activate Text Tool -With the font attached(ZoloftSideffex)
-Size 48 - Write the title (foreground a color of your
work - background white)

-
Place to your liking
52.
Layers- New Raster Layer
53.
Selections –load/save selection –load selection from
disc and select my selection: ‘’Infinite- reflection
1’’
54.
Set the Foreground color to color white (7)
Flood
Fill Tool
 –
Flood fill the selection with color white (7) –
Flood fill the selection with color white (7)
55.
Selections- Modify-Contract 1 Pixel


56
Open and activate the tube
‘’ Renee-Tubes- Infinite reflection -Fleches’’ -Edit - Copy- Activate
your work -Edit - Paste as new layer
-
Move see finished image
57.
Open 2 tubes to your liking
These
2 were chosen by Renée
‘’ Renee-Tubes-Infinite -reflection –Femme’’ and ‘’ Renee-Tubes-Infinite
-reflection –Homme’’
-Edit
- Copy- Activate your work -Edit - Paste as new layer
58. On
each tube - apply a drop shadow of your choice
This is my
shadow
-
Effects - Plugins - Alien Skin EyeCandy 5 –
Impact- Perspective Shadow use the settings below
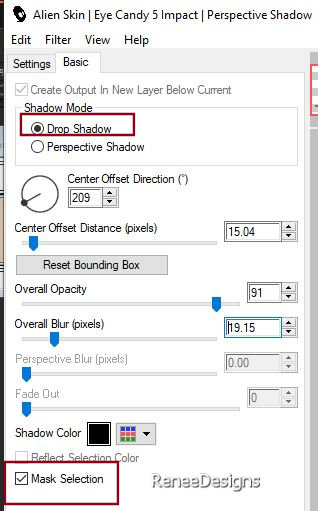
59.
Image - Add Borders-Symmetric checked: 1 Pixel Color No
6
60.
Selections – Select All
61.
Image - Add Borders-Symmetric checked: 45 Pixels Color
white
62.
Selections – Modify – Expand by 15 Pixels
63.
Effects – 3D-Effects-Drop Shadow with these settings :
0/0/50/50 Color Black
64.
Selections – Select All
65.
Selections - Modify- Contract by 15 Pixels
66.
Effects – Plugins – AAA Frame – Foto Frame use the
settings below
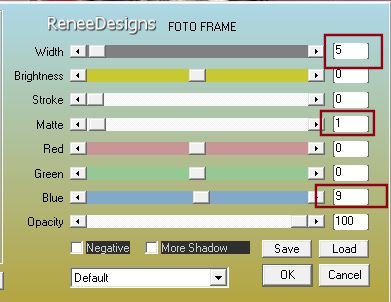

67.
Add the author's watermark to your work and your own
watermark.
68.
Layers-Merge-Merge All (flatten)
69.
Image -Resize 1050 Pixels width - Resize all layers
checked.
Save as JPG
I appreciate your attention
and engagement with this lesson.
Renée
Renée wrote this lesson on 06/09/2024
I have edited and updated
it.
in 2024
*
Any resemblance to an
existing lesson is purely coincidental.
Do not forget to thank the people who work with us and
for us. I have appointed the tubeurs and translators.
Thank you *.
*
|
 Translations


