|
Let's start the lesson .
1.
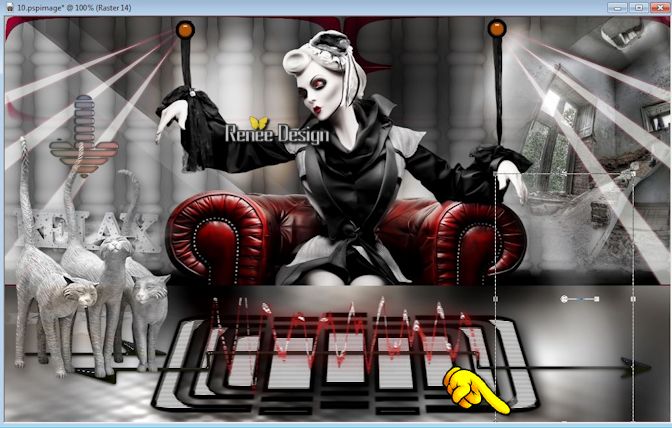
Open a new transparent image of 1025 x 625 pixels
2.
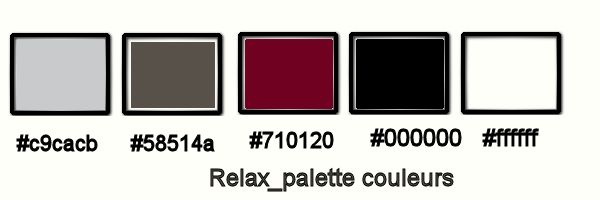
Material Properties: Foreground color to this color: #c9cacb Background color to this color :#58514a
-
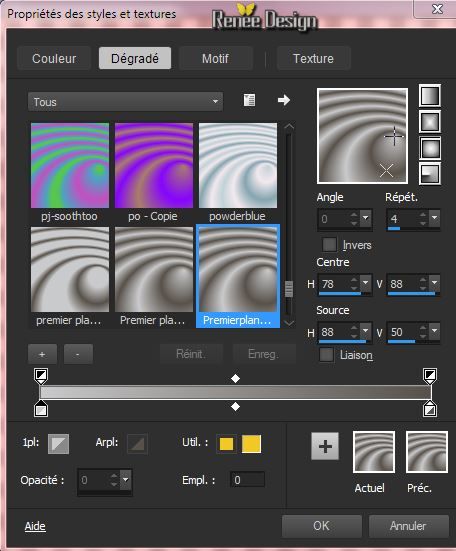
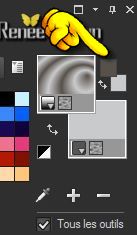
Put your foreground/background into a sunburst gradient as configured
3.
Activate Flood Fill Tool and fill the layer with the gradient
4.
Adjust-Blur-Gaussian Blur: Radius 15
5.
Effects- Plugins -Redfield - RipplesMagic
-
choose the preset> Dance floor
-
then control measures

6.
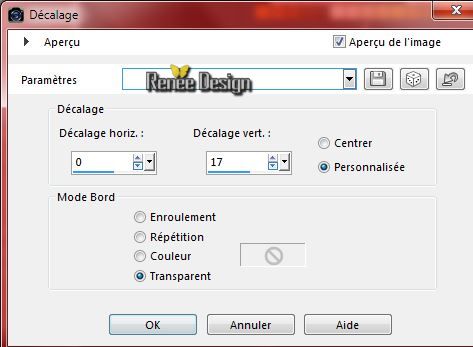
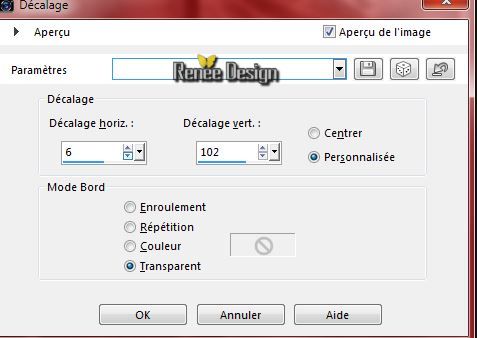
Effects- Image Effects- Offset with these settings
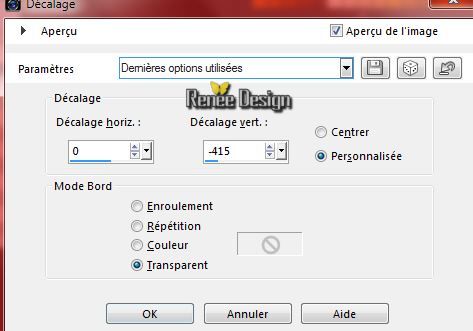
-Activate your Pick Tool (K)Pull the Left and Right Nodes outwards so you do not see the white lines
7.
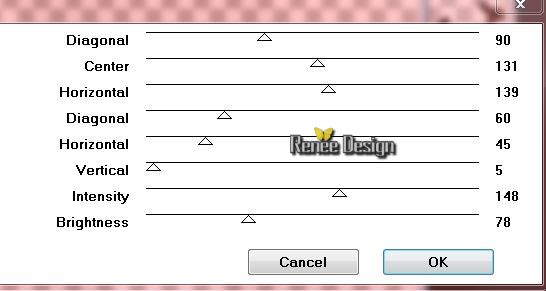
Effects- Plugins - Graphic Plus -Cross Shadow use settings below
8.
Activate the magic wand - Mode (Add Shift) In the upper transparent part
9. Layers - new raster layer (Raster 2)
10.
Activate Flood Fill Tool and fill the selection with the background color
11.
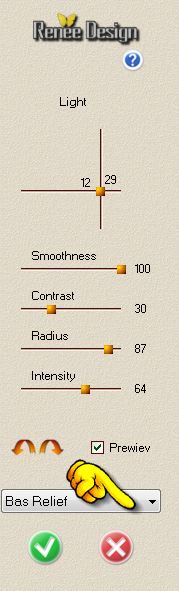
Effects- Plugins -Redfield+++- Bas relief
Selections- Deselect All
12.
Layers- Duplicate
13.
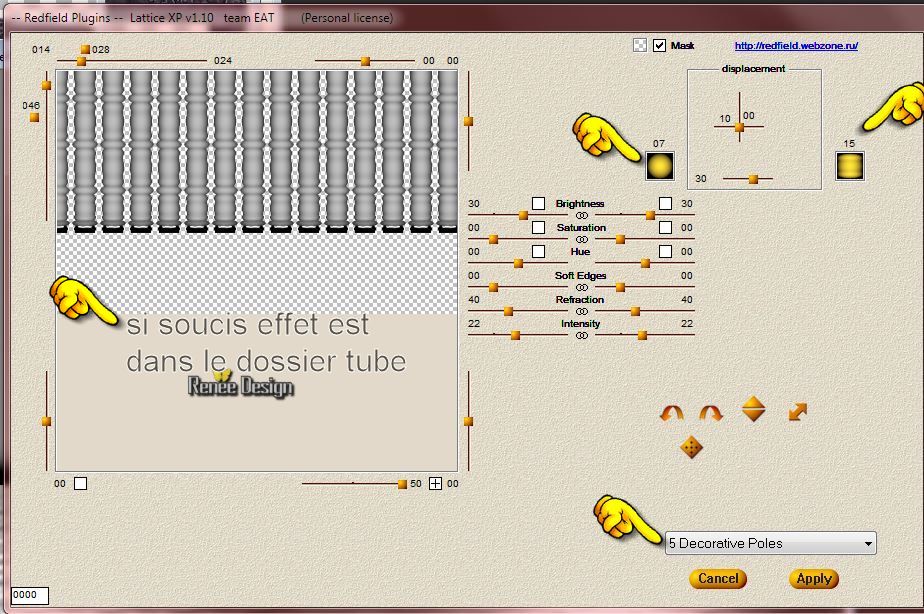
Effects- Plugins - Redfield- Lattice Xp/5
Decoratives Poles
I add this effect to the download map - in case you can't manage the plugin just past my effect pspimage ''Effet_Redfield-LatticeXP ''as a new layer and place like this
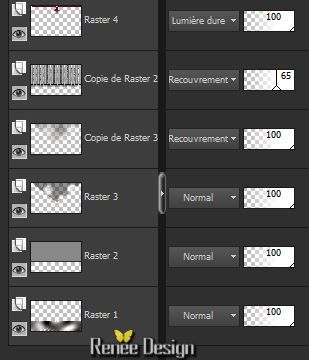
14.
Layer Palette -Double click on this Layer and set the Blend Mode to "Overlay " Reduce the opacity of this layer to: 69%
15.
Layer-New Raster Layer
16.
Selections - load/save selection - load selection from disk and choose my selection: ''relax_1''
Color Palette -Turn the colors( Dark color = FG-Color)
17.
Pot of Paint Opacity 100% - Activate Flood Fill Tool and fill the selection with the gradient
18.
Layers- Duplicate
19.
Layers- Merge - Merge Down
Selections- Deselect All
20.
Effects- Plugins - Graphic plus - Cross shadow
(always in memory)
21.
Effects- Image Effects- Offset with these settings
22.
Layers- Arrange-Move Down (under copy of raster 2)
23.
Layers- Duplicate
24. Effects- Plugins - Toadies - What are you: 20/20
25.
Layer Palette -Double click on this Layer and set the Blend Mode to "Overlay "
Your work and Layer Palette look like this now:
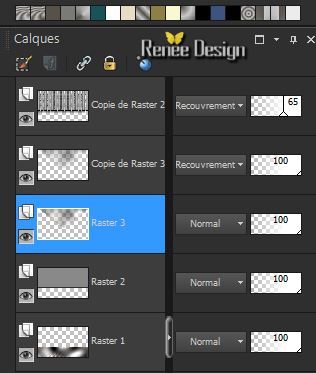
- Layer Palette : activate Raster 3
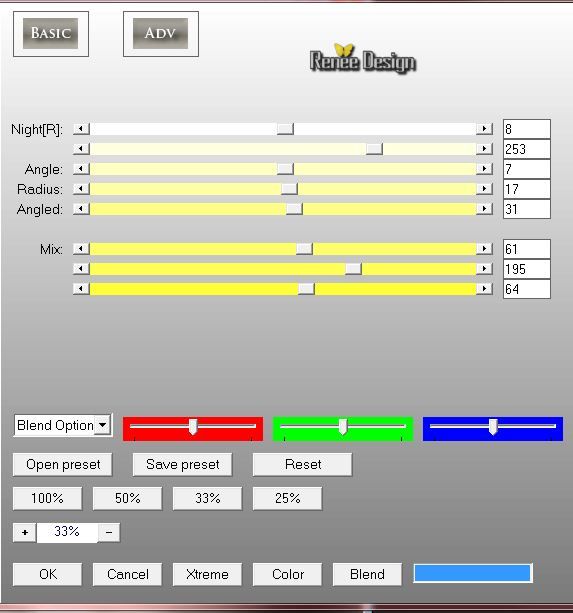
26. Effects- Plugins - AP01-Innovation - Color - Nightmares
- Activate the top of the layer-Palette
27.
Material Properties: Foreground color to this color:
#710120 Background color to this color : #58514a
28.
Layer-New Raster Layer
29.
Selections-Custom Selection with these settings
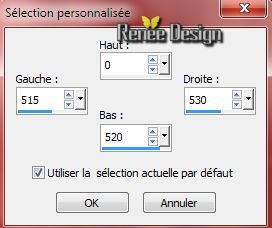
30. Pot of Paint Opacity 100% - Activate Flood Fill Tool and fill the selection with the FG-Color
Selections- Deselect All
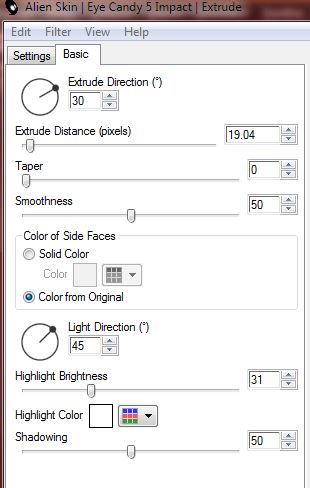
31.
Effects- Plugins -EyeCandy5 -Extrude -tab-User-User Settings click on the "Preset_relax-Extrude ''
32.
Layers- Duplicate - Image Mirror
33.Layers- Merge- Merge-Down
34.
Effects- Plugins - Flaming Pear - Flexify 2

35.
Effects- Image Effects- Offset with these settings H = 0 and V = 40 transparent
36.
Activate Raster Deform Tool
Is Raster Deform Tool not listed ?- View -Customize-Commands-All Commands select 'Deform" on the right side .With the mouse button pressed drag it between the other tools in your psp

-Activate Raster Deform Tool: click on the-Preset "Preset_RasterDeform_relax_deformation"
an OK (Preset into the zip file)
37.
Effects- Plugins - Eyecandy 5 Impact -
Perspective shadow-tab-User-User Settings click on the-Preset ''relax_ombre''
38.
Layer Palette -Double click on this Layer and set the Blend Mode to "Hard Light "
Your Layer Palette look like this now:
39.
Activate the tube ''MR_Femme au teint diaphane.pspimage''
-
Image Resize at 75%
-
Edit/copy-Edit paste as a new layer on your working area
40.
Effects- Image Effects- Offset with these settings
41.Layer-New Raster Layer
42.
Selections - load/save selection - load selection from disk and choose my selection: ''relax_2''
43.
Pot of Paint Opacity 75% -Activate Flood fill tool and fill the selection with the FG-Color
44.
Selections- Modify- Contract 2 Pixels -Delete
Keep Selected
-
On
the same layer
- Pot of Paint Opacity:100% - Activate Flood fill tool and fill the selection with color white
Selections-Deselect All
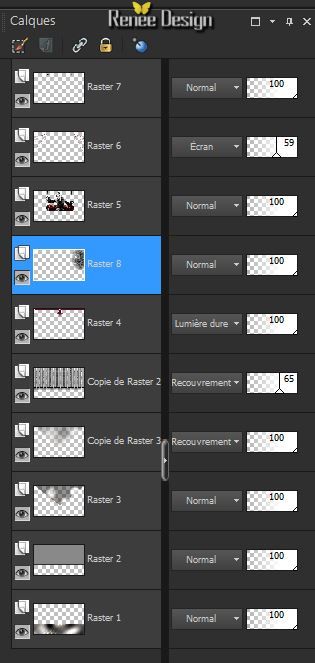
45.
Layer Palette -Double click on this Layer and set the Blend Mode to "Screen " Reduce the opacity of this layer to: 59%
46.
Activate the tube''relax_image_1''
-
Edit/copy-Edit paste as a new layer on your working area.
-
With your move tool place it in the right place
47.
Activate the tube ''relax_fenetre_courbe''- Edit/copy-Edit paste as a new layer on your working area
-With your move tool move to the right
48.Layer Palette -Double click on this Layer and set the Blend Mode to "Hard Light "
-
Layers- Arrange-Move Down 3x (Under Raster 5)
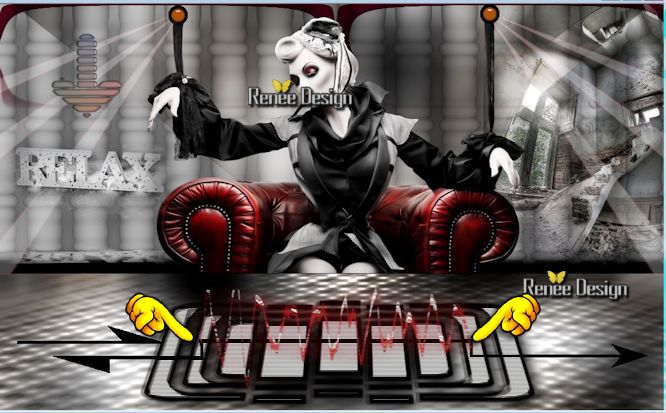
Your work and Layer Palette look like this now:
49.
Layer-New Raster Layer
50.
Selections - load/save selection - load selection from disk and choose my selection: ''relax_3''
-Activate Flood Fill Tool and fill the selection with color black
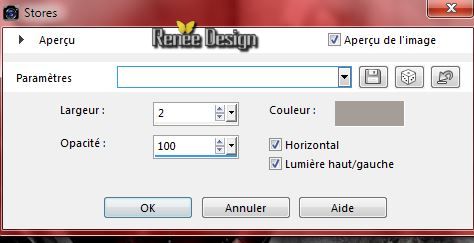
51.
Effects-Texture Effects-Blinds-Color #a59d97
Selections- Deselect All
52. Effects- Plugins - Eyecandy5 Impact - Perspective Shadow- Preset
- Drop shadow blury
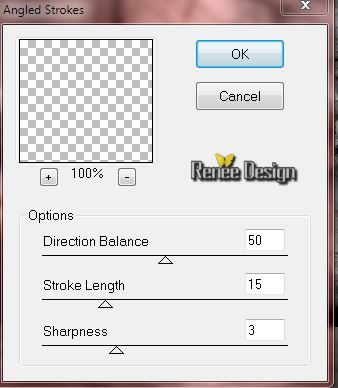
53. Effects- Plugins - Brush strokes -Angled strokes
Activate the top of the layer-Palette
54.
Activate the tube ''relax_fleche_logo''-Edit/copy-Edit paste as a new layer on your working area
-
With your move tool move to the left
55.
Effects- Plugins - EyeCandy 5 Impact -
Perpsective shadow-tab-User-User Settings click on the-Preset ''relax_ombre-2''
56.
Layer-New Raster Layer
57.
Selections - load/save selection - load selection from disk and choose my selection: ''relax_4'' -
-Activate Flood Fill Tool and fill the selection with color black
Selections- Deselect All
58.
Effects-Plugins- EyeCandy 5 Impact - Glass tab-User-User Settings click on the-Preset
''relax_Glass''
59.
Activate the tube ''relax_image_courbes''-Edit/copy- Edit/ paste as new layer
With your move tool move to the bottom like this .
60.
Activate the tube ''SvB Decoratie 30''- Image
Resize at 65%
-
Edit/copy-Edit paste as a new layer on your working area and move to the left side
61.
Layer Palette -Double click on this Layer and set the Blend Mode to "Luminance-Legacy "
62.
Effects - 3D Effects - Drop shadow with these settings: 8/6/32/20 color black
63.
Layer-New Raster Layer
64.
Selections - load/save selection - load selection from disk and choose my selection: ''relax_5''
65.
Pot of Paint Opacity 25% -Activate Flood Fill Tool and fill the selection with color white
Selections- Deselect All
66.
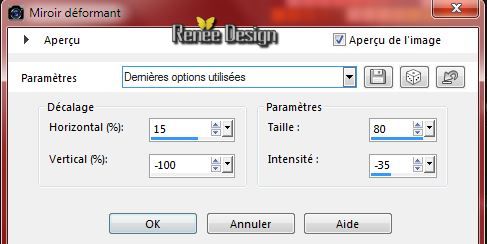
Effects- Distortion Effects-Warp use settings below
67.
Effects- Distortion Effects- Wind/Wind direction From left 75
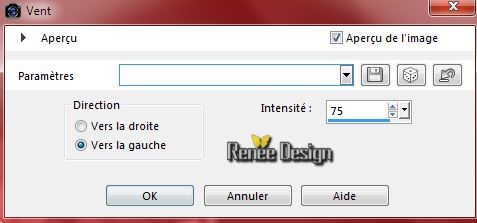
68.
Effects-Distortion Effects-Wind/Wind direction From right 75
69.
Activate Pick Tool (K) and move to the bottom like this
70.
Layers- Merge- Merge Visible
71.
Image - Add borders-Symmetric checked: 1 pixel color black
72.
Image - Add borders-Symmetric checked: 50 pixels color white
73.
Activate Magic Wand and click in the white border of 50
pixels
74.
Selections- Promote selection to layer
75. Effects- Plugins -Toadies -What are you 20/20
76.Effects- Edge Effects- Enhance More
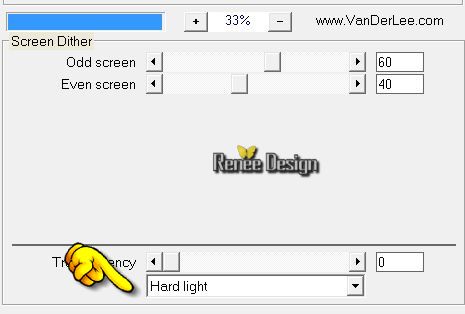
77. Effects- Plugins - Vanderlee Unpluged X - Screen Dither
78.
Effects- Plugins -AAA Frame - Foto Frame
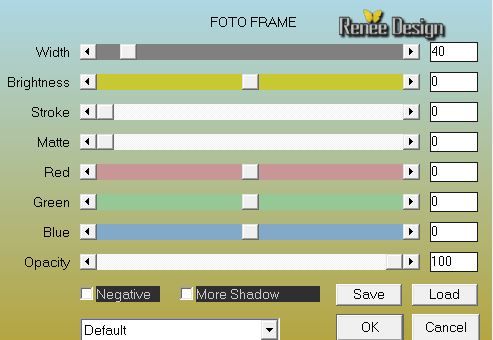
Selections- Deselect All
79.
Image - Add borders-Symmetric checked: 1 pixel color black
80.
Image - Add borders-Symmetric checked: 10 pixels color white
81.
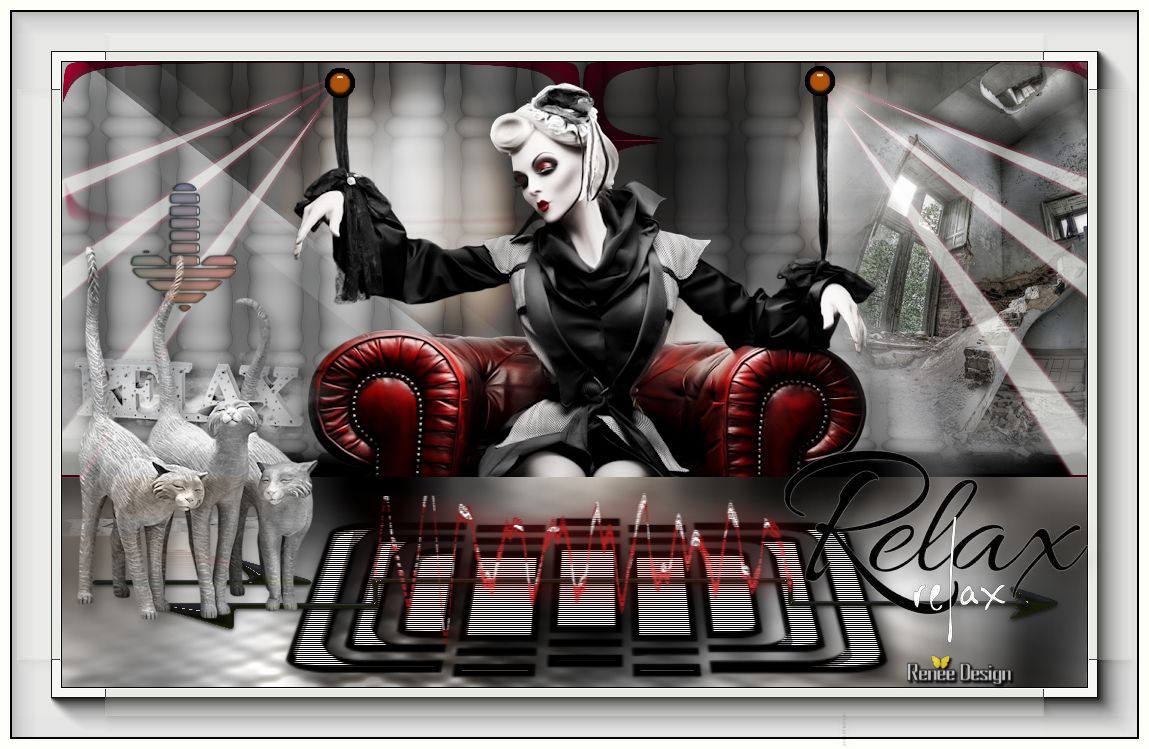
Activate the tube ''2_titres_relax''- Edit - Copy -Edit - Paste as new layer on your working area and move
-
Effects - 3D Effects - Drop shadow (feel free to use)
Save as JPG
I hope you enjoyed this lesson
Renée
This lesson was written by Renée 21/09/2014
Created the
10/2014
*
Any resemblance with an existing lesson is merely a coincidence *
* Don't forget to thank the people who work for us and with us. I named the tubeurs - Testers and the translators.
Thanks Renée.
*
|
 Translations


 All rights reserved