|
Let's start the lesson. The cosmic dream

-
Color-palette:Set your foreground color to color
#e7ebec - Set your background color to color #57656d
-
Color-palette:Set your foreground color to a sunburst gradient and select my gradient ’’soul017’’ configured like this.
We start the lesson with this material palette 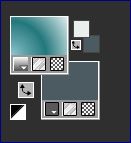 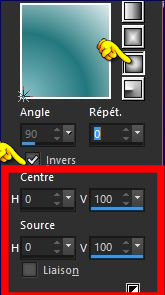
-
Let's start the lesson.
1.
File - New - Open a new transparent image 1005 x 705 pixels
2.
Activate Flood Fill Tool and fill the layer with the gradient
3.
Effects- Image Effects- Seamless Tiling with these settings
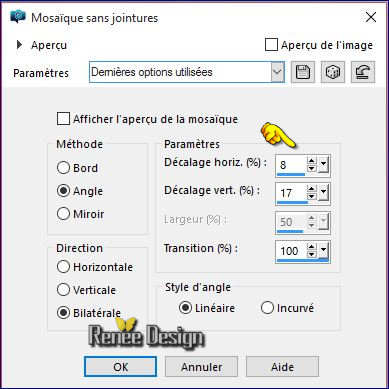
4.
Effects –Plugins - Unlimited -Andrew's Filters 7- Yukky
Distort..use settings below .
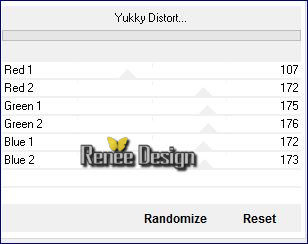
5.
Effects –Plugins- Unlimited - Andrew's Filters 5- Into A
Corner..use settings below .
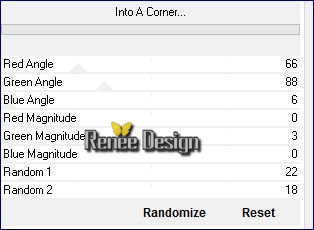
6. Effects- Image Effects- Seamless Tiling with these settings
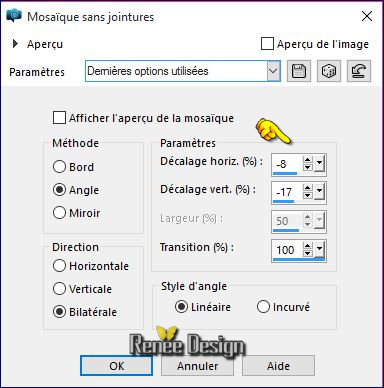
7. Effects –
Plugins –AIM– Space Hunter use settings below
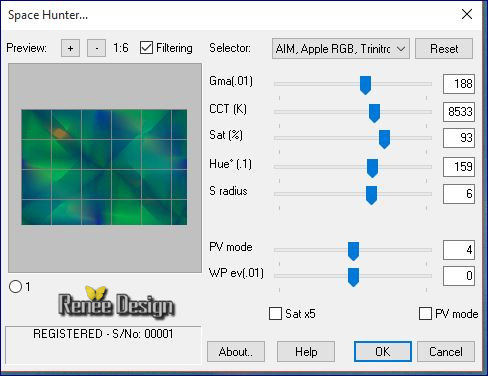
8. Layers- Duplicate
9. Adjust- Sharpness-Sharpen
- Activate bottom layer in the Layer palette= Raster 1
10. Adjust- Blur- Gaussian Blur:Radius 35
- Activate Copy of Raster 1 in the Layer Palette
11. Effects
– Plugins -L and K’s - Dimitri a 115
12. Double click on this Layer and set the Blend Mode to "Multiply "
13. Layers- Merge- Merge Down
14. Effects- Distortion Effects- Punch-Strength
100
15.
Selections –load/save selection –load selection from disc and choose: ‘’ reve_cosmic_1’’
16.
Selections- Promote selection to Layer
17. Effects
– Plugins – EyeCandy 5 textures – Marble
-tab Settings/User settings choose my preset: ‘’
reve_cosmic_marble »Or manual settings as shown in the example below
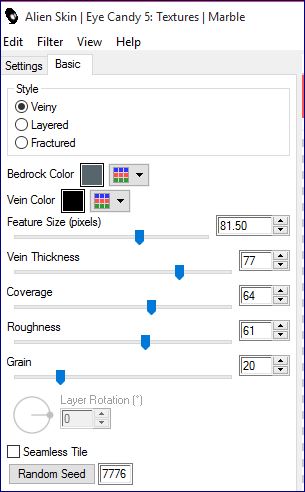
18. Effects
– Plugins – Mura’s Meister Perspective
Tilling use settings below
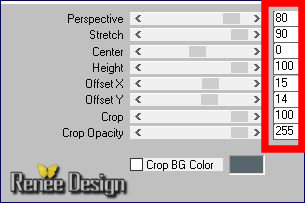
19. Effects- 3 D Effects-Drop Shadow with these settings: 0/0/75/28 color black
Selections- Deselect All
-
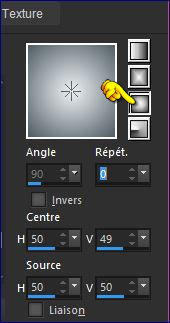
Color-palette:Set your foreground color to color
#e7ebec -Set your foreground to gradient 'Foreground-background' -Sunburst -configured like this.
20. Layers- New Raster Layer
21.
Selections –load/save selection –load selection from disc and choose: ‘’ reve_cosmic_2’’
22. Activate Flood Fill Tool and fill the selection with the gradient
Selections- Deselect All
- Color-palette:Set your foreground color to color #8b8c7a
23. Activate Pen Tool -Line Style -straight solid line= Corel 13_001 –Width 1
And draw 2 lines like this
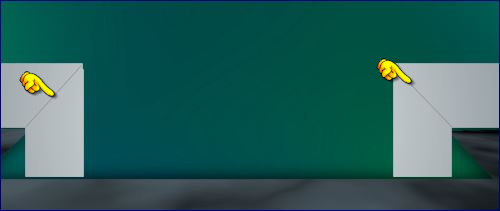
-.
Convert to Raster Layer
24. Effects –3D Effects- Drop Shadow with these settings: 1/1/100/1 color black
25. Layers- Merge- Merge Down
26. Activate Emboss Tool with these settings 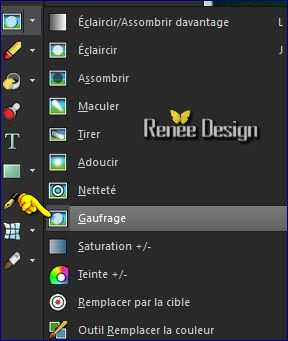

With the left button of the mouse pressed glide gently over your image from right side and the left see printscreen

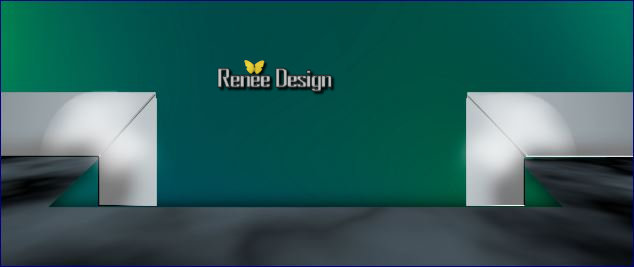
27. Activate the tube ‘’reve_cosmic_image1’’
-Edit/ Copy-Edit - Paste as new layer on your working image
28. Layers- Duplicate / Image Mirror
-
You should have this result as shown in the print screen below
29. Layers- Merge- Merge Down
30. In the Layer- Palette- Double click and set the Blend Mode to "Lighten"
31.
Set the layer opacity of this layer to 81%
- Activate bottom layer in the Layer palette= Raster 1
32. Open the tube ‘’ Renee_tube_cosmic_dreamer.pspimage’’
- Image Resize to 60%
-Edit/ Copy-Edit - Paste as new layer on your working image
33.Effects-Image Effects- Offset with these settings: H = 0 and V = 137
34. Adjust- Sharpness-Sharpen
-Activate bottom layer in the Layer palette=Raster 1
do not take a new layer
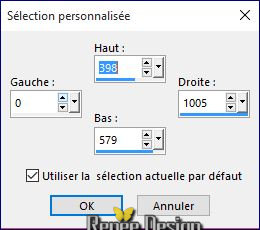
35.Selection Tool ( S ) Custom selection use settings below
36.
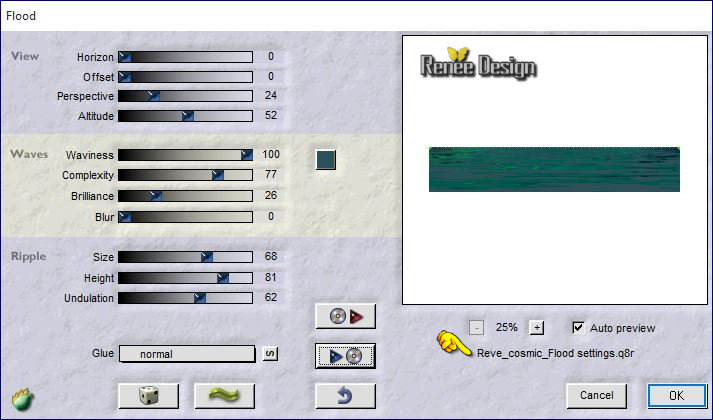
Effects- Plugins - Flaming Pear/ Flood click on the red arrow>>select my file preset ‘’ Reve_cosmic_Flood
settings” can be used in any folder of your choice by clicking it. -3 Open it will be ok in your filter- Or manual settings as shown in the example below -color #2d4f57
37. Effects –3D Effects- Drop Shadow with these settings: 1/1/100/18 color black
Selections- Deselect All
- Activate the top of the layer palette
38. Open the tube ‘’Renee_tube_balance.pspimage’’
- Image Resize to 60%
Edit/ Copy-Edit - Paste as new layer on your working image
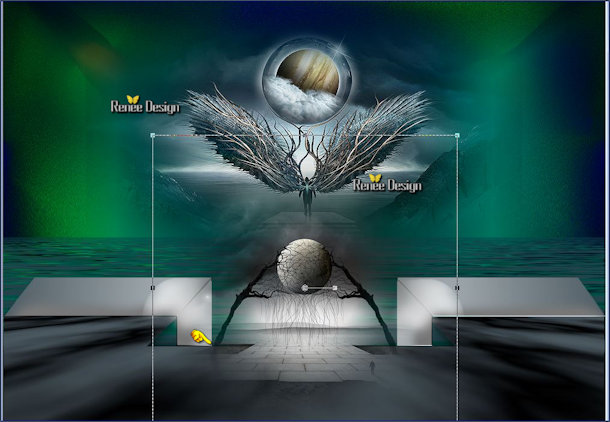
39. Activate your Pick Tool (K) and move as shown in the example below
- Activate the tube ‘’ Reve_cosmics_renee_DECOS’’
Do not close we need it later for the rest of the work
40.Activate the layer ‘’cascade’ of the tube
- Edit/Copy -Edit paste as new layer on your working image
- Move Tool(M) move against the bottom edge (see finished image)
-Blend Mode= Screen
41. Layers- New Raster Layer
42.
Selections –load/save selection –load selection from disc and choose: ‘’reve_cosmic_3’’
Color-palette:Set your foreground color to a sunburst gradient and select gradient ‘’NGBlazingSunset’’-
configured like this.
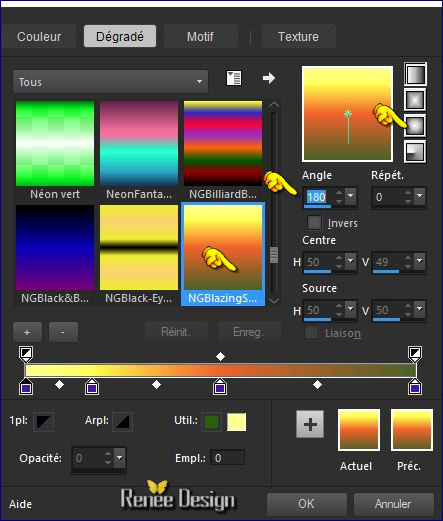
43. Activate Flood Fill Tool and fill the selection with the gradient
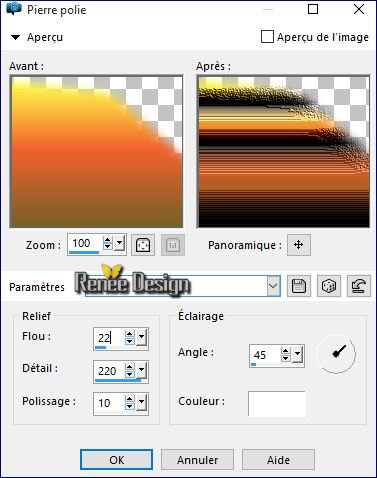
44. Effects-Texture Effects-Polished Stone use settings below
Selections- Deselect All
45. Layers- Duplicate
46. Image -
Mirror
47. Layers- Merge- Merge Down
48. In the Layer- Palette- Double click and set the Blend Mode to "Hard Light "
- Back on the tube DECOS
49. Activate the layer ‘’lune ‘’of the tube
-Edit/ Copy-Edit - Paste as new layer on your working image
50. Effects- Image Effects- Offset with these settings:H = - 340 and V = 50
51. Layers- Arrange- Move Down
52. Activate the layer ‘’petit_nuage ‘of the tube
- Edit/ Copy-Edit - Paste as new layer on your working image
- Activate your Pick Tool (K) and move as shown in the example below
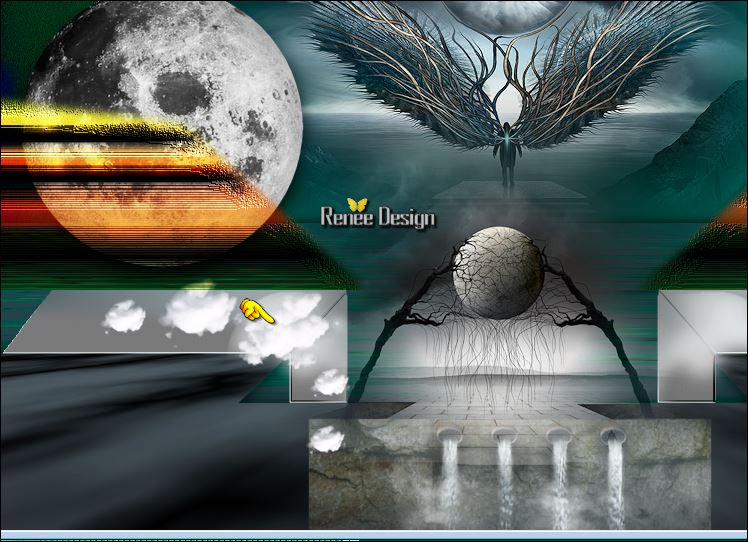
53. Layers- Duplicate – Image Mirror
- Color-palette:Set your foreground color to a Linear gradient and select gradient
« @nn_080114_GR_142_tdstudio »and let the background color to color #57656d
configured like this.
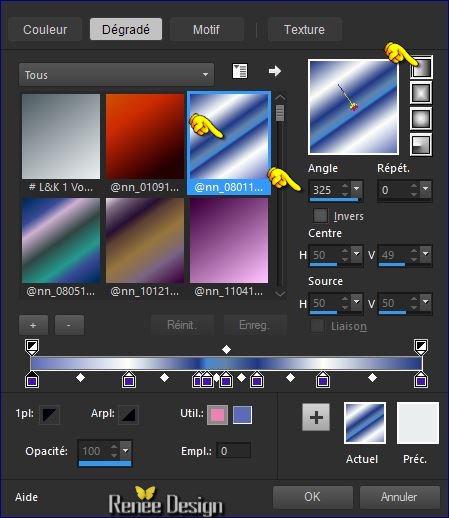
- Activate the top of the layer palette
54. Layers- New Raster Layer
55.
Selections –load/save selection –load selection from disc and choose: ‘’reve_cosmic_4’’
56. Pot of Paint: Change the opacity of the color at 60%
- Activate Flood Fill Tool and fill the selection with the gradient
57. Adjust- Blur- Gaussian Blur:Radius 18
58.Effects- Distortion Effects- Twirl -Degrees -
227
Selections- Deselect All
59.
Effects –Plugins- Unlimited – [AFS IMPORT]- CLRCREEP use settings below
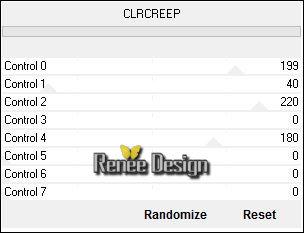
60. Double click on this Layer and set the Blend Mode to "Overlay "
61.
Repeat": Effects –Plugins- Unlimited – [AFS IMPORT]- CLRCREEP(with the samen settings )
- Back on the tube DECOS
62. Activate the layer ‘’nuage_2’’of the tube
-Edit/ Copy-Edit - Paste as new layer on your working image
- Activate Move Tool (M) move to the upper right corner
63. Effects
– Plugins – Flaming Pear – ChromaSolarize
64.
Set the layer opacity of this layer to 69%
-
Activate the bottom of the layer palette = Raster 1
65. Effects- Illumination Effects -Sunburst with these settings
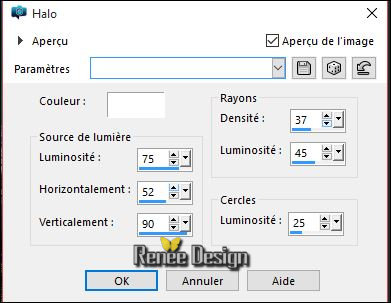
66. Layers- Merge- Merge Visible
67.
Selections –load/save selection –load selection from disc and choose: ‘’reve_cosmic_5’’
68.
Selections- Promote selection to Layer
69. Effects
– Plugins – L & K’s – Elvida a 195
Selections- Deselect All
70. Effects- Image Effects- Seamless Tiling with these settings
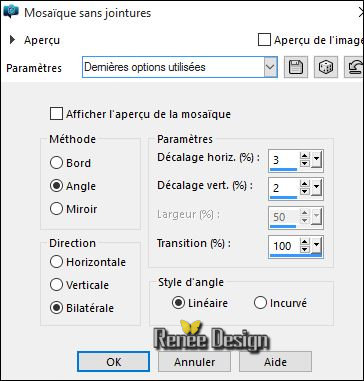
71.
Selection Tool ( S ) Custom selection use settings below
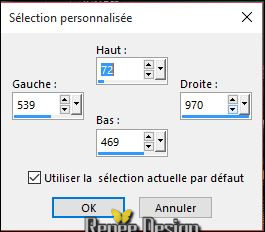
Press the Delete button on your key board
Selections- Deselect All
72. Layers- Duplicate
- Image
Mirror
73. Effects- Image Effects- Offset with these settings: H = 14 and V = 0
74. Layers- Merge- Merge Down
75. Adjust- Sharpness-Sharpen
76. Activate the tube ’’Reve_cosmic_ciel’’
-Edit/ Copy-Edit - Paste as new layer on your working image
- With your Move Tool(M) move against the top edge
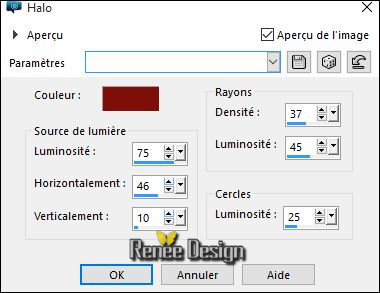
77. Effects- Illumination Effects -Sunburst with these settings-Color #86140c
78. Layers- New Raster Layer
79.
Selections –load/save selection –load selection from disc and choose: ‘’reve_cosmic_6’’
80. Pot of Paint: the opacity of the color at 60% Color-Palette:Set your foreground color to color #ffffff -Activate Flood Fill Tool and fill the selection with the foreground color #ffffff
Selections- Deselect All
81. Effects
– Plugins -L an K’s – Sanne change the setting to 0/65
82.
Effects – Plugins EyeCandy 5 Impact Blacklight –tab Settings/User settings choose my preset: ‘’ reve_cosmic_light’’Or manual settings as shown in the example below
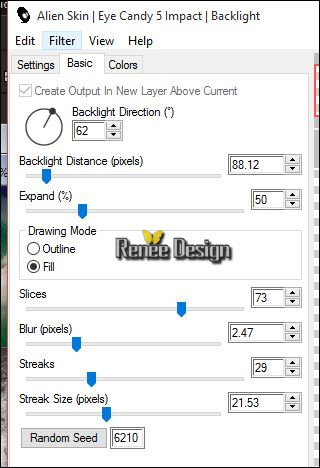
- In the Layer- Palette- Double click and set the Blend Mode to "Soft Light "
83. Activate the tube ‘’reve_cosmic_image2.png’’
-Edit/ Copy-Edit - Paste as new layer on your working image
-
Place on previous effect
- Back on the tube DECOS
84. Activate the layers ‘’oiseau 1 and oiseau 2’’of the tube
- Edit/ Copy-Edit - Paste as new layer on your working image
- With your Move Tool (M) move to the right /and the left side (see finished image)
85. Activate the tube ‘’ Reve_cosmic_cercles.pspimage’’
-Edit/ Copy-Edit - Paste as new layer on your working image
- With your Move Tool move to the bottom (see finished image)
86.
Effects- Plugins - Flaming Pear/ Flood -click on the red arrow>>select my file preset ‘’ Reve_cosmic_Flood2
settings” can be used in any folder of your choice by clicking it. -3 Open it will be ok in your filter- Or manual settings as shown in the example below 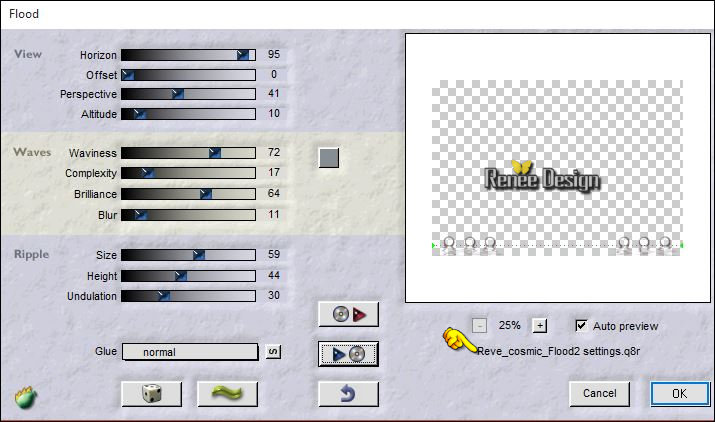
- Activate bottom layer in the Layer palette=(Merged Layer)
87. Repeat: Effects- Plugins- Flood with the same settings (please do not change the settings)
- Activate the top of the layer palette
88. Open the tube ‘’Reve_cosmic_lignes.pspimage’’
- Edit/ Copy-Edit - Paste as new layer on your working image
- Activate Move Tool (M) place against the top edge of your image
89. Layers-New Raster Layer
- Open the Brush image ‘’pinceau reve’ in your PSP
- File- Export Custom Brush (Give it a name)
90.
Activate Brush Tool and select my file in the list ‘’pinceau reve’’ use settings below

Stamp your brush in the upper left corner by using your foreground color #ffffff
91. Open the tube " texte"-‘’citation un reve ‘’ Edit/Copy -Edit paste as new layer on your working image and move -Ore write your own text
92. Image - Add borders-Symmetric checked:1 pixel color #57656d
93. Image - Add borders-Symmetric checked: 40 pixels color #fffffff
94. Image - Add borders-Symmetric checked: 1 pixel en color #57656d
95. Image - Add borders-Symmetric checked: 5 pixels color#ffffff
96. Image - Add borders-Symmetric checked: 1pixel color #57656d
Save as JPEG
20/02/2016
I hope you enjoyed this lesson
Renée
This lesson was written by Renée 20/02/2016
Edited and Update
2016
*
*
Any resemblance with an existing lesson is a coincidence
*
Do not forget to thank the people who work with us and for us I have appointed the tubeurs and translators
Thanks Renée
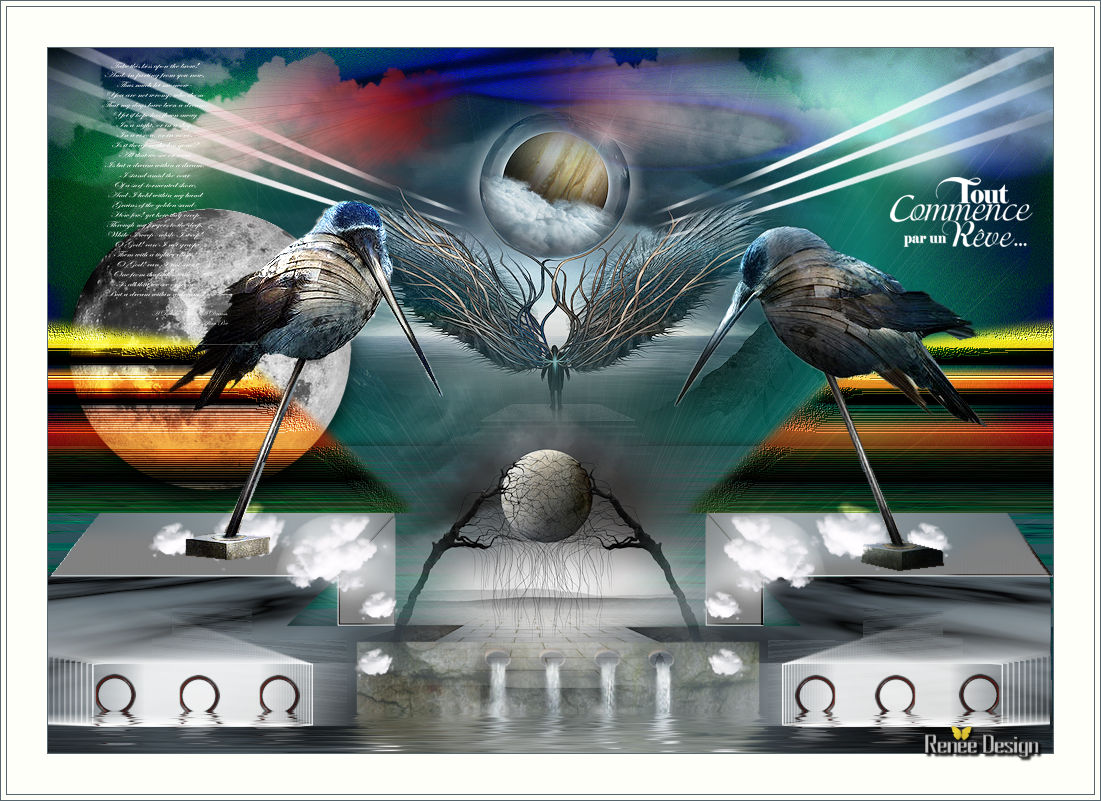
| 
 Translations


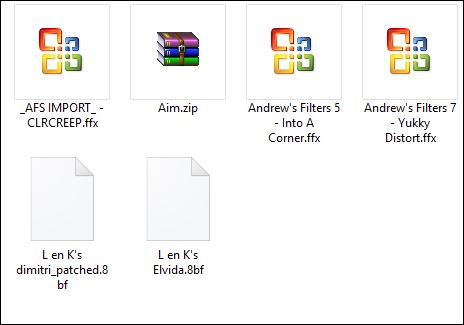
 When you see this logo the filter is imported in Unlimited


 All rights reserved
